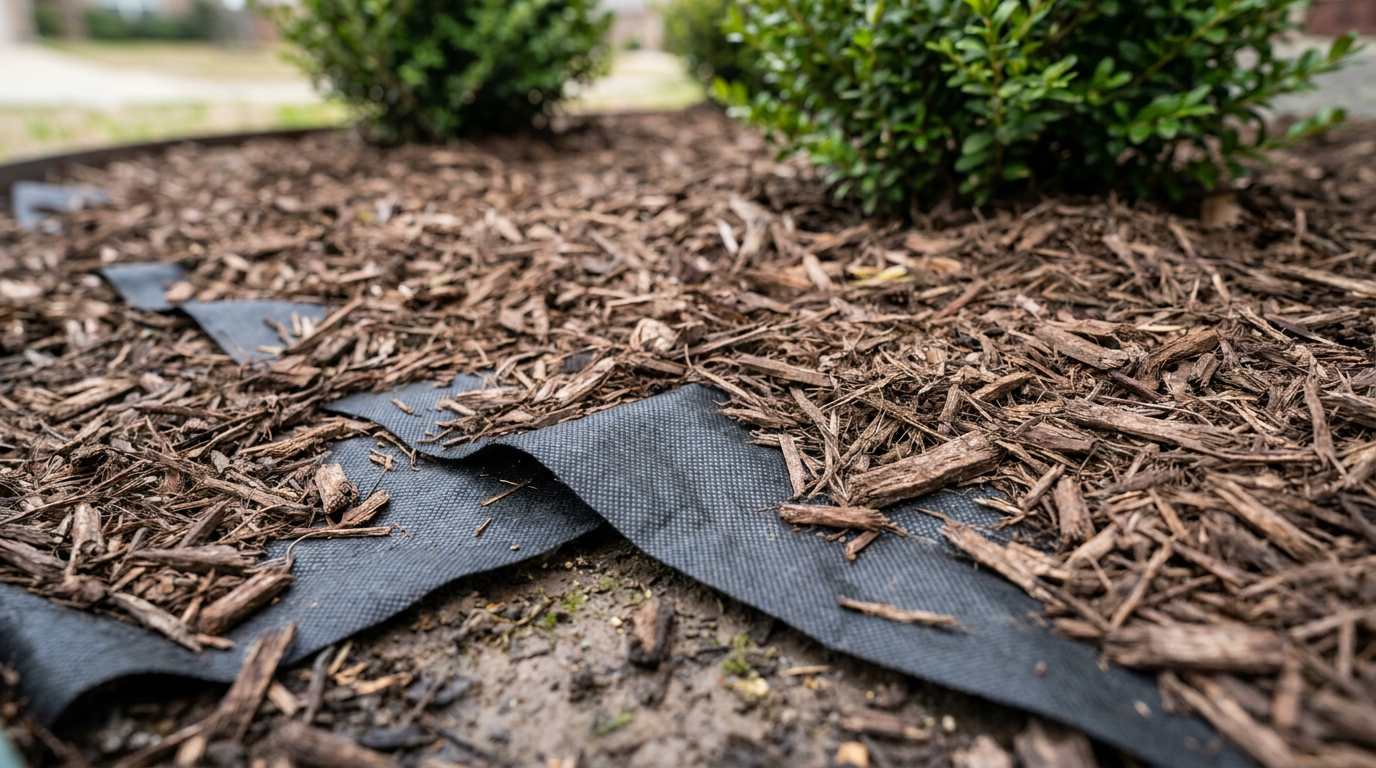
- Mulch applied too thin — Spreading 1 to 2 inches might look fine for the first week, but rain settles organic mulch by up to 25% within thirty days. Once it drops below 2 inches, fabric exposure is basically guaranteed.
- Using lightweight, buoyant mulch varieties — Large bark chunks, single-ground pine bark nuggets, and cypress rounds float. One hard summer downpour lifts the nuggets, washes them to the lowest drain point, and leaves the fabric bare.
- Aggressive leaf blowing — Gas-powered leaf blowers blast air at 150 to 200+ mph. If you point the nozzle straight down into a mulch bed to clean up autumn leaves, you’ll scour the mulch right off that slick synthetic fabric in seconds.
Landscaping · Deck or fence project
| Project category | Landscaping |
|---|---|
| Problem type | Deck or fence project |
| Trade required | Landscaping |
| Urgency | Planned project |
| Safety risk | Moderate safety risk |
| DIY suitability | DIY for experienced homeowners |
| Cost category | High cost |
| Typical timeline | Most builds 3–10 days depending on size |
| Contractor type | Landscaping contractor |
Repair option
Replace failed boards, posts, and hardware; reseal the surface.
Replacement option
Rebuild when framing or the ledger connection is unsafe.
Common causes
- Rot at posts and ledger
- Storm damage
- Adding outdoor living space
Relevant tools:home improvement material pricesproject cost estimator
Published October 29, 2026Last updated October 29, 2026
Tools & materials you'll need
Affiliate linksAs an Amazon Associate FixlyGuide earns from qualifying purchases — at no extra cost to you. Prices and availability are accurate as of publication and subject to change.
Quick Answer
To fix landscaping fabric showing through mulch, rake back the existing cover so you can see the fabric, cut out any loose or buckled sections with a sharp utility knife, and pin the edges every 8 to 12 inches with 6-inch steel landscape staples. Then top it with at least 3 full inches of shredded wood mulch so the sun can’t beat up the fabric and the wind doesn’t keep stealing it.
The Problem
You spend good money and burn up an entire Saturday putting down landscape fabric and fresh mulch. Then, a few months later, you’ve got shiny black plastic or fraying woven polypropylene popping up all over the flower beds. Every gust of wind drags more mulch downhill, dog paws catch the seams, and weeds still take root right on top of the exposed cloth. No kidding.
Exposed landscape fabric looks rough. Worse, once that geotextile is bare, direct sunlight hammers the synthetic fibers with ultraviolet radiation. Most polypropylene fabrics start breaking down and turning brittle after just 30 to 60 days of direct UV exposure. After that, it cracks, stops blocking weeds, shreds into a mess of microplastic ribbons in your soil, and turns into one of those cleanup jobs you really don’t want to touch twice.
How It Works
Geotextile weed barrier fabrics work by blocking light. No sunlight at the soil surface, no weed seeds getting the signal to sprout. Most non-woven and woven polypropylene fabrics have microscopic pores ranging between 100 to 200 microns wide, and those pores let water, air, and dissolved nutrients move down to the roots while still stopping plant shoots from pushing up from below.
Here’s the hitch: landscape fabric has an extremely low coefficient of friction. Smooth polypropylene gives mulch—especially dry, lightweight pine nuggets or dry shredded wood—almost nothing to grab onto. Gravity, leaf blowers, foot traffic, and a hard rain pull that mulch downhill across the slick surface like snow sliding off a tin roof.
The whole setup depends on weight. A bed needs a minimum 3-inch depth of fibrous, interlocking mulch to stay put over the fabric. If you only spread 1 or 2 inches, or the fabric’s laid over rough ground with air pockets underneath, the mulch slides off into the low spots. Then the high spots poke through, catch the wind, and start lifting the whole sheet. I pulled a water heater in Frisco last month that had exactly this kind of “looks fine from the driveway” problem—once I got close, it was obvious the base layer never had a chance.
Step-by-Step Fix
Follow these steps to anchor, trim, and properly re-cover showing fabric so it stays hidden for years.
-
Clear the loose mulch off the exposed area — With a flexible plastic leaf rake, gently pull the mulch 2 to 3 feet back from every spot where the fabric is visible. Don’t use a metal garden rake here; those stiff steel tines grab the weave and rip big tears in the geotextile.
- Tools: 24-inch plastic spring leaf rake, 5-gallon work bucket.
- Tip: Dump clean, reusable mulch into buckets or onto a flat tarp nearby so you don't mix it up with clay or dirt while you're working.
-
Inspect the fabric for UV rot and brittle failure — Pinch the exposed fabric between your thumb and forefinger and give it a good tug. If it tears like wet tissue paper or crumbles into fine dust, that section’s done.
- If compromised: Cut the rotten square out entirely down to the soil line with your utility knife. Don’t leave brittle plastic behind; it won’t hold staples worth a darn.
-
Slice out trapped bubbles and excessive bunching — Run your hands flat across the bed and feel for hollow pockets where the fabric is bridging over low spots in the dirt. Slit those tents open down the middle with your utility knife, lay the flaps flat against the natural soil grade, and overlap any excess material by at least 4 to 6 inches.
- Safety: Always pull your utility knife stroke away from your body. Cutting geotextile takes real pressure, and a dull blade can jump on you in a hurry.
-
Excavate an edge anchor trench — If the fabric is lifting along sidewalks, curbs, or bed edging, dig a sharp "slip trench" 3 to 4 inches deep right against the hard edge with a square-nosed spade. Clean up the edge so roots or sharp stones don’t punch holes in the fabric.
- Pro Tip: Never let fabric ride up flush to the top edge of lawn edging or stone walls. Tuck it down into this perimeter trench.
-
Pin the fabric perimeter into the trench — Push the perimeter edge of the fabric down into the bottom of the 4-inch trench, folding it 90 degrees against the vertical soil face. Drive 6-inch steel staples directly through the crease at a 45-degree angle toward the bed interior every 12 inches.
- Tools: 6-inch 11-gauge steel U-shaped landscape staples, 16-ounce rubber mallet or claw hammer.
- If this doesn't work: In rock-hard clay soil (like Texas Blackland), standard round-top staples will bend. Switch to heavy-duty, commercial square-top 8-gauge steel stakes or use a 3/16-inch masonry drill bit to pre-drill pilot holes through rocky layers.
-
Tension and stake the bed field — Walk across the center sections of the fabric to pull out slack. Drive steel staples into all seams, overlaps, and high spots across the field at intervals of no more than 18 to 24 inches.
- Make sure each staple sits flat against the fabric. A staple that sticks up just 1/2 inch turns into a snagging hook for rakes and lawn equipment later on.
-
Cut neat "X" collars around existing root crowns — If the fabric is bunching up against shrubs and perennials, cut a clean "X" shaped slit starting from the outer edge to the trunk. Fold the four triangle tips back under the fabric to leave a 2- to 3-inch gap of bare dirt around woody stems.
- Warning: Piling fabric and mulch right against tree bark traps moisture, causes collar rot, and kicks off fungal decay that can kill mature plantings within 18 months.
-
Backfill the edge trench with heavy soil or gravel — Fill your slip trench with topsoil or coarse gravel right over the pinned fabric edge and stomp it firm with your boots. That gives you an immovable subterranean "deadman" lock that keeps the sheet taut even when the yard gets plenty of traffic.
-
Apply an interlocking base layer of mulch — Move away from lightweight, round pine nuggets. Spread a double-shredded hardwood or cedar mulch over the fabric. The rough, jagged fibers knit together like felt, making an interlocking mat that resists sliding down slopes.
- Tools: Wheelbarrow, square transfer shovel, work gloves.
- Material check: Double-shredded hardwood creates the tightest structural bond on polypropylene fabric.
-
Establish a uniform 3-inch finished depth — Spread the mulch across the whole bed with your hands or a flat landscaping rake, keeping a measured 3-inch depth on flat areas and 3.5 to 4 inches on slopes up to 15 degrees.
- Stick a wooden ruler into the mulch down to the fabric at three random spots. If you measure less than 3 inches, add another bag. That mass is what blocks the UV and keeps the fabric down where it belongs.
Common Causes
- Mulch applied too thin — Spreading 1 to 2 inches might look fine for the first week, but rain settles organic mulch by up to 25% within thirty days. Once it drops below 2 inches, fabric exposure is basically guaranteed.
- Using lightweight, buoyant mulch varieties — Large bark chunks, single-ground pine bark nuggets, and cypress rounds float. One hard summer downpour lifts the nuggets, washes them to the lowest drain point, and leaves the fabric bare.
- Insufficient or weak staples — Skimping on staples makes the cloth act like a sail. A lot of builders toss in one staple every 5 or 6 feet; standard industry practice calls for staples every 12 to 18 inches on seams and every 8 inches on perimeter borders.
- Installing fabric over un-graded soil — Draping fabric across footprints, ruts, or rocks creates suspended pockets of cloth. When you walk across the finished bed or drag a hose through it, your foot drives the high spot into the open and pushes the thin mulch crust aside.
- Aggressive leaf blowing — Gas-powered leaf blowers blast air at 150 to 200+ mph. If you point the nozzle straight down into a mulch bed to clean up autumn leaves, you’ll scour the mulch right off that slick synthetic fabric in seconds.
Common Mistakes
- Pulling up the fabric and throwing it away in frustration — Folks get fed up with showing fabric and rip out 50 feet of it, which drags thousands of dormant weed seeds up into the oxygenated topsoil. If the fabric’s still structurally sound, trimming the bubbles and adding staples takes a whole lot less time.
- Topping showing spots with a single handful of mulch — Tossing one little shovel load over an exposed ridge is just a cosmetic band-aid. The unpinned fabric under that ridge will pop right back through the fresh scoop the next time it rains. Cut the ridge flat first.
- Using plastic tent pegs or wire coat hangers — Cheap plastic barbs bend or snap in tough dirt, and thin coat-hanger wire rusts out in three months. Use genuine 11-gauge or 8-gauge galvanized steel landscape staples with sharp, chiseled ends.
- Layering mulch deeper than 4 inches to hide the fabric — Piling on 5 or 6 inches of mulch to bury stubborn edges suffocates plant roots by starving them of oxygen, and it makes roots grow upward into the mulch instead of down into the soil where they belong.
- Leaving exposed fabric unprotected in direct summer heat — Ignoring bare patches during hot summer months ruins the geotextile. If you see fabric, patch it or cover it within a week before UV radiation turns it into brittle plastic flakes.
Cost & Time Breakdown
| Task | DIY Cost | Pro Cost | Time |
|---|---|---|---|
| Raking, trimming bubbles, & tensioning fabric | $15–$30 (utility knife & staples) | $150–$250 | 1–2 hours |
| Installing edge trench & perimeter re-pinning | $20–$40 (trenching shovel & heavy staples) | $200–$350 | 2–3 hours |
| Replacing UV-rotted fabric sections (100 sq ft) | $35–$60 (commercial geotextile & pins) | $250–$400 | 1–2 hours |
| Adding 3" double-shredded hardwood mulch (2 yards) | $70–$110 (bulk or bagged mulch) | $220–$350 | 2–3 hours |
| Complete bed overhaul (stripping, grading, re-laying) | $150–$250 (all materials) | $800–$1,500 | 6–8 hours |
Tips & Prevention
- Switch your blower technique to a horizontal sweep — When you're cleaning leaves off mulched beds, throttle your blower down to 25% power and keep the tube parallel to the ground. Skim the leaves off the surface without messing up the interlocking mulch crust underneath.
- Top-dress with 1 inch of fresh mulch every spring — Organic shredded hardwood breaks down naturally from fungal activity at an average rate of 1 inch per season. Adding a fresh 1-inch layer each year keeps the total barrier at the required 3-inch depth to block sunlight.
- Select double- or triple-shredded hardwood exclusively — Stay away from wood chips from arborists or smooth pine nuggets on fabric-lined slopes. Triple-shredded cedar or oak creates a matted, interwoven barrier that stays put on grades up to 15 degrees.
- Check fabric stability twice a year — Walk the perimeter of your beds every spring and late autumn. Look for lifted corners along stone edging or patio pavers and hammer down loose staples before heavy seasonal rains roll in.
When to Call a Professional
Landscape fabric repairs are almost always within reach of a DIYer who's willing to spend a Saturday with a shovel and utility knife. Still, some structural and site-specific conditions call for a licensed landscape contractor.
If your beds are cut into steep slopes exceeding 20 degrees, standard fabric and mulch systems will keep sliding off no matter how many staples you drive in; those hillsides need engineered geogrid systems, rip-rap stone terracing, or woven coir erosion-control blankets that take specialized grading equipment.
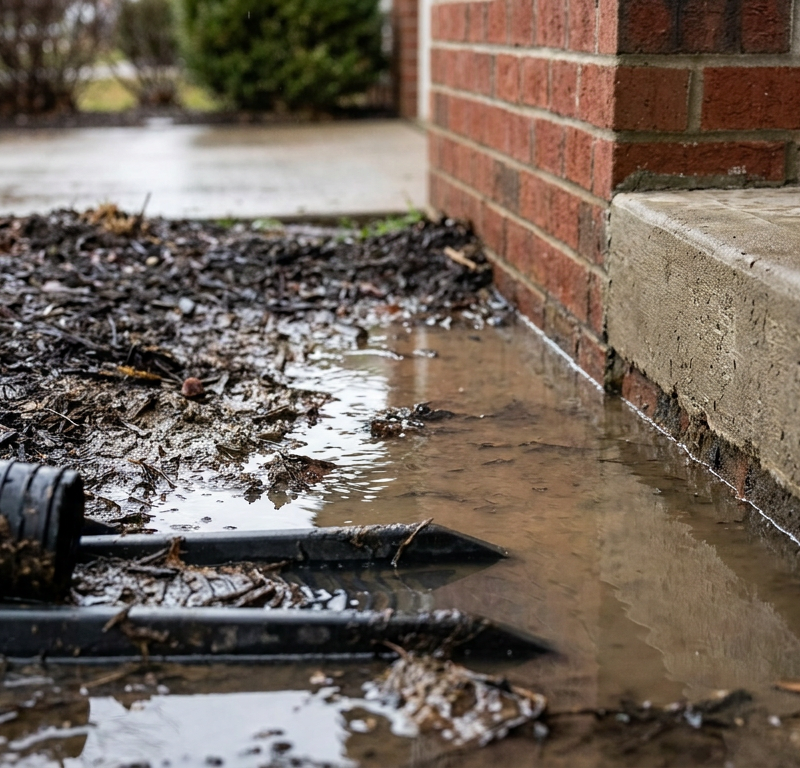
If your flower beds have serious underground drainage or foundation issues—like standing water backing up toward your home's foundation footing during normal rainfall—the fabric isn't the problem. That's a grading failure. Call a drainage specialist or hardscaping pro to shoot grade with a transit level and install catch basins, dry wells, or buried 4-inch rigid PVC French drains before you spend another dollar on surface fabric and mulch.
Related Articles
Keep troubleshooting with these hand-picked guides from FixlyGuide:
- Weeds in Paver Joints? 11 Steps to Clear Them and Lock Seams for Good — Stop weeds from taking over your paver patio and driveway cracks. Learn how to eradicate root systems, pressure-wash seams, and install pol…
- The One Weed Killer Mistake That Makes Your Weeds Grow Back Stronger — You've sprayed and pulled, but those persistent weeds keep popping up. The real problem isn't the weed itself; it's a common mistake in how…
- The #1 Mistake Homeowners Make with Dandelions (and How to Fix It) — Most homeowners battle dandelions all wrong, making the problem worse instead of getting rid of those stubborn yellow invaders for good.
- Why Your Weed Killer Isn't Working (And the 3 Hidden Reasons Why) — Ever wonder why you spray weed killer only for those stubborn invaders to pop right back up? I've seen it countless times, and usually, it…
- The Invisible Lawn Invaders: How to Erase Fire Ant Mounds for Good — Fire ant mounds can turn your beautiful lawn into a minefield of painful stings. Discover why these pests are so resilient and my pro-teste…
- That Annoying Sawhorse Wobble: The Simple Fix Your Shop Needs — Don't let a wobbly sawhorse ruin your cuts or—worse—cause an accident. I'll walk you through the real reasons your sawhorses are unstable a…
Should you do this yourself?
Answer five quick questions before you start. Safety outranks savings every time.
Your experience with work like this
How high do you have to work?
Does the job involve any of these?
Will it need a permit?
Specialty tools
Free and instant. Educational guidance only — not a quote, inspection, or professional diagnosis.
Estimate your own project cost
National averages are a starting point. Enter your details for a range that fits your house.
Mulch & topsoil calculator
- Material cost (delivery extra)$45 – $90
Bulk delivery typically adds $50–$150 per trip but is cheaper than bagged for jobs over ~2 cu yd.
Educational estimate only — always confirm with written local bids.
What should this project cost?
Enter your project details for a realistic cost range before you call anyone.
Maintenance projects start a few hundred dollars; full redesigns often $6,000–$15,000.
- Regional adjustment
- National average
- Labor share (typical)
- ~$2,453
- Quotes to collect
- 3 written estimates
Educational estimate based on national averages — not a binding quote. Always confirm with written local estimates.
Get the print-ready PDF of this guide
A clean, ad-free, printable version you can keep on your phone or pin to the workshop wall. Free with a FixlyGuide account.
- Print-optimized layout
- Tools, materials & every step included
- Saved to your account
Frequently asked questions
Can I reuse landscape fabric that has been exposed to the sun?+
Clear the mulch away and inspect the fabric. If it is stiff and strong, trim any folds or bubbles, stake it flat with 6-inch steel staples, and cover it with 3 inches of shredded mulch. If it flakes or tears easily between your fingers, UV light has ruined it; cut out the brittle section and staple down fresh commercial geotextile.
How thick should mulch be over landscape fabric?+
A minimum of 3 inches is required over landscape fabric. Anything less than 3 inches does not provide enough physical weight to lock down against the slippery polypropylene, causing the mulch to shift and expose the black underlayment.
What type of mulch stays in place best on top of weed barrier fabric?+
Double-shredded or triple-shredded hardwood and shredded cedar are best. The long, irregular wood strands mesh together to form a mat that grips the slick fabric. Avoid pine bark nuggets, wood chips, and gravel; nuggets float away during heavy rains, and round rocks slide down the synthetic surface.
What size staples should I use to secure landscape fabric?+
Use 6-inch, 11-gauge steel U-shaped landscape staples. Space them 12 inches apart along all perimeter edges and seams, and every 18 to 24 inches throughout the middle of the bed. For rock-hard clay or rocky subsoils, upgrade to 8-gauge heavy-duty square stakes.
Does tearing landscape fabric ruin its weed prevention ability?+
Poking holes in landscape fabric with rakes or shovels creates an open door for weed roots to enter the subsoil. If you accidentally tear a hole larger than 2 inches, patch it by slipping a 6-inch square of fresh fabric underneath the tear and securing all four corners with steel staples before re-mulching.
Why are weeds growing on top of my landscape fabric?+
No. Organic matter, windblown dust, and decaying leaves accumulate in the mulch on top of the fabric over time. Weed seeds dropped by birds will germinate right inside that top organic layer. The fabric prevents deep taproot weeds from easily anchoring into native subsoil, making surface weeds much easier to hand-pull.
Can I lay a new layer of landscape fabric directly over the old layer?+
Yes, if you properly pin the old layer first. If the original fabric is simply thin or has scattered holes, mow or trim any weeds flat, secure the base fabric firmly with new staples, lay fresh woven geotextile directly over the top with 6-inch overlaps, stake it, and top with 3 inches of mulch.
Can I use plastic sheeting instead of woven landscape fabric?+
Never use thin agricultural plastic or 6-mil poly sheeting under mulch in garden beds. Non-porous plastic completely blocks water and oxygen transfer, killing earthworms, turning soil anaerobic, and rotting the roots of your shrubs and trees. Always install professional woven or non-woven spunbond geotextile.
Discussion
Loading comments…