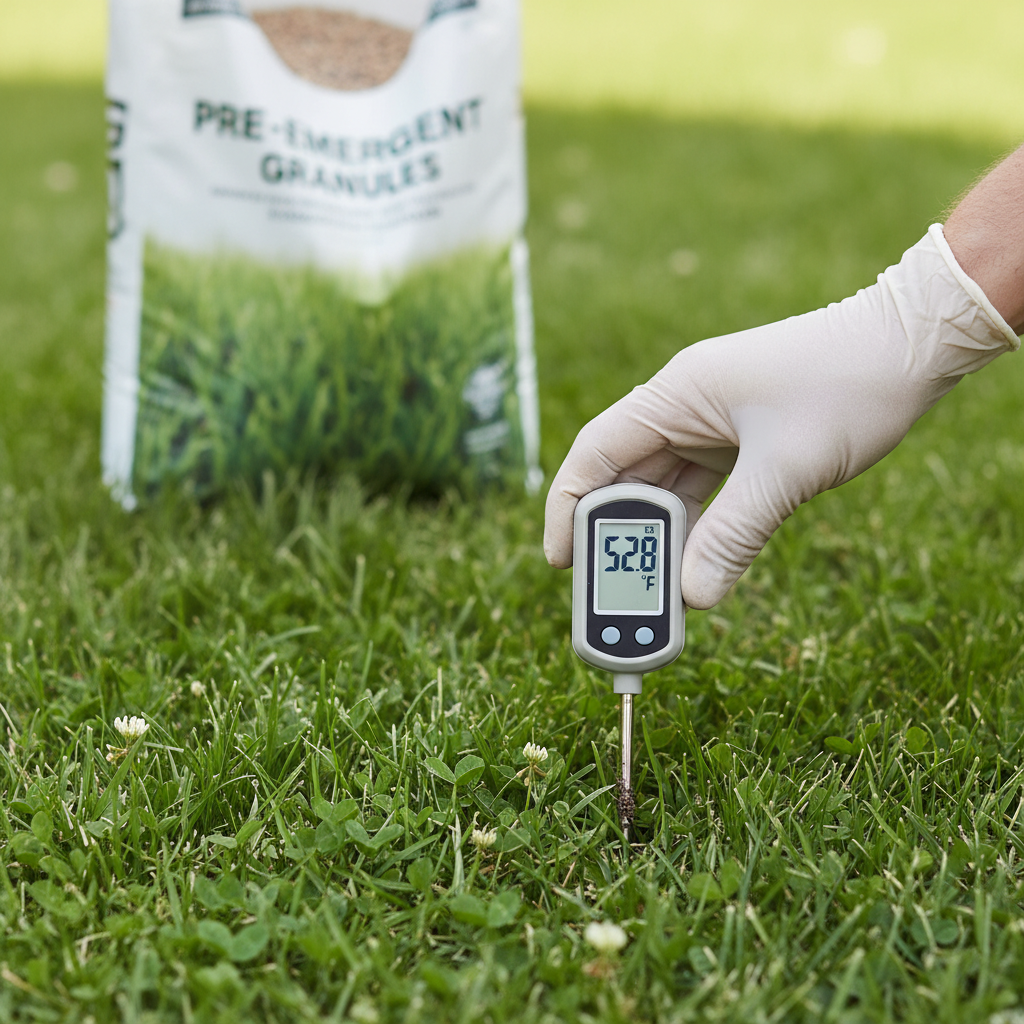
- Monitor Soil Temperature, Not Air Temperature — This is the single most important factor. Air temperature can fluctuate wildly day to day, but soil temperature is a more reliable indicator of germination conditions.
- Tool: Use a soil thermometer. This is inexpensive and essential.
- Method: Push the thermometer into the soil 2-4 inches deep, in a few different spots in your lawn. Take readings daily in the morning and late afternoon.
- Fallback: If you don't have a soil thermometer, look for natural indicators. When forsythia bushes are in full bloom, crabgrass germination is typically imminent. However, this is a less precise method.
Landscaping · Deck or fence project
| Project category | Landscaping |
|---|---|
| Problem type | Deck or fence project |
| Trade required | Landscaping |
| Urgency | Planned project |
| Safety risk | Moderate safety risk |
| DIY suitability | DIY for experienced homeowners |
| Cost category | High cost |
| Typical timeline | Most builds 3–10 days depending on size |
| Contractor type | Landscaping contractor |
Repair option
Replace failed boards, posts, and hardware; reseal the surface.
Replacement option
Rebuild when framing or the ledger connection is unsafe.
Common causes
- Rot at posts and ledger
- Storm damage
- Adding outdoor living space
Relevant tools:home improvement material pricesproject cost estimator
Published July 21, 2026Last updated August 18, 2026
Tools & materials you'll need
Affiliate links- AmazonGranular pre-emergent herbicide1 bag · Specific to your target weeds and grass type
As an Amazon Associate FixlyGuide earns from qualifying purchases — at no extra cost to you. Prices and availability are accurate as of publication and subject to change.
Quick Answer
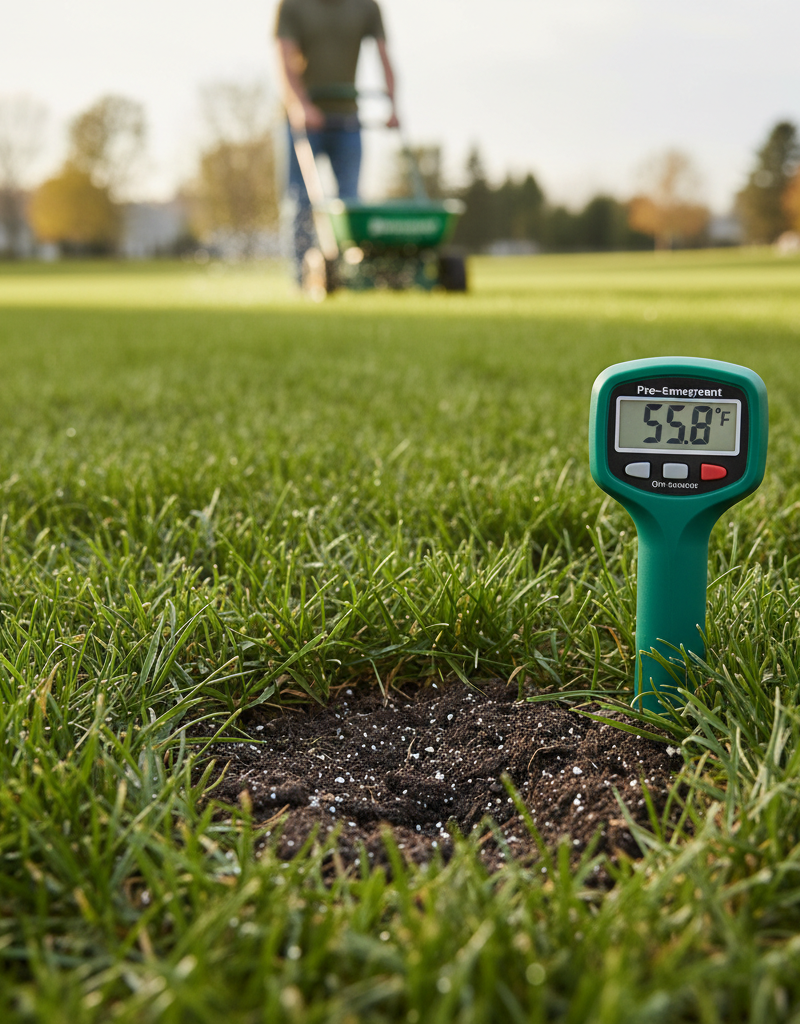
Pre-emergent herbicides prevent weed seeds from germinating by forming a chemical barrier in the soil. The key to successful weed control is applying these products at the correct time, which is dictated by soil temperature, not ambient air temperature or the calendar. For summer annual weeds like crabgrass, apply pre-emergent in early spring when soil temperatures consistently reach 50-55°F at a 2-4 inch depth. For winter annual weeds such as poa annua, a second application in late summer or early fall, when soil temperatures begin to drop to the 50-55°F range, is often necessary. Misjudging this timing is the leading cause of pre-emergent failure.
The Problem
Homeowners often struggle to achieve a truly weed-free lawn, despite diligent efforts with pre-emergent herbicides. The common frustration stems from seeing crabgrass, goosegrass, or dandelions emerge even after an application. This isn't usually due to a faulty product, but rather a fundamental misunderstanding of how pre-emergents work and, more critically, when they work most effectively. Most DIYers rely on the calendar or air temperature, leading to applications that are either too early (and break down before seeds germinate) or too late (after germination has already occurred). The result is wasted money, time, and the demoralizing sight of weeds taking over a seemingly protected lawn.
How It Works
Pre-emergent herbicides operate by creating a very thin, invisible chemical barrier in the top quarter-inch or so of the soil. When weed seeds germinate and their tiny root radicles attempt to push through this barrier, they absorb the herbicide, halting their growth and causing them to die before they can sprout above ground. This mechanism makes timing absolutely critical. The barrier only lasts for a specific duration, typically 6 to 12 weeks depending on the product and environmental factors like rainfall and soil microbe activity. If applied too early, the barrier can degrade before the target weed seeds begin to germinate, leaving your lawn unprotected. If applied too late, many seeds will have already germinated and pushed through the soil, rendering the pre-emergent useless against them. Different weeds germinate at different soil temperatures. For instance, crabgrass, the nemesis of many lawns, typically germinates when soil temperatures consistently stabilize at 50-55°F for several days. Other weeds, like chickweed or poa annua, germinate in cooler soil conditions in the fall. Understanding your target weeds and their germination triggers is paramount to effective control.
Step-by-Step Fix
Safety Note: Always read and follow all instructions, warnings, and safety precautions on the herbicide label. Wear appropriate personal protective equipment (PPE), which typically includes gloves, long pants, a long-sleeved shirt, and closed-toe shoes. Avoid applying on windy days to prevent drift.
-
Understand Your Target Weeds — Different pre-emergents target different weeds, and their timing varies. Most homeowners focus on crabgrass and other summer annual broadleaf weeds. For these, your primary application window is spring. If you battle winter annuals like Poa annua or chickweed, you'll need a fall application as well.
- If your target is crabgrass: Focus on the 50-55°F soil temperature window in spring.
- If your target is Poa annua (annual bluegrass): Focus on a fall application when soil temperatures drop to 70°F and below, ideally around 50-55°F for sustained periods.
-
Monitor Soil Temperature, Not Air Temperature — This is the single most important factor. Air temperature can fluctuate wildly day to day, but soil temperature is a more reliable indicator of germination conditions.
- Tool: Use a soil thermometer. This is inexpensive and essential.
- Method: Push the thermometer into the soil 2-4 inches deep, in a few different spots in your lawn. Take readings daily in the morning and late afternoon.
- Fallback: If you don't have a soil thermometer, look for natural indicators. When forsythia bushes are in full bloom, crabgrass germination is typically imminent. However, this is a less precise method.
-
Identify the Optimal Application Window — For most summer annual weeds (e.g., crabgrass, foxtail, goosegrass), the sweet spot is when soil temperatures at 2-4 inches consistently stay between 50-55°F for 3-5 consecutive days. This usually happens after the last hard frost and before prolonged warm spells.
- Too early: The pre-emergent may break down before weed seeds are ready to germinate, leaving your lawn unprotected later.
- Too late: Weeds may have already begun to germinate, and the pre-emergent will be ineffective against them.
-
Calibrate Your Spreader — An improperly calibrated spreader leads to uneven application or applying too much or too little product. Both scenarios result in poor weed control.
- Check the bag: The pre-emergent bag will have specific settings for various spreader brands and models.
- Test: For granular products, use a small tarp or a section of concrete to test and ensure even distribution. Measure out a small area (e.g., 100 sq ft) and apply the correct amount of product for that area.
-
Apply Evenly to Dry Grass — Ensure your lawn is dry before application. This helps the granules settle into the turf canopy and limits skin contact.
- Application Pattern: Walk at a consistent pace. Apply half the product in one direction (e.g., north-south), and the other half perpendicular to the first pass (e.g., east-west). This cross-hatch pattern ensures thorough, even coverage.
- Avoid Overlap: Overlapping too much can lead to excessively high concentrations in certain areas, potentially harming desirable turf grasses.
-
Water In Immediately (or Within 24-48 Hours) — Most granular pre-emergents require watering in to activate. This dissolves the chemical and moves it into the soil where it forms the barrier.
- Rainfall: Ideally, a quarter to half-inch of rainfall within 24-48 hours after application is perfect.
- Irrigation: If no rain is expected, set your sprinklers to deliver 0.25 to 0.5 inches of water.
- Do not delay: Letting the product sit on the surface too long can lead to photodegradation (break down by sunlight) or getting blown away.
-
Avoid Disturbing the Soil — Once the pre-emergent barrier is established, disturbing the soil (e.g., heavy aeration, de-thatching, digging) can break the barrier, allowing weed seeds to germinate in those disturbed areas.
- Plan ahead: If you need to aerate or de-thatch, do it before applying pre-emergent.
-
Consider a Split Application — For extended protection, especially in regions with longer warm seasons or if dealing with a heavy weed seed bank, a split application can be beneficial. Apply half the recommended rate at the initial optimal timing, and the second half 6-8 weeks later.
- Check product label: Ensure the pre-emergent you're using allows for split applications and adheres to total annual application limits.
Common Causes
- Incorrect Timing (Soil Temperature): This is by far the most common cause. Applying too early means the product degrades before peak germination; applying too late means weeds have already germinated. Relying on calendar dates or air temperature is a recipe for failure. Crabgrass, for example, will germinate once the soil consistently hits 50-55°F, regardless of the date.
- Insufficient Watering In: Pre-emergent granules need water to dissolve and move into the top layer of soil to form the protective barrier. If not watered in, the product sits on the surface, exposed to sunlight (photodegradation) and wind, rendering it ineffective.
- Uneven Application: An improperly calibrated spreader or irregular walking patterns can lead to stripes of weeds in the lawn. Areas with too little product will allow weeds through, while areas with too much can potentially harm desirable grass.
- Disturbing the Soil After Application: Aerating, de-thatching, or even vigorous raking after the pre-emergent barrier has formed can break this protective layer, creating pathways for weed seeds to germinate.
- Applying to Immature or Stressed Lawns: Pre-emergents can sometimes hinder the root development of new grass seedlings. It's generally not recommended for newly seeded or sodded lawns until after at least two mowings, or for highly stressed lawns that need to prioritize root growth.
- Using the Wrong Product for the Weed: While many pre-emergents are broad-spectrum, some are more effective against specific weed types. Always check the label to ensure the product targets the weeds you are trying to control.
Common Mistakes
- Ignoring Soil Temperature as the Primary Guide: Many homeowners apply pre-emergent on a specific calendar date or when the air feels warm. This is a gamble. Invest in a soil thermometer and use it.
- Applying Too Close to Seeding New Grass: Most pre-emergents will prevent desirable grass seeds from germinating too. If you plan to overseed, you need to use a starter fertilizer with a pre-emergent safe for new grass (like siduron), or delay seeding until 2-3 months after pre-emergent application, or vice-versa.
- Skipping Spreader Calibration: Eye-balling the spreader setting or using an old, uncalibrated spreader will almost guarantee uneven coverage and patchy results.
- Not Watering in Promptly: Assuming rain will come, or simply forgetting to water, allows the product to sit inert on the surface, where it can degrade or be washed away inefficiently by a later downpour.
- Trying to Control Existing Weeds with Pre-Emergent: Pre-emergents only work on seeds before they sprout. They have no effect on weeds that are already visible in your lawn. For established weeds, you need a post-emergent herbicide.
- Applying a Single, Heavy Dose Instead of a Split Application: A single heavy dose can break down over time, leaving your lawn vulnerable. A split application provides more consistent, extended protection without increasing the total yearly application rate beyond label limits.
Cost & Time Breakdown
| Task | DIY Cost | Pro Cost | Time |
|---|---|---|---|
| Soil Thermometer Purchase | $10–$25 | N/A | 0 |
| Pre-emergent Herbicide (Bag) | $30–$80 | Included in svc | 10–20 min |
| Spreader Calibration | $0 | Included in svc | 5–10 min |
| Application (5,000 sq ft) | $0 | $100–$200+ | 20–40 min |
| Watering In (Irrigation) | $5–$15 (water) | Included in svc | 30–60 min |
| Total Estimated | $40–$120 | $100–$200+ | 1–2 hours |
Tips & Prevention
- Yearly Soil Temperature Tracking: Keep a record of your soil temperatures each spring and fall. This historical data will help you fine-tune your application timing year after year for better results.
- Consider a Two-Application Strategy: For comprehensive weed control, especially against both summer and winter annuals, plan for a spring application (for crabgrass, etc.) and a fall application (for Poa annua, chickweed).
- Know Your Local Indicators: While soil temperature is best, pay attention to local phenological indicators. For example, when forsythia bushes are in full bloom, crabgrass germination is typically very close.
- Read the Label Meticulously: Herbicide labels contain critical information about application rates, target weeds, safety precautions, and watering instructions. Different products have different active ingredients and require slightly different approaches.
- Maintain a Healthy Lawn: A thick, healthy lawn is the best defense against weeds. Proper mowing height, adequate watering, and balanced fertilization create a dense turf that naturally chokes out weeds by competing for light, water, and nutrients.
- Monitor Weather Forecasts: Keep an eye on the forecast for rain or wind. Ideally, apply just before a light rain, or be prepared to irrigate if no rain is expected within 24-48 hours. Avoid very windy days to prevent drift.
When to Call a Professional
While pre-emergent application is a manageable DIY task, there are instances where professional help is warranted. If your lawn is heavily infested with a wide variety of weeds that seem resistant to your efforts, a lawn care professional can accurately identify the specific weeds and recommend a targeted program that may involve different active ingredients or strategies. If you have struggled with persistent uneven coverage despite calibrating your spreader, or if you consistently miss the optimal timing window due to your schedule, a professional service ensures precise, timely applications. Furthermore, if you are planning to renovate your lawn, or if your lawn is suffering from significant diseases or insect issues alongside weed problems, a professional can create a comprehensive treatment plan that addresses all these factors efficiently and safely, advising on the complex interplay between pre-emergents, seeding, and other treatments.
Related Articles
Keep troubleshooting with these hand-picked guides from FixlyGuide:
- The #1 Timing Mistake Most Homeowners Make with Pre-Emergent Weed Control — Learn the critical timing of pre-emergent weed control application to prevent frustrating weed invasions and maintain a pristine lawn.
- The 7 Critical Yard Prep Steps Smart Homeowners Never Miss (And Why) — Prepare your yard for a thriving spring with these essential steps, from soil testing to tool maintenance, ensuring a vibrant outdoor space.
- The #1 Lawn Aeration Mistake Most Homeowners Make (And How to Fix It) — Timing is everything when it comes to lawn aeration, and doing it at the wrong time can do more harm than good for your grass.
- The #1 Pre-Emergent Mistake Wrecking Your Weed Control (And How to Fix It) — Applying pre-emergent at the wrong time is the most common mistake, leading to ineffective weed control and wasted effort for homeowners.
- The #1 Mistake Killing Your Lawn (and the Simple Grub Fix) — Grub worms can covertly destroy a beautiful lawn, but specific biological and chemical treatments applied at the right time can eliminate t…
- The #1 Mistake Homeowners Make Caulking a Bathroom Sink (And How to Fix It) — Discover the most common caulking mistake homeowners make around bathroom sinks and how to achieve a waterproof, professional-looking seal…
Should you do this yourself?
Answer five quick questions before you start. Safety outranks savings every time.
Your experience with work like this
How high do you have to work?
Does the job involve any of these?
Will it need a permit?
Specialty tools
Free and instant. Educational guidance only — not a quote, inspection, or professional diagnosis.
What should this project cost?
Enter your project details for a realistic cost range before you call anyone.
Cost depends heavily on which system turns out to be the source.
- Regional adjustment
- National average
- Labor share (typical)
- ~$1,620
- Quotes to collect
- 3 written estimates
Educational estimate based on national averages — not a binding quote. Always confirm with written local estimates.
Before you start
Check the difficulty, permits, and safety risk — then decide whether to call a pro.
- Estimate this projectGet a cost range for your scope and ZIP before you call anyone.Open
- Get local estimatesSend one request and compare written estimates from vetted pros.Open
Free, no signup required. Estimates are educational guidance, not a quote or an inspection.
Get the print-ready PDF of this guide
A clean, ad-free, printable version you can keep on your phone or pin to the workshop wall. Free with a FixlyGuide account.
- Print-optimized layout
- Tools, materials & every step included
- Saved to your account
Frequently asked questions
What is the ideal soil temperature for applying pre-emergent?+
For summer annual weeds like crabgrass, the ideal soil temperature for pre-emergent application is consistently between 50-55°F at a 2-4 inch depth. For winter annuals, apply when soil temperatures fall into the 50-55°F range in late summer or early fall.
Can I apply pre-emergent too early or too late?+
Yes, applying too early can cause the product to break down before weed seeds germinate, making it ineffective. Applying too late means many weed seeds have already sprouted, and the pre-emergent will not kill established weeds.
Do I need to water in pre-emergent after applying?+
Yes, most granular pre-emergents need to be watered in within 24-48 hours. This activates the product by dissolving it and moving it into the soil to form the protective barrier. About 0.25 to 0.5 inches of water is usually sufficient from either rain or irrigation.
Will pre-emergent prevent new grass seed from growing?+
Most conventional pre-emergents _will_ prevent new grass seed from germinating. If you plan to overseed, you must use a pre-emergent specifically labeled as safe for new grass (like those containing siduron) or delay seeding for 2-3 months after application, or delay pre-emergent application until new grass is established (after at least two mowings).
How long does pre-emergent last?+
The effectiveness of pre-emergent typically lasts for 6 to 12 weeks, depending on the specific product, application rate, environmental conditions, and soil type. This is why a split application or a second fall application may be beneficial for season-long control.


Discussion
Loading comments…