- Ignoring a Small Stain: That little discoloration in the corner of your spare bedroom? Don’t shrug it off. Small stains are often the first warning sign of a bigger problem. I always say, a small stain today is a big repair tomorrow.
- Thinking It's Always Direct Overhead: Water moves around. A stain on your living room ceiling could come from a leak 10 feet away or higher up the roof line. It’ll follow the path of least resistance along rafters or ducts.
- Relying on Caulk to Fix Flashing: Caulk is a temporary patch, not a real fix for bad flashing. If the metal itself is damaged or installed wrong, slapping on more caulk won’t solve it. You’ve got to deal with the flashing issue underneath.
- Trying to DIY a Steep Roof Inspection: If your roof is steep or you’re uneasy on ladders, don’t gamble with it. A fall can put you in the hospital. Protect yourself first; that’s what the pros are for.
- Not Checking After Every Major Storm: High winds, heavy rain, and hail can do damage fast. A quick visual check after severe weather can help you catch issues before they turn into full-blown leaks.
Plumbing · Leak
| Project category | Plumbing |
|---|---|
| Problem type | Leak |
| Trade required | Plumbing |
| Urgency | Emergency — act now |
| Safety risk | High safety risk |
| DIY suitability | DIY for experienced homeowners |
| Cost category | Low cost |
| Typical timeline | Shut water off now; repair usually same or next day |
| Contractor type | Licensed plumber |
Repair option
Isolate at the shutoff, replace the failed component, and dry the cavity fully.
Replacement option
Repipe the run or the branch when corrosion is widespread.
Common causes
- Failed supply line or shutoff valve
- Worn washers, cartridges, or P-trap connections
- Pinhole corrosion in older copper
Relevant tools:emergency checklistdiy or hire a pro
Published July 25, 2026Last updated August 17, 2026
Tools & materials you'll need
Affiliate linksAs an Amazon Associate FixlyGuide earns from qualifying purchases — at no extra cost to you. Prices and availability are accurate as of publication and subject to change.
Quick Answer
Nobody wants a leaky roof. Plain and simple. But I’ll tell you, by the time you’ve got a drip hitting the living room floor, that leak’s been working for a while. The real game is catching it early, before it turns into a mess. I tell homeowners all the time to keep an eye out for the little stuff: water stains on ceilings in rooms you don’t use much, discolored drywall, peeling paint, or that stale, musty smell in the attic or along exterior walls. Don’t only look when it’s raining, either — some of the worst leaks hide out on a dry day, just waiting. You’ve got to know the usual trouble spots and stay ahead of them.
The Problem
I’ve been on enough roofs to know a tiny leak can turn into a giant, expensive headache faster than you can say "mold remediation." Folks usually call me after they spot a dark stain on the ceiling, or worse, water dripping right into a bucket. By then, it’s not just drywall that’s in trouble. Your attic insulation, your rafters, and sometimes even the wiring can be affected. Mold loves moisture, and it can get going in as little as 24-48 hours. I had a homeowner in Rosemont last year who brushed off a small stain in his spare bedroom for months, figuring it was just an old pipe. No dice. It was a slow roof leak that rotted out a 4-foot section of roof decking and ceiling joists. Cost him nearly $12,000 to fix, all because he didn’t catch it early. That’s why learning to spot these things yourself matters so much; it can save you a pile of money and a whole lot of grief.
How It Works
To really spot a leak, you’ve gotta understand how the roof’s supposed to keep water out. Think of it as a layered defense. The shingles — whether they’re asphalt, wood, or tile — are the first line. They’re built to shed water down and off the roof. Under that, you’ve got underlayment, usually felt or a synthetic sheet, and that’s your backup barrier if water slips past the shingles. Then there’s the roof deck, usually plywood or OSB, which is the structural base. All those layers overlap in a specific way to push water where it belongs.
But here’s the kicker: the most common leak spots usually aren’t out in the middle of a clean shingle field. They’re where things meet or penetrate the roof. I’m talking flashing around chimneys, skylights, plumbing vents, and valleys — those V-shaped channels where two roof planes come together. Those spots depend on metal flashing and sealants to stay watertight. Over time, that sealant can dry out, crack, or pull loose, and the metal can corrode or rust. Even a tiny crack, say 1/32 of an inch, can let in a surprising amount of water over a couple heavy rains. Then gravity does its thing, running that water along rafters, ceiling joists, or even inside exterior walls, so the stain you see might show up nowhere near the actual entry point. That’s why leak hunting can feel like detective work. The stain in your kitchen ceiling might come from a leak 10 feet away along a valley, or from a higher spot that’s tracking down through a wall cavity.
Step-by-Step Fix
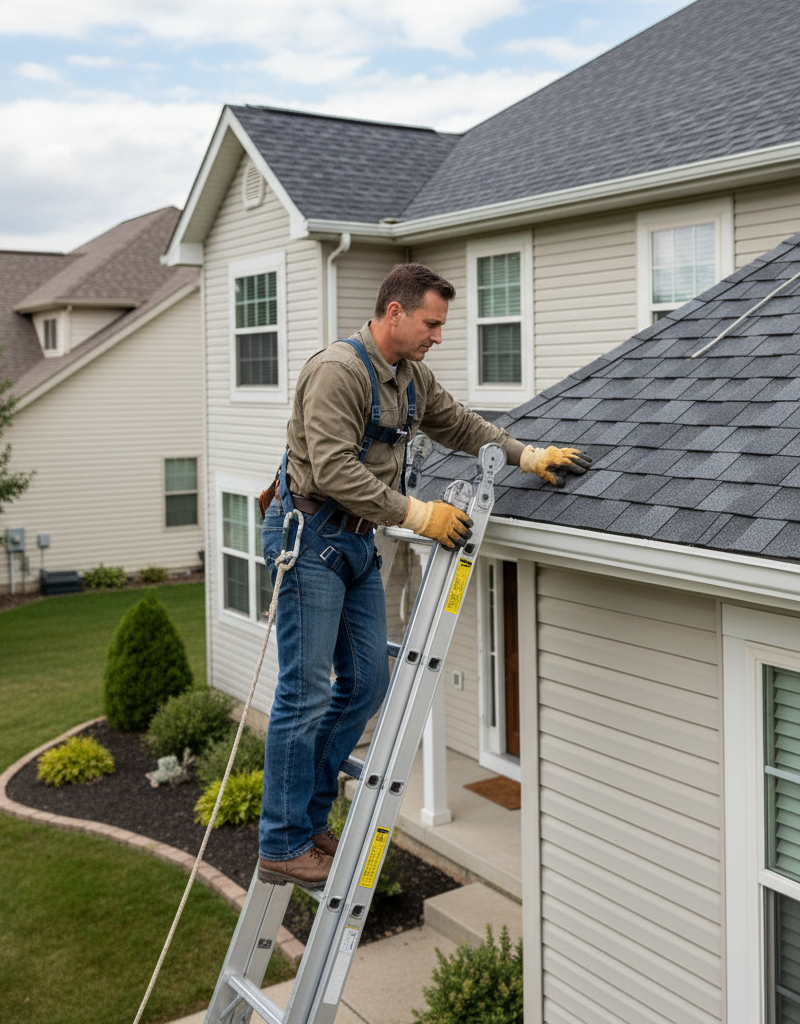
Before you even think about climbing a ladder, grab a flashlight and a notepad. Safety first, always. If heights aren’t your thing or you don’t have a solid ladder, that’s where a pro comes in. I’ve seen too many homeowners get hurt trying to DIY a roof inspection they weren’t ready for.
-
Start in the Attic — Your best first detective step
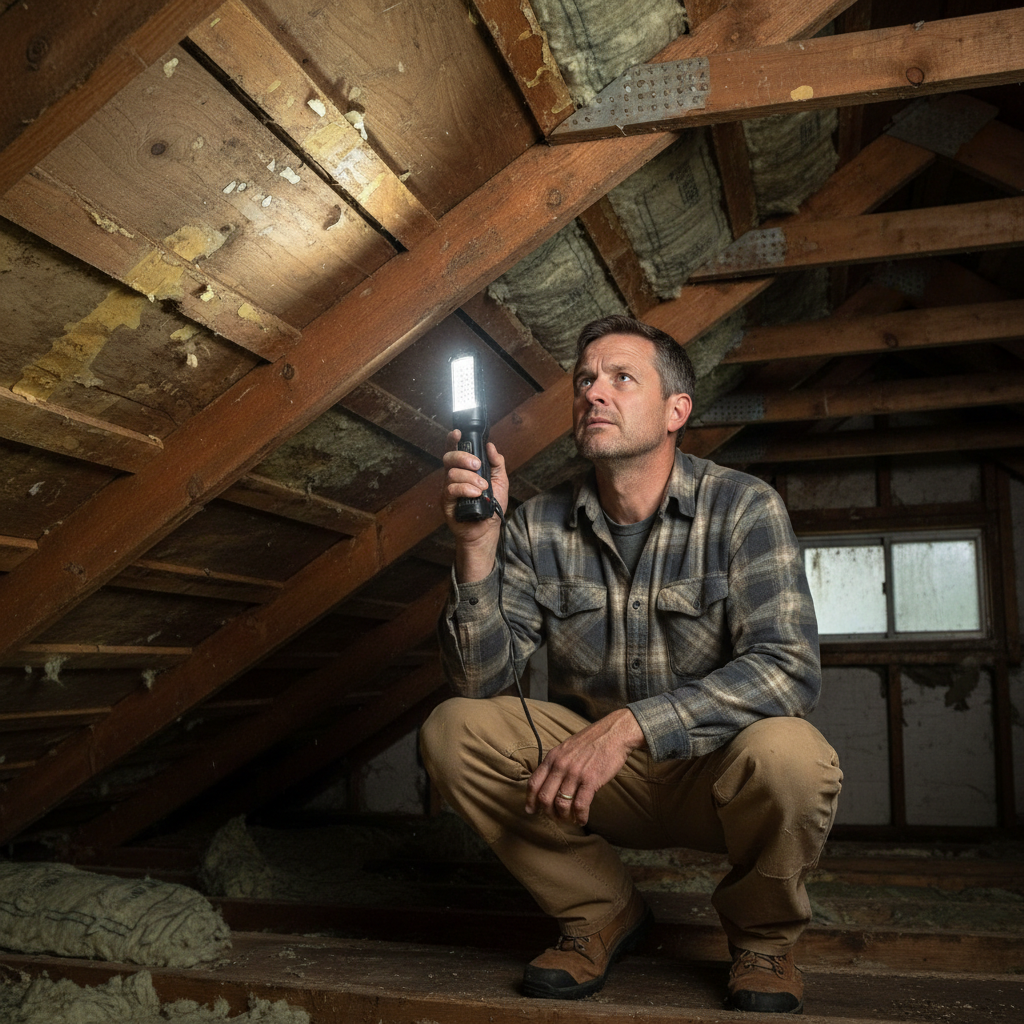
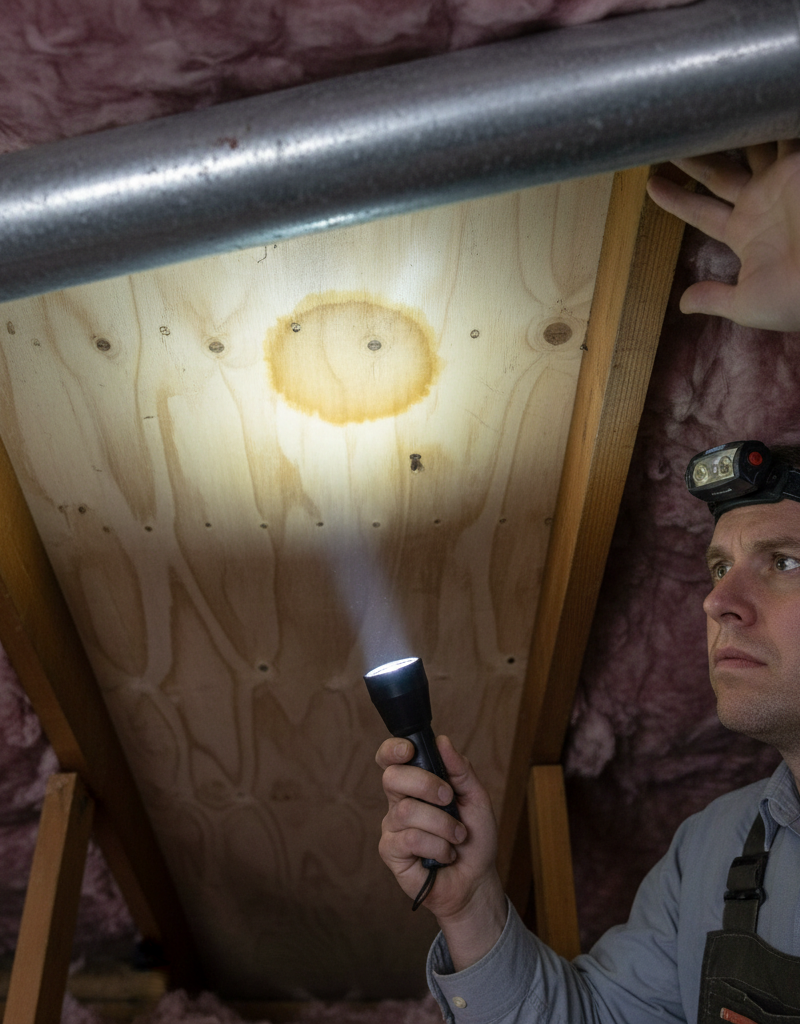
- Head up to your attic with a strong flashlight. Look for signs of water intrusion: dark stains or discoloration on the underside of the roof decking or rafters. Pay close attention around vents, chimneys, and pipe penetrations. Check the insulation for damp spots or compression; wet insulation usually looks flattened or falls apart easy. You might even catch mildew or that tell-tale musty smell. I always tell homeowners to look for stains that are darker or shinier than the surrounding wood, especially after a rain.
-
Inspect Ceilings and Walls — Look for subtle interior clues
- Walk through every room, even the ones you barely use, and look up. Check for yellowish or brownish stains, peeling paint, or bubbling plaster on ceilings and walls. Don’t skip the trim around windows and doors, especially upstairs. Sure, a wall stain could be plumbing — but don’t rule out the roof too quick. Press gently on any soft spots; if the drywall feels spongy, moisture’s already there.
-
Check Your Exterior Vents and Chimneys — Prime leak real estate
- From the ground or a sturdy ladder (with a spotter!), carefully check the flashing around chimneys, vents (plumbing, attic, dryer), and skylights. Look for cracks in the caulk, bent or rusted flashing, or places where the metal’s pulled away from the structure. Cracks as small as 1/16th of an inch can matter. If you see old, dried-out caulk, that’s your clue. If there’s granular loss around these spots, it may be from foot traffic, which weakens the shingle and opens it up to UV damage.
-
Examine Shingle Condition — The first line of defense
- Scan the roof for obvious wear and tear. Any missing, cracked, curled, or buckled shingles? Look for widespread granule loss — that sandy stuff on asphalt shingles — especially in valleys or near gutters. Too much granule loss means the shingles are losing UV protection and their water-shedding ability. Watch for loose shingles that might lift in the wind. If you can’t get up there safely, use binoculars and check the whole roof, not just the easy-to-see parts.
-
Clean and Inspect Gutters & Downspouts — Overflows can mimic leaks
- Gutters aren’t technically part of the roof, but clogged ones can back water up under shingles or against fascia boards and look just like a roof leak. Make sure yours are clear of leaves and debris, and check that downspouts dump water at least 5-10 feet away from the foundation. I’ve been to homes where overflowing gutters caused soffit and fascia rot that looked exactly like a roof leak.
-
Water Test (Carefully!) — If you can't find the source
- Only do this on a dry day, with a helper, and if you’re comfortable on the roof. One person goes into the attic with a flashlight, the other gets on the roof with a garden hose. Start at the lowest suspected point — maybe one shingle — and run water directly over that small area for 5-10 minutes. The person in the attic watches for drips. If nothing shows, move up to the next section — say, a piece of flashing — and do it again. Keep the spray tight so you can isolate the leak. This takes time, sure, but it’s often the best way to pin down a stubborn leak. Don’t blast water all over the roof or you’ll muddy the trail.
-
Identify Flashing Issues — Specifically target these tricky areas
- Focus on step flashing (where the roof meets a wall) and valley flashing. Look for rust, holes, or spots where the flashing isn’t sealed tight against both surfaces. Even small gaps can let water in. Old tar-based sealants around flashing can dry out and crack, leaving a path for leaks. If the flashing’s rusted through, it’s done for and needs replacement. Sometimes the base flashing around a chimney is shot while the cap flashing looks okay, so you’ve got to check both.
-
Examine Skylights — Another common suspect
- Skylights are notorious leak points. Check the seal around the glass. Look for cracks in the frame, worn-out flashing kits, or dried-out gaskets. Water can also sneak in if the glass seal fails, which leads to condensation between the panes and gets mistaken for an outside leak. If you see condensation inside the house around the skylight, the exterior seal may be going bad.
Common Causes
- Damaged or Missing Shingles: Wind, hail, and plain old wear can crack, curl, or rip shingles off, which leaves the underlayment exposed. After a big storm, I’m always telling clients to walk around the house and eyeball the roof. Even one missing shingle can turn into a pretty serious leak over time.
- Failing Flashing: This causes a huge chunk of leaks. Metal flashing around chimneys, vents, skylights, and valleys can rust, bend, separate, or lose its sealant, and that opens the door for water. I’ve seen original flashing on a 30-year-old roof just crumble when you touch it.
- Clogged Gutters & Ice Dams: When gutters are packed with debris, water can’t drain the way it should. In winter, that leads to ice dams that push meltwater back up under shingles and leak along the eaves. Even in warm weather, long-term backup can overwhelm the drip edge and get into the soffits.
- Punctures or Damage: Falling branches, animals, walking on the roof the wrong way, or even satellite dish installs can leave small holes or cracks that let water in. I had one job in Maplewood where a squirrel chewed a dime-sized hole in a plumbing vent boot, and it caused thousands in damage.
- Aged Roofing Materials: Nothing lasts forever. If a roof’s past its expected lifespan (typically 20-25 years for asphalt shingles), the materials get brittle, lose their resilience, and start failing more often. Granule loss, curling, and widespread cracking are big warning signs. If you can find the original paperwork, check the install date.
- Poor Installation: Shortcuts happen, and they usually show up later. Bad shingle overlap, not enough nails, or sloppy flashing work can cause leaks years after the roof goes on. It’s less common with solid contractors, but it still happens — especially with a "friend of a friend" special.
Common Mistakes
- Ignoring a Small Stain: That little discoloration in the corner of your spare bedroom? Don’t shrug it off. Small stains are often the first warning sign of a bigger problem. I always say, a small stain today is a big repair tomorrow.
- Thinking It's Always Direct Overhead: Water moves around. A stain on your living room ceiling could come from a leak 10 feet away or higher up the roof line. It’ll follow the path of least resistance along rafters or ducts.
- Relying on Caulk to Fix Flashing: Caulk is a temporary patch, not a real fix for bad flashing. If the metal itself is damaged or installed wrong, slapping on more caulk won’t solve it. You’ve got to deal with the flashing issue underneath.
- Trying to DIY a Steep Roof Inspection: If your roof is steep or you’re uneasy on ladders, don’t gamble with it. A fall can put you in the hospital. Protect yourself first; that’s what the pros are for.
- Not Checking After Every Major Storm: High winds, heavy rain, and hail can do damage fast. A quick visual check after severe weather can help you catch issues before they turn into full-blown leaks.
- Assuming All Leaks are Roof-Related: Sometimes what looks like a roof leak is actually plumbing, condensation from an HVAC unit, or even a window seal failure. You’ve got to diagnose it right before you start blaming the roof.
Cost & Time Breakdown
When you’re trying to stay ahead of a leak, most of the cost is about prevention and early detection. If you catch it early, you’re usually looking at minor repairs. If you let it go, that
Related Articles
Keep troubleshooting with these hand-picked guides from FixlyGuide:
- The One Hidden Sign of a Roof Leak Most Homeowners Miss (And the $10 Fix) — Catching a roof leak early can save thousands in repairs. Learn the elusive signs and a simple, effective fix before minor issues become ma…
- The 3 Hidden Dangers of Frozen Pipes (And How to Thaw Them Safely) — Safely thawing a frozen pipe is crucial to prevent bursting, water damage, and costly repairs; acting quickly and correctly can save your h…
- The Secret Culprit Behind Your Leaking Washing Machine (and the $15 Fix) — Discover the often-overlooked cause of washing machine leaks from the bottom and how a simple, affordable fix can save you from costly repa…
- The $5 Secret to Fixing a Clogged AC Drain Line (and Avoiding a Costly Flood) — A clogged AC drain line can lead to water damage and mold, but a simple, inexpensive DIY fix can prevent costly repairs.
- The #1 Overlooked Reason Your Chimney Leaks (It Rots Your Roof!) — Discover the surprising, often-missed culprit behind your leaky chimney and how this common issue can silently damage your home.
- The 7 Critical Home Inspection Mistakes Most Homeowners Make (and How to Spot Them) — Discover the crucial home inspection mistakes homeowners commonly overlook and learn how to identify potential problems before they become…
Should you do this yourself?
Answer five quick questions before you start. Safety outranks savings every time.
Your experience with work like this
How high do you have to work?
Does the job involve any of these?
Will it need a permit?
Specialty tools
Free and instant. Educational guidance only — not a quote, inspection, or professional diagnosis.
Questions to ask before you sign
Ask every contractor the same questions and the cheapest bid stops looking cheapest. Check them off as you go — your progress is saved on this device.
Free, no signup. Bring this to every walkthrough so you compare bids on the same terms.
What should this project cost?
Enter your project details for a realistic cost range before you call anyone.
Common repairs run $150–$650; repipes and water-heater replacements reach $1,500–$4,500.
- Regional adjustment
- National average
- Labor share (typical)
- ~$754
- Quotes to collect
- 3 written estimates
Educational estimate based on national averages — not a binding quote. Always confirm with written local estimates.
Fixly Project Decision Box
- DIY difficulty
- Professional Recommended
- Estimated time
- Inspection 1–2 hours · repairs 1–3 days
- Cost level
- High
Main tools / materials
- Binoculars for a ground-level look
- Flashlight for attic checks
- Moisture meter
- Roofing cement (temporary patch only)
When to stop and call a pro
- Active leak near lights, fans, or any wiring
- Sagging, bulging, or water-filled ceiling
- Steep, wet, or two-story roof — do not climb it
- Storm or hail damage you plan to claim on insurance
Need professional help?
Free roof assessment first — no phone calls until you ask for them.
Get Local Roofing HelpGet help with your roof now
Stay off the roof. These free tools help you protect the house and reach the right professional fast.
- Emergency repair checklistThe first steps that limit damage before a pro arrives.Open
- Repair or replace your roof?Answer 10 questions about age, leaks, and damage to get a clear next step.Open
- Get local estimatesSend one request and compare written estimates from vetted pros.Open
Free, no signup required. Estimates are educational guidance, not a quote or an inspection.
Get the print-ready PDF of this guide
A clean, ad-free, printable version you can keep on your phone or pin to the workshop wall. Free with a FixlyGuide account.
- Print-optimized layout
- Tools, materials & every step included
- Saved to your account
Frequently asked questions
What are the first signs of a roof leak?+
The earliest signs are often subtle: a musty smell in your attic, faint water stains or discoloration on ceilings or walls, or bubbling paint. Sometimes you'll notice small granules from your shingles in your gutters after a heavy rain.
Can a roof leak repair be a DIY job?+
Minor roof leak repairs, like patching a small shingle crack or re-sealing a vent, can be DIY. However, anything involving extensive flashing work, structural damage, or working on a steep roof is best left to a licensed professional for safety and proper execution.
How long does it take for a small roof leak to cause major damage?+
A small leak can cause significant damage surprisingly quickly. In wet conditions, mold can start growing within 24-48 hours. Depending on the leak's severity, it could rot wood decking or joists in a matter of weeks or a few months, leading to costly structural repairs.
Why does my roof leak only when it rains heavily?+
Leaks that only appear during heavy rains often indicate a small, intermittent entry point that only lets water in when there's a significant volume or pressure. Common culprits are slightly compromised flashing, a minor shingle crack, or a clogged gutter causing water to back up.
Can I use a hose to find a roof leak?+
Yes, carefully. This method works best with two people: one on the roof with a hose, applying water to small sections, and one in the attic looking for drips. Start low and work your way up to isolate the source. Never spray water directly up under shingles.
How often should I inspect my roof for leaks?+
I recommend a thorough visual inspection at least twice a year—once in the spring and once in the fall. Also, check your roof after every major storm, especially those with high winds or hail, as they can cause immediate damage.
What areas of the roof are most prone to leaking?+
The most common leak spots are usually where the roof is penetrated or changes direction. This includes flashing around chimneys, skylights, plumbing vents, and the valleys where two roof planes meet. These areas rely on sealants and metal that can degrade over time.
What does a roof leak smell like?+
A persistent musty or earthy smell, especially in your attic or near exterior walls, is a classic sign of a hidden roof leak and mold growth. Don't ignore it, even if you can't see visible water stains yet.

Discussion
Loading comments…