
Tools & materials you'll need
Affiliate links- AmazonSmall flat-head screwdriverFor adjusting radius and arc on most sprinkler heads
- AmazonManufacturer's adjustment keyIf your rotor sprinkler head came with one (e.g., Hunter or Rain Bird)
- AmazonStiff brush or old toothbrushFor cleaning debris from around the nozzle
- AmazonPliersOptional, for gripping stubborn adjustable spray head collars
- AmazonSmall utility knifeOptional, for carefully trimming grass around the head if overgrown
As an Amazon Associate FixlyGuide earns from qualifying purchases — at no extra cost to you. Prices and availability are accurate as of publication and subject to change.
Quick Answer
Many homeowners instinctively try to solve sprinkler spray issues by fiddling with water pressure or moving the head itself, but the true fix for an uneven or misdirected spray pattern lies in understanding and utilizing the dedicated adjustment screws on the sprinkler head. For most rotor and spray heads, a small flat-head screwdriver or a specialized adjustment key is all you need to precisely control the arc (how far the head rotates) and the radius (how far the water sprays). Learning to use these adjustments correctly ensures your lawn gets the water it needs without waste and prevents costly damage to driveways or structures.
The Problem
Is your sprinkler drenching the driveway while leaving a patch of lawn parched? Are you noticing puddles in one area and dusty grass in another? An incorrectly adjusted sprinkler spray pattern is a common and frustrating problem for homeowners. Not only does it lead to an unhealthy, unevenly watered lawn with tell-tale brown spots, but it also wastes significant amounts of water, driving up your utility bills and potentially damaging fences, siding, or concrete over time. The issue isn't usually a broken sprinkler, but rather that its arc (the angle of its rotation) or radius (how far it sprays) is out of sync with your landscape's needs. This often happens after initial installation, during maintenance, or even due to accidental bumps from lawnmowers or foot traffic. Addressing this means understanding the mechanics of your specific sprinkler head and making targeted adjustments, rather than resorting to guesswork or unnecessary replacements.
How It Works
To understand how to adjust a sprinkler, it's helpful to know how these common types operate. Most residential sprinkler systems primarily use two types of heads: spray heads and rotor heads.
Spray Heads
Spray heads are stationary. They pop up and spray water in a fixed pattern, much like a showerhead. Their spray pattern can be a full circle, a half-circle, a quarter-circle, or various other preset shapes. The key adjustments on a spray head are typically for the radius and, in some cases, the arc. The radius adjustment screw (often a small flat-head screw on top of the nozzle) obstructs the flow of water, effectively shortening the spray distance. Some spray nozzles also have a collar or ring that can be rotated to adjust the arc, especially for heads designed for adjustable patterns from 0 to 360 degrees. Water enters the head from the lateral line, travels up the riser, and is then forced through the nozzle orifice, creating the spray pattern. The pressure of the water and the design of the nozzle determine the initial throw distance and shape.
Rotor Heads
Rotor heads, on the other hand, rotate, directing a single stream or multiple streams of water across a larger area. They are often used for larger lawn sections due to their greater throw distance. Rotors typically have two primary adjustments: the arc of rotation and the radius (or throw distance). The arc adjustment determines the start and end points of the head's rotation. On most rotors, there's a designated "fixed" side (often indicated by an arrow or a textured area) and an adjustable side. You set the fixed side first, then use a specialized adjustment tool or screwdriver to increase or decrease the arc from that point. The radius adjustment typically involves a screw (sometimes called a "flow adjustment" or "distance control" screw) that partially obstructs the water stream, causing it to fall closer to the head. Some advanced rotors also allow for nozzle replacement to change the type of spray or flow rate. The internal gears of the rotor, driven by water pressure, cause the head to oscillate back and forth within the set arc.
Both types of heads rely on adequate water pressure to function correctly. If the pressure is too low, the spray won't reach its intended distance, and if it's too high, it can atomize the water, leading to excessive misting and evaporation. Understanding these basic mechanisms makes targeted adjustments much more logical and effective.
Step-by-Step Fix
Before you begin, turn on the sprinkler zone you wish to adjust. This allows you to see the current spray pattern in action.
1. Identify Your Sprinkler Head Type — Know your equipment
- Before making any adjustments, determine if you have a spray head (fixed pattern) or a rotor head (rotating stream). This dictates the adjustment method. Look for the rotating element in rotors; spray heads will just pop up and spray.
- If it's a rotor head: Check if it's a gear-driven rotor or an impact rotor. Most modern residential systems use gear-driven rotors. Identify the specific brand and model if possible, as adjustment methods can vary slightly.
- If it's a spray head: Note if it has a fixed-pattern nozzle or an adjustable-pattern nozzle (VAN – Variable Arc Nozzle). VAN nozzles have a serrated or ribbed collar for arc adjustment.
2. Clear Debris and Inspect for Damage — Ensure proper function
- Safety Note: Always be cautious when working with pop-up sprinklers to avoid pinching fingers. Avoid looking directly into high-pressure water streams.
- Gently pull up pop-up heads if they aren't fully extending. Clear any grass, dirt, or mulch from around the head and the nozzle opening. A clogged nozzle can significantly distort the spray pattern.
- Check the head and nozzle for cracks, chips, or visible wear. A damaged nozzle or riser can cause unadjustable spray issues. If damaged, replacement is usually the best option.
- If this doesn't work: A clogged filter screen beneath the nozzle can also cause issues. Turn off the water, unscrew the nozzle, and carefully remove and clean the small cylindrical filter screen, then reassemble.
3. Adjust the Radius (Throw Distance) — Control how far the water sprays
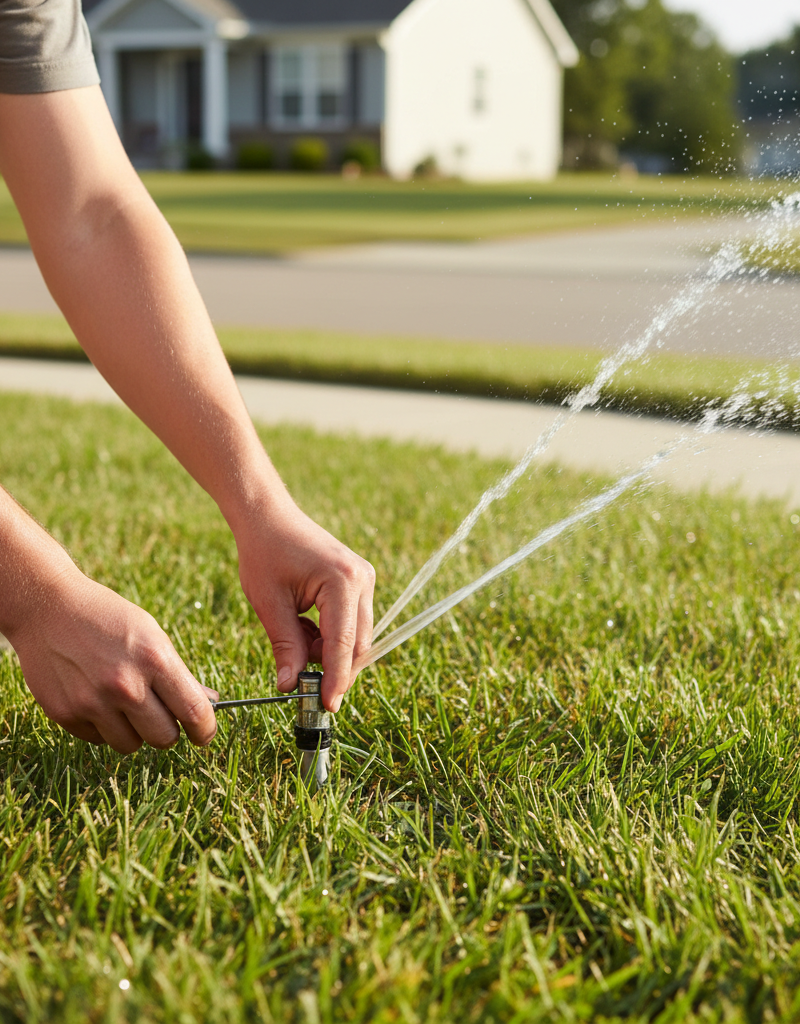
- For Spray Heads: Locate the small flat-head screw on the top center of the nozzle (not the main body). This is the radius adjustment screw. Using a small flat-head screwdriver, turn the screw clockwise to decrease the radius (shorten the spray distance) or counter-clockwise to increase it. Turning it in too far will stop the water flow completely.
- For Rotor Heads: Locate the radius adjustment screw, usually on the side or top of the head, often marked with a minus (-) and plus (+) or an arrow pointing to a spray pattern. Use a small flat-head screwdriver or the manufacturer's adjustment key. Turn clockwise to decrease the spray distance and counter-clockwise to increase it. Do not turn it more than a few full turns past fully open.
- Tip: Adjust in small increments (quarter-turns) and observe the effect before making further changes. The goal is for the water to reach the edge of the desired watered area.
4. Adjust the Arc (Rotation Pattern) — Set the start and stop points
- For Adjustable Spray Heads (VANs): With the water on, grasp the ribbed or serrated collar firmly and rotate it left or right. One side of the pattern will be fixed; you're rotating the other side to expand or contract the arc. Aim for the water to stop just short of hard surfaces.
- For Rotor Heads: This is usually a two-step process.
- Set the Fixed Side: First, identify the fixed or non-adjustable side of the rotor's arc. This is often clearly marked with a pointer or a textured area. Manually rotate the top of the rotor clockwise until it stops at the fixed right stop. This is your desired right-hand boundary.
- Adjust the Left Stop: Insert the adjustment key or flat-head screwdriver into the arc adjustment slot (often labeled "Arc" or with an arrow). Turn it clockwise to increase the arc (make it spray over a wider area) or counter-clockwise to decrease the arc (make it spray over a narrower area). Some brands like Hunter use a key that turns an internal screw; other brands may have a collar or ring you lift and rotate. Observe the rotation; the head should rotate from your fixed right stop to your newly set left stop.
- Tip: Adjust the arc so the water only hits your lawn and landscape, avoiding sidewalks, driveways, and buildings. Overlap patterns slightly between adjacent heads for even coverage.
5. Check Sprinkler Alignment — Ensure the head is straight
- While the water is off, gently check if the sprinkler head is sitting vertically straight in the ground. If it's leaning, carefully dig around the base and straighten it, repacking the soil firmly around its base to hold it in place. A tilted head will deliver an uneven spray.
- If this doesn't work: A worn-out riser seal or a loose connection at the swing joint can allow the head to lean. This might require digging down to the swing joint for repair or replacement, which is more involved.
6. Balance Pressure Across the Zone — Optimize system performance
- After adjusting individual heads, stand back and observe the entire zone. Are some heads spraying further or higher than others? This can indicate pressure imbalances.
- Safety Note: Never attempt to adjust main system pressure regulators without proper knowledge, as this can affect your whole house's water supply. Focus on individual head adjustments.
- While you can't typically adjust pressure at each head, ensuring all heads are the same model and nozzle type in a zone helps. If one head is spraying significantly less, it may be partially clogged or have a different nozzle. If one is spraying too much, it may be the wrong type of nozzle for that zone.
- If this doesn't work: Consider installing a pressure-regulating body or nozzle on individual heads that are experiencing chronic over-pressurization to ensure consistent output, especially in zones with significant elevation changes.
7. Repeat and Refine — Fine-tune until perfect
- Walk through the entire zone, carefully observing the spray patterns. Adjust as needed until each head provides optimal coverage for its designated area.
- It often takes several passes to get it just right. Be patient and make small, incremental adjustments. The goal is "head-to-head coverage," meaning the spray from one head should reach the adjacent head.
Common Causes
- Initial Installation Errors: Often, sprinklers are installed without precise adjustment, leading to immediate uneven watering.
- Accidental Bumps: Lawn mowers, edgers, foot traffic, or even children playing can bump and misalign sprinkler heads, subtly changing their arc or radius settings.
- Clogged Nozzles: Dirt, debris, or mineral deposits can partially block the nozzle's orifice, distorting the spray pattern or reducing its throw distance.
- Worn-Out Components: Over time, the internal gears of a rotor head can wear down, or the seals can degrade, affecting its rotation or spray consistency. Nozzles can also wear out, especially in areas with hard water.
- Changes in Landscape: Newly planted shrubs, trees, or garden beds can obstruct an existing sprinkler's spray, requiring readjustment or even relocation.
- Water Pressure Fluctuations: While not directly an adjustment issue, significant changes in your home's water pressure (e.g., municipal changes, new appliances) can impact spray distance and require radius adjustments to compensate.
Common Mistakes
- Ignoring Head-to-Head Coverage: A common error is not ensuring that the spray from one head reaches the next head in the zone. This creates dry spots between them. Always aim for overlapping coverage.
- Adjusting Pressure Instead of Nozzle: Trying to "fix" a spray issue by manipulating the main water valve or system pressure regulator. This can negatively impact your entire system and even indoor plumbing. Most adjustments are done at the head itself.
- Overtightening Adjustment Screws: Forcing adjustment screws too far can strip the plastic threads, permanently damaging the sprinkler head and necessitating replacement.
- Not Clearing Debris First: Attempting adjustments without first cleaning out debris from around and inside the nozzle. A simple cleaning might resolve the issue without needing any screw adjustments.
- Mixing Sprinkler Types/Nozzles in One Zone: Placing different types of sprinkler heads (e.g., spray and rotor) or nozzles with vastly different flow rates on the same zone can lead to significant pressure imbalances and uneven watering, making precise adjustment nearly impossible.
- Adjusting When the Wind is Blowing: Strong winds can significantly distort spray patterns, making accurate adjustment difficult. Choose a calm day for fine-tuning.
Cost & Time Breakdown
| Task | DIY cost | Pro cost | Time |
|---|---|---|---|
| Clean & Adjust 1-2 Heads | $0 | $50–$100 | 10–20 min |
| Clean & Adjust Full Zone (4-6+) | $0 | $100–$250 | 30–60 min |
| Replace Single Nozzle | $2–$10 | $75–$125 | 15–20 min |
| Replace Single Spray Head | $5–$15 | $100–$150 | 20–30 min |
| Replace Single Rotor Head | $15–$50 | $125–$200 | 30–45 min |
Tips & Prevention
- Observe Your System Regularly: During your normal watering schedule, take a few minutes to walk your property and observe each sprinkler head in action. Look for misdirected sprays, clogged nozzles, or heads that aren't popping up fully.
- Perform Annual Maintenance: At the beginning of each irrigation season (typically spring), visually inspect all sprinkler heads, clean any visible debris, and make minor adjustments as needed. This proactive approach prevents bigger issues.
- Install Correctly Matched Heads: When installing new heads or replacing old ones, ensure that all heads within a single zone have similar precipitation rates and are appropriate for the area they are watering. This minimizes pressure imbalances.
- Use the Right Tools: Always use the manufacturer's specific adjustment key if available, especially for rotor heads. A generic screwdriver might work but could strip the adjustment points over time.
- Mark Head Locations: For pop-up heads that retract into the turf, consider using small flags or markers to make them easier to locate, especially during winterization or spring startup. This helps prevent accidental damage from lawn equipment.
- Consider Smart Controllers: Upgrading to a smart irrigation controller can help detect leaks and watering inefficiencies, and some even integrate with hyper-local weather data to optimize watering schedules, reducing the chances of uneven watering due to pressure changes or incorrect timing.
When to Call a Professional
While most spray pattern adjustments are well within the DIY homeowner's capability, there are specific situations where calling a licensed irrigation professional is the wisest course of action. If you notice persistent low water pressure affecting multiple zones, or if large sections of your lawn are consistently dry despite proper head adjustments, there might be a more significant underlying issue like a broken main line, a faulty valve box, or an incorrectly sized main system. Similarly, if you have old, seized sprinkler heads that won't adjust, or if you suspect extensive damage to the underground pipes, a professional has the specialized tools and expertise to diagnose and repair these complex problems without causing further damage to your irrigation system or yard. They can also perform a comprehensive system audit to optimize overall efficiency, saving you water and money in the long run. Don't hesitate to call if you're dealing with problems beyond simple nozzle adjustments. Only licensed pros should handle main irrigation lines or system-wide pressure issues.
Related Articles
Keep troubleshooting with these hand-picked guides from FixlyGuide:
- The 5-Minute Fix for Sprinkler Head Chaos (and Why It’s Spraying the Sidewalk) — Tired of your sprinklers watering everything but your lawn? Learn how to quickly adjust sprinkler spray patterns and coverage for a greener…
- The #1 Watering Mistake Homeowners Make (And How to Fix It in Minutes) — Discover the most common lawn watering mistake homeowners make and how adjusting your technique can lead to a healthier, greener lawn.
- The #1 Mistake Homeowners Make When Battling Lawn Grubs (And a Simple Fix) — Discover the common mistake homeowners make when treating grubs and learn a simple, effective solution for a healthier lawn.
- The #1 Mistake Turning Your Healthy Lawn Brown After Watering — Discover the most common, overlooked reason your lawn develops brown spots right after you water it, and how to fix it with simple steps.
- The #1 Mistake Homeowners Make When a Lawn Mower Won't Start (And the Easy Fix) — Before you despair, discover the most common culprit behind a non-starting lawn mower and how to fix it in minutes.
- The #1 Mistake Homeowners Make Installing Floating Shelves (and How to Avoid It) — Learn the proper techniques for securely installing floating shelves into drywall, avoiding common mistakes that lead to costly damage or w…
Frequently asked questions
Why is my sprinkler drenching the driveway?+
Your sprinkler is likely drenching the driveway because its radius or arc is set too wide. You need to adjust the radius screw to shorten the throw distance and/or adjust the arc to prevent it from spraying beyond your lawn onto hard surfaces. Follow the steps for adjusting radius and arc on your specific sprinkler head type.


Discussion
Loading comments…