
- Stock Spare Tiles in the Attic: Keep at least one or two full boxes of your original tile after the job wraps. Dye lots change, styles get discontinued, and finding an exact match five years later is usually a waste of time.
- Run Indoor Humidity Controls: In places with wild weather swings, keep indoor relative humidity between 35% and 55%. That helps cut down on seasonal swelling and shrinking in wood subfloors.
- Use Flexible Silicone at All Plane Changes: Where tile meets a wall, bathtub, cabinet toe-kick, or another flooring type, don’t use hard grout. Use color-matched 100% silicone caulk so the joint can handle little movements without cracking.
General remodeling · Renovation planning
| Project category | General remodeling |
|---|---|
| Problem type | Renovation planning |
| Trade required | General contracting |
| Urgency | Planned project |
| Safety risk | Low safety risk |
| DIY suitability | Pro recommended |
| Cost category | Major investment |
| Typical timeline | Design and permitting often 2–4 months before work starts |
| Contractor type | General contractor |
Repair option
Phase the work and fix the building envelope first.
Replacement option
Full renovation with permits, design, and a general contractor.
Common causes
- Space no longer fits how the household lives
- Resale preparation
- Deferred maintenance stacking up
Relevant tools:project cost estimatorcompare quoteshome improvement material prices
Published October 30, 2026Last updated October 30, 2026
Tools & materials you'll need
Affiliate links- AmazonOscillating multi-tool with diamond grout blade1 · For clearing joints without cracking adjacent tiles
- AmazonCold chisel and 2-lb sledge hammer1 each · To break up and lift old tile and bed
- AmazonSquare-notched trowel (1/4" x 1/4" or 1/4" x 3/8")1 · Size to match tile dimensions
- AmazonHEPA shop vacuum1 · For removing masonry dust
- AmazonRubber grout float and tile sponge1 each · For grout pack-in and clean-up
- AmazonRubber mallet1 · For leveling replacement tile
- AmazonPolymer-modified thinset mortar (ANSI A118.4)1 small bag or tub · Match to substrate and tile type
- AmazonReplacement tile1–2 tiles · From original spare stock
- AmazonColor-matched floor grout1 small bag · Sanded for joints 1/8" or wider
- AmazonLiquid crack isolation membrane1 quart · For concrete slab cracks under 1/16"
As an Amazon Associate FixlyGuide earns from qualifying purchases — at no extra cost to you. Prices and availability are accurate as of publication and subject to change.
Quick Answer
Cracked tile over a concrete slab or subfloor usually comes from foundation settlement, substrate movement, bad thinset coverage, or a missing uncoupling membrane. If it’s just one hairline surface crack from a dropped pan or a heavy boot heel, a handy homeowner can usually patch or swap that tile out in an hour or two. But if the crack keeps running across multiple tiles, that’s not a tile problem anymore — that’s the floor telling you it’s moving, and you’ll need a structural engineer or foundation specialist to take a hard look.
The Problem
Not much sinks a homeowner’s heart faster than seeing a jagged crack running through a bathroom or kitchen tile floor you thought was set for life. It usually starts small. One chipped ceramic or porcelain square. Then a few weeks or months later, you notice the crack doesn’t stop at the grout line — it keeps going through three, four, maybe five tiles in a row, straight as a string or wandering all over the place.
Tile’s tough in one direction and helpless in another. It’s got plenty of compressive strength — often 2,000 to 4,000 PSI or more — so it can take a lot of straight-down weight without blinking. But tensile and flexural strength? Practically none. Once the surface underneath shifts, bends, shrinks, or heaves even a little, the tile can’t flex with it. The stress goes right into the tile body, and something’s got to give. In places like North Texas, where expansive clay soils move around on you, or in older houses where joists are already working too hard, cracked tile usually isn’t just a cosmetic headache. It’s the floor giving you a peek at what the structure beneath is doing.
How It Works
To understand why floor tiles crack, you’ve got to picture the whole floor stack, not just the pretty top layer. A tiled floor isn’t one solid piece. It’s a rigid sandwich with a few different layers working together. Down low, you’ve got the structure — either a poured concrete slab on grade or wood joists, usually 2x10s or 2x12s spaced 16 inches on center, covered with 3/4-inch plywood or OSB subflooring. On top of that sits either cement backer board, like Durock or HardieBacker, or an uncoupling membrane such as Schluter-DITRA. Then comes polymer-modified thinset mortar, combed out with a notched trowel, and then the tile itself, with grout filling the joints between pieces.
+-------------------------------------------------------+  <-- Tile Surface
|                      TILE LAYER                       |
+-------------------------------------------------------+
|~.~.~.~.~.~ Thinset Mortar (Polymer-Modified) ~.~.~.~.~|
+-------------------------------------------------------+
|  Cement Backer Board / Uncoupling Membrane (DITRA)    |
+-------------------------------------------------------+
|         Subfloor (Plywood/OSB) OR Concrete Slab       |
+=======================================================+  <-- Joists / Soil
Tile failures happen when the movement underneath beats the bond strength of the thinset or the tile’s own breaking point. The big two are vertical deflection — bouncing or sagging under load — and horizontal expansion or contraction from heat, moisture, or shrinkage. A proper system uses an uncoupling membrane to break up lateral stress, so the stuff below can move a little without dragging the tile along for the ride. If tile is stuck straight to a concrete slab without an isolation layer, or if wood joists flex more than the industry standard of L/360, which means the span divided by 360 and works out to about 1/2 inch of flex over a 15-foot run, that movement goes straight up through the tile. The bond may hang on, but the tile body won’t. It snaps. Plain and simple.
I pulled a water heater in Frisco last month and found a kitchen floor with a crack dead in line with the same slab fissure under the fridge. No mystery there. The tile was just reporting what the slab had been doing for years.
Step-by-Step Fix
Replacing one damaged tile, or figuring out whether there’s a bigger issue underneath, takes a methodical approach. If you rush it, you’ll crack the neighbor tiles and wreck your whole Saturday. Here’s how I go about pulling a cracked tile and seeing what’s really going on below it.
-
Safety and Workspace Prep — Put on heavy-duty wrap-around safety glasses, leather work gloves, and an N95 dust mask. Ceramic shards and dry old thinset go flying, and they’ll cut you like glass. Clear the area, pull rugs, move anything loose, and if you need to, pop off nearby baseboards and tape up light plastic sheeting so the dust doesn’t get everywhere.
- Tools: Safety glasses, N95 mask, work gloves, masking tape, 1-mil plastic drop cloth.
-
Isolate the Broken Tile with Grout Removal — Don’t start chiseling with the grout still locked in place. You’ll just shock the good tiles beside it and make a bigger mess. I use an oscillating multi-tool with a carbide or diamond grit grout blade. Grind out the grout around all four sides of the cracked tile down to the substrate, and keep that blade centered so you don’t nick the glaze on the next tile over.
- Tools: Oscillating multi-tool, diamond grout blade (or manual carbide grout rake).
- Safety Note: Keep the tool speed moderate; too much friction can scorch surrounding porous stone or melt composite trims.
-
Relieve Internal Tension in the Tile — Drill a few relief holes right through the face of the broken tile with a 1/4-inch or 5/16-inch carbide masonry or diamond hole saw bit. A damp sponge on the surface helps keep the bit cool and knocks down the dust. Put 4 to 6 holes across the center and along the crack line; that breaks the tile’s internal tension so it won’t fight you as hard.
- Tools: Corded or cordless drill, 5/16-inch diamond core bit, wet sponge.
-
Chisel Out the Tile Shards — Set a cold chisel or an old narrow masonry chisel into the drilled holes at a 45-degree angle, aiming inward toward the middle of the broken tile, not toward the edge. Hit it with a 2-pound hand sledge or ball-peen hammer. Work from the center outward and pop the pieces free little by little until the whole tile’s out. No need to get heroic.
- Tools: Cold chisel (1/2-inch to 3/4-inch width), 2-lb sledge hammer.
- If this doesn't work: If the tile won’t budge, slide a wide flat-blade putty knife in and tap it flat against the substrate to start separating the thinset from the backer.
-
Inspect the Subfloor and Read the Failure — Before you scrape anything clean, stop and look at what’s under there. Check the thinset ridges. Were they crushed flat, or do you still see the trowel lines like the tile never got seated right? Scrape a spot clean. Do you see a hairline crack in the concrete slab below that matches the tile crack? That tells you a lot.
- Diagnostic Point: If you see a crack in the concrete slab wider than 1/16 inch, stop right here. Mortaring a new tile over this will fail within months; see the "When to Call a Professional" section.
-
Clear Out Old Thinset Down to Substrate — Use your chisel and a stiff 2-inch putty knife to scrape the old mortar down flat to the original backer board or concrete. You want a clean recess, roughly 1/8 to 3/16 inch deep, so the replacement tile doesn’t stick up above the finished floor. Vacuum every bit of dust and grit with a shop vac that has a HEPA filter.
- Tools: 2-inch stiff putty knife, shop vac, sanding block with 40-grit sandpaper for high spots.
-
Dry-Fit the Replacement Tile — Set the replacement tile in the hole dry, no mortar yet. Lay a 2-foot level across it and the surrounding tiles in every direction — north-south, east-west, diagonal too. You want it slightly lower than or dead-even with the floor around it. If it sits high, take a little more old mortar off. If it sits low, you’ll make up for it with your trowel notch size.
- Tools: 2-foot spirit level, replacement tile, 1/8-inch tile spacers.
-
Apply Crack Isolation (If Replacing on Slab) — If you’re setting onto concrete and you found a small shrinkage crack under 1/32 inch, roll or brush on a liquid crack isolation membrane like Custom Building Products RedGard or Laticrete Hydro Ban. Do two solid coats, crossing the direction on the second coat, and give it 60 to 90 minutes of dry time between coats. That rubbery layer helps absorb tiny slab movement before it gets to the tile.
- Materials: Liquid crack isolation membrane, 3-inch paintbrush.
-
Mix and Comb Polymer-Modified Thinset — Mix a small batch of ANSI A118.4 polymer-modified thinset mortar with water in a clean 2-gallon bucket following the bag directions. You want something about the consistency of creamy peanut butter. Use a 1/4" x 3/8" or 1/4" x 1/4" square-notched trowel and comb the mortar onto the substrate in straight, parallel lines. Then flat-back-butter the back of the replacement tile with a thin skim coat using the flat side of the trowel.
- Tools: Margin trowel, 1/4" notched trowel, measuring cup, mixing paddle.
- Pro Tip: Don’t swirl the mortar around. Straight ridges collapse the way they’re supposed to, and you won’t trap air pockets.
-
Set and Align the Tile — Press the tile into the wet bed. Slide it back and forth about 1/8 inch perpendicular to the trowel ridges so the mortar ribbons flatten out underneath. Set plastic spacers in the corners to keep the grout joints even. Then lay your level across the tile and tap the high spots lightly with a rubber mallet until it sits flush with the floor around it.
- Tools: Rubber mallet, 2-foot level, plastic tile spacers.
-
Clean Joints and Let Cure — Use a wooden toothpick or the edge of a plastic spacer to clean out any thinset that squeezed into the grout joints. You want the joint open at least 2/3 of the tile’s depth. Wipe the face clean with a damp tile sponge and leave it alone for a full 24 hours. Don’t walk on it.
- Tools: Tile sponge, clean water bucket.
-
Grout and Seal — After 24 hours, pull the spacers. Mix matching grout — sanded for joints 1/8 inch or wider; unsanded for joints under 1/8 inch. Pack it into the joints at a 45-degree angle with a rubber grout float. Wait 15 to 20 minutes until it firms up and goes matte, then wipe off the extra with a barely damp sponge in light circular motions. Give it 72 hours before applying a penetrating silicone grout sealer.
- Tools: Rubber grout float, dense grout sponge, microfiber towel, penetrating grout sealer.
Common Causes
Why do tiles crack at all? I usually split the causes into bad installation work and plain old structural movement:
- Reflected Slab Cracks (Telegraphing): Concrete shrinks as it cures, and it forms control or stress cracks while it does it. In homes built on moving soil — especially the expansive bentonite clay we deal with across North Texas and the Midwest — slabs can settle unevenly. If tile goes down directly over concrete without a crack isolation membrane, those slab cracks come right back up through the tile.
- Joist Deflection (Excessive Floor Flex): Wood floors bend under furniture, foot traffic, and life in general. Ceramic tile needs at least L/360, while natural stone like travertine, slate, or marble needs L/720. If your joists are too small, too far apart, or chopped up by plumbing cuts, the floor flexes and the tile breaks at the weak spots.
- Spot Bonding ("Dot Method"): I’ve seen installers slap five or six big dollops of thinset on the back of a tile instead of combing full ridges across the whole thing. That leaves hollow pockets under the center and edges. Drop a cast-iron skillet, or even step hard with a boot heel, and that unsupported spot caves in.
- Missing Perimeter Expansion Joints: Tile expands and shrinks with temperature and humidity changes. The Tile Council of North America (TCNA) standard EJ171 calls for an open 1/4-inch expansion gap around the perimeter of each room, covered by baseboards, and movement joints every 20 to 25 feet across larger spans. If the tile gets jammed tight against drywall or framing, it’s got nowhere to move. It tents, buckles, and splits along the pressure points.
- Curing Green Concrete: Putting tile on fresh concrete before it’s cured for at least 28 days — and often 60 days in humid conditions — is asking for trouble. As the slab loses water, it shrinks. The tile doesn’t, and something gives.
Common Mistakes
Here are the mistakes I see all the time from DIYers and bargain-bin installers who keep creating the same problem twice:
- Mortaring straight over concrete slab cracks — If you slap new thinset over an existing slab crack without an elastomeric membrane like RedGard or an uncoupling mat, that replacement tile is going to snap in the exact same place within 3 to 12 months. No dice.
- Combing thinset in swirling patterns — Swirled ridges fold over themselves and trap air. You end up with only 40% to 50% thinset coverage instead of the TCNA-mandated 80% (95% in wet areas). Straight lines only.
- Skipping back-buttering on large format tiles — Tiles 12x24 inches or larger usually have a little bow from the kiln. If you don’t flat-trowel a skim coat on the back before setting them, you’ll wind up with hollow spots big enough to haunt you later.
- Using premixed mastic in heavy-traffic or wet areas — Premixed tile adhesive, or mastic, dries by air evaporation instead of chemical cure. It’s weak, it hates moisture, and it doesn’t handle movement well. That thing’s toast in a floor application that gets real use.
- Filling perimeter expansion joints with hard grout — Grouting tile tight against drywall or baseboard locks the whole floor into a rigid cage. Those perimeter gaps need to stay open, or you fill them with flexible 100% silicone sealant. Never hard grout.
Cost & Time Breakdown
| Task | DIY Cost | Pro Cost | Time |
|---|---|---|---|
| Single Tile Replacement (Cosmetic crack) | $20 – $50 | $150 – $300 | 2 – 3 hours (plus cure time) |
| Grout Line Removal & Re-caulk (30 lin ft) | $15 – $35 | $200 – $400 | 2 – 4 hours |
| Crack Isolation Membrane Application (Small Room) | $60 – $120 | $350 – $600 | 3 – 5 hours |
| Subfloor Sistering / Joist Stiffening (Per Bay) | $40 – $90 | $300 – $700 | 4 – 6 hours |
| Structural Slab Piering / Leveling | Not DIY | $3,500 – $12,000+ | 1 – 3 days |
Tips & Prevention
- Stock Spare Tiles in the Attic: Keep at least one or two full boxes of your original tile after the job wraps. Dye lots change, styles get discontinued, and finding an exact match five years later is usually a waste of time.
- Tap with a Golf Ball to Catch Voids Early: Roll a golf ball or lightly tap a broom handle across the tile floor. A solid bond gives you a crisp, high-pitched click. A hollow spot or loose tile gives off a dull thud. Find those spots before heavy furniture starts breaking them.
- Run Indoor Humidity Controls: In places with wild weather swings, keep indoor relative humidity between 35% and 55%. That helps cut down on seasonal swelling and shrinking in wood subfloors.
- Use Flexible Silicone at All Plane Changes: Where tile meets a wall, bathtub, cabinet toe-kick, or another flooring type, don’t use hard grout. Use color-matched 100% silicone caulk so the joint can handle little movements without cracking.
When to Call a Professional
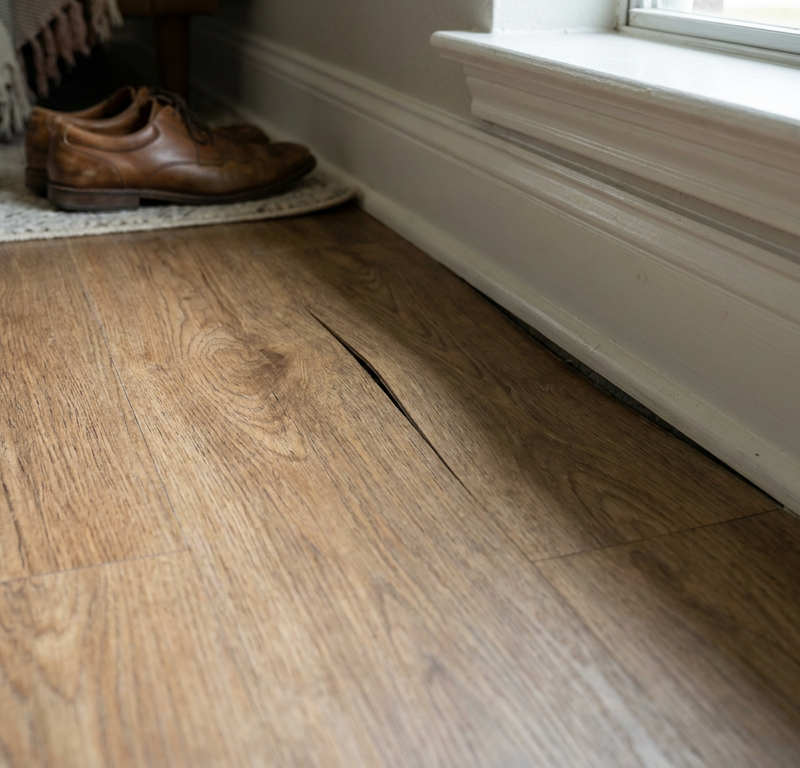
There’s a pretty clear line between a dropped-jar chip and a structural problem that’s chewing on your house. If one tile has a star-shaped impact crack, sure — grab your chisel and replace it. But if a fracture keeps running in a straight or stepped line across four or more tiles, you’re not dealing with a simple surface problem anymore. That’s active movement under the floor.
Call a licensed pro if:
- The crack is wider than 1/8 inch or one side sits higher than the other — that’s lippage.
- You notice the floor sloping, walls cracking above doorframes, or doors sticking around the house. That usually points to foundation settlement, beam trouble, or slab upheaval.
- Tiles are tenting — popping up off the floor like a little ridge line. That’s a bad sign. It usually means serious compressive stress, missing movement joints, or a shifting foundation.
A structural engineer or foundation specialist needs to check slab elevation differences, crawlspace piers, or joist spans before you sink another dollar into tile repair. Grouting over a sinking foundation is just tossing money into a crack and hoping for the best.
Related Articles
Keep troubleshooting with these hand-picked guides from FixlyGuide:
- Baseboard Pulling Away from Wall? 5 Causes and the Step-by-Step Fix — Baseboards pulling away from the wall? Learn how to identify warped studs, re-nail into framing with the right fasteners, and seal gaps per…
- Window Frame Cracked? 5 Causes and How to Fix Each Type — A cracked window frame isn't just ugly—it can lead to leaks, drafts, and even bigger structural problems if you don't fix it right.
- The Unseen Culprit Behind Hardwood Floor Gaps (It’s Not Always Age) — Discover why your hardwood floors are gapping and what to do about it, often due to hidden moisture issues, not just normal wear and tear.
- The Mystery of the Spongy Floor: Is Your Subfloor Failing? — A spongy or bouncy floor can be more than just annoying; it often signals a hidden problem with your subfloor or joists that needs immediat…
- Why Does My Trim Look Like a Snake Ate It? (The Hidden Culprit) — That wavy, crooked trim isn't just shoddy workmanship—it's often a sign of underlying issues. Learn what causes your trim to warp and how t…
- Outlet Sparks When Plugging In? 5 Causes and the Step-by-Step Fix — Learn why outlets spark, how to tell harmless micro-arcs from serious fire hazards, and the step-by-step method to safely test and replace…
Should you do this yourself?
Answer five quick questions before you start. Safety outranks savings every time.
Your experience with work like this
How high do you have to work?
Does the job involve any of these?
Will it need a permit?
Specialty tools
Free and instant. Educational guidance only — not a quote, inspection, or professional diagnosis.
Estimate your own project cost
National averages are a starting point. Enter your details for a range that fits your house.
Flooring cost estimator
- Material$498 – $1,095
- Installation labor$360 – $720
Tile installs and stairs increase labor cost. Get 2–3 quotes for jobs over 200 sq ft.
Educational estimate only — always confirm with written local bids.
What should this project cost?
Enter your project details for a realistic cost range before you call anyone.
Minor crack sealing $800–$2,500; pier and beam stabilization $10,000–$30,000+.
- Regional adjustment
- National average
- Labor share (typical)
- ~$4,961
- Quotes to collect
- 3 written estimates
Educational estimate based on national averages — not a binding quote. Always confirm with written local estimates.
Fixly Project Decision Box
- DIY difficulty
- Professional Recommended
- Estimated time
- Monitoring over 60–90 days · engineer visit 1–2 hours
- Cost level
- Major Project
Main tools / materials
- Crack monitor or pencil marks with dates
- Tape measure
- Marble or level for floor slope
When to stop and call a pro
- A crack wider than 1/4 inch or growing month over month
- Doors and windows that suddenly stick or will not latch
- Stair-step cracks in brick or block
- Separation between walls and ceilings or floors
Need professional help?
Get a Foundation EvaluationGet the print-ready PDF of this guide
A clean, ad-free, printable version you can keep on your phone or pin to the workshop wall. Free with a FixlyGuide account.
- Print-optimized layout
- Tools, materials & every step included
- Saved to your account
Recommended for DIYers & woodworkers
Sponsored
The Top 20 Tools for Workshops of Any Budget
No stationary machines or power tools required — plus 3 fundamental tools that can't be bought at any price.
Get the free guide
Ted's Woodworking — The #1 Woodworking Resource
Detailed instructions, dimensioned drawings, materials & cutting lists, and 3D schematics for every skill level.
See the plansSponsored: links above are affiliate links. FixlyGuide may earn a commission on qualifying purchases — at no extra cost to you.
Frequently asked questions
How can I tell if my tile cracked from an impact or a foundation problem?+
A spiderweb or star-shaped crack in the center of one tile almost always indicates a blunt impact from a heavy dropped object. A straight, continuous crack that cuts across multiple tiles and grout joints points directly to subfloor deflection, joist sagging, or a settling foundation slab underneath.
Can I fix a cracked tile with epoxy or filler without removing it?+
No. Cosmetic surface repair kits, colored epoxies, and resin fillers may hide the visual blemish temporarily, but they cannot restore the tile's tensile strength. If the crack was caused by substrate movement or hollow voids, the epoxy will crack again as soon as the floor experiences foot traffic.
Why do I have to remove the grout before chiseling out a broken tile?+
You must clear the grout first. Grout is a hard, continuous bridge linking the tiles together. If you strike a cracked tile with a chisel while the grout is still intact, the shockwave travels directly through the grout joint and shatters the edges of adjacent, undamaged tiles.
What is an uncoupling membrane and does it prevent cracks?+
An uncoupling membrane (such as Schluter-DITRA) is an engineered plastic mat with air channels that sits between the substrate and tile. It creates a mechanical slip-sheet that decouples the tile from the subfloor, absorbing lateral movement so slab cracks or subfloor wood movement don't shear through the tile.
Why are my floor tiles pushing upward into a tent shape?+
Tenting happens when tile is installed without perimeter expansion joints, leaving no room for natural thermal and moisture expansion. When the tile expands during warm or humid months, horizontal compressive forces push the tiles against each other until they snap their bond with the slab and buckle upward into a tent shape.
How do I find a replacement tile if I don't have any spares?+
Take a clean shard of your broken tile to a dedicated local tile distributor (not a big-box store). They can help identify the manufacturer, material type, and finish. If the tile is discontinued, look for matching tiles hidden inside bedroom closets, under kitchen appliances, or underneath vanity cabinets that can be salvaged.
What is the maximum allowed floor deflection for tile installations?+
For standard ceramic or porcelain tile, the floor joist system must meet an L/360 deflection standard (maximum 1/2 inch of flex across a 15-foot span). For heavy, brittle natural stone like marble, slate, or travertine, the deflection limit is twice as rigid: L/720 (no more than 1/4 inch of flex across 15 feet).
Can you install tile directly over a concrete expansion joint?+
Tile can bridge a concrete control joint only if an ANSI A118.12 certified crack-isolation membrane or uncoupling mat is installed over the joint first. Alternatively, the installer must run a soft movement joint (color-matched silicone sealant instead of hard grout) directly over the control joint in the tile surface.
Discussion
Loading comments…