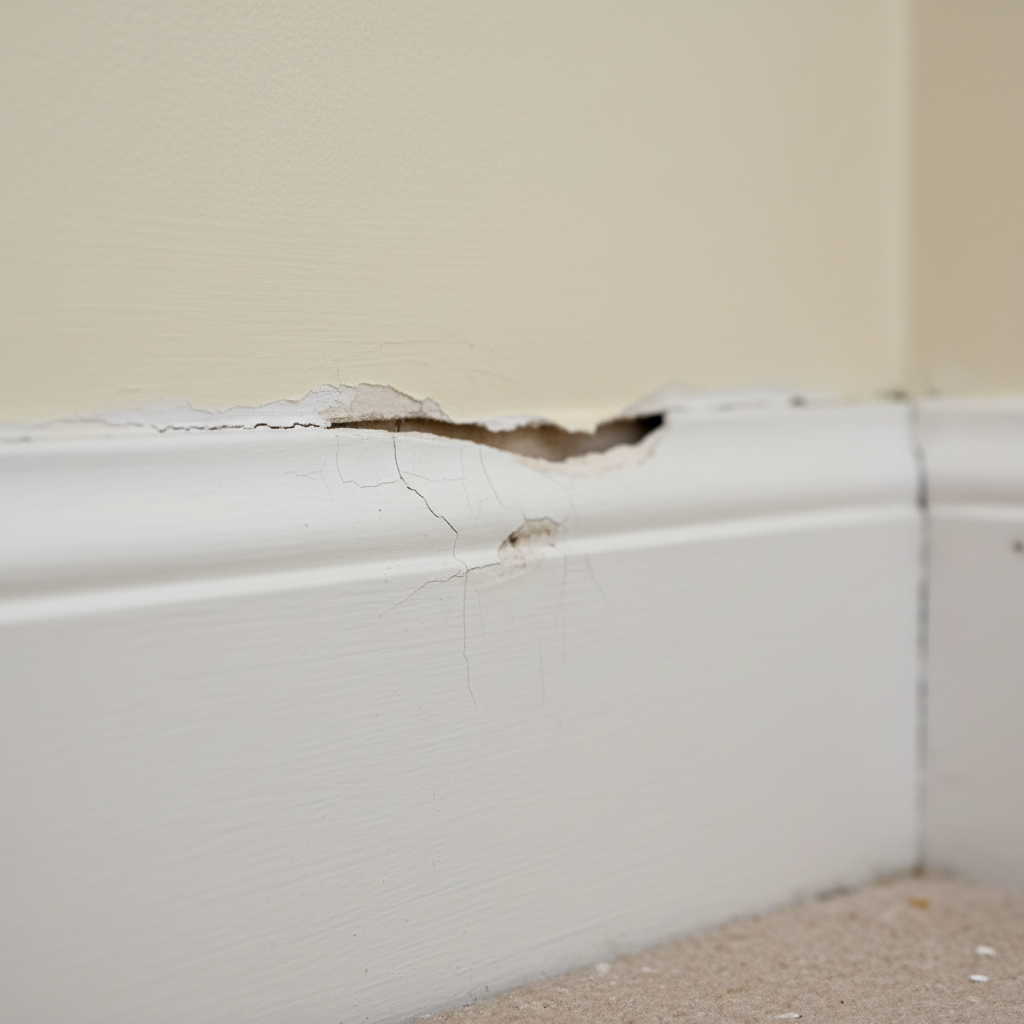
- Carefully Remove the Problematic Trim — Patience prevents drywall damage.
- Tools: Utility knife, flat pry bar, wood shims, pliers/nail puller.
- Safety: Wear gloves. Old nails and sharp edges don’t care how careful you are.
General remodeling · Renovation planning
| Project category | General remodeling |
|---|---|
| Problem type | Renovation planning |
| Trade required | General contracting |
| Urgency | Planned project |
| Safety risk | Low safety risk |
| DIY suitability | Pro recommended |
| Cost category | Major investment |
| Typical timeline | Design and permitting often 2–4 months before work starts |
| Contractor type | General contractor |
Repair option
Phase the work and fix the building envelope first.
Replacement option
Full renovation with permits, design, and a general contractor.
Common causes
- Space no longer fits how the household lives
- Resale preparation
- Deferred maintenance stacking up
Relevant tools:project cost estimatorcompare quoteshome improvement material prices
Published September 7, 2026Last updated September 7, 2026
Tools & materials you'll need
Affiliate linksAs an Amazon Associate FixlyGuide earns from qualifying purchases — at no extra cost to you. Prices and availability are accurate as of publication and subject to change.
Quick Answer
Listen, when your trim starts looking like a snake swallowed it whole, it ain't just bad luck. Most of the time, you're looking at moisture sneaking in where it doesn't belong, junky material, or a sloppy install. The fast fix is almost never the real fix. You’ve gotta figure out why it moved in the first place. Maybe it’s humidity in the house. Maybe the nails were wrong. Maybe there’s water hiding behind the wall. Dry it out, brace what you can, or rip it out and put in something that’ll actually stay straight.
The Problem
I’ve seen this a hundred times. A homeowner calls me up, irritated, pointing at baseboards or door casings that look like they’re trying to do the wave. They’ve patched it, painted it, hammered in a few more nails, and that trim still keeps moving, bowing, and pulling off the wall. That’s not just ugly. It’s a warning sign. If your trim’s crooked or wavy, it’s telling you something’s off. Could be humidity making the wood swell and shrink, bad installation where the trim never got fastened into anything solid, or — and this is the one that bites people — moisture from a leak getting into the wood or drywall behind it. That wavy line is the house waving a red flag. Ignore it, and it’ll keep getting worse. Seen that movie. Don’t like the ending.
How It Works
Alright, let’s talk about why wood trim goes off the rails. Most trim, especially in older homes, is either solid wood or MDF (medium-density fiberboard). Both have their quirks. Solid wood is alive in its own way, and yeah, I mean that literally. It breathes. It expands when it pulls in moisture from the air or from a leak, then shrinks when things dry out. If nobody accounted for that during the install, it’ll cup, bow, or twist on you. Picture a board that got soaked — it swells up. Dry it back out, and it shrinks. If it’s pinned down hard in just a spot or two, the rest of it moves, and now you’ve got a mess on your hands.
MDF is a different animal. It’s engineered wood, basically wood fibers glued together under pressure. It’s flatter and more stable than plain wood in a lot of situations, but water hates it. Or rather, MDF loves to drink water like it’s free at a bar. Get it wet, and it swells like a balloon. Once it swells, it usually doesn’t come back. That’s why even a small leak or a stretch of high humidity can turn a straight piece of MDF into a wavy, lumpy headache almost overnight. Once the material’s gone soft and swollen, the game’s over. You can paint it all you want, but you’re just painting a problem.
Then there’s the install. Trim needs to be fastened into something solid — studs, blocking, real framing. If somebody just shot nails into drywall, that trim never had a chance. Drywall doesn’t hold worth a damn. It’s like trying to nail into a sponge. As the house moves a little or the seasons change, those fasteners work loose, and the trim starts wandering. You want at least 1-1/2 inches of penetration into a solid wood stud or blocking to make it hold. Less than that? You’re asking for callbacks.
Step-by-Step Fix
This ain’t a one-size-fits-all fix, but here’s how I usually handle a wavy trim job. First you figure out what’s causing it. Then you fix that. Only then do you deal with the trim itself.
-
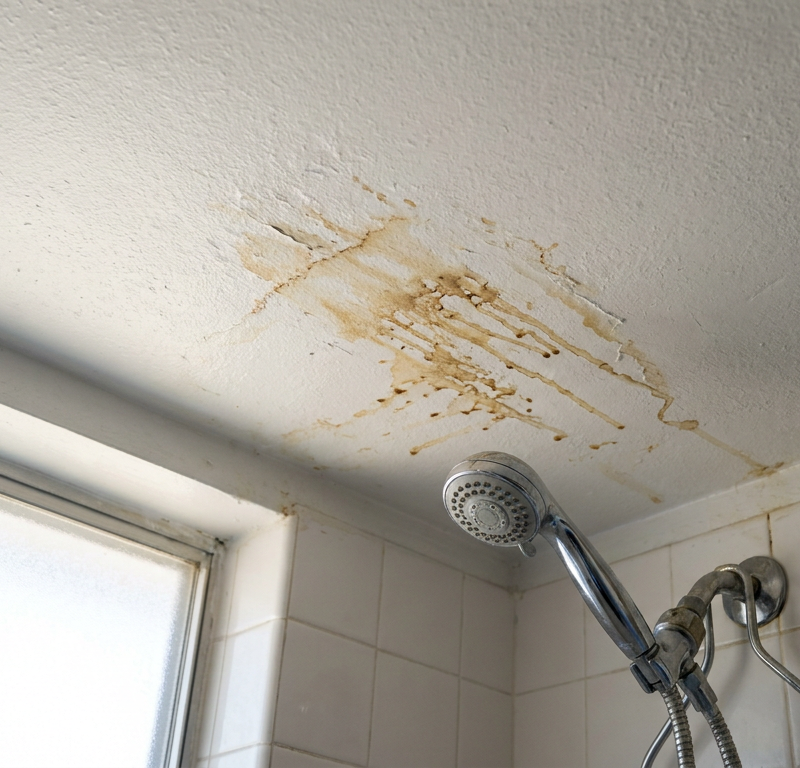
Diagnose the Culprit — Find the "why" before the "how". Look hard at the wavy section. Is it near a window, a door, a bathroom, or an exterior wall? Feel the wall for dampness or soft spots. Check for water stains on the wall or ceiling above. Sometimes the problem jumps right out at you, like a leaking window. Other times, you’ll need a moisture meter (I always keep one in the truck) to check the wood and drywall for hidden dampness. If humidity’s the issue, you might notice condensation on windows or that stale, musty smell nobody likes. If the trim is pulling away evenly, that usually points to fastening issues or normal wood movement.
-
Address Any Moisture Issues — No fix holds if it's still wet. If you find a leak, fix it. Right away. Re-caulk leaky window frames, fix the plumbing, patch the roof — whatever the job needs. Run a dehumidifier in the room for several days, and aim for a steady indoor humidity of 30-50%. You need the wood and the wall to dry out all the way through. Don’t even think about reattaching or replacing trim until it’s bone dry. I’m serious. Otherwise, you’re doing the same job again in six months, and nobody wants that.
-
Carefully Remove the Problematic Trim — Patience prevents drywall damage. Take a utility knife and score the paint and caulk lines along the top and bottom of the trim. That keeps the paint from ripping off the wall or jambs when you pull the piece free. Then use a flat pry bar and a wood shim to protect the wall, and gently work the trim loose. Start at one end and move along slow. Don’t yank on it. You’ll tear up the drywall, and now your “simple trim repair” just turned into patchwork. Pull the old nails with pliers or a nail puller. Lay the trim flat and look it over. Is it warped beyond saving? Any rot? Any mold? If it’s MDF and swollen, that thing’s toast.
- Tools: Utility knife, flat pry bar, wood shims, pliers/nail puller.
- Safety: Wear gloves. Old nails and sharp edges don’t care how careful you are.
-
Inspect the Wall Surface — Smooth and solid is the goal. With the trim off, check the wall behind it. Drywall damaged? Nail pops? Loose sections? Fill the holes with joint compound and sand it smooth once it dries. If there was moisture, make sure the drywall isn’t crumbling or moldy. If it is, you may need to cut out and replace a section of drywall — not fun, but sometimes that’s the only honest fix. Find the studs with a stud finder and mark them with a pencil. That’s where your new fasteners are going.
-
Straighten or Replace the Trim — Sometimes a new start is best.
- For minor warps (solid wood only): If the trim’s only slightly bowed and still sound, you might straighten it. Clamp it to a dead-straight board overnight, or lightly dampen the concave side and let it dry while clamped. Lightly, though — don’t soak the thing. This is a long shot, but it can work on small issues. Let it stay clamped and fully dry for at least 24 hours. Truth is, replacement is often easier and lasts longer.
- For severely warped wood or MDF: If it’s twisted bad, swollen MDF, or showing mold or rot, toss it. Don’t waste time trying to save junk. You’ll just put a wavy piece back on the wall. Go get new trim. And let it sit in the room for at least 48 hours before you install it so it can adjust to the humidity in the house.
-
Install Furring Strips (If Necessary) — For truly uneven walls. If you pull the trim and find the wall itself isn’t flat — which happens a lot in older houses — you may need thin furring strips or shims behind the trim to build a straight surface. Fasten the strips to the studs, then mount the trim to the strips. It’s an extra step, sure, but it keeps the trim sitting flush instead of following every hump and dip in the wall.
-
Fasten the Trim Securely — No more wobbly lines. This is where a lot of DIY jobs go sideways. Use a finish nailer, pneumatic or electric, with 1-1/2 inch or 2-inch finish nails. Hit the studs. Mark them before you start so you’re not guessing. Drive nails every 16 to 24 inches into a stud. If you miss a stud, angle the nail a bit to get a better bite into the framing, or use construction adhesive along with nails. For wider trim, put in two nails at each stud — one near the top, one near the bottom. Make sure the nail heads end up just a touch below the surface.
- Tools: Finish nailer, air compressor (if pneumatic), 1-1/2" or 2" finish nails, stud finder.
- Pro Tip: Put a continuous bead of construction adhesive on the back of the trim before nailing for extra holding power, especially if studs are hard to line up. Don’t glob it on. Just a wavy bead down the back does the trick.
-
Fill and Finish — The final touches. Use a little spackle or wood filler for the nail holes. Let it dry all the way, then sand it smooth with 180-grit sandpaper. Caulk the top and bottom edges where the trim meets the wall, plus any mitered corners or seams. Use a high-quality acrylic latex caulk with silicone. Wipe the extra with a damp sponge so it looks clean, not smeared. Once the caulk dries — check the label, usually a few hours — prime and paint the trim to match what’s there. Two thin coats beat one thick coat every time.
- Materials: Wood filler/spackle, 180-grit sandpaper, caulk gun, acrylic latex caulk with silicone, painter's tape, primer, paint.
Common Causes
- Moisture Absorption: This is the big one. High humidity, a leaky window, plumbing trouble behind the wall — wood and MDF will soak it up, swell, and go out of shape. MDF gets hit hardest. Once it swells, it’s usually done.
- Improper Fastening: If trim gets nailed only into drywall, or the nails are too short, it isn’t anchored to anything worth mentioning. Over time, gravity and normal house movement pull it away from the wall, and now you’ve got gaps and waves.
- Natural Wood Movement: Even without a leak, solid wood expands and contracts with the seasons. If it’s installed too tight or has nowhere to move, it can bow or cup.
- Uneven Substrate: If the wall itself isn’t flat — bowed studs, sloppy drywall, all that fun stuff — the trim will follow the shape of the wall, no matter how straight the piece started out.
- Poor Quality Material: Cheap trim, especially finger-jointed pine or lower-grade MDF, is more likely to warp and twist right out of the gate. Some of that stuff never had much of a chance.
Common Mistakes
- Ignoring the Root Cause: If you just nail the trim back on without fixing the moisture problem or the wall issue, it’s coming back. You’re treating the symptom, not the cause.
- Not Letting New Trim Acclimate: Dragging trim straight from the store to the wall can cause movement later. Let it sit in the room for a couple days so it can adjust to the temperature and humidity.
- Using Too Few Fasteners or Short Nails: Skimping on nails or using nails that are too short (less than 1.5 inches for 3/4 inch trim) means the trim won’t stay put. Hit the studs.
- Nailing Only Into Drywall: Drywall doesn’t hold enough. You need studs or solid blocking if you want it to last. A finish nail needs at least an inch and a half into solid wood.
- Over-Caulking: Stuffing big gaps with too much caulk looks sloppy, and if the trim keeps moving, that caulk will crack and split anyway.
- Trying to Save Damaged MDF: Once MDF swells from water, it’s compromised. It won’t go back to shape. Replace it. Save yourself the aggravation.
Cost & Time Breakdown
| Task | DIY Cost | Pro Cost | Time |
|---|---|---|---|
| Diagnose Problem & Dry Out | $0–$100 (moisture meter) | $150–$300 (leak detection) | 1–3 days |
| Remove Old Trim & Prep Wall | $0 (if you have tools) | $75–$150/hr | 1–2 hours |
| New Trim (Material) | $2–$8/linear ft | $2–$8/linear ft | N/A |
| Install New Trim (DIY) | $0–$20 (nails, adhesive) | $75–$150/hr (installation) | 2–4 hours |
| Fill, Caulk, Prime & Paint | $30–$80 (materials) | $75–$150/hr | 2–4 hours |
| Total Project Estimate | $30–$250+ | $300–$800+ | 1 day – 1 week (drying) |
Tips & Prevention
- Maintain Consistent Humidity: Use humidifiers or dehumidifiers to keep the house between 30-50% humidity year-round. That cuts down on wood movement.
- Seal Exterior Gaps: Check and re-caulk around windows and doors, especially on exterior walls. Keep water from getting behind the trim in the first place.
- Proper Fastening: When you install new trim, use the right length finish nails (1.5 to 2 inches) and hit the studs or solid blocking. Construction adhesive helps too.
- Acclimate Materials: Let new wood or MDF trim sit in the room where it’s going for at least 48 hours. It helps the material settle in to your home’s conditions.
- Use Quality Materials: Don’t cheap out on trim, especially in damp spots like bathrooms. Solid wood or moisture-resistant MDF holds up better over time.
- Regular Inspections: Check your trim now and then, especially after heavy rain or a big humidity swing. Look for tiny signs of movement, gaps, or discoloration. Catch it early, and the fix stays simple.
When to Call a Professional
Look, I’m all for DIY, but sometimes you’ve gotta know when to bring in the big guns. If you’re dealing with serious water damage, like soggy drywall or visible mold behind the trim, that’s a job for a water damage restoration specialist or a general contractor. Same deal if there’s a leak you can’t track down. If the walls feel soft, or you think there might be structural damage, don’t mess around. Get a pro to look at it the right way. If you’ve got a bunch of trim sections going wavy and it feels like the whole house is doing it, or you just don’t have the tools or time, call a finish carpenter or general contractor. They’ve got the nail guns, the experience, and the eye for a dead-straight line. Don’t try to jerry-rig something when you’re already out over your skis — you’ll just make a bigger, pricier headache later. It’s almost always cheaper to call a pro before you make a bigger mess. I’ve had folks in Frisco call me after trying to “fix” swollen casing with more caulk and a handful of brads. No dice. We ended up replacing the whole run anyway.
Related Articles
Keep troubleshooting with these hand-picked guides from FixlyGuide:
- The Hidden Cause of Squeaky Hardwood Floors & The Real Fix — That persistent squeak from your hardwood floors isn't just an annoyance; it's a sign of movement. We'll uncover the hidden causes, from hu…
- That Ceiling Stain Isn't a Leak: 5 Hidden Causes — A mysterious ceiling stain can be alarming, especially when there's no active leak. The real culprits are often hidden issues like attic co…
- That Corner Crack Is Back? It's Not the Drywall's Fault — Discover the real reasons that annoying drywall crack in the corner keeps returning. It's often a sign of deeper issues than just bad mud o…
- That Drywall Hole Isn't Just Ugly, It's a Bat Signal — Learn the pro-approved method for patching drywall holes of any size. We cover the surprising science behind a lasting repair and common mi…
- The Unseen Culprit Behind Hardwood Floor Gaps (It’s Not Always Age) — Discover why your hardwood floors are gapping and what to do about it, often due to hidden moisture issues, not just normal wear and tear.
- The Mystery Smell: Why Your Fridge Stinks (Even After Cleaning It) — That persistent, foul odor in your refrigerator isn't just gross; it's often a sign of hidden issues. Learn the real culprits behind linger…
Should you do this yourself?
Answer five quick questions before you start. Safety outranks savings every time.
Your experience with work like this
How high do you have to work?
Does the job involve any of these?
Will it need a permit?
Specialty tools
Free and instant. Educational guidance only — not a quote, inspection, or professional diagnosis.
What should this project cost?
Enter your project details for a realistic cost range before you call anyone.
Cost depends heavily on which system turns out to be the source.
- Regional adjustment
- National average
- Labor share (typical)
- ~$1,620
- Quotes to collect
- 3 written estimates
Educational estimate based on national averages — not a binding quote. Always confirm with written local estimates.
Get the print-ready PDF of this guide
A clean, ad-free, printable version you can keep on your phone or pin to the workshop wall. Free with a FixlyGuide account.
- Print-optimized layout
- Tools, materials & every step included
- Saved to your account
Recommended for DIYers & woodworkers
Sponsored
The Top 20 Tools for Workshops of Any Budget
No stationary machines or power tools required — plus 3 fundamental tools that can't be bought at any price.
Get the free guide
Ted's Woodworking — The #1 Woodworking Resource
Detailed instructions, dimensioned drawings, materials & cutting lists, and 3D schematics for every skill level.
See the plansSponsored: links above are affiliate links. FixlyGuide may earn a commission on qualifying purchases — at no extra cost to you.
Frequently asked questions
Why does my trim keep pulling away from the wall even after I nail it back?+
You're likely nailing it into drywall instead of studs, or the underlying issue (like moisture) is still present. Drywall doesn't provide enough grip, so the trim will just work itself loose again. You need to hit solid wood framing for a lasting hold.
Can I reuse warped wood trim?+
If it's solid wood with only minor bowing and no signs of rot, you *might* be able to straighten it by clamping it for an extended period. However, if it's severely warped, twisted, or if it's MDF that has swollen, it's best to replace it. Once MDF absorbs water and expands, it rarely returns to its original shape.
What's the best way to prevent trim from warping?+
The best prevention involves maintaining consistent indoor humidity (30-50%), properly sealing around windows and doors to prevent leaks, and ensuring trim is installed securely into wall studs with appropriate fasteners. Also, let new trim acclimate in the room for a few days before installation.
Is it okay to use construction adhesive with trim?+
Absolutely, construction adhesive is a great idea, especially if you're struggling to hit studs consistently or for extra holding power on wider trim. Apply a continuous, wavy bead on the back of the trim in conjunction with finish nails. It creates a much stronger bond.
How long should new trim acclimate before installation?+
Give it at least 48 hours in the room where it will be installed. This allows the wood or MDF to adjust to the temperature and humidity levels of your home, reducing the chances of it moving or warping after it's installed.
Why does MDF trim swell so easily?+
MDF is made of wood fibers bound with resin. While durable, it's very porous. When it gets wet, it acts like a sponge, rapidly absorbing moisture and swelling significantly. Unlike solid wood, this swelling is often irreversible and damages the material's structure.
My wall isn't perfectly straight; how do I get my trim to look good?+
For uneven walls, you can use shims or thin furring strips behind the trim to create a straight plane. Attach these to the studs first, then fasten your trim to them. This ensures your trim follows a straight line, not the wall's imperfections.
What's the difference between caulk and wood filler for trim?+
Wood filler (or spackle) is used to fill nail holes and minor imperfections *on* the trim itself, drying hard and sandable. Caulk is a flexible sealant used to fill gaps where the trim meets the wall or at mitered corners, accommodating slight movement without cracking. Don't use caulk for nail holes, and don't use wood filler for dynamic gaps.
Can high humidity alone cause trim to warp without a direct leak?+
Yes, absolutely. Consistent high humidity causes wood to absorb moisture from the air, expand, and if constrained, can lead to bowing or cupping. Conversely, very low humidity can cause shrinkage and cracking. Maintaining stable indoor humidity is key.
What type of nails should I use for trim?+
For most trim, 16-gauge or 18-gauge finish nails are best. The length depends on the trim thickness; you want nails long enough to penetrate at least 1-1/2 inches into the stud or solid blocking behind the drywall. For example, 3/4-inch trim needs 2-inch nails.
I have old, painted-over trim. How do I get it off without damaging the wall?+
First, score the caulk/paint lines with a utility knife. Use a wide, flat pry bar with a thin piece of wood or cardboard as a shim against the wall. Gently work the pry bar behind the trim, leveraging it slowly along its length. Take your time to minimize drywall damage.
Discussion
Loading comments…