- Hammering the Old Nail Back In: This is the worst move. You’re just setting yourself up for another pop, usually worse, because you’ve already damaged the drywall paper.
- Not Adding New Fasteners: If you just patch over the hole without re-securing the drywall, the area’s still loose. The pop will come back, like a bad penny.
- Over-Tightening New Screws: Driving screws so deep they tear the paper face or leave huge craters. The paper is where drywall gets its strength. If you break it, the screw won’t hold right.
- Using Too Much Compound at Once: Trying to fill a deep void with one thick layer of joint compound. It’ll crack, shrink too much, and take forever to dry. Thin coats. Every time.
- Not Sanding Properly: Leaving ridges or bumps after patching. You’ll see every single flaw once the paint goes on, especially in certain lighting. Feel it with your hand — your fingers pick up what your eyes miss.
General remodeling · Renovation planning
| Project category | General remodeling |
|---|---|
| Problem type | Renovation planning |
| Trade required | General contracting |
| Urgency | Planned project |
| Safety risk | Low safety risk |
| DIY suitability | Pro recommended |
| Cost category | Major investment |
| Typical timeline | Design and permitting often 2–4 months before work starts |
| Contractor type | General contractor |
Repair option
Phase the work and fix the building envelope first.
Replacement option
Full renovation with permits, design, and a general contractor.
Common causes
- Space no longer fits how the household lives
- Resale preparation
- Deferred maintenance stacking up
Relevant tools:project cost estimatorcompare quoteshome improvement material prices
Published September 9, 2026Last updated September 9, 2026
Tools & materials you'll need
Affiliate linksAs an Amazon Associate FixlyGuide earns from qualifying purchases — at no extra cost to you. Prices and availability are accurate as of publication and subject to change.
Quick Answer
You keep patching those nail pops, and they keep coming back, right? I’ve been there with homeowners standing in the hallway, pointing at the same little bump like it’s mocking them. Usually, those repeat drywall nail pops mean the original nail or screw isn’t holding tight anymore, and that’s often because the wood framing behind it has shrunk, warped, or moved. If you want them gone for good, you don’t just pile on more spackle. You pull the bad fastener, secure the drywall with a couple new screws into fresh wood, then patch and paint it right. And sometimes, sure, it’s pointing to something bigger going on in the house.
The Problem
There’s nothing quite like finishing a fresh coat of paint, stepping back to admire the wall, and then spotting that same little bump again a few weeks later. “Didn’t I just fix that?” Yeah, you did. But that stubborn nail pop, or screw pop, isn’t just a cosmetic annoyance; it means the drywall’s lost its grip on the wall stud. It happens when the stud behind the drywall shrinks or warps away from the fastener, or when the drywall shifts from humidity changes or plain old settling. The fastener — nail or screw — pushes against the drywall paper and makes that tell-tale bump. If it keeps coming back, you’re patching the surface and ignoring the real failure underneath. You’ve got to figure out why that connection gave up in the first place.
How It Works
To really get why these little demons keep showing up, you’ve got to picture what’s happening behind that smooth wall. Your drywall sheets – usually 4x8 or 4x12 feet – are fastened to wood studs, which are the vertical bones of the wall. Back in the day, especially before the 80s, folks used nails a lot, often ring-shank nails, to hang drywall. Now it’s mostly drywall screws, and that’s for a good reason — they hold better.
Here’s the deal: wood moves. It expands and contracts with temperature and humidity, and it doesn’t care about your paint job. When a house is built, the lumber is usually 'green' – meaning it still has a lot of moisture in it. As the house dries out over the first few years, those studs shrink, sometimes by as much as 1/8 to 1/4 inch across their width. If a nail or screw was driven into a stud and that stud later shrinks, the fastener can lose its bite, or the drywall sheet can flex outward and push the fastener head through the paper face. It’s a lot like over-tightening a belt — eventually something’s gonna show strain.
Another thing I see all the time is improper fastener depth. If a nail isn’t driven in just right, or a screw gets over-driven or under-driven, the whole connection gets weaker. An over-driven screw breaks the paper face, and that paper is what gives drywall most of its strength. An under-driven screw or nail head isn’t recessed enough, so it gets buried in compound but it’s already working loose underneath. Over time, any movement at all will make that weak point fail, and pop! — there’s your bump. It’s wood movement versus drywall stability, and sometimes the wood wins.
Step-by-Step Fix
Alright, let’s get rid of these for real. This isn’t just about smearing on spackle; it’s about re-securing the drywall so the thing stops acting up.
-
Locate and Clear the Pop — First, find exactly where the pop is. Sometimes it’s just a bump, other times the paint is cracked or the paper’s torn open. Use a utility knife to carefully cut around the raised area, maybe a 1-inch square if the paper is damaged. You’re trying to expose the head of the nail or screw. Don’t go wild — just open it enough to see what you’re dealing with.
- Safety First: Always cut away from yourself with a utility knife. Wear gloves if you’re prone to nicks.
-
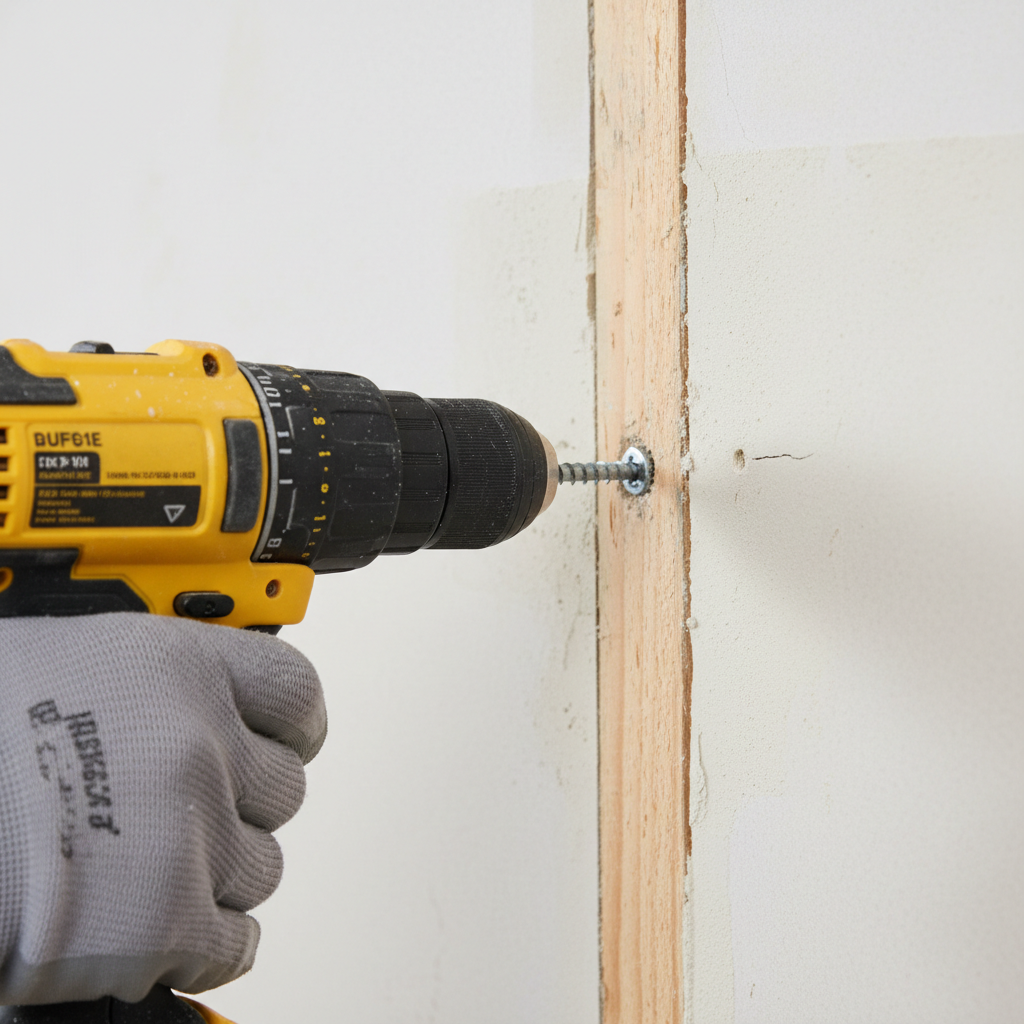
Remove the Offender — This part matters. If it’s a nail, use the claw of a hammer, a pry bar, or even a pair of nippers to pull it straight out. Don’t just hammer it back in — that’s how you get the same call-back later. If it’s a screw, use a Phillips or square drive bit — whatever fits — on your drill and back it out. You want that original fastener completely out of the wall.
-
Secure New Fasteners — This is where you fix the problem, not just the symptom. Grab your drill and some 1-1/4 inch coarse-thread drywall screws. Find the stud by tapping or with a stud finder. Drive two new screws into the stud, one about 1-2 inches above where the old fastener was, and another 1-2 inches below it. Sink them just below the drywall surface so you get a slight dimple, but don’t break the paper face. That’s the money shot. If you tear the paper, you’ve just wrecked a big chunk of the holding power. The dimple should be shallow enough to cover with joint compound.
- Pro Tip: Aim for solid wood. If you hit a soft spot, pull it out and shift over 1/4 inch. You want that screw to bite hard.
-
Prepare the Area — With the old fastener out and the new ones in place, you might have a little hole or some torn-up paper. If you cut out a square, clean up the edges. Use a damp sponge to wipe away loose drywall dust or crumbs. Clean surface, clean patch. That’s how you avoid headaches later.
-
Apply First Coat of Joint Compound — Using a 4-inch or 6-inch drywall knife, spread a thin, even coat of all-purpose joint compound (or spackle for smaller repairs) over the dimpled screw heads and any damaged area around them. Feather the edges so it blends into the wall. Don’t pile it on thick. Thin layers dry better, shrink less, and sand nicer. Let it dry completely – usually 1-2 hours depending on humidity.
- Material Choice: For a small, single nail pop, lightweight spackle is fine. For bigger patches or a bunch of pops, actual joint compound is the better call because it shrinks less and feathers smoother.
-
Sand Smooth — Once that first coat is bone dry, lightly sand the area with 150-grit or 220-grit sandpaper. You’re not grinding it down; you’re just knocking off ridges and smoothing the patch. Run your hand over it — it should feel flat. Wipe away the dust with a damp cloth.
-
Apply Second Coat (if needed) — Joint compound often shrinks a little as it dries. If the spot still looks recessed or uneven after the first coat and sanding, add another thin layer. Feather it out even wider than the first coat. Let it dry, sand again, and repeat if you have to until it sits flush with the wall. No shame in doing a third pass if that’s what it takes.
-
Prime and Paint — Once you’re happy with the smoothness, put on a good quality primer over the patched area. That seals the compound and keeps it from 'flashing' – showing up as a dull spot under the topcoat. Let the primer dry, then paint to match the rest of the wall. You might need two coats of paint to get it to disappear.
- Matching Paint: If you don’t have the original paint, you may need to paint the whole wall corner-to-corner so the color doesn’t jump out at you, especially if the old paint has faded.
Common Causes
I’ve seen enough nail pops to fill a small swimming pool, and it usually comes down to a handful of usual suspects:
- Lumber Shrinkage: This is the big one. When the wood studs dry out after construction, they shrink. If a nail or screw was holding tight, that shrinkage can loosen its grip or pull the drywall board off the fastener, and the head starts working its way out. It’s especially common in newer homes, usually the first 2-5 years.
- Improper Fastener Installation: Nails not fully seated, screws stripped, or screws over-driven and breaking the paper face — any of that gives you a weak connection that won’t hold up to normal house movement. I remember one house in the Highlands where the builder used nails that were way too short, like 1-inch nails into 1/2-inch drywall. Those things were popping up like whack-a-mole a year later. I had to pull every single one and replace them with proper 1-1/4 inch screws.
- Seasonal Humidity Changes: Your house breathes, whether you want it to or not. As humidity rises and falls with the seasons, the framing expands and contracts. That movement works fasteners loose over time, especially if they weren’t installed perfectly from the start.
- House Settling: Every home settles some. Small foundation shifts, vibrations from heavy traffic, or just plain old gravity over decades can move the framing enough to stress drywall fasteners.
- Inadequate Fastener Spacing: If the drywall hangers skimped on fasteners, there might not be enough holding power to keep the sheets flat against the studs. That leads to movement, then pops. Standard is usually 7 inches on ceilings and 8-12 inches on walls.
Common Mistakes
Homeowners make these all the time trying to fix a nail pop. Don’t be that guy — or gal:
- Hammering the Old Nail Back In: This is the worst move. You’re just setting yourself up for another pop, usually worse, because you’ve already damaged the drywall paper.
- Not Adding New Fasteners: If you just patch over the hole without re-securing the drywall, the area’s still loose. The pop will come back, like a bad penny.
- Over-Tightening New Screws: Driving screws so deep they tear the paper face or leave huge craters. The paper is where drywall gets its strength. If you break it, the screw won’t hold right.
- Using Too Much Compound at Once: Trying to fill a deep void with one thick layer of joint compound. It’ll crack, shrink too much, and take forever to dry. Thin coats. Every time.
- Not Sanding Properly: Leaving ridges or bumps after patching. You’ll see every single flaw once the paint goes on, especially in certain lighting. Feel it with your hand — your fingers pick up what your eyes miss.
- Skipping Primer: Painting straight over joint compound. The compound is porous and will soak up paint differently than the surrounding drywall, leaving a dull or blotchy finish, known as 'flashing'.
Cost & Time Breakdown
Here’s what you can expect to spend and how long it’ll take to get those pops under control.
| Task | DIY Cost | Pro Cost | Time |
|---|---|---|---|
| Prep & Remove Old Fastener | $0 - $5 (if tools are on hand) | Included in total | 5-10 minutes per pop |
| Install New Drywall Screws | $0 - $5 | Included in total | 5 minutes per pop |
| Patching with Joint Compound | $5 - $15 | Included in total | 15-30 min (per coat) |
| Sanding | $0 - $2 | Included in total | 5-10 minutes per pop |
| Priming & Painting | $10 - $30 | Included in total | 30-60 min (per coat) |
| Total (per few pops) | $15 - $50 | $150 - $400 | 2-4 hours total |
Note: Pro costs can vary widely based on location and the number of pops. A handyman might charge an hourly rate, plus materials. If there are many pops across multiple rooms, expect higher costs.
Tips & Prevention
Keeping those walls smooth doesn’t have to turn into a forever job. A little prevention goes a long way.
- Control Humidity: Keep indoor humidity steady, ideally between 30% and 50%. A humidifier in dry winters or a dehumidifier in humid summers can cut down on wood movement and take stress off the fasteners.
- Proper Fastener Depth: When you’re installing new drywall or making repairs, drive screws just below the surface so you get a slight dimple, but don’t break the paper face. That’s where the holding power lives.
- Use Screws, Not Nails: If you’re part of a new build or renovation, push for drywall screws. They hold way better than nails. No contest.
- Check for Underlying Issues: If you’re seeing a ton of nail pops in one spot, it might be worth checking for a bigger problem. Are there cracks elsewhere? Sagging floors? Something’s telling you to look harder.
- Allow for Settling: In a new home, it’s almost normal to see a few nail pops during the first year or two. A lot of the time, it makes sense to let the house settle and the lumber dry out for about a year before doing big final drywall patching and painting.
- Don’t Overload Walls: Don’t hang something heavy from one drywall screw or a flimsy anchor and hope for the best. Spread the load with proper anchors or screw into studs.
When to Call a Professional
Look, fixing a few isolated nail pops is a perfectly doable DIY job for most homeowners. But there are times when it’s just smarter — and safer — to call in a pro. If you’re seeing dozens of nail pops across an entire wall or through multiple rooms, especially if they’re showing up with larger cracks in the drywall or around door and window frames, that’s a red flag. It could mean serious structural shifting, foundation issues, or framing problems. A general contractor or structural engineer can look at the bigger picture. Also, if you’re not comfortable using power tools, or if you just can’t get the patch to blend cleanly, a good handyman or drywall specialist can make it disappear. No shame in handing it off — sometimes peace of mind is worth every cent.
Related Articles
Keep troubleshooting with these hand-picked guides from FixlyGuide:
- The Mystery of the Spongy Floor: Is Your Subfloor Failing? — A spongy or bouncy floor can be more than just annoying; it often signals a hidden problem with your subfloor or joists that needs immediat…
- Why Does My Trim Look Like a Snake Ate It? (The Hidden Culprit) — That wavy, crooked trim isn't just shoddy workmanship—it's often a sign of underlying issues. Learn what causes your trim to warp and how t…
- The Surprising Reason Your Interior Door Sticks (It's Not Always Humidity) — Discover why your interior door sticks, often due to more than just humidity, and learn simple DIY fixes to restore smooth operation.
- The Hidden Cause of Squeaky Hardwood Floors & The Real Fix — That persistent squeak from your hardwood floors isn't just an annoyance; it's a sign of movement. We'll uncover the hidden causes, from hu…
- The Secret Reason Your Interior Door Sticks (It's Not Always Humidity) — A sticking interior door is a common household nuisance, often attributed to humidity, but frequently caused by easily fixable issues like…
- That Heavy Mirror? It Needs More Than Just a Nail — Stop guessing with drywall anchors; the physics of shear force and toggle bolt ratings are the secret to keeping your heavy mirror securely…
Should you do this yourself?
Answer five quick questions before you start. Safety outranks savings every time.
Your experience with work like this
How high do you have to work?
Does the job involve any of these?
Will it need a permit?
Specialty tools
Free and instant. Educational guidance only — not a quote, inspection, or professional diagnosis.
What should this project cost?
Enter your project details for a realistic cost range before you call anyone.
Cost depends heavily on which system turns out to be the source.
- Regional adjustment
- National average
- Labor share (typical)
- ~$1,620
- Quotes to collect
- 3 written estimates
Educational estimate based on national averages — not a binding quote. Always confirm with written local estimates.
Get the print-ready PDF of this guide
A clean, ad-free, printable version you can keep on your phone or pin to the workshop wall. Free with a FixlyGuide account.
- Print-optimized layout
- Tools, materials & every step included
- Saved to your account
Recommended for DIYers & woodworkers
Sponsored
The Top 20 Tools for Workshops of Any Budget
No stationary machines or power tools required — plus 3 fundamental tools that can't be bought at any price.
Get the free guide
Ted's Woodworking — The #1 Woodworking Resource
Detailed instructions, dimensioned drawings, materials & cutting lists, and 3D schematics for every skill level.
See the plansSponsored: links above are affiliate links. FixlyGuide may earn a commission on qualifying purchases — at no extra cost to you.
Frequently asked questions
Why do nail pops keep reappearing after I patch them?+
They keep coming back because you're likely just patching over the problem. The original fastener (nail or screw) has lost its grip, usually due to wood shrinkage or improper installation. You need to remove the old fastener and install new ones into solid wood to truly secure the drywall.
Can I just hammer the nail pop back in?+
No, absolutely not! Hammering the nail back in will only further damage the drywall paper and create a weaker connection. It guarantees the pop will return, often worse than before. Always remove the old fastener completely.
What's the best way to secure drywall to prevent nail pops?+
Always use drywall screws, not nails, as they have superior holding power. Drive them so they dimple the drywall surface slightly without breaking the paper face. Ensure proper spacing, usually 7 inches on ceilings and 8-12 inches on walls.
How deep should drywall screws be?+
Drywall screws should be driven just below the surface of the drywall, creating a slight dimple. This allows the screw head to be covered by joint compound without protruding. Avoid breaking the paper face of the drywall, as this significantly reduces holding strength.
Is it normal to have nail pops in a new house?+
Yes, it's quite common for new homes to develop some nail pops within the first year or two. This is primarily due to the framing lumber drying out and shrinking as the house settles. They are usually minor and fixable.
What tools do I need to fix a nail pop?+
You'll need a utility knife, a drill with a Phillips or square drive bit, a hammer or pry bar (if dealing with nails), 1-1/4 inch coarse-thread drywall screws, a 4-inch or 6-inch drywall knife, all-purpose joint compound (or spackle), 150-220 grit sandpaper, a damp sponge/cloth, primer, and paint.
How long does it take for joint compound to dry?+
Joint compound typically takes 1-2 hours to dry for thin coats, but this can vary depending on humidity and temperature. Thicker coats will take longer. Always ensure each coat is bone dry before sanding or applying the next layer.
When should I worry about nail pops?+
While a few isolated nail pops are normal, you should worry if you see dozens of them, especially if they're accompanied by large cracks in the drywall, doors/windows sticking, or other signs of significant structural movement. In such cases, consult a general contractor or structural engineer.
Can humidity affect nail pops?+
Yes, significant fluctuations in humidity can contribute to nail pops. Wood framing expands and contracts with changes in moisture content, and this movement can loosen fasteners over time. Maintaining consistent indoor humidity helps minimize this stress.
Discussion
Loading comments…