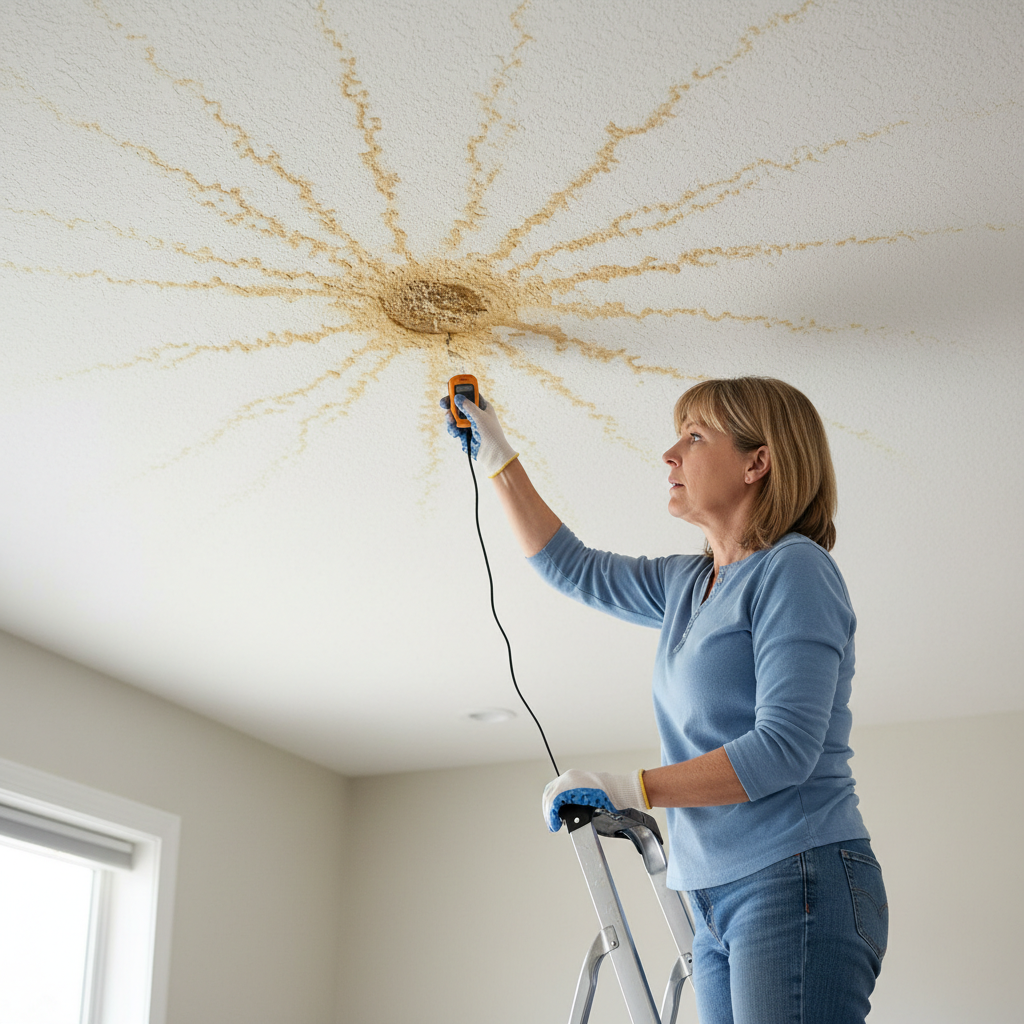
- Pinpoint the General Area — Take a hard look at the stain. Is it growing? How big is it? Note where it sits in relation to exterior walls, chimneys, upstairs bathrooms, or vents. That narrows the hunt pretty fast.
- Tools needed: Flashlight, camera (phone).
- If the stain is small and stable: It might be an old leak that’s already been fixed. Don’t assume that, though — check it anyway.
Plumbing · Leak
| Project category | Plumbing |
|---|---|
| Problem type | Leak |
| Trade required | Plumbing |
| Urgency | Emergency — act now |
| Safety risk | High safety risk |
| DIY suitability | DIY for experienced homeowners |
| Cost category | Low cost |
| Typical timeline | Shut water off now; repair usually same or next day |
| Contractor type | Licensed plumber |
Repair option
Isolate at the shutoff, replace the failed component, and dry the cavity fully.
Replacement option
Repipe the run or the branch when corrosion is widespread.
Common causes
- Failed supply line or shutoff valve
- Worn washers, cartridges, or P-trap connections
- Pinhole corrosion in older copper
Relevant tools:emergency checklistdiy or hire a pro
Published September 10, 2026Last updated September 10, 2026
Tools & materials you'll need
Affiliate linksAs an Amazon Associate FixlyGuide earns from qualifying purchases — at no extra cost to you. Prices and availability are accurate as of publication and subject to change.
Quick Answer
Look, if you spot a water stain spreading across your ceiling, your first gut move might be to grab a bucket and slap some paint on it. Don’t. That stain’s screaming at you that there’s a leak hiding somewhere, and painting over it is just covering up the smoke while the fire keeps burning. Find the source first, fix that, and then — only then — deal with the pretty part. Could be a shingle that got ripped loose in the last storm. Could be a leaky pipe upstairs. Either way, if you ignore it, you’re asking for a bigger bill later.
The Problem
I’ve seen this one a hundred times. Homeowner notices a yellowish-brown blotch on the ceiling and says, “Eh, probably just a little leak,” or worse, “I’ll paint it out later.” No dice. That stain isn’t just ugly; it’s a warning sign. Water’s getting where it doesn’t belong, and it’ll keep chewing on wood, soaking insulation, and setting up mold if you let it ride.
Leave it alone long enough and that little spot can turn into a sagging ceiling, structural damage, or electrical trouble if the water finds wiring. Then you’re not talking about a quick repaint. You’re talking drywall, joists, insulation, all of it. I had a client out in Marietta last year who put off a stain for six months. By the time he finally called me, the kitchen ceiling was bowed and half the attic insulation was wet as a dog. We tore out about 40 square feet of ceiling and replaced a couple rafters. Cost him a bundle, and it started with something that could’ve been a simple fix.
How It Works
Water moves. That’s the whole game. It takes the path of least resistance, and gravity’s got its back. So when you’ve got a leak — above, behind a wall, wherever — the water doesn’t just sit there politely. It runs along pipes, electrical conduits, ceiling joists, attic trusses, and anything else in its way until it finds a weak spot. Usually that’s a drywall joint, a light fixture, or a vent, and that’s where you finally see the stain.
Start with the roof. It’s a system, not just shingles nailed on top of wood. You’ve got shingles or another roofing material, underlayment, flashing around chimneys and vents, and gutters moving water off the house. If any piece of that chain fails — cracked shingle, worn flashing sealant, clogged gutter backing water up — water can get underneath and start traveling. It might run down a rafter for feet before it ever shows up on the ceiling below. That’s why the stain’s not always right under the leak. Sometimes it’s several feet away. Annoying? You bet.
Then there’s plumbing. Second-floor bathrooms, laundry rooms, and HVAC condensate lines are all usual suspects. A tiny pinhole in a supply line, a loose drain under a sink, a cracked toilet flange — any one of those can drip steadily into the ceiling below. Even a slow leak from a shower pan or tub surround that wasn’t sealed right can do real damage over time. Water soaks the subfloor first, then it creeps through to the ceiling underneath.
Sometimes it’s an interior wall. Maybe a window frame lost its seal. Maybe moisture’s sneaking in from a foundation issue and wicking upward. Point is, the stain is just the clue you can see. The leak’s source is usually higher up, off to the side, or buried out of sight. That’s why you can’t just smear spackle over it and call it a day — you’ve got to trace the water’s path.
Step-by-Step Fix
Safety First — Before you touch anything, if the water stain is near a light fixture or any electrical outlet, turn off the power to that circuit at your main breaker panel. Water and electricity don’t play nice. Not even a little. And grab a ladder that’s stable and rated for your weight.
-
Pinpoint the General Area — Take a hard look at the stain. Is it growing? How big is it? Note where it sits in relation to exterior walls, chimneys, upstairs bathrooms, or vents. That narrows the hunt pretty fast.
- Tools needed: Flashlight, camera (phone).
- If the stain is small and stable: It might be an old leak that’s already been fixed. Don’t assume that, though — check it anyway.
-
Inspect Above (If Possible) — If the stain is on a top-floor ceiling, get into the attic. Look straight above the stain first. You’re hunting for wet insulation, dark streaks on wood, or actual dripping water. Follow any dampness upward to the roof sheathing.
- Tools needed: Flashlight, dust mask, old clothes.
- Safety: Watch your step — stay on the ceiling joists so you don’t punch through the drywall.
-
Check for Roof Issues — If the roof looks suspicious, use a stable ladder with a spotter or call a roofer. Look for:
- Missing, cracked, or curled shingles.
- Damaged or improperly sealed flashing around chimneys, vents, or skylights.
- Clogged gutters causing water to back up under shingles.
- Pro Tip: Some roof leaks only show up during a hard rain or when snow’s melting. If it’s dry out, you may need to spray water with a hose in sections to find where it’s getting in.
-
Investigate Upper Floor Plumbing — If the stain sits below a bathroom, laundry room, or kitchen, check every accessible plumbing line.
- Look under sinks for leaks.
- Check toilet bases for wobble or water sneaking out.
- Inspect shower/tub grout and caulk lines for cracks or breakdown.
- Action: Run the shower, flush the toilet, fill the tub — then watch for water showing up in the ceiling below.
-
Examine HVAC Condensate Lines — A lot of central air units have a condensate pan and drain line that clog up and overflow.
- Locate your HVAC unit in the attic or a closet.
- Check the drain pan for standing water and the drain line for clogs.
- Maintenance: Pour a cup of distilled vinegar down the condensate line every few months to slow down algae buildup.
-
Assess Exterior Walls and Windows — If the stain is near an exterior wall or window, check outside for cracked siding, failing window caulk, or damaged trim that might be letting water in.
- Tools needed: Binoculars (for high areas), caulk gun.
- Repair: Re-caulk any gaps with exterior-grade caulk.
-
Dry Out the Area — After you’ve found and fixed the source, you’ve got to dry out the wet ceiling and insulation completely.
- Action: Use fans, dehumidifiers, and open windows to get air moving. This can take several days.
- Note: If the area stayed wet for a long time, or if you spot mold, you’ll need to cut out the affected drywall and insulation.
-
Repair the Ceiling — Once everything’s bone dry and mold-free, then you can handle the stain.
- Action: For minor stains, clean with a bleach solution (1 part bleach, 10 parts water), let dry, then apply a stain-blocking primer.
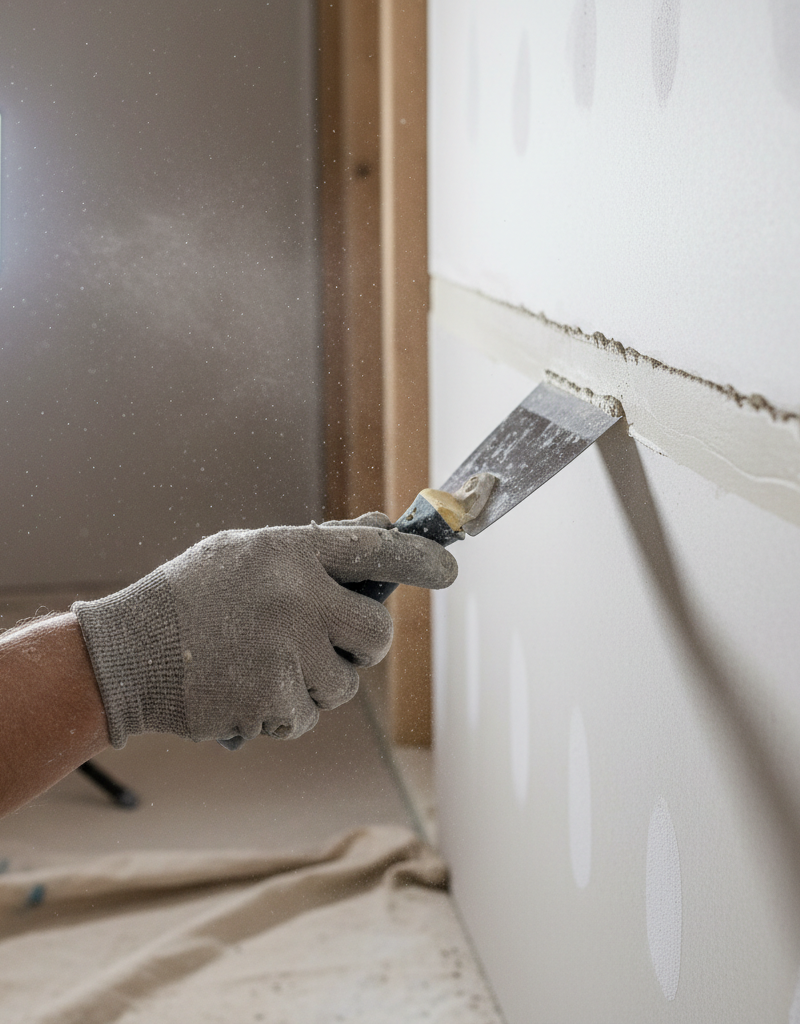
- For severe stains or damaged drywall: You’ll need to cut out the bad section, install new drywall, tape, mud, sand, prime, and paint.
Common Causes
- Roof Damage: Missing or cracked shingles, worn flashing around chimneys or vents, ice dams in winter, clogged gutters. Those are the usual suspects, especially on top floors.
- Plumbing Leaks: Leaky supply lines, loose drain connections, overflowing toilets, cracked toilet flanges, failing shower pan membranes, or leaky appliance hoses (e.g., washing machine, dishwasher).
- HVAC Issues: Clogged condensate drain lines from air conditioners or furnaces, causing overflow from the drip pan.
- Window or Wall Penetrations: Failed caulking around window frames, cracks in exterior siding, or poorly sealed penetrations for pipes/wires letting rainwater sneak in.
- Condensation: In very rare cases, extreme humidity differences can cause condensation within ceiling cavities, but this usually shows up as smaller, spread-out spots rather than one big stain.
Common Mistakes
- Painting Over It Immediately: This is the big one. You’re hiding the issue, not fixing it. The leak keeps going, the damage keeps growing, and the stain usually bleeds right back through.
- Assuming It's a Roof Leak: Sure, roofs are common, but don’t blame the roof by default, especially if the stain sits under a bathroom or near a plumbing fixture. Check all the angles.
- Not Drying Thoroughly: If you don’t dry out the wet materials all the way, mold’s going to move in and you can end up with structural trouble too. The framing and insulation need to be dry-dry before you patch or paint.
- Ignoring Small Stains: A little stain today can be a monster tomorrow. Leaks start small. Catching them early saves money and a whole lot of hassle.
- DIYing Without Safety Precautions: Climbing a roof or crawling around an attic without proper gear or a spotter is asking for a busted ankle or worse. And water near electrical? That’s a hard stop unless the power’s off.
- Using the Wrong Primer: Regular primer won’t block water stains. You need a shellac-based or oil-based stain-blocking primer made for water and smoke damage, or the stain will bleed through your finish coat.
Cost & Time Breakdown
| Task | DIY Cost | Pro Cost | Time |
|---|---|---|---|
| Finding Leak Source | $0 (your time) | $100–$300 (per visit) | 1–4 hours |
| Minor Roof Repair (caulk/shingle) | $10–$50 | $200–$500 | 30 min–2 hours |
| Plumbing Repair (minor) | $5–$50 | $150–$400 | 1–3 hours |
| Ceiling Dryout (fans/dehum.) | $0 (your equip.) | $200–$500 | 2–5 days |
| Stain Treatment & Repaint | $30–$80 | $150–$350 | 2–4 hours |
| Drywall Patch (4 sq ft) | $50–$150 | $400–$800 | 1–2 days (with drying) |
Tips & Prevention
- Regular Roof Inspections: Walk the house twice a year — spring and fall — and after any big storm. Check for loose or missing shingles, damaged flashing, and junk piled up in the gutters. Catching small stuff early saves a pile of grief.
- Clean Gutters Annually: Clogged gutters can back water up under the roof and chew up the fascia while they’re at it. Keep ’em clear, especially before winter.
- Check Plumbing Periodically: Every few months, peek under sinks, behind toilets, and around appliance hookups for any damp spots or drips.
- Maintain Caulking and Grout: In bathrooms, re-caulk around tubs, showers, and sinks every couple of years, or right away if you see cracks. Cheap insurance.
- Monitor Attic for Dampness: If you’ve got an attic, stick your head up there now and then. Look for moisture, dark wood, or musty smells, especially after heavy rain.
- Insulate Pipes in Cold Climates: Frozen pipes that burst are a huge source of sudden, ugly leaks. Insulate exposed pipes in unheated spots like attics or crawl spaces if you live where temps drop below 32°F.
When to Call a Professional
Look, I’m all for saving a buck with DIY, but some jobs belong to the pros. If you can’t find the leak source after a real investigation, or if the leak’s widespread and you’re seeing serious structural damage — like a sagging ceiling or wetness all over — it’s time to call a general contractor or a leak detection service. If it’s a complicated roof repair, especially on a steep pitch or if ladders aren’t your thing, get a licensed roofer out there. Any plumbing problem that’s more than a simple tighten or re-caulk, like a burst pipe or a tricky drain line issue, needs a licensed plumber. And definitely call in help if you suspect electrical involvement or if you find mold spreading around. Those folks have the gear and the know-how to handle it without you making the problem worse. No hero points for getting hurt in your own house.
Related Articles
Keep troubleshooting with these hand-picked guides from FixlyGuide:
- That Ceiling Stain Isn't a Leak: 5 Hidden Causes — A mysterious ceiling stain can be alarming, especially when there's no active leak. The real culprits are often hidden issues like attic co…
- That Drywall Hole Isn't Just Ugly, It's a Bat Signal — Learn the pro-approved method for patching drywall holes of any size. We cover the surprising science behind a lasting repair and common mi…
- That Softball-Sized Hole in Your Wall? Make It Vanish — A softball-sized hole in the drywall is an eyesore, but you can make it disappear. Learn the pro method for a seamless patch that vanishes…
- That Annoying Nail Pop Is Back? Your Home's Telling You Something — Nail pops in drywall are a common nuisance, but if they keep reappearing, it's often a sign of deeper structural movement or improper insta…
- The Hidden Cause of Squeaky Hardwood Floors & The Real Fix — That persistent squeak from your hardwood floors isn't just an annoyance; it's a sign of movement. We'll uncover the hidden causes, from hu…
- That Brown Stain Above Your Shower Isn't a Roof Leak — Discover why that ugly brown stain on the ceiling below your attic bathroom vent is more likely caused by condensation from your shower tha…
Should you do this yourself?
Answer five quick questions before you start. Safety outranks savings every time.
Your experience with work like this
How high do you have to work?
Does the job involve any of these?
Will it need a permit?
Specialty tools
Free and instant. Educational guidance only — not a quote, inspection, or professional diagnosis.
Questions to ask before you sign
Ask every contractor the same questions and the cheapest bid stops looking cheapest. Check them off as you go — your progress is saved on this device.
Free, no signup. Bring this to every walkthrough so you compare bids on the same terms.
What should this project cost?
Enter your project details for a realistic cost range before you call anyone.
Common repairs run $150–$650; repipes and water-heater replacements reach $1,500–$4,500.
- Regional adjustment
- National average
- Labor share (typical)
- ~$754
- Quotes to collect
- 3 written estimates
Educational estimate based on national averages — not a binding quote. Always confirm with written local estimates.
Fixly Project Decision Box
- DIY difficulty
- Professional Recommended
- Estimated time
- Inspection 1–2 hours · repairs 1–3 days
- Cost level
- High
Main tools / materials
- Binoculars for a ground-level look
- Flashlight for attic checks
- Moisture meter
- Roofing cement (temporary patch only)
When to stop and call a pro
- Active leak near lights, fans, or any wiring
- Sagging, bulging, or water-filled ceiling
- Steep, wet, or two-story roof — do not climb it
- Storm or hail damage you plan to claim on insurance
Need professional help?
Free roof assessment first — no phone calls until you ask for them.
Get Local Roofing HelpGet help with your roof now
Stay off the roof. These free tools help you protect the house and reach the right professional fast.
- Emergency repair checklistThe first steps that limit damage before a pro arrives.Open
- Repair or replace your roof?Answer 10 questions about age, leaks, and damage to get a clear next step.Open
- Get local estimatesSend one request and compare written estimates from vetted pros.Open
Free, no signup required. Estimates are educational guidance, not a quote or an inspection.
Get the print-ready PDF of this guide
A clean, ad-free, printable version you can keep on your phone or pin to the workshop wall. Free with a FixlyGuide account.
- Print-optimized layout
- Tools, materials & every step included
- Saved to your account
Recommended for DIYers & woodworkers
Sponsored
The Top 20 Tools for Workshops of Any Budget
No stationary machines or power tools required — plus 3 fundamental tools that can't be bought at any price.
Get the free guide
Ted's Woodworking — The #1 Woodworking Resource
Detailed instructions, dimensioned drawings, materials & cutting lists, and 3D schematics for every skill level.
See the plansSponsored: links above are affiliate links. FixlyGuide may earn a commission on qualifying purchases — at no extra cost to you.
Frequently asked questions
How do I know if a ceiling water stain is old or active?+
An active leak stain will likely be expanding in size, feel damp to the touch, or show fresh water marks after rain. An old, inactive stain will be dry and static, though it still needs to be cleaned and sealed before painting.
Can a ceiling water stain be caused by condensation?+
Yes, but it's less common for a significant, defined stain. Condensation usually occurs in very cold climates when warm, moist air meets a cold ceiling surface, often resulting in widespread dampness or smaller, speckled stains rather than a single, large drip-type stain. Proper ventilation and insulation can prevent this.
What kind of primer should I use for water stains?+
You need a shellac-based or oil-based stain-blocking primer. These types of primers create a barrier that prevents the water-soluble compounds in the stain from bleeding through your topcoat of paint. Water-based primers generally won't do the trick.
Should I cut out the wet drywall immediately?+
If the drywall is heavily saturated, soft, crumbling, or shows signs of mold, yes, you should cut it out after the leak source is fixed and the area is dry. Removing it prevents mold spread and allows you to inspect the framing for damage. For minor dampness, thorough drying might suffice.
How long does it take for a ceiling to dry out after a leak?+
Drying time depends on the extent of saturation, humidity levels, and airflow. With fans and a dehumidifier, a moderately wet area might take 2-5 days to thoroughly dry. You need to ensure the framing and insulation are also dry before proceeding with repairs.
Can a clogged gutter cause a ceiling leak?+
Absolutely. Clogged gutters can cause rainwater to overflow and back up under the roof's edge, potentially seeping underneath shingles and into the soffit or wall cavity, eventually leading to a ceiling leak. Keeping gutters clean is crucial prevention.
Is it safe to repair a ceiling leak myself?+
For simple leak detection and minor repairs like re-caulking or replacing a single shingle, it can be a DIY project if you're comfortable and safety-conscious. However, if the leak is extensive, involves electrical, structural damage, or you can't find the source, it's best to call a professional for safety and effective repair.
How can I prevent future ceiling water stains?+
Regular home maintenance is key: inspect your roof bi-annually, keep gutters clean, check plumbing for drips, and maintain caulking around windows and wet areas like showers. Proactive care helps catch small issues before they become big, leaky problems.
What's the difference between a roof leak and a plumbing leak stain?+
Roof leak stains often appear on top-floor ceilings, especially after rain or snow melt, and might track along rafters. Plumbing leak stains typically appear directly below bathrooms, kitchens, or laundry rooms, regardless of weather, and might have a more continuous drip pattern.
My water stain has a fuzzy growth. What is it?+
That fuzzy growth is likely mold or mildew. It's crucial to address both the leak and the mold. Small areas of mold can sometimes be cleaned with a bleach solution, but for larger infestations or if you have respiratory sensitivities, professional mold remediation might be necessary, and you should always cut out and replace moldy drywall and insulation.

Discussion
Loading comments…