- Rainfall: High rainfall areas tend to have more acidic soils. Rainwater is naturally slightly acidic, and it leaches basic cations (like calcium, magnesium, and potassium) from the soil over time, replacing them with acidic hydrogen ions.
- Organic Matter Decomposition: While beneficial for soil structure and fertility, the decomposition of organic matter releases organic acids, which can slowly lower soil pH over many years.
- Tree Cover: Certain trees, particularly conifers (pines, firs, spruces), are often associated with increased soil acidity due to the acidic nature of their needles and the organic acids released during decomposition.
- Irrigation Water: In some regions, tap water used for irrigation can be naturally alkaline, slowly increasing soil pH over time, especially in areas with low rainfall.
Landscaping · Deck or fence project
| Project category | Landscaping |
|---|---|
| Problem type | Deck or fence project |
| Trade required | Landscaping |
| Urgency | Planned project |
| Safety risk | Moderate safety risk |
| DIY suitability | DIY for experienced homeowners |
| Cost category | High cost |
| Typical timeline | Most builds 3–10 days depending on size |
| Contractor type | Landscaping contractor |
Repair option
Replace failed boards, posts, and hardware; reseal the surface.
Replacement option
Rebuild when framing or the ledger connection is unsafe.
Common causes
- Rot at posts and ledger
- Storm damage
- Adding outdoor living space
Relevant tools:home improvement material pricesproject cost estimator
Published May 29, 2026Last updated August 17, 2026
Tools & materials you'll need
Affiliate linksAs an Amazon Associate FixlyGuide earns from qualifying purchases — at no extra cost to you. Prices and availability are accurate as of publication and subject to change.
Quick Answer
Testing your lawn soil's pH at home is a straightforward process that involves collecting representative soil samples and using an at-home test kit to determine its acidity or alkalinity. Understanding your soil's pH is critical because it dictates nutrient availability for your grass, directly impacting its health, color, and resilience to disease and pests. Correcting an imbalanced pH is a foundational step toward a thriving lawn, often revealing the hidden reason why your fertilizers aren't working or why your grass looks perpetually stressed.
The Problem
You've fertilized, watered, and mowed diligently, yet your lawn still looks lackluster – perhaps thin, yellowing, or prone to weeds. Many homeowners overlook the fundamental culprit: an imbalanced soil pH. Soil pH is a measure of how acidic or alkaline your soil is, expressed on a scale from 0 to 14. A pH of 7.0 is neutral, below 7.0 is acidic, and above 7.0 is alkaline. Most lawn grasses, particularly common varieties like Kentucky Bluegrass, Tall Fescue, and Perennial Ryegrass, thrive in a slightly acidic to neutral range, typically between 6.0 and 7.0.
When the pH strays too far from this ideal range, essential nutrients in the soil become locked up and unavailable to your grass roots, even if those nutrients are present in abundance. This phenomenon, known as nutrient lockout, means your lawn is essentially starving, no matter how much fertilizer you apply. Acidic soils (below 6.0) often lead to deficiencies in phosphorus, potassium, calcium, and magnesium, while highly alkaline soils (above 7.5) can restrict iron, manganese, and zinc uptake. The result is a weak, stressed lawn that's more susceptible to disease, insect infestations, and weed invasion. Understanding and correcting your soil's pH is not just another lawn care task; it's the foundational step to unlocking your lawn's full potential and making every other effort, like fertilizing and watering, truly effective.
How It Works
Soil is a complex ecosystem, and pH is a master control switch for many of its critical functions. Specifically, pH influences the solubility and availability of macro and micronutrients. Think of your soil as a giant chemistry lab. Each nutrient element (nitrogen, phosphorus, potassium, iron, etc.) has an optimal pH range at which it dissolves best in soil water and can be absorbed by plant roots. Enzymes within the soil and within the grass roots themselves also function optimally within specific pH windows.
For instance, phosphorus, a crucial nutrient for root development and energy transfer, becomes less available in highly acidic soils (below 5.5) because it binds tightly with aluminum and iron. In highly alkaline soils (above 7.5), phosphorus also becomes less available as it forms insoluble compounds with calcium. Similarly, nitrogen, vital for leafy growth, is processed by soil microbes whose activity is highly pH-dependent. If the pH is too low or too high, these beneficial microbes are less active, leading to reduced nitrogen cycling and availability.
Beyond nutrient availability, soil pH also affects beneficial microbial activity (which aids in decomposition and nutrient cycling), the toxicity of certain elements (like aluminum, which becomes toxic to plants in highly acidic conditions), and even the effectiveness of herbicides and pesticides. Grass roots absorb nutrients dissolved in the soil water through a process called ion exchange. The pH directly impacts the charge of these ions and the root hairs, influencing how effectively this exchange occurs. A healthy, balanced pH supports a vibrant soil microbiome and efficient nutrient uptake, leading to a denser, greener, and more resilient lawn that can better withstand environmental stresses.
Step-by-Step Fix
1. Gather Your Tools and Materials — *Proper preparation is key to accurate results.
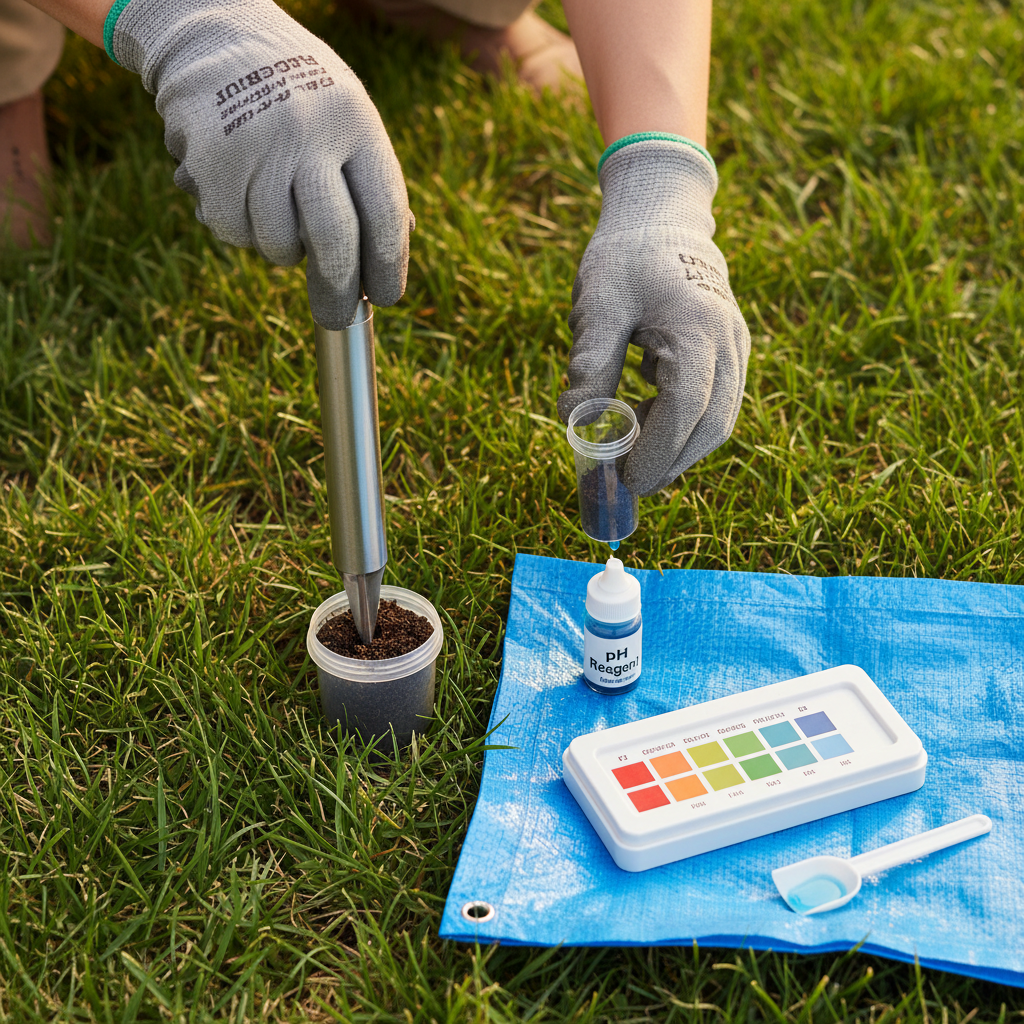
- Before you begin, ensure you have all the necessary items on hand: a soil test kit (liquid reagent or digital), a clean trowel or soil probe, plastic buckets (various sizes), distilled water, and disposable gloves. Avoid using metal containers for soil collection as they can contaminate samples and skew pH readings. Make sure your trowel is clean and free of rust or other soil remnants to avoid cross-contamination.
2. Select Your Sampling Areas — *Choose representative spots for an accurate overall picture.
- For an average-sized lawn (up to 10,000 sq ft), choose 5-10 random spots that represent different areas: sunny, shady, near trees, open lawn, and any areas where growth is particularly poor or good. Avoid sampling directly next to foundations, driveways, or compost piles, as these areas can have unnaturally skewed pH levels. If you have distinct garden beds or zones with different plants, consider them separate sampling areas.
3. Collect Your Soil Samples — *Consistency in depth is crucial for reliability.
- Using a clean trowel or soil probe, dig down 4-6 inches deep in each selected area. This depth is where most grass roots feed. For each spot, collect a consistent amount of soil. Place each individual sample into a separate, clean plastic bucket. If using a soil probe, push it into the ground, twist, and pull up a core of soil. Dump the core into your plastic bucket. Be sure to scrape off any grass or thatch from the surface of the core before putting it in the bucket.
- Safety Note: Always wear gardening gloves when handling soil to protect your hands from contaminants and potential irritants.
4. Blend Your Samples for an Average Reading — *Create a composite sample for a reliable overall pH.
- Once you've collected samples from all your chosen spots, combine them into one larger, clean plastic bucket. Mix the soil thoroughly with your hands or a clean mixing stick. This creates a composite sample that represents the average pH of your lawn. If you have distinct problem areas you want to test separately, keep those samples isolated and test them individually.
5. Prepare the Soil for Testing — *Remove debris to ensure accurate results.
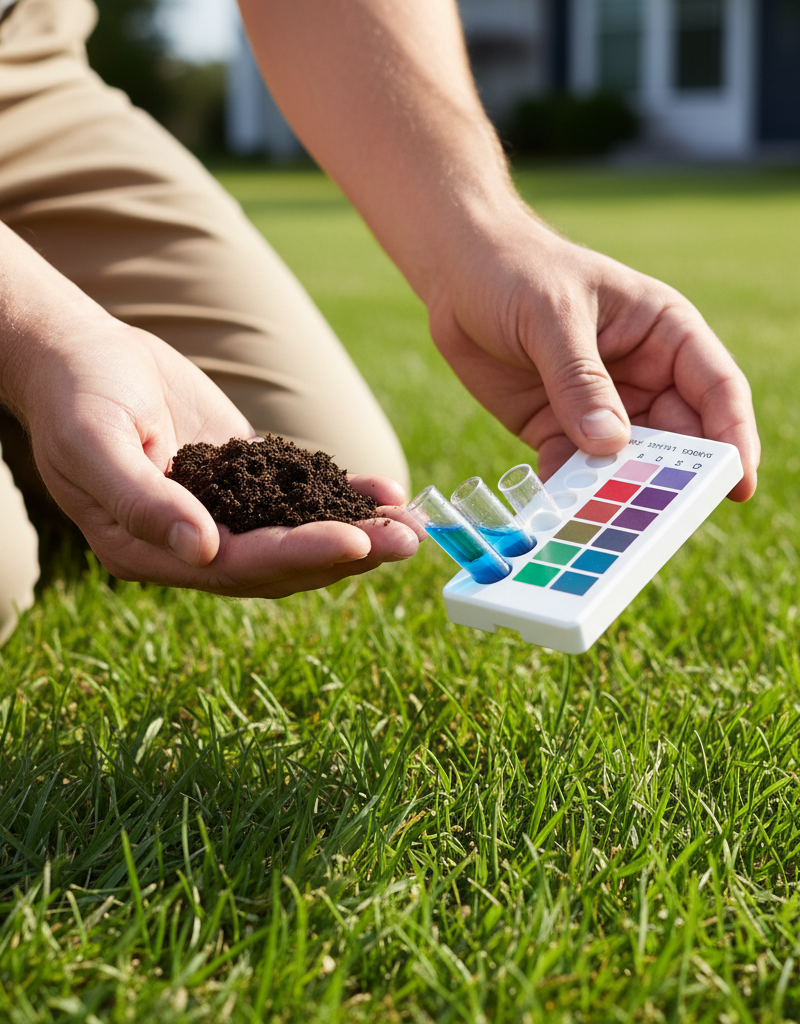
- Remove any large debris such as rocks, twigs, grass blades, or roots from the composite soil sample. Break up any large clumps of soil to create a fine, uniform texture. If the soil is very wet, spread it out on a clean, dry surface (like newspaper) for a few hours to air dry slightly. Do not bake it or use artificial heat; this can alter the pH.
6. Perform the pH Test (Liquid Reagent Kit) — *Follow kit instructions precisely for the best outcome.
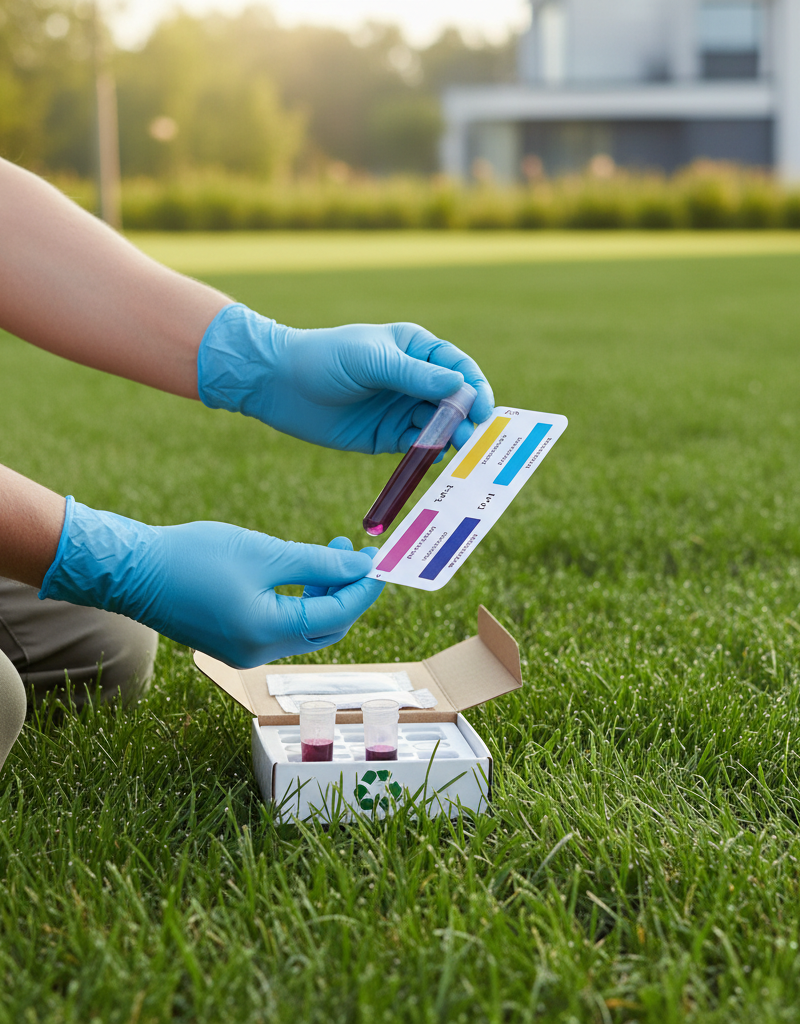
- Most liquid reagent kits involve placing a small amount of soil (usually a teaspoon or so) into a test chamber or tube. Add a specified amount of distilled water (not tap water, which can have its own pH and minerals) and then a few drops of the indicator solution. Cap the tube and shake vigorously. Allow the mixture to settle for a few minutes. The liquid will change color. Compare this color to the provided color chart to determine your soil's pH. Ensure you're in good lighting to accurately match the colors.
7. Perform the pH Test (Digital Meter) — *For quick, repeatable, and precise readings.
- If using a digital pH meter, calibrate it according to the manufacturer's instructions before use (this usually involves dipping it in calibration solutions). Moisten your composite soil sample with distilled water to create a muddy consistency. Insert the probe of the digital meter into the moistened soil, ensuring good contact. Wait for the reading to stabilize, typically a minute or two. Take readings from several spots within your composite sample and average them for greater accuracy. Clean the probe thoroughly with distilled water after each use.
8. Understand Your Results & Take Action — *Translate numbers into a healthier lawn.
- Once you have your pH reading, compare it to the ideal range for your specific grass type (generally 6.0-7.0 for most lawns). If your pH is too low (acidic), you'll likely need to add lime (calcium carbonate). If it's too high (alkaline), you'll need to add elemental sulfur or an acidifying fertilizer. The amount to apply depends on your current pH, desired pH, soil type, and the product's recommendations. For example, to raise pH by one point, sandy soils might need 20-40 lbs of pulverized limestone per 1,000 sq ft, while clay soils might need 40-80 lbs. Consult reputable extension office guides or product labels for precise application rates.
- If your lawn is still struggling after pH adjustment: Consider a full professional soil analysis from a local university extension office. These tests provide detailed nutrient profiles and more precise recommendations for amendments.
Common Causes
Several factors can contribute to an imbalanced soil pH:
- Native Soil Geology: The underlying rock and mineral composition of your region significantly influences the natural pH of your soil. Areas with limestone bedrock tend to have more alkaline soils, while regions with granite or sandstone often have more acidic soils.
- Rainfall: High rainfall areas tend to have more acidic soils. Rainwater is naturally slightly acidic, and it leaches basic cations (like calcium, magnesium, and potassium) from the soil over time, replacing them with acidic hydrogen ions.
- Organic Matter Decomposition: While beneficial for soil structure and fertility, the decomposition of organic matter releases organic acids, which can slowly lower soil pH over many years.
- Fertilizer Use: Specific fertilizers are designed for different purposes. Heavy, continuous use of ammonium-based fertilizers (like ammonium sulfate) without pH monitoring can acidify the soil over time as the ammonium converts to nitrate, releasing hydrogen ions. Using fertilizers balanced for pH or incorporating slow-release options can mitigate this.
- Tree Cover: Certain trees, particularly conifers (pines, firs, spruces), are often associated with increased soil acidity due to the acidic nature of their needles and the organic acids released during decomposition.
- Irrigation Water: In some regions, tap water used for irrigation can be naturally alkaline, slowly increasing soil pH over time, especially in areas with low rainfall.
Common Mistakes
- Skipping the Calibration: For digital pH meters, failing to calibrate the device before each use or periodically can lead to highly inaccurate readings. Always follow manufacturer instructions for calibration using buffer solutions.
- Using Tap Water for Tests: Tap water contains dissolved minerals and often has its own pH. Using it to mix soil samples or rinse probes can contaminate the sample and skew the results of at-home liquid reagent tests. Always use distilled water.
- Inconsistent Sampling Depth: Taking soil samples from varying depths or only skimming the surface won't give an accurate representation of the root zone where your grass feeds. Aim for a consistent 4-6 inch depth.
- Testing Immediately After Amendments: Applying lime or sulfur and then retesting the soil within a few days or weeks will not yield accurate results. These amendments take time to react and impact the soil pH – often several months. Wait at least 2-3 months before retesting after applying amendments.
- Over-Correcting pH: Applying too much lime or sulfur in an effort to quickly adjust pH can lead to an overshoot, making the soil either too alkaline or too acidic, which can be even harder to correct. Make gradual adjustments based on test results and retest before applying more.
- Ignoring Local Extension Office Tests: While at-home kits are great for quick checks, a detailed soil analysis from a local university extension office provides precise nutrient levels and tailored recommendations, making it a valuable investment, especially for stubborn lawn problems or before making significant amendments.
Cost & Time Breakdown
| Task | DIY cost | Pro cost | Time |
|---|---|---|---|
| Soil pH Test Kit | $10–$30 | N/A | 15–30 minutes |
| Digital pH Meter (optional) | $20–$60 | N/A | 15–30 minutes |
| Distilled Water | $2–$5 | N/A | negligible |
| Lime (if needed, per 1000 sq ft) | $15–$25 | $100–$200 | 1–2 hours |
| Sulfur (if needed, per 1000 sq ft) | $15–$30 | $100–$200 | 1–2 hours |
| Professional Soil Analysis | N/A | $20–$50 | 1–2 hours (sample collection) |
Tips & Prevention
- Test Annually: Make soil pH testing a routine part of your lawn care calendar, ideally in the fall or early spring, before applying any major amendments or fertilizers. This allows time for any corrections to take effect.
- Use Granular Lime/Sulfur: Calibrated spreaders work best with granular products, ensuring even distribution and preventing patches of over- or under-treated areas. Powders can be harder to apply evenly and can create dust.
- Incorporate Organic Matter: Regularly top-dressing your lawn with compost can help buffer soil pH, making it more resistant to drastic swings, while also improving soil structure and fertility. Compost adds a slow release of nutrients and beneficial microbes.
- Smart Fertilizer Choices: Be mindful of the fertilizers you use. If your soil is consistently acidic, opt for fertilizers that are less acidifying or contain calcium. If it's alkaline, choose options that have an acidifying effect, like those with ammonium sulfate, but always monitor pH.
- Water Correctly: Proper watering encourages deeper root growth, making your lawn more resilient. Deep, infrequent watering is generally better than shallow, frequent watering.
- Keep Records: Maintain a log of your pH readings, the products you applied (type and quantity), and the dates. This helps track progress and informs future decisions.
When to Call a Professional
While at-home pH testing and simple amendments are well within a homeowner's capability, there are specific situations where calling a professional is recommended. If your lawn exhibits severe, persistent issues like widespread disease, extreme yellowing despite proper fertilization, or consistent failure of new grass seed to establish, a professional lawn care specialist can provide a comprehensive diagnosis. They have access to advanced soil testing equipment, can analyze nutrient deficiencies in detail, and have the expertise to develop a tailored treatment plan for complex soil chemistry problems. Additionally, if your measurements are consistently outside optimal ranges (e.g., below 5.0 or above 8.0) and DIY adjustments haven't yielded significant improvement after several applications and months, a professional can apply stronger, often commercial-grade, amendments safely and effectively or identify other underlying issues beyond simple pH imbalance that may be impacting your lawn's health.
Related Articles
Keep troubleshooting with these hand-picked guides from FixlyGuide:
- The #1 Mistake Homeowners Make When Testing Soil pH (And How to Get It Right Every Time) — Learn the critical mistake most homeowners make when testing lawn soil pH and how to perform accurate tests at home for a healthier, greene…
- The #1 Mistake Killing Your Lawn? It's Hiding in Your Soil pH — Discover how to quickly and accurately test your lawn's soil pH at home, identify nutrient absorption issues, and unlock a healthier, green…
- The #1 Mistake Killing Your Thin Lawn (And How to Fix It in a Weekend) — Overseeding your lawn can transform it from thin and patchy to lush, but many homeowners make a crucial mistake that hinders success. Learn…
- The #1 Mistake Homeowners Make When Battling Lawn Grubs (And a Simple Organic Fix) — Discover why most DIY grub treatments fail and how a simple, organic approach can permanently rid your lawn of these destructive pests.
- The #1 Mistake Killing Your Lawn's Thickness (and How to Fix It for $50) — Overseeding can transform a thin, patchy lawn into a lush, vibrant carpet, but many homeowners miss a critical step, hindering success.
- The #1 Mistake Homeowners Make When Caulking a Bathroom Sink (And How to Fix It) — Discover the most common caulk mistake homeowners make around bathroom sinks and follow simple steps to achieve a lasting, watertight seal.
Should you do this yourself?
Answer five quick questions before you start. Safety outranks savings every time.
Your experience with work like this
How high do you have to work?
Does the job involve any of these?
Will it need a permit?
Specialty tools
Free and instant. Educational guidance only — not a quote, inspection, or professional diagnosis.
What should this project cost?
Enter your project details for a realistic cost range before you call anyone.
Cost depends heavily on which system turns out to be the source.
- Regional adjustment
- National average
- Labor share (typical)
- ~$1,620
- Quotes to collect
- 3 written estimates
Educational estimate based on national averages — not a binding quote. Always confirm with written local estimates.
Before you start
Check the difficulty, permits, and safety risk — then decide whether to call a pro.
- Estimate this projectGet a cost range for your scope and ZIP before you call anyone.Open
- Get local estimatesSend one request and compare written estimates from vetted pros.Open
Free, no signup required. Estimates are educational guidance, not a quote or an inspection.
Frequently asked questions
How often should I test my lawn's soil pH?+
It's recommended to test your lawn's soil pH once a year, ideally in the fall or early spring. This allows you ample time to make any necessary amendments before the prime growing season, giving them time to react with the soil.
What is the ideal pH range for most lawns?+
Most common lawn grasses, such as Kentucky Bluegrass, Tall Fescue, and Perennial Ryegrass, thrive in a slightly acidic to neutral pH range of 6.0 to 7.0. Some grasses, like certain fescues, can tolerate slightly more acidic conditions.
How long does it take for lime or sulfur to change soil pH?+
The effects of lime (to raise pH) or sulfur (to lower pH) are not immediate. It typically takes several weeks to a few months for these amendments to react with the soil and alter the pH significantly. For best results, retest your soil after 2-3 months to assess the change and determine if further applications are needed.
Can I use household items to test soil pH?+
While some informal methods using vinegar and baking soda can indicate extreme acidity or alkalinity, they are not precise enough for accurate lawn care. For reliable results, use a dedicated soil pH test kit or a digital pH meter designed for soil.
What happens if my soil pH is too high or too low?+
If your soil pH is too high (alkaline) or too low (acidic), essential nutrients become 'locked up' in the soil and are unavailable to your grass roots, a phenomenon called nutrient lockout. This results in a weak, discolored, and unhealthy lawn prone to weeds and diseases, even if you apply fertilizer.
Discussion
Loading comments…