- Remove the Inner Door Panel — Open the door and find the perimeter screws holding the stainless steel inner door skin to the outer door face.
- Tools: Torx T15 or T20 screwdriver (most Whirlpool, Bosch, and GE units use Torx).
- Caution: Leave the center screws near the latch alone until you’ve got the exterior panel supported with your knee or hand; modern outer door panels will drop fast once those top perimeter screws come free.
HVAC · High energy usage
| Project category | HVAC |
|---|---|
| Problem type | High energy usage |
| Trade required | HVAC |
| Urgency | Planned project |
| Safety risk | Low safety risk |
| DIY suitability | DIY for experienced homeowners |
| Cost category | High cost |
| Typical timeline | Assessment within weeks; replacement planned off-season |
| Contractor type | Licensed HVAC technician |
Repair option
Duct sealing, insulation, and a tune-up before touching the equipment.
Replacement option
High-efficiency replacement sized by a load calculation, not a rule of thumb.
Common causes
- Aging, low-efficiency equipment
- Leaking ducts losing conditioned air
- Insufficient attic insulation
- Oversized system short-cycling
Relevant tools:project cost estimatorrepair or replace
Published November 3, 2026Last updated November 3, 2026
Tools & materials you'll need
Affiliate links- AmazonDigital multimeterfor testing dispenser actuator ohms
- AmazonTorx T15 and T20 screwdriversfor inner door panel removal
- AmazonDigital probe thermometerfor testing sink water temperature
- AmazonNeedle-nose pliersfor pulling spade wire terminals
- AmazonWooden toothpick or 14-gauge copper wireto clear clogged spray arm nozzles
- AmazonOld toothbrushfor scrubbing soap residue off hinge pin
- AmazonReplacement detergent dispenser assembly1 · optional, if latch or coil is broken
As an Amazon Associate FixlyGuide earns from qualifying purchases — at no extra cost to you. Prices and availability are accurate as of publication and subject to change.
Quick Answer
If your dishwasher tablet is still intact, half-melted, or glued to the dispenser door when the cycle ends, the dispenser didn’t pop open on time or the hot water never really got there. I’ve seen this in about 80% of homes, and more times than I can count it’s something dumb-simple — a tall cutting board or an oversized skillet sitting in the front-left of the bottom rack and pinning that spring-loaded door shut. Clear the obstruction, make sure your incoming hot water hits at least 120°F, and take a hard look at the dispenser door spring and bi-metal release actuator.
The Problem
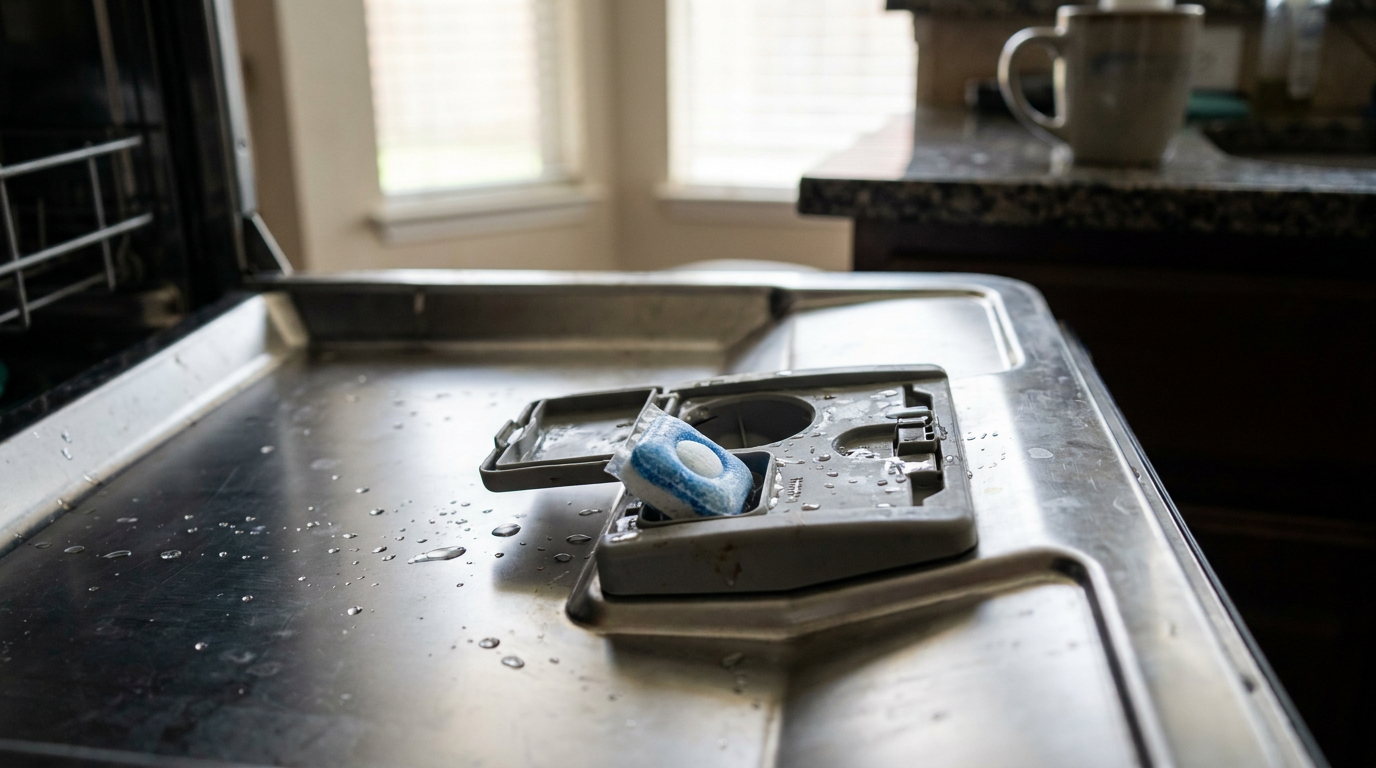
You crack the dishwasher open after an hour-and-a-half cycle expecting clean glass and decent plates. Instead, you get dirty dishes, lukewarm water droplets, and your detergent pod or tablet sitting in the little plastic cup — bone-dry, half-dissolved, or turned into that nasty gelatinous mess nobody wants to touch.
It’ll make you curse a little, and I don’t blame you. Modern dishwashers depend on dead-on timing. If the tablet doesn’t dissolve, your dishes just get rinsed in warm, greasy water with no surfactants to cut the oil or enzymes to break down the food. Folks jump straight to “the machine’s junk” or “that detergent’s bad.” Usually, it ain’t either one. Nine times out of ten, the machine’s fine, but a physical block, a dead heating circuit, or a gummed-up wax motor stopped the cycle from doing its job.
How It Works
Modern dishwashers don’t drop detergent the second you hit start. If they did, the first 5-to-10-minute pre-rinse would wash the soap right down the drain before the real wash even got going.
What actually happens is the machine fills with a couple gallons, sloshes that water around to knock off the heavy food soil, and pumps it out. Once that dirty pre-rinse water’s gone, it fills again for the main wash. Only then does the control board send 120 volts of electricity (or a low-voltage DC signal on newer electronic platforms) to an actuator mounted inside the door panel.
That actuator usually isn’t some fancy little motor with gears. It’s most often a wax motor or a small bi-metal solenoid. When it gets energized, the wax expands or the solenoid pulls, which releases a plastic catch. A tiny stainless steel torsion spring snaps the dispenser door open, and the tablet drops straight into the tub.
Once it drops, the circulation pump hammers pressurized water through the spray arms, blasts the tablet, churns it into a soapy wash liquor, and dissolves the polyvinyl alcohol (PVA) casing within 2 to 4 minutes — assuming the water’s at least 120°F. If the door catches on a plate, if the spring’s broken, or if the water stays cold, that tablet just sits there like it owns the place.
Step-by-Step Fix
Go in order here. Start with the simple physical checks before you start pulling inner door panels off with your screwdrivers.
-
Check for Rack Obstructions — Pull the bottom rack out halfway and look straight at where the dispenser door sits when the main door is shut. Tall cookie sheets, cutting boards, or long utensil handles shoved on the front-left side of the rack routinely smack the dispenser face and keep that spring door from popping open during the cycle.
- Action: Re-load the rack so tall items sit along the sides or rear of the rack, at least 4 inches away from the dispenser face.
- Check: Close the dishwasher door slow and watch the clearance. You don’t want anything touching the dispenser housing.
-
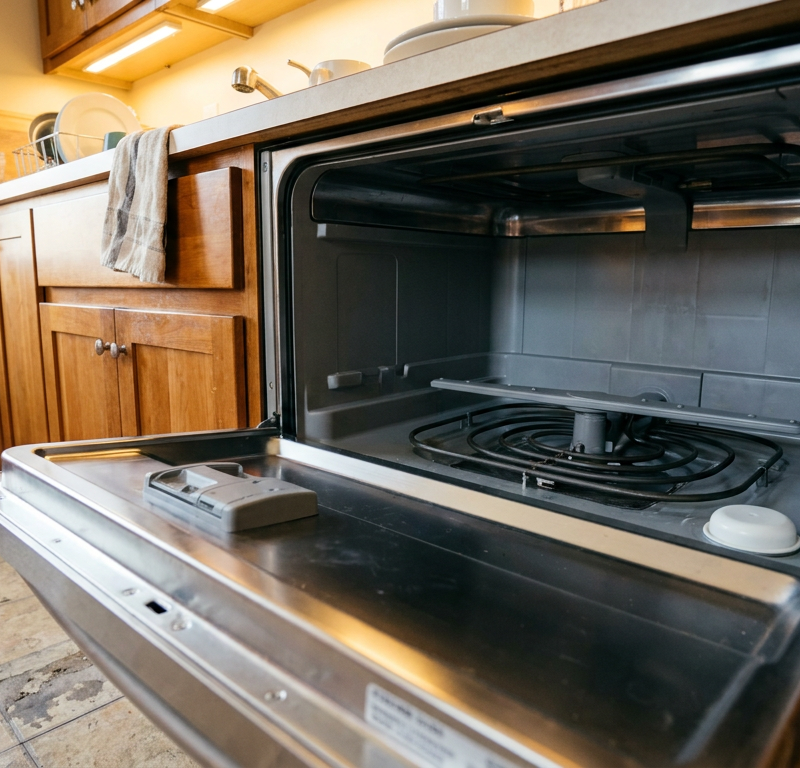
Test the Door Latch and Spring Mechanism — With the main dishwasher door wide open, press the dispenser door shut until you hear it click into the catch, then hit the manual release tab or button with your thumb. The dispenser door ought to snap open hard on its torsion spring; if it flops open lazily or stays shut, the hinge or spring’s been compromised.
- Tools: Clean microfiber rag and warm water.
- If it sticks: Dried detergent crud loves to gum up the hinge pin. Scrub the hinge channel with hot water and an old toothbrush to break loose the dried rinse aid and soap residue.
-
Verify Incoming Hot Water Temperature — Detergent tablets, especially compressed powder bricks and PVA gel pods, need hot water to break down right. Go to your kitchen sink, turn on the hot tap all the way, and hold a digital probe thermometer under the stream until the temperature peaks.
- Target: You need a minimum reading of 120°F. If your tap only hits 105°F to 110°F, your water heater’s set too low for proper enzyme breakdown.
- Quick test: Run the kitchen sink hot tap for 30 to 45 seconds right before you start the dishwasher so the machine gets hot water right away instead of sucking in cold water sitting in the supply pipe.
-
Inspect the Spray Arm Nozzles — Water has to blast against the dispenser door and tub floor to dissolve the tablet once it drops. Pull the lower and middle spray arms off — most twist counterclockwise by hand or lift off a center retaining nut — and inspect the little exit holes.
- Tools: Wooden toothpick or short piece of 14-gauge copper wire.
- Process: Clear out melon seeds, hard water calcium, and tiny glass shards stuck in the spray holes. Rinse the arms under the sink faucet and make sure every jet flows clean.
-
Kill Power to the Unit — Before you touch any wiring or internal door parts, shut off the dishwasher’s electrical supply.
- Safety: Flip the dedicated 15-amp or 20-amp breaker at your main electrical panel. If the unit plugs into an outlet under the sink, pull the plug and make sure the display panel’s completely dark.
-
Remove the Inner Door Panel — Open the door and find the perimeter screws holding the stainless steel inner door skin to the outer door face.
- Tools: Torx T15 or T20 screwdriver (most Whirlpool, Bosch, and GE units use Torx).
- Caution: Leave the center screws near the latch alone until you’ve got the exterior panel supported with your knee or hand; modern outer door panels will drop fast once those top perimeter screws come free.
-
Inspect the Dispenser Assembly Wiring and Actuator — Look at the backside of the detergent dispenser module mounted inside the door cavity. You should see a small solenoid coil or a cylindrical wax motor with two spade terminals attached.
- Visual check: Look for burnt terminal leads, melted plastic around the wax actuator, or a loose wiring harness.
- Mechanical check: Manually depress the linkage hooked to the catch. If the plastic linkage has snapped, the whole detergent dispenser assembly needs to be swapped out.
-
Test the Actuator Coil with a Multimeter — Pull the two spade wire connectors off the actuator terminals with needle-nose pliers (pull the metal connectors, never the wires). Set your digital multimeter to the ohms (Ω) setting and test resistance.
- Values: A healthy solenoid typically reads between 1,000 and 3,000 ohms (1kΩ to 3kΩ). A wax motor generally reads between 1,200 and 2,000 ohms at room temperature.
- Diagnosis: If your meter reads "OL" (open loop) or zero ohms (dead short), the internal coil’s cooked and can’t release the door. The actuator or complete dispenser assembly is bad.
-
Install a Replacement Dispenser Assembly (If Required) — If the actuator coil failed or the plastic hinge arms are broken, remove the retaining bracket holding the dispenser to the inner door.
- Tools: 1/4-inch nut driver or Phillips screwdriver.
- Process: Unbend the metal locking tabs or back out the retaining bracket screws. Push the old assembly forward into the tub. Clean the rubber gasket mating surface good with rubbing alcohol.
- Sealing: Press the new dispenser in from the tub side, seat the perimeter gasket firmly, reattach the mounting bracket, and plug the spade connectors back onto the terminals.
-
Reassemble the Door and Run a Test Diagnostic — Tuck all wiring harnesses into their factory clips so screws don’t chew up the insulation. Re-hang the outer door panel, reinstall the perimeter Torx screws, restore breaker power, and run a high-temp or pots-and-pans cycle with a fresh tablet to confirm a clean door release and full dissolution.
Common Causes
- Tall Dish Placement: The single most common culprit. A cutting board, baking sheet, or tall stockpot loaded into the front-left quadrant of the lower rack holds the spring door shut during the timed release.
- Gummed-up Door Hinge: Rinse aid and concentrated liquid soap seep into the dispenser hinge pin over months of use. That dried residue turns into a glue-like paste that beats on the tiny wire spring.
- Failed Wax Motor or Solenoid: An electrical open-circuit in the actuator coil leaves the mechanical catch locked up tight, even when the control board sends full release voltage.
- Low Water Temperature: If water enters the tub at under 110°F and the machine’s heating element is coated in thick lime scale or burnt out, the water never gets hot enough to dissolve compressed detergent powders or melt polyvinyl alcohol pod shells.
- Wet Detergent Cup at Loading: Pop a dry tablet into a wet dispenser cup, close the door, and let it sit for two hours before running the cycle. The moisture partially dissolves the tablet casing, gluing it to the plastic cup so hard it won’t drop even when the door pops wide open.
- Clogged Upper and Lower Spray Arm Holes: If lime or food debris blocks the directional nozzles, the spray arms stop spinning. Without moving water jets hitting the front door, the soap just sits there untouched.
Common Mistakes
- Throwing the Tablet into the Bottom of the Tub — A lot of homeowners give up on the dispenser and just toss the pod on the floor of the machine. That kills cleaning performance flat-out: the pre-rinse cycle flushes the detergent down the drain in the first eight minutes, and you’re left with plain dirty water for the 70-minute main wash.
- Loading Tablets with Wet Hands — Grabbing a gel pod with wet fingers starts the PVA melting process right away. By the time you close the dispenser cup, the pod’s already sticking to the plastic walls like industrial adhesive.
- Overtightening Inner Door Screws — When reinstalling inner door panels, folks often run Torx screws in with a power drill. That strips the soft sheet metal threads and warps the door frame, which leads to future air and steam leaks. Snug them by hand with a screwdriver.
- Ignoring Low Water Fill Levels — If your water inlet valve is clogged with sediment, the dishwasher might only fill with 1 gallon instead of the required 2 to 3 gallons. The circulation pump can’t build pressure without enough water, and then the spray arms stall while the detergent sits there undissolved.
Cost & Time Breakdown
| Task | DIY Cost | Pro Cost | Time |
|---|---|---|---|
| Clear rack & clean dispenser hinge | $0 | $100–$150 | 10–15 mins |
| Unclog spray arm jets | $0 | $110–$160 | 15–20 mins |
| Adjust water heater / run pre-fill tap | $0 | $90–$120 | 5 mins |
| Replace dispenser door spring/latch kit | $12–$25 | $150–$225 | 30–45 mins |
| Replace complete dispenser assembly | $45–$110 | $220–$340 | 45–60 mins |
| Replace circulation pump / heating element | $90–$220 | $350–$550 | 1–2 hours |
Tips & Prevention
- Run the Kitchen Tap First: Let your kitchen faucet run until hot water shows up before you start the dishwasher. That way the pre-rinse and main wash both begin with 120°F water instead of pushing 20 feet of cold pipe water into the machine.
- Dry the Cup Thoroughly: Wipe the inside of the dispenser cup with a dry dish towel before you drop a tablet or pod in there. A dry cup keeps the soap casing from sticking.
- Select 'High Temp' or 'Sanitize' in Winter: Ground water temperatures fall hard in winter. Picking high-temp cycles forces the dishwasher’s heating element to hold the timer until the water reaches full dissolution temperatures (typically 135°F–140°F).
- Inspect Spray Arms Monthly: Pull the bottom rack and spin both spray arms by hand. If an arm wobbles loose or catches on its spindle, pull it off and flush out mineral grit under the faucet.
- Run a Citric Acid Clean Cycle Every 90 Days: Hard water builds a crust of calcium carbonate over the dispenser hinge and heating element. Run an empty cycle with two tablespoons of food-grade citric acid or a commercial dishwasher cleaner to knock scale off the components.
When to Call a Professional
Replacing a dispenser latch or unclogging spray arms is a pretty straightforward Saturday job, but some failures go past simple hand tools. If your multimeter says the dispenser actuator is healthy, but you’re not getting any voltage to the door during the main wash cycle, the problem’s probably a burnt trace or fried relay on the main electronic control board. Diagnosing control boards means working around live line-voltage circuits inside the machine’s base.
Same deal if your dishwasher won’t heat water even after you put in a new heating element. That often points to a tripped high-limit thermostat, a melted wiring harness under the tub, or a failing circulation pump pressure switch. If you see scorched wiring terminals, smell electrical burning inside the door, or find standing water leaking into your kitchen subfloor beneath the appliance, shut off the breaker and call an authorized appliance repair technician. I pulled a water heater in Frisco last month that had exactly this kind of half-dead symptom trail — turned out the homeowner had three issues stacked on top of each other, not just one.
Frequently Asked Questions
Can I just toss the pod in the bottom of the dishwasher?
No, you shouldn’t toss pods into the bottom of the tub. Dishwashers always run a short pre-rinse cycle first, and that dumps out the initial water after 5 to 10 minutes. If your pod’s lying loose on the tub floor, it dissolves early and gets pumped down the drain with the food scraps, leaving your main 60-to-90-minute wash cycle with no soap at all.
Why is my detergent tablet half-dissolved and stuck to the door?
A half-dissolved tablet means the dispenser door opened late in the cycle or water spray couldn’t hit the door directly. This usually happens when a tall plate or skillet blocks the lower spray arm from spinning, or when the water inside the machine never reaches 120°F. Without heat and active spray pressure, the tablet melts into a paste instead of dissolving cleanly into the water.
How do I know if my dispenser door spring is broken?
Close the dispenser door until it clicks shut, then press the manual release button with your finger. The door should snap open quick and firm. If it slowly falls open, stays partly closed, or won’t move until you tug it with your fingernail, the small stainless steel torsion spring has either popped off its retaining tab or snapped clean in half.
Does the brand of detergent pod make a difference?
Yes, some compressed powder tablets take longer to break down than liquid-gel packs. Still, all the major brands are built to dissolve within a few minutes if your water temperature is between 120°F and 130°F. If you’ve got hard water or a low-temp wash cycle, switching to a liquid gel detergent or an all-liquid pod usually gives you faster dissolution than a hard-pressed powder block.
Can cold water keep a dishwasher pod from dissolving?
Cold water is one of the most common reasons pods fail to dissolve. The polyvinyl alcohol (PVA) film used to package modern pods needs water that’s at least 115°F to 120°F to break down completely. If your water heater’s set too low, or if the dishwasher’s internal heating element has burnt out, the pod’ll stay tough and rubbery through the whole wash cycle.
What is the wax motor on a dishwasher dispenser?
A wax motor is a small, quiet thermal actuator used in a lot of modern dishwashers to open the soap door. When the control board sends power to it, an internal heating resistor warms a small cylinder of wax. As the wax heats up, it expands and pushes a small metal pin outward, which releases the spring latch on your soap door. Once power cuts out, the wax cools down and contracts.
Why won't my dispenser door stay shut when loading?
If your dispenser door pops open right away when you try to close it, check the plastic latch hook for damage. Dried soap crumbs often pack into the tiny catch recess and keep the latch from grabbing the door hook. Clean the notch out with a toothpick. If the plastic catch’s chipped off, you’ll need a latch replacement kit or the whole dispenser box.
How hot should the water be inside my dishwasher?
Your incoming water should enter the dishwasher at a minimum of 120°F straight from your household plumbing. During the cycle, the dishwasher’s internal heating element will usually boost that temperature to between 135°F and 145°F for the main wash, and up to 155°F if you select a high-temp or sanitize rinse cycle. Anything under 120°F will have a rough time activating enzymes and melting detergent casings.
Related Articles
Keep troubleshooting with these hand-picked guides from FixlyGuide:
- Freezer Cold but Fridge Warm? 5 Causes and the Step-by-Step Fix — Freezer freezing but fridge warm? Learn how to diagnose a bad fan, stuck damper, or frosted coils with real multimeter tests and simple ste…
- Dishwasher Won't Fill With Water? 5 Causes and the Step-by-Step Fix — Dishwasher running dry? Learn how to diagnose a stuck float switch, unclog a water inlet valve, and test solenoid continuity with step-by-s…
- The $5 Part That Stops Your Fridge From Leaking (And Why It Fails) — A leaking refrigerator can lead to serious floor damage and appliance issues. Often, the culprit is a clogged defrost drain, a simple fix m…
- The 30-Minute Trick When Your Dishwasher Won't Drain (Plumbers Keep Secret) — Discover the real reasons your dishwasher isn't draining and how to fix it in under an hour, without calling a plumber.
- The Fiery Light Show: Why Your Microwave Is Sparking Inside — Microwave sparking is alarming, but often fixable with some DIY know-how, usually pointing to issues with the waveguide cover, metal object…
- Window Crank Won't Close Flush? 5 Causes and the Step-by-Step Fix — Is your casement window crank spinning or refusing to pull the sash tight? Here is how to diagnose stripped gears, bent tracks, and fix it…
Should you do this yourself?
Answer five quick questions before you start. Safety outranks savings every time.
Your experience with work like this
How high do you have to work?
Does the job involve any of these?
Will it need a permit?
Specialty tools
Free and instant. Educational guidance only — not a quote, inspection, or professional diagnosis.
What should this project cost?
Enter your project details for a realistic cost range before you call anyone.
Cost depends heavily on which system turns out to be the source.
- Regional adjustment
- National average
- Labor share (typical)
- ~$1,620
- Quotes to collect
- 3 written estimates
Educational estimate based on national averages — not a binding quote. Always confirm with written local estimates.
Get the print-ready PDF of this guide
A clean, ad-free, printable version you can keep on your phone or pin to the workshop wall. Free with a FixlyGuide account.
- Print-optimized layout
- Tools, materials & every step included
- Saved to your account
Frequently asked questions
Can I just toss the pod in the bottom of the dishwasher?+
No, you shouldn't toss pods into the bottom of the tub. Dishwashers always run a short pre-rinse cycle first, which drains out all that initial water after 5 to 10 minutes. If your pod is lying loose on the tub floor, it dissolves right away and gets pumped down the drain with the food scraps, leaving your main 60-to-90-minute wash cycle without any soap at all.
Why is my detergent tablet half-dissolved and stuck to the door?+
A half-dissolved tablet means the dispenser door opened late in the cycle or water spray couldn't hit the door directly. This usually happens when a tall plate or skillet blocks the lower spray arm from spinning, or when the water inside the machine never reaches 120°F. Without high heat and active spray pressure, the tablet melts into a paste instead of dissolving cleanly into the water.
How do I know if my dispenser door spring is broken?+
Close the dispenser door until it clicks shut, then press the manual release button with your finger. The door should snap open quickly and firmly. If the door slowly falls open, stays partially closed, or doesn't move until you pull it with your fingernail, the small stainless steel torsion spring has either popped off its retaining tab or snapped completely.
Does the brand of detergent pod make a difference?+
Yes, certain compressed powder tablets take longer to break down than liquid-gel packs. However, all major brands are designed to dissolve within a few minutes if your water temperature is between 120°F and 130°F. If you have hard water or a low-temperature wash cycle, switching to a liquid gel detergent or an all-liquid pod usually yields much faster dissolution than a hard-pressed powder block.
Can cold water keep a dishwasher pod from dissolving?+
Cold water is one of the most common reasons pods fail to dissolve. The polyvinyl alcohol (PVA) film used to package modern pods needs water that is at least 115°F to 120°F to break down completely. If your water heater is set too low, or if the dishwasher's internal heating element has burnt out, the pod will remain tough and rubbery throughout the entire wash cycle.
What is the wax motor on a dishwasher dispenser?+
A wax motor is a small, quiet thermal actuator used in many modern dishwashers to open the soap door. When the control board sends power to it, an internal heating resistor warms a small cylinder of wax. As the wax heats up, it expands and pushes a small metal pin outward, which releases the spring latch on your soap door. Once power cuts out, the wax cools down and contracts.
Why won't my dispenser door stay shut when loading?+
If your dispenser door pops open immediately when you try to close it, check the plastic latch hook for damage. Dried soap crumbs often pack into the tiny catch recess, preventing the latch from grabbing the door hook. Clean the notch out with a toothpick. If the plastic catch has chipped off, you'll need to install a latch replacement kit or replace the entire dispenser box.
How hot should the water be inside my dishwasher?+
Your incoming water should enter the dishwasher at a minimum of 120°F straight from your household plumbing. During the cycle, the dishwasher's internal heating element will usually boost that temperature to between 135°F and 145°F for the main wash, and up to 155°F if you select a high-temp or sanitize rinse cycle. Anything under 120°F will struggle to activate enzymes and melt detergent casings.
Discussion
Loading comments…