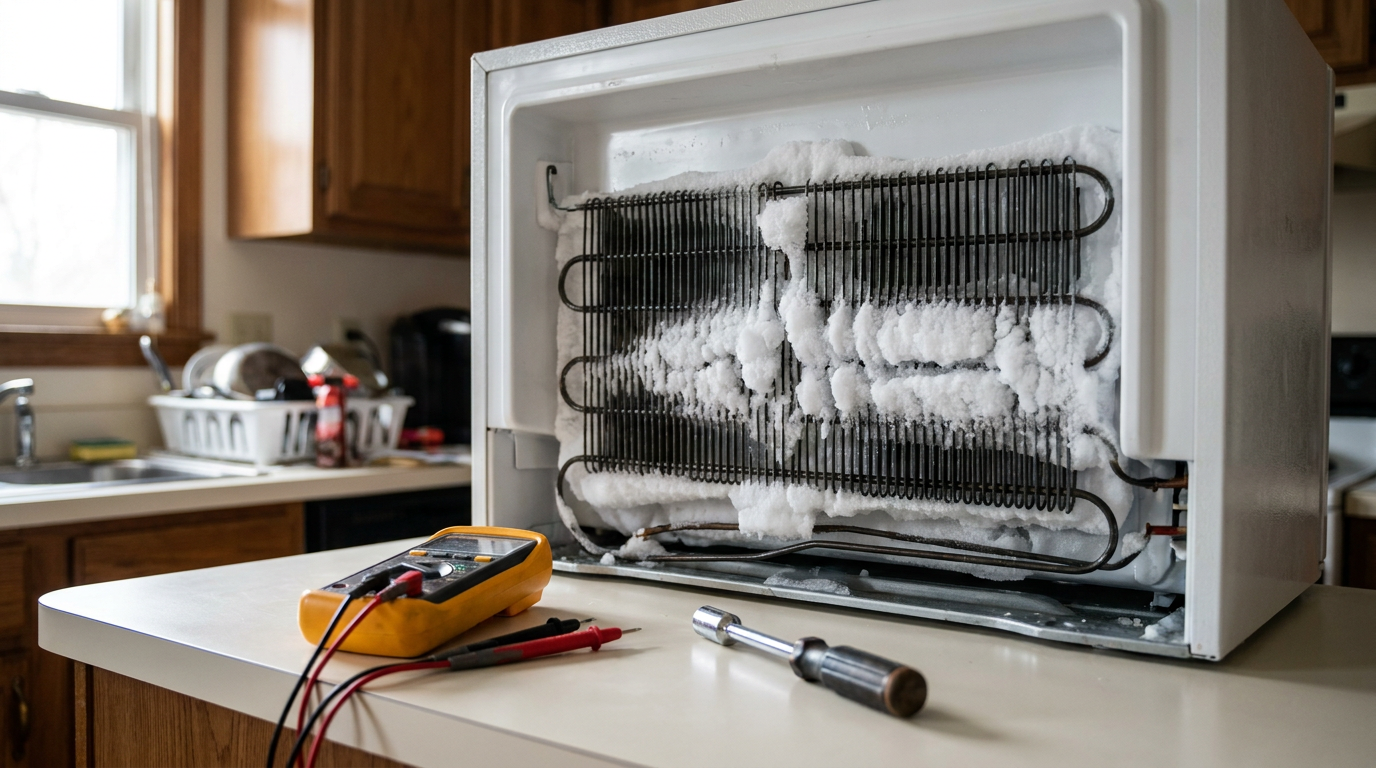
- Symptom branch A (Solid Ice): Air can’t pass through the packed fins to reach the fresh food duct. Jump to Step 8.
- Symptom branch B (Coils Lightly Frosted or Dry): The fan or damper is the main suspect. Move to Step 7.
- Symptom branch C (Frost Only on the Top Two Loops): Stop here. You’ve likely got a refrigerant leak or a weak compressor. That’s licensed-tech territory.
HVAC · High energy usage
| Project category | HVAC |
|---|---|
| Problem type | High energy usage |
| Trade required | HVAC |
| Urgency | Planned project |
| Safety risk | Low safety risk |
| DIY suitability | DIY for experienced homeowners |
| Cost category | High cost |
| Typical timeline | Assessment within weeks; replacement planned off-season |
| Contractor type | Licensed HVAC technician |
Repair option
Duct sealing, insulation, and a tune-up before touching the equipment.
Replacement option
High-efficiency replacement sized by a load calculation, not a rule of thumb.
Common causes
- Aging, low-efficiency equipment
- Leaking ducts losing conditioned air
- Insufficient attic insulation
- Oversized system short-cycling
Relevant tools:project cost estimatorrepair or replace
Published October 31, 2026Last updated October 31, 2026
Tools & materials you'll need
Affiliate linksAs an Amazon Associate FixlyGuide earns from qualifying purchases — at no extra cost to you. Prices and availability are accurate as of publication and subject to change.
Quick Answer
If your freezer stays rock-solid at 0°F while your fresh food compartment hovers at a lukewarm 50°F, you’re not looking at a dead compressor. You’re looking at an airflow problem. Nine times out of ten, it’s a bad evaporator fan motor, an evaporator coil packed in ice because the defrost system quit doing its job, or an air damper that’s stuck shut. I can usually pin down the bad part in about 30 minutes with a multi-bit nut driver and a basic digital multimeter.
The Problem
You reach into the fridge for a gallon of milk, crack the cap, and take a whiff. Nope. Gone sour. Butter’s soft too—spreads like it’s been sitting on the counter. Then you swing open the freezer door, expecting a slushy mess, and instead the ice cream’s hard as a brick, the ice cubes are dry, and the thermometer says a chilly -2°F.
So what’s going on?
This is the classic one-compartment-good, one-compartment-warm failure. It fools homeowners all the time. They figure the refrigerator must have two cooling systems and one of ’em quit. Then they start shopping for a new appliance and talking themselves into a $2,000 mistake. Fact is, a residential refrigerator only makes cold in one spot: the evaporator coils behind the back wall of the freezer. One cooling loop handles both sections. If the freezer’s fine and the fresh food side is warm, the system’s still making cold. That cold just isn’t getting where it needs to go.
How It Works
Think of your refrigerator like a little enclosed wind tunnel. The compressor squeezes the refrigerant vapor and pushes it through the condenser coils on the outside, dumping heat into the kitchen. Then that cooled liquid refrigerant goes through a tiny expansion tube into the evaporator coils tucked behind the freezer’s back panel. As it expands and boils, it sucks heat out of the freezer cabinet and drops the coil temp down around -10°F to -20°F.
Sitting right above those frosty coils is a small electric fan—the evaporator fan motor. Its whole job is to pull warm air from both compartments across those cold fins, chill it, and blow that sub-zero air back out. Some of that air stays in the freezer. The rest gets routed through a plastic tunnel over to the fresh food section.
That tunnel works with a motorized gate called the air damper. When the fresh food compartment creeps above 38°F, the control board tells that damper to open up and let freezer air pour into the top section. Return vents down by the crisper drawers pull the slightly warmed air back toward the freezer so the cycle keeps rolling. If that loop gets choked anywhere—fan quits, damper sticks, frost turns the evaporator into a solid block, or the return path freezes shut—the fridge warms up while the freezer keeps right on trucking.
I pulled a refrigerator in Frisco last month that had exactly this leak in airflow—well, not a leak, really, but a total ice choke behind the panel. Looked like somebody packed the coil in snow. Same story, different house.
Step-by-Step Fix
Before you start pulling panels off, get the food squared away. Toss the dairy and anything perishable into a cooler with ice packs. If you keep the freezer door shut while you prep, the frozen food will hold for an hour or two just fine.
-
Check the Temperature Settings and Air Return Vents — Start with the cheap stuff. Free, actually. Look at the control panel and make sure nobody bumped the fridge setting to 7 or “warm” while reaching for salsa. Then check the vents inside the fresh food compartment, especially the back wall and the floor by the crisper drawers. If a pack of chicken breasts or a pile of soda cans is shoved right against the intake or return grilles, you’ve basically strangled the airflow. Pull everything back at least 2 inches and give it 8 hours to settle down.
- Safety: None needed here.
- If this doesn’t work: If the vents are open and the controls are set to 37°F/0°F, move on to the fan test.
-
Test the Door and Light Switches — When you open the fresh food door, the light comes on and the evaporator fan often shuts down so it doesn’t blow cold air in your face. Find the spring-loaded plunger switch or magnetic reed sensor on the door jamb. With the freezer open and the fridge running, press and hold that switch with your thumb. Listen close. You should hear the evaporator fan kick up in 2 to 3 seconds.
- Tools: Just your thumb or a small piece of masking tape if you want to hold the switch down.
- If this doesn’t work: If you hold the switch and hear nothing from the freezer, the fan motor or its power circuit’s got a problem.
-
Inspect the Air Damper Vent for Movement — Find the plastic diffuser housing, usually up in the top-left or top-center of the fresh food compartment. Shine a flashlight into the louvers. Hold the door switch closed so the unit thinks the door’s shut. Look inside that vent—you should see a small flap or baffle wide open. Put your hand under the louvers. You ought to feel a steady blast of cold air.
- If this doesn’t work: If the flap stays closed, or you hear clicking or grinding like stripped plastic gears, the damper assembly’s toast and needs replacement.
-
Cut the Power to the Refrigerator — Don’t mess with wiring or take panels off a live appliance. Pull the fridge away from the wall and unplug it from the 120V outlet. If it’s built in or jammed into cabinetry, head to the breaker panel and shut off the dedicated 15-amp or 20-amp refrigerator breaker.
- Safety: Open the door and make sure the interior LED lights are dead dark before you touch anything.
-
Disassemble the Freezer Rear Interior Wall — Open the freezer all the way. Pull out the ice bucket, wire shelves, and plastic bins. Most modern units use a two-piece plastic rear panel held with 1/4-inch or 5/16-inch hex-head screws. Back those out with a nut driver. Then pry the panel loose from the top edge. Unplug the small ground wire or wiring harness clip tied to the panel, and set it aside.
- Tools: 1/4-inch and 5/16-inch magnetic nut drivers, flathead screwdriver for stubborn clips.
-
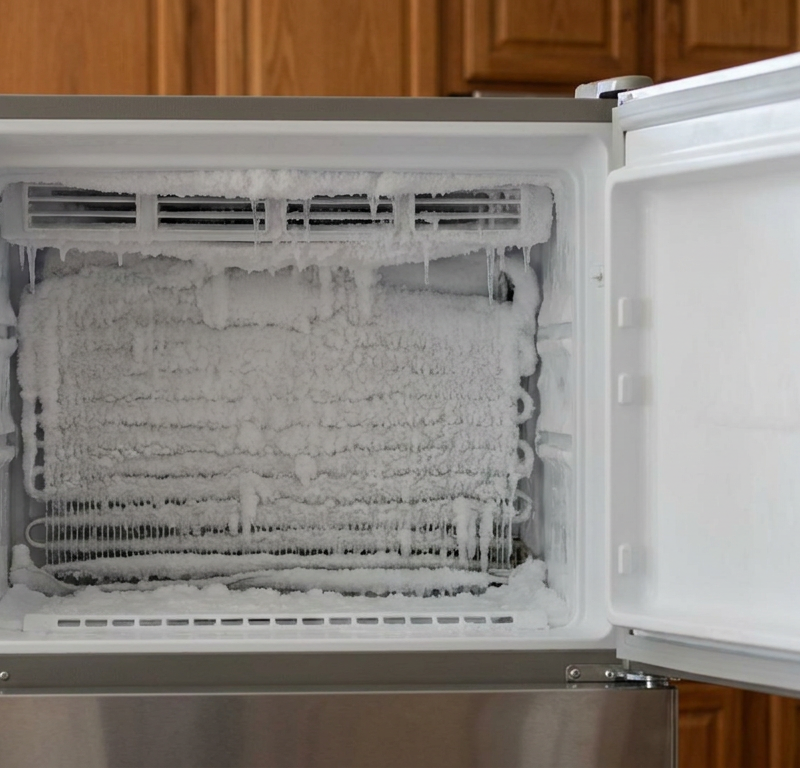
Diagnose the Evaporator Coil Frost Pattern — Look straight at the aluminum evaporator fins. A healthy system will have a light, even dusting of white frost across the whole coil. That’s what you want. If the coils are buried under a solid block of white snow and ice that looks like a glacier, the defrost system has failed.
- Symptom branch A (Solid Ice): Air can’t pass through the packed fins to reach the fresh food duct. Jump to Step 8.
- Symptom branch B (Coils Lightly Frosted or Dry): The fan or damper is the main suspect. Move to Step 7.
- Symptom branch C (Frost Only on the Top Two Loops): Stop here. You’ve likely got a refrigerant leak or a weak compressor. That’s licensed-tech territory.
-
Test and Replace the Evaporator Fan Motor — With the coils exposed, look right above them for the fan. Spin the plastic blade with your finger. It should turn easy, no squeak, no drag. If it binds, wobbles, or feels sticky, the bearings are shot. Next, unclip the wiring harness and pop the motor out of its rubber grommets. Set your digital multimeter to ohms and touch the probes to the motor terminals.
- Tools: Digital multimeter, needle-nose pliers.
- Data point: A standard AC fan motor should read between 50 and 200 ohms across the terminals. If you get open-loop (“OL”) or infinite resistance, the winding’s burned up.
- Fix: Swap in an OEM direct-fit motor, reconnect the harness, and make sure the fan blade sits firmly on the shaft with the bevel facing the correct airflow direction.
-
Test the Defrost Thermostat (Bimetal) and Heating Element — If you found a solid wall of ice in Step 6, grab the meter again. Find the heating element under the aluminum coils—it’ll look like a thick black rod or a glass quartz tube. Unplug its leads and test resistance across the terminals. A good element reads between 10 and 50 ohms; if it shows open circuit (“OL”), the element’s burned out. Next, locate the defrost bimetal thermostat—a round metal puck clipped to the top tubing of the evaporator. While it’s still ice-cold (below 32°F), test it for continuity. It should read near 0 ohms, closed circuit. If it reads open (“OL”) while it’s buried in ice, the switch is stuck open and never tells the heater to kick on.
- Action: Replace whichever part failed the continuity test. Defrost bimetal thermostats usually come with wire leads that need water-resistant, gel-filled crimps.
-
Melt the Frost Blockage with a Hair Dryer — Even after you put in new defrost parts, that ice isn’t going anywhere on its own. Set a regular hair dryer to medium heat. Wave the warm air slowly across the aluminum fins, top to bottom. Don’t park the heat on one spot—hold it there too long and you’ll warp the plastic liner or wreck the fragile aluminum tubing.
- Caution: Put an old bath towel on the freezer floor to catch the meltwater.
- Drain check: Make sure the water runs down the drain hole at the bottom center trough. If it pools up and spills onto the freezer floor, clear the drain line with hot water and a turkey baster.
-
Reinstall Panels and Run a 24-Hour Thermal Reset — Hook up all the electrical connectors to the freezer back panel. Line up the tabs and drive the 1/4-inch screws back in. Snug them down, but don’t crank on them and strip the plastic. Put the shelves and baskets back. Plug the fridge back into the outlet. Set both compartments to their factory middle settings (typically 37°F for fresh food, 0°F for the freezer). Then leave it alone. Doors shut. No peeking. A residential refrigerator can take anywhere from 12 to 24 hours to get back down to safe temps.
Common Causes
- Failed Defrost System (Heater, Thermostat, or Control Board): Moisture gets into the freezer every time the door opens. In a working fridge, an electric heater comes on every 8 to 12 hours and melts that frost off the evaporator coils so air can move. If the bimetal thermostat, heating rod, or control timer fails, the frost keeps building until it turns into a solid chunk of ice. The freezer still freezes because all that ice is sitting right there, but the fan can’t pull air through it to feed the fridge.
- Burnt-Out Evaporator Fan Motor: The compressor can run day and night and still keep the freezer at sub-zero temperatures, but if that little fan isn’t spinning at 2,000 RPM, cold air just sits low in the appliance. Natural convection won’t lift dense, sub-zero air up into the fresh food section.
- Jammed or Stripped Air Damper Assembly: The damper has a small 120V or 12V DC stepper motor that opens and closes a plastic flap. Condensation can freeze that flap in place, or the teeth on the plastic gears can strip out. If it sticks shut, the fresh food compartment gets cut off from the cooling system.
- Frozen Return Air Tunnel: Cold air can’t get into the fresh food section unless the air already in there has somewhere to go. Low return vents—usually behind the crisper bins—let warm air cycle back to the evaporator. If moisture drips into that return path and freezes solid, it makes an airlock. Cold air stops moving even if the fan runs and the damper opens wide.
- Blocked Cabinet Vents: Big cereal boxes, plastic grocery bags, or bulky sheet pans shoved flush against the air vents kill the convection loop. That’s probably the most common non-mechanical reason for warm shelves.
Common Mistakes
- Leaving the hair dryer in one place. Folks get impatient melting a 3-inch block of frost and point a blow dryer or heat gun right at one corner on high. Bad move. The thin polystyrene liner inside the cabinet can warp, bubble, and melt at temperatures above 175°F. Once that liner goes, the cabinet loses its seal and the fridge is basically done. Keep the dryer moving.
- Chipping at coil ice with screwdrivers or butter knives. This is how you turn a $20 repair into a $1,500 headache. Evaporator coils are soft, thin aluminum. One slip with a flathead or pick and you’ll puncture the tube, dump the whole refrigerant charge, and hear that ugly hiss. You can’t really patch refrigerant tubing with epoxy. You’re buying a new fridge.
- Replacing the control board first. A lot of DIYers see a warm fridge and decide the main board’s fried. Then they spend $150–$300 on a new PCB. Nine times out of ten, it’s a $25 bimetal thermostat or a dead fan motor. Don’t replace the main control board until you’ve checked power and resistance right at the parts with a meter.
- Failing to clear the defrost drain hole. If you melt the coil ice and ignore the drain hole under the evaporator, the water’s got nowhere to go. It pools in the freezer, freezes into a sheet, and plugs the return air channel again within 48 hours. Always squirt hot water down the drain hole until you hear it splashing into the drain pan under the fridge.
- Checking temperature after only two hours. Refrigerators cool the air fast, but food, shelves, and plastic walls hang onto heat. If you keep opening the door every thirty minutes to see if it’s fixed, you’re dumping out all the cold you just made. Let the closed unit run undisturbed for at least 12 hours before you call it a bad repair.
Cost & Time Breakdown
| Task | DIY Cost | Pro Cost | Active Time |
|---|---|---|---|
| Clear Air Vents & Thermal Reset | $0 | $100–$150 (Service Call) | 15 minutes |
| Evaporator Fan Motor Replacement | $30–$75 | $200–$350 | 45 minutes |
| Defrost Bimetal Thermostat Replacement | $15–$35 | $175–$275 | 45 minutes |
| Defrost Heater Element Replacement | $25–$60 | $200–$300 | 60 minutes |
| Air Damper Control Assembly Swap | $40–$90 | $225–$375 | 45 minutes |
| Manual Coil De-Icing & Drain Clear | $0 | $150–$250 | 60 minutes |
Tips & Prevention
- Clean Condenser Coils Every 6 to 12 Months: Pop off the front toe-kick grille and vacuum the coils under the fridge with a skinny crevice tool or condenser brush. Pet hair and dust pile up fast, especially in warm places like North Texas where the AC runs nonstop. Dirty coils make the compressor run twice as long, and that extra run time pumps out more moisture that turns into frost inside the freezer.
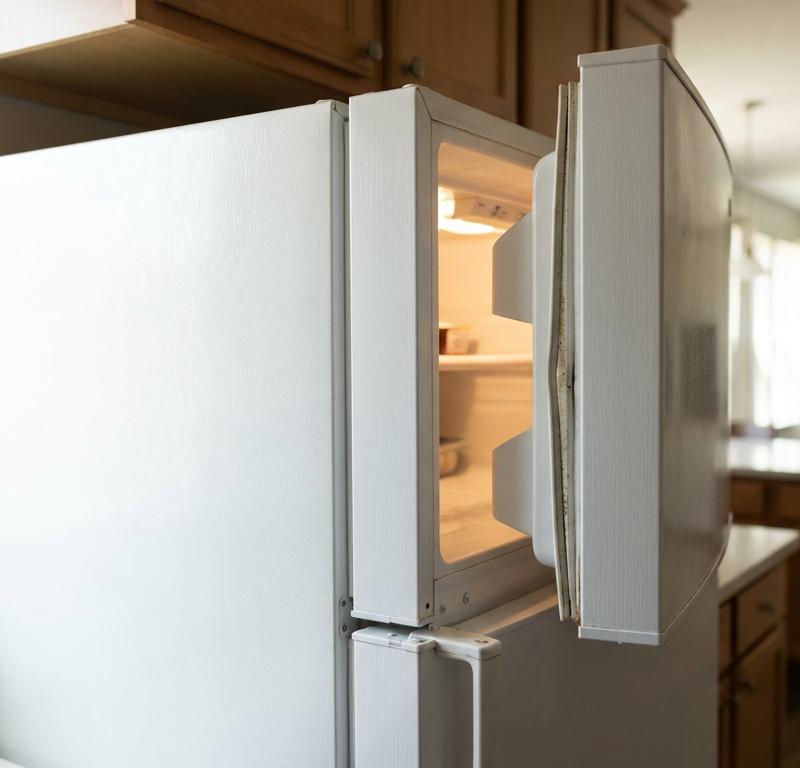
- Inspect the Perimeter Door Gaskets: Grab a dollar bill, set it against the cabinet face, and shut the door on it. Pull it out. You should feel some solid resistance. If it slides out easy, the vinyl seal is split, stiff, or warped. Leaky gaskets pull humid kitchen air into the box 24/7, and that’ll overwhelm the defrost cycle and ice up the evaporator.
- Keep Temperatures at the Golden Numbers: Set the fresh food compartment to 37°F (3°C) and the freezer to 0°F (-18°F). Making the freezer colder, like -10°F, doesn’t make food safer. It just makes the evaporator work harder, loads it with more frost, and makes damper freezing a whole lot more likely.
- Maintain 2 Inches of Breathing Room: Keep food packages at least 2 inches away from the walls inside both compartments. Don’t wedge bags against the rear freezer panel or the crisper return vents. Airflow needs clean, open paths to keep the fresh food section cold.
- Listen for Damper Chatter: Pay attention to weird noises from the top corner of the fresh food cabinet. If you hear a steady click-click-click-click for 15 to 30 seconds every time you open or close the door, the plastic gears inside the damper motor are slipping. Order the replacement part now before the flap strips out completely and sticks shut.
When to Call a Professional
Airflow parts are fair game for a handy homeowner. Sealed system problems aren’t. If you pull the freezer back panel and find the evaporator coils bone dry, or if you see thick frost on just the first two or three inches of tubing while the rest of the coil is bare metal, you’ve probably got a refrigerant leak or a weak compressor with blown internal valves.
Fixing a refrigerant leak takes EPA Section 608 certification, vacuum pumps, nitrogen purging rigs, and an oxy-acetylene torch to braze new lines. If you put the meter on the compressor and find open windings, or if the compressor shell is blistering hot (above 150°F) and keeps shutting off on thermal overload every two minutes, stop there. At that point, you need a licensed appliance repair tech to look at the sealed system—or it’s time to cut bait and replace the unit.
Frequently Asked Questions
Can I just leave the fridge unplugged for 24 hours to fix this?
Yes, a manual 24-hour defrost by leaving both doors wide open will melt the ice choking the coils and return vents, and that can get cooling back temporarily when you plug it in again. But if you don’t replace the bad part underneath it all—like a failed defrost heater or bimetal thermostat—the frost will come right back, and the fresh food compartment will warm up again within 3 to 7 days.
Why does my freezer keep freezing food if the defrost system is broken?
The defrost system’s job is just to melt thin frost off the cooling coils behind the back wall. It doesn’t control whether food freezes. In fact, when the defrost system fails, the freezer often gets even colder at first because the compressor keeps running nonstop trying to force cold air into the warm fresh food compartment.
How do I know if my evaporator fan is getting power?
Set your digital multimeter to measure AC voltage, or DC voltage if your newer fridge uses a variable-speed brushless motor. Hold the door switch down, then carefully put the meter probes into the fan wiring harness connector. If you read 120V AC, or 9-13V DC on variable units, and the fan still won’t spin, the motor windings are dead and the fan has to be replaced.
Is the air damper the same thing as the thermostat?
No. A thermostat, or thermistor, is the sensor that reads temperature and sends resistance data to the control board. The air damper is a mechanical flap with a motorized actuator that physically opens and closes the air passage between the freezer and the fridge based on what the thermostat reads.
Why is there water pooling beneath my crisper drawers?
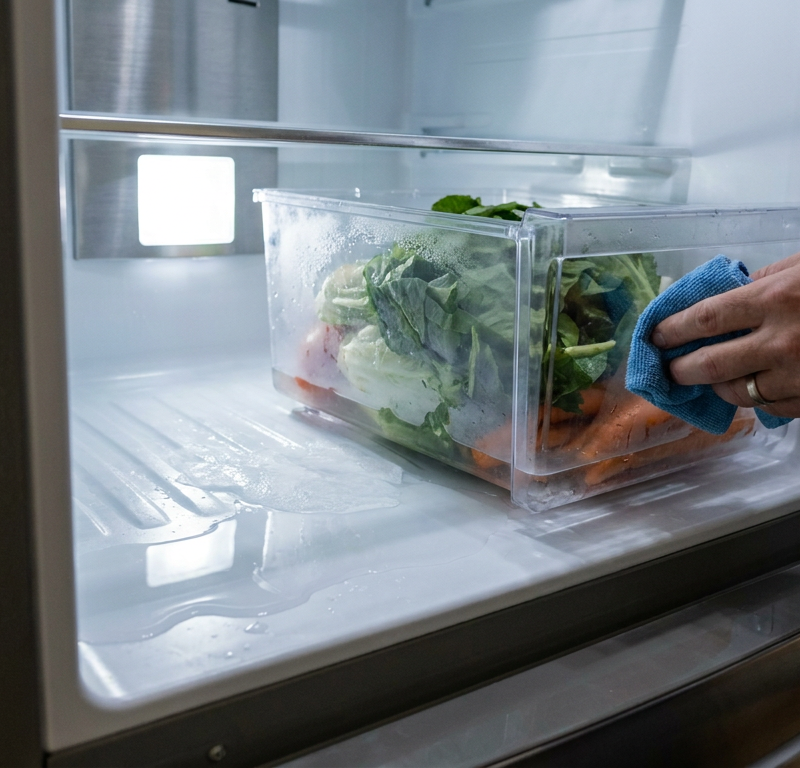
When the evaporator coils defrost, the meltwater drips into a small catch trough and goes out through a rubber drain hose to the drain pan under the fridge. If that drain line gets clogged with algae, mold, or ice, the water overflows the trough, runs down the freezer floor, or sneaks behind the plastic liner and pools under the crisper drawers in the fresh food section.
How long does a refrigerator take to get cold again after replacing parts?
It takes between 12 and 24 hours for a refrigerator to settle back in after a repair. The air coming out of the vents might feel cold within 30 minutes, but the plastic liners, glass shelves, and the food itself take much longer to get down to a steady 37°F. Don’t load warm groceries into it during that recovery window.
Can a dirty condenser coil make the fridge warm and the freezer cold?
Usually, no. Dirty condenser coils hurt the heat exchange for the whole appliance, which normally makes both compartments warm up while the compressor runs hot and constant. If your freezer is sitting pretty at 0°F, the condenser side is moving enough heat. Your problem’s almost certainly an airflow blockage inside the cabinet.
Can I manually force my refrigerator into a defrost cycle?
Yes, most modern electronic refrigerators have a forced-defrost mode you can trigger with a specific button sequence on the digital display, like holding the door alarm and water filter buttons at the same time. Older units often have a mechanical defrost timer behind the front toe-kick or inside the control housing with a slotted dial you can turn clockwise with a flathead screwdriver until it clicks into defrost mode.
What causes an air damper to freeze shut?
An air damper usually freezes shut because there’s too much humidity inside the cabinet. That can happen if the fresh food door gasket has a tear, somebody leaves the door ajar, or warm, unsealed liquids sit on the top shelves right under the vent. The moist air hits that sub-zero blast from the freezer, condenses, and freezes the damper’s plastic hinge.
Related Articles
Keep troubleshooting with these hand-picked guides from FixlyGuide:
- The $5 Part That Stops Your Fridge From Leaking (And Why It Fails) — A leaking refrigerator can lead to serious floor damage and appliance issues. Often, the culprit is a clogged defrost drain, a simple fix m…
- Dishwasher Won't Fill With Water? 5 Causes and the Step-by-Step Fix — Dishwasher running dry? Learn how to diagnose a stuck float switch, unclog a water inlet valve, and test solenoid continuity with step-by-s…
- The 30-Minute Trick When Your Dishwasher Won't Drain (Plumbers Keep Secret) — Discover the real reasons your dishwasher isn't draining and how to fix it in under an hour, without calling a plumber.
- Water Under Crisper Drawers? 5 Causes and the Step-by-Step Fix — Water pooling under your refrigerator crisper drawers is almost always caused by a frozen or clogged defrost drain line. Here is how to tha…
- The #1 Mistake Homeowners Make When Their Dryer Stops Drying (And How to Fix It Free) — If your dryer is taking too long to dry clothes, the most common culprit is a clogged vent, which can be easily fixed with simple tools.
- The #1 Reason Your AC Blows Warm Air (And It's Not What You Think) — A dirty air filter is often the overlooked culprit behind an air conditioner blowing warm air, hindering its ability to cool your home effi…
Should you do this yourself?
Answer five quick questions before you start. Safety outranks savings every time.
Your experience with work like this
How high do you have to work?
Does the job involve any of these?
Will it need a permit?
Specialty tools
Free and instant. Educational guidance only — not a quote, inspection, or professional diagnosis.
What should this project cost?
Enter your project details for a realistic cost range before you call anyone.
Cost depends heavily on which system turns out to be the source.
- Regional adjustment
- National average
- Labor share (typical)
- ~$1,620
- Quotes to collect
- 3 written estimates
Educational estimate based on national averages — not a binding quote. Always confirm with written local estimates.
Fixly Project Decision Box
- DIY difficulty
- Advanced
- Estimated time
- Homeowner checks 20–30 minutes
- Cost level
- Moderate
Main tools / materials
- Clean air filter
- Garden hose for condenser coils
- Shop vac for the condensate line
When to stop and call a pro
- Burning smell, smoke, or a tripping breaker
- Refrigerant lines iced over or hissing
- Any work inside the sealed refrigerant circuit (EPA-licensed only)
- Gas smell near a furnace — leave and call the utility
Need professional help?
Find an HVAC Pro Near YouGet the print-ready PDF of this guide
A clean, ad-free, printable version you can keep on your phone or pin to the workshop wall. Free with a FixlyGuide account.
- Print-optimized layout
- Tools, materials & every step included
- Saved to your account
Frequently asked questions
Can I just leave the fridge unplugged for 24 hours to fix this?+
Yes, doing a manual 24-hour defrost by leaving both doors open will melt all the ice choking the coils and return vents, temporarily restoring cooling when you plug it back in. However, if you don't replace the underlying failed component (like a bad defrost heater or bimetal thermostat), the frost will build right back up, and your fresh food compartment will turn warm again within 3 to 7 days.
Why does my freezer keep freezing food if the defrost system is broken?+
The defrost system's sole job is to melt thin ice off the cooling coils behind the back wall; it has nothing to do with keeping your food frozen. In fact, when the defrost system breaks, the freezer often stays rock solid because the compressor runs non-stop trying to satisfy the warm thermostat in the fresh food compartment.
How do I know if my evaporator fan is getting power?+
Set your digital multimeter to measure AC voltage (or DC voltage if your modern fridge uses a variable-speed brushless motor). With the door switch held down, carefully insert the meter probes into the fan's wiring harness connector. If the meter reads 120V AC (or 9-13V DC for variable units) but the fan motor isn't spinning, the motor's internal windings are dead and the fan must be replaced.
Is the air damper the same thing as the thermostat?+
No. A thermostat (or thermistor) is an electronic sensor that reads cabinet temperature and sends resistance data to the control board. The air damper is a mechanical flap with a motorized actuator that physically opens and closes the air passage between the freezer and the fridge based on what the thermostat signals.
Why is there water pooling beneath my crisper drawers?+
When the evaporator coils defrost, the melted water drips into a small catch trough and exits through a rubber drain tube down to the drain pan under the fridge. If that drain line gets plugged with algae, mold, or ice, the defrost water overflows the trough, runs down the freezer floor, or sneaks behind the plastic paneling and pools under the crisper drawers.
How long does a refrigerator take to get cold again after replacing parts?+
It takes between 12 and 24 hours for a refrigerator to stabilize completely after a repair. While the air coming out of the vents will feel cold within 30 minutes, it takes many hours for the plastic liners, glass shelves, and your stored food to pull down to a safe, stable 37°F. Avoid loading warm groceries into the box during this recovery window.
Can a dirty condenser coil make the fridge warm and the freezer cold?+
Generally, no. Dirty condenser coils reduce the overall heat-exchange efficiency of the entire appliance, which usually causes both compartments to warm up simultaneously while the compressor overheats. If your freezer is rock solid at 0°F, your condenser coils are exchanging enough heat; the issue is almost certainly an internal airflow blockage between the two sections.
Can I manually force my refrigerator into a defrost cycle?+
Yes, most modern electronic refrigerators have a forced-defrost diagnostic mode you can trigger using specific button sequences on the digital display (such as holding the door alarm and water filter buttons simultaneously). Older units often have a mechanical defrost timer located behind the front toe-kick or inside the control housing with a slotted dial you can turn clockwise with a flathead screwdriver until it clicks into defrost mode.
Discussion
Loading comments…