- The $5 Part That Stops Your Fridge From Leaking (And Why It Fails) — A leaking refrigerator can lead to serious floor damage and appliance issues. Often, the culprit is a clogged defrost drain, a simple fix m…
- Your Dishwasher Dishes Come Out Cloudy? It's This, Not Soap — Tired of cloudy glasses and spotty plates? The unsightly white residue from your dishwasher is almost always caused by hard water mineral d…
- Dishwasher Won't Fill With Water? 5 Causes and the Step-by-Step Fix — Dishwasher running dry? Learn how to diagnose a stuck float switch, unclog a water inlet valve, and test solenoid continuity with step-by-s…
- That 15-Minute Brew? Your Coffee Maker's Secret Clog — A slow-dripping coffee maker is almost always a sign of internal mineral buildup, not a faulty machine, and a simple vinegar descaling can…
- Freezer Frost Buildup? 6 Causes and How to Fix the Ice Yourself — Stop thick ice from choking your freezer. Step-by-step diagnosis and repairs for blocked drains, failed defrost heaters, bad bimetal switch…
Plumbing · Clog
| Project category | Plumbing |
|---|---|
| Problem type | Clog |
| Trade required | Plumbing |
| Urgency | Soon — within weeks |
| Safety risk | Low safety risk |
| DIY suitability | DIY friendly |
| Cost category | Low cost |
| Typical timeline | Same-day DIY attempt; pro visit within a day or two |
| Contractor type | Licensed plumber |
Repair option
Plunger, hand auger, or trap cleanout before chemicals.
Replacement option
Line replacement when clogs return in the same spot repeatedly.
Common causes
- Hair and soap buildup in the trap
- Grease cooling in the branch line
- Flushed wipes or foreign objects
Relevant tools:diy difficultydiy or hire a pro
Published October 27, 2026Last updated October 27, 2026
Tools & materials you'll need
Affiliate links- AmazonKitchen turkey baster1 · Clean, 2 oz capacity or larger
- AmazonFlexible 1/4-inch vinyl tubing or weed trimmer line2 ft · At least 24 inches long for snaking
- AmazonNut driver set (1/4-inch and 5/16-inch)1 set · For rear access and freezer panels
- AmazonPlastic putty knife1 · Do not use metal scrapers on plastic liners
- AmazonMicrofiber towels or shop vac3-4 towels · For soaking up standing floor water
- AmazonFlashlight or headlamp1 · For inspecting dark compressor bay and coils
As an Amazon Associate FixlyGuide earns from qualifying purchases — at no extra cost to you. Prices and availability are accurate as of publication and subject to change.
Quick Answer
If water pools under your crisper drawers, your defrost drain is frozen solid or clogged with algae and food debris. Hot water, a 1/4-inch flexible tubing snake, and an inexpensive turkey baster will clear the blockage in about 45 minutes. I’ve fixed this one a bunch of times, and a simple copper or aluminum drain heater clip on the defrost element keeps it from icing up again.
The Problem
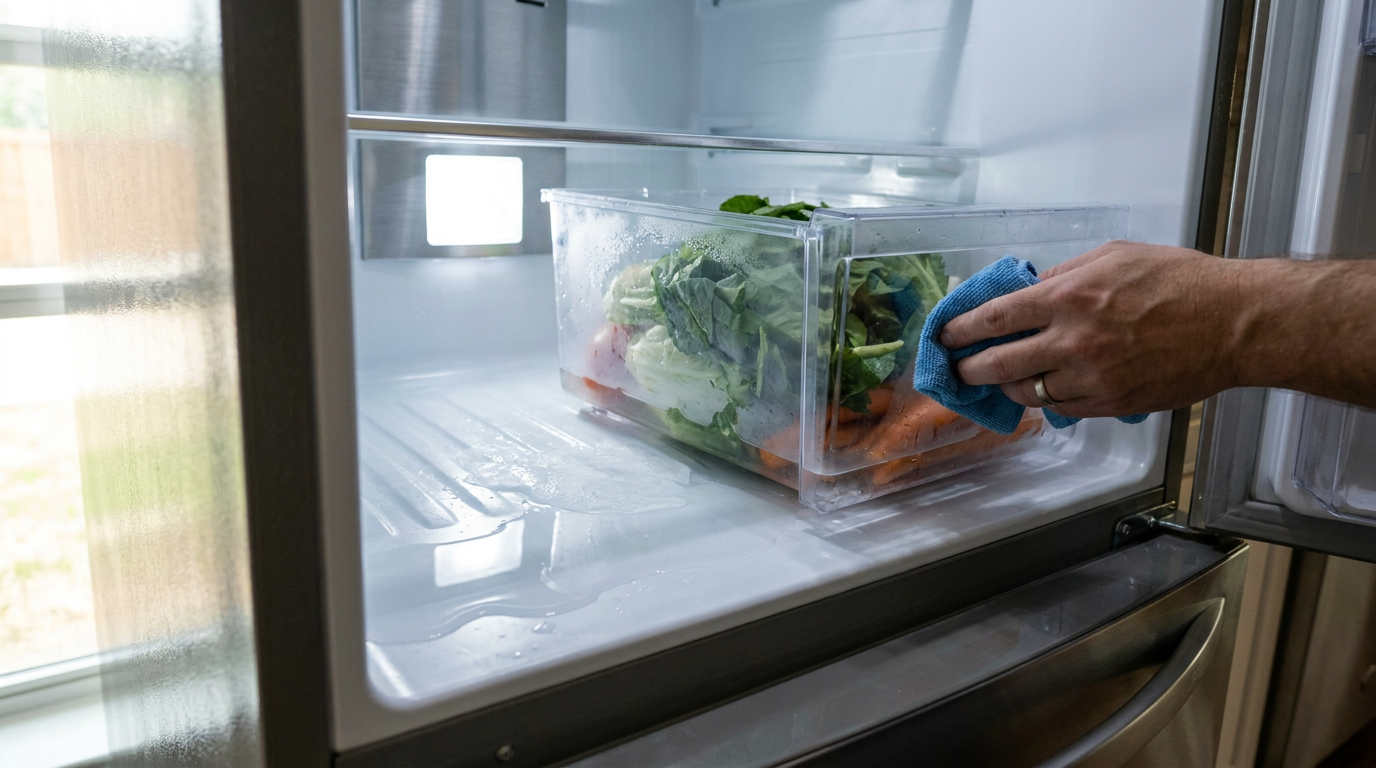
You pull open your refrigerator's produce bin to grab carrots or lettuce, only to find the bottom drawer floating in a quarter-inch of chilly water. Even worse, pull the drawer out entirely and you discover a solid sheet of ice coating the plastic floor of the fresh food compartment.
Water isn't coming from a busted gallon of milk. It isn't leaking from the water filter housing, either.
When a refrigerator enters its automated defrost cycle, melting frost drops off the evaporator coils and lands directly into an internal drain trough. If that trough or the 1/2-inch rubber drain line downstream is choked off by a slug of ice, mineral gunk, or mold, the meltwater has nowhere to go. It spills over the lip of the interior drain pan, runs down the rear inner liner, and settles at the lowest point in the fridge: right beneath your crisper drawers.
Leave it alone long enough, and that water creeps past the lower door gasket, soaks into your subfloor, rots your kitchen baseboards, and wrecks hardwood or vinyl plank flooring. No joke.
How It Works
Every modern frost-free refrigerator runs an automated defrost cycle every 8 to 24 hours. A mechanical defrost timer or main electronic control board shuts down the compressor and energizes an electric defrost heating element wrapped around the evaporator coils.
As the heater warms the aluminum fins to roughly 45°F–50°F, accumulated frost turns to liquid water. That water drops by gravity into a small metal or molded plastic drain pan positioned directly underneath the coil pack. From that pan, the water funnels into a drain tube—usually a flexible vinyl, rubber, or plastic hose running down the back wall inside the cabinet insulation.
The hose terminates underneath the refrigerator cabinet, dumping the water into an exterior drain pan sitting near the compressor and condenser fan. The heat off the compressor, plus airflow from the condenser fan, lets that wastewater evaporate into the room air. Simple enough.
At the bottom of the internal tube, manufacturers install a duckbill valve or rubber P-trap grommet. This one-way rubber flapper lets water drain outward while keeping warm, humid kitchen air and pests from sucking backward up into the freezer.
That’s where the trouble starts. The duckbill can pinch shut from sticky dust, or residual drain water can freeze in the top trough before it ever clears the freezer compartment. Once that drain freezes once, every later defrost cycle adds another cup of water to the overflow pool inside your fridge.
Step-by-Step Fix
Clear your afternoon calendar for an hour, pull your food bins, and work through these mechanical steps to clear the clog and lock in a permanent fix.
-
Disconnect the Power and Clear the Bottom Shelves — Pull the refrigerator forward from the wall and yank the three-prong power cord out of the wall outlet. Never work around evaporator heaters or rear cabinet wiring with the unit energized. Empty the crisper drawers and set your produce on the kitchen counter in insulated bags. Pop out the crisper drawers, the glass shelf frame above them, and any lower door bins so you have a clean view of the bottom floor.
- Tools: Heavy-duty work gloves, painter's tape to secure open doors.
- Safety check: Confirm the interior light is completely off before touching internal panels.
-
Mop Up the Standing Floor Water and Ice Sheet — Take a stiff plastic putty knife and carefully wedge it under the front edge of the ice sheet resting on the refrigerator floor. Never use a metal screwdriver, utility knife, or ice pick; modern plastic liners crack easily, and puncturing the interior cabinet wall ruins the insulation foam permanently. Scoop out the ice chunks into a bucket, then soak up the remaining puddle using thick microfiber towels or a shop vac on wet mode.
-
Locate the Evaporator Access Panel — Depending on your refrigerator design (freezer-on-top, side-by-side, or French door bottom-freezer), the evaporator coils sit behind a removable plastic or sheet-metal panel on the interior back wall of the freezer compartment. French door models require taking off the freezer door and pulling out the sliding wire baskets to reach the back wall screws. Remove the 1/4-inch or 5/16-inch hex-head screws holding the rear panel in place.
- Tools: 1/4-inch nut driver, 5/16-inch nut driver, Phillips screwdriver.
- If panel won't budge: Do not force it. Ice buildup often anchors the panel to the back wall. Warm the screw seams with a hairdryer on medium heat for two minutes to loosen the bond.
-
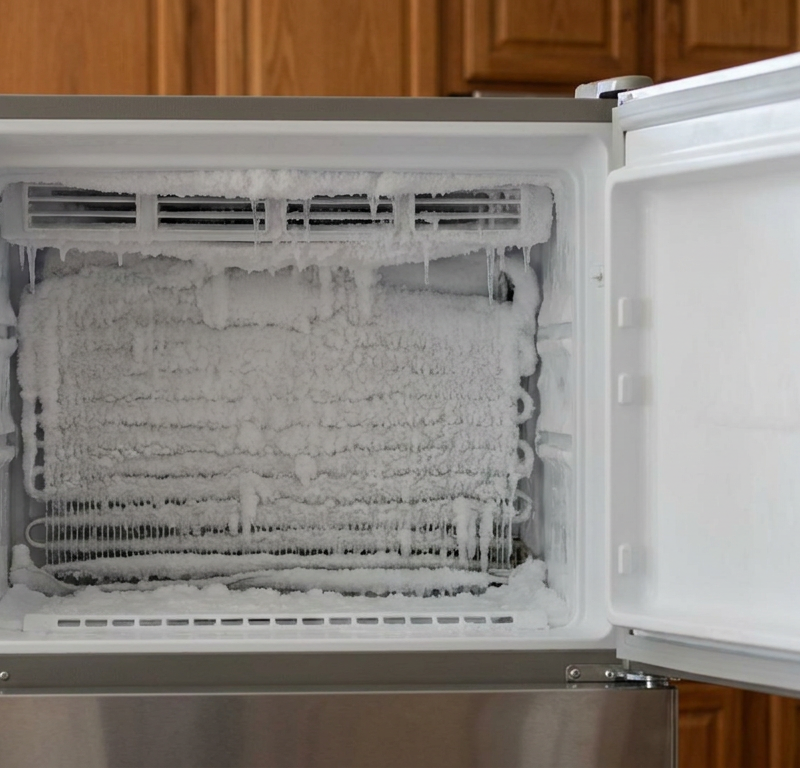
Inspect the Drain Trough Under the Coils — With the back panel removed, locate the aluminum evaporator coils. Directly below them sits a shallow V-shaped metal or plastic gutter with a nickel-sized drain hole in the middle. If you see a solid block of translucent ice choking that trough, your drain line is completely frozen shut.
-
Melt the Trough Ice Block with Hot Water — Fill an insulated travel mug with steaming hot tap water (around 140°F; do not use rolling boiling water over 200°F, or you can warp the plastic liner or shock cold components). Draw the hot water into a 2-ounce kitchen turkey baster and squirt it directly onto the ice plug in the drain trough. Soak up the displaced, overflowing cold water with clean shop rags as the ice melts. Repeat this baster flush four to six times until the drain opening is clearly visible.
-
Snake the Drain Hole to Break the Deep Plug — The ice plug usually extends 4 to 8 inches down into the hidden rubber tube. Feed a 24-inch length of 1/4-inch flexible vinyl tubing, a piece of heavy 0.080-inch weed trimmer line, or an insulated piece of 12-gauge solid copper wire down through the drain opening. Gently push and twist the line down into the channel until you feel it pop through the blockage.
- Safety alert: Never use a stiff wire coat hanger; the sharp cut metal end will pierce the soft rubber drain tube inside the insulated wall, turning a simple drain clog into a catastrophic internal cabinet leak.
-
Flush the Line with a Baking Soda Solution — Mix 1 tablespoon of standard baking soda into 1 cup of hot water (about 120°F). Squirt the solution down the cleared drain tube using your baster. Listen closely near the floor: you should hear water freely gushing down into the drain pan beneath the appliance. Baking soda knocks down odors and helps wash out the slime and fungal growth lining the drain pipe.
-
Pull the Lower Rear Access Cover Outside the Fridge — Walk around to the back of the refrigerator. Remove the lower cardboard or stamped-metal access panel held by small 1/4-inch sheet metal screws. Use a flashlight to locate the machine compartment housing the compressor and condenser fan. Find the end of the plastic or rubber drain tube that drops down over the white plastic condensation pan.
-
Inspect and Clean the Duckbill Valve or Drain Grommet — The bottom of the drain tube often features a small black or gray rubber cap with a flattened, slit-style opening called a duckbill valve. Squeeze the sides of this valve. You'll likely see thick, gelatinous brown gunk or dust clotted inside the slit, which seals the valve shut. Pull the valve off, wash it thoroughly in warm soapy water, and ream out the slit with your fingers.
- Pro tweak: If the rubber valve is gummy, rock-hard, or permanently stuck shut, trim the very tip of the rubber slit back by 1/16 of an inch with sharp utility shears to prevent future stickiness, or swap it for an updated open-bore P-trap grommet from the manufacturer.
-
Install a Defrost Drain Heater Probe (The Permanent Fix) — To prevent the upper trough from freezing again during hard winters or humid Texas summers, install a drain heater extension clip (OEM or universal copper/aluminum probe). Wrap the upper loop of this small conductive metal clip tightly around the tubular defrost heating element directly above the drain hole. Drop the lower 2-inch tail of the clip down inside the drain hole opening. When the defrost cycle energizes the heater, conductive heat travels straight down the metal tail, keeping the mouth of the drain tube above 32°F.
-
Reassemble the Compartment Panels and Test the Flow — Squirt one final cup of clean hot water down the drain trough to confirm that 100% of the water empties smoothly into the bottom drain pan outside without backing up. Reinstall the interior freezer back cover panel, tighten the 1/4-inch hex screws hand-snug (do not overtighten into plastic anchors), slide the freezer bins back onto their rails, and secure the lower rear exterior panel.
-
Restore Power and Reinstall Crisper Drawers — Push the refrigerator back into position, leaving at least 1 inch of clearance from the back wall for adequate condenser airflow. Plug the power cord into the wall outlet. Reinstall the fresh food crisper frame and slide the drawers back into their tracks. Check the crisper floor in 24 hours to confirm the plastic is bone-dry.
Common Causes
- Frozen Drain Trough from Heater Placement: The defrost element melts frost off the coils, but the heat fails to radiate deeply into the recessed drain hole. Water hits the sub-freezing drain neck and freezes on contact, forming an ice dam over two to three weeks.
- Dust-Clogged Duckbill Valve: Located at the bottom exterior terminus of the drain line, this rubber one-way flapper collects household pet dander, lint, and kitchen cooking grease. The debris glues the rubber lips together, stopping drainage entirely.
- Microbial Slime and Mold Colony: Condensation creates an ideal damp environment inside the dark tube. Airborne yeast, mold, and bacteria build an organic jelly plug inside the line that blocks gravity flow.
- Cracked or Sagging Drain Line: Older refrigerators with vinyl drain lines can kink or sag over time, creating an unintended trap where water sits, stagnates, and freezes upward toward the freezer compartment.
- Failed Defrost Thermostat or Bi-Metal Switch: If the defrost cycle terminates prematurely (lasting only 5 minutes instead of the normal 15–25 minutes), meltwater does not stay warm long enough to exit the cabinet before the compressor kicks back on to 0°F.
Common Mistakes
- Chipping at the Ice with Screwdrivers or Knives: It is tempting to grab an awl or flathead screwdriver and hammer away at the frozen ice sheet on the cabinet floor. Don't do it. The thin plastic liner cracks under blunt pressure, and if your blade slips into the evaporator compartment, you can puncture an aluminum refrigerant tube. Puncturing that line releases refrigerant, ruins the sealed system, and turns your $1,500 fridge into scrap metal instantly. Use hot water and a hair dryer instead.
- Pouring Boiling Water Over Cold Plastic: Water at 212°F poured over cold plastic at 34°F causes rapid thermal expansion. You run a massive risk of spider-web cracking your refrigerator liner or snapping brittle plastic drain fittings. Stick to hot tap water around 130°F–140°F.
- Clearing the Top Without Checking the Bottom Valve: Homeowners routinely thaw the drain trough with a turkey baster, watch the water disappear, and button the fridge back up. Two weeks later, the water returns. If you don't clean out the clogged duckbill valve at the very bottom of the cabinet, the line backs up the second you walk away.
- Using Chemical Drain Cleaners: Never pour caustic chemical drain openers (like lye, sulfuric acid, or bleach gels) down a refrigerator drain line. These harsh chemicals dissolve the rubber seals, eat through plastic fittings, and leave hazardous chemical fumes circulating across your fresh food. Use plain water, baking soda, or distilled white vinegar.
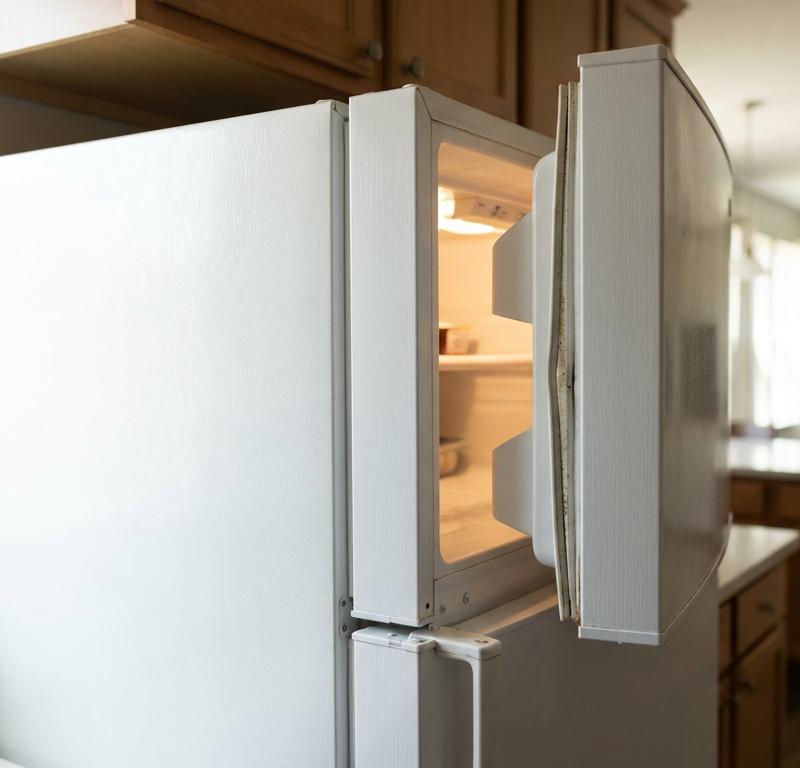
- Overlooking Air Leaks in Door Gaskets: A torn or warped door gasket lets continuous warm, humid air seep into the cabinet. This overloads the evaporator coils with thick, snowy frost that overwhelms the drain system during defrost.
Cost & Time Breakdown
| Task | DIY Cost | Pro Cost | Time |
|---|---|---|---|
| Thawing & Snaking Defrost Drain | $0–$10 (baster, weed line) | $150–$250 | 45–60 mins |
| Cleaning or Replacing Duckbill Valve | $0–$15 (replacement part) | $120–$200 | 20–30 mins |
| Installing Drain Heater Clip | $8–$20 (metal probe) | $175–$275 | 30–45 mins |
| Flushing Microbial Biofilm & Odors | $2–$5 (baking soda/vinegar) | $100–$150 | 15–20 mins |
| Replacing Torn Door Gasket | $45–$95 (OEM seal) | $200–$325 | 30–45 mins |
Tips & Prevention
- Install an Aluminum or Copper Drain Clip: If your refrigerator model didn't come with a heat probe connecting the defrost element to the drain hole, buy one. This single $10 metal strip prevents 90% of recurring frozen drain callbacks by transferring radiant heat down the first 2 inches of the pipe.
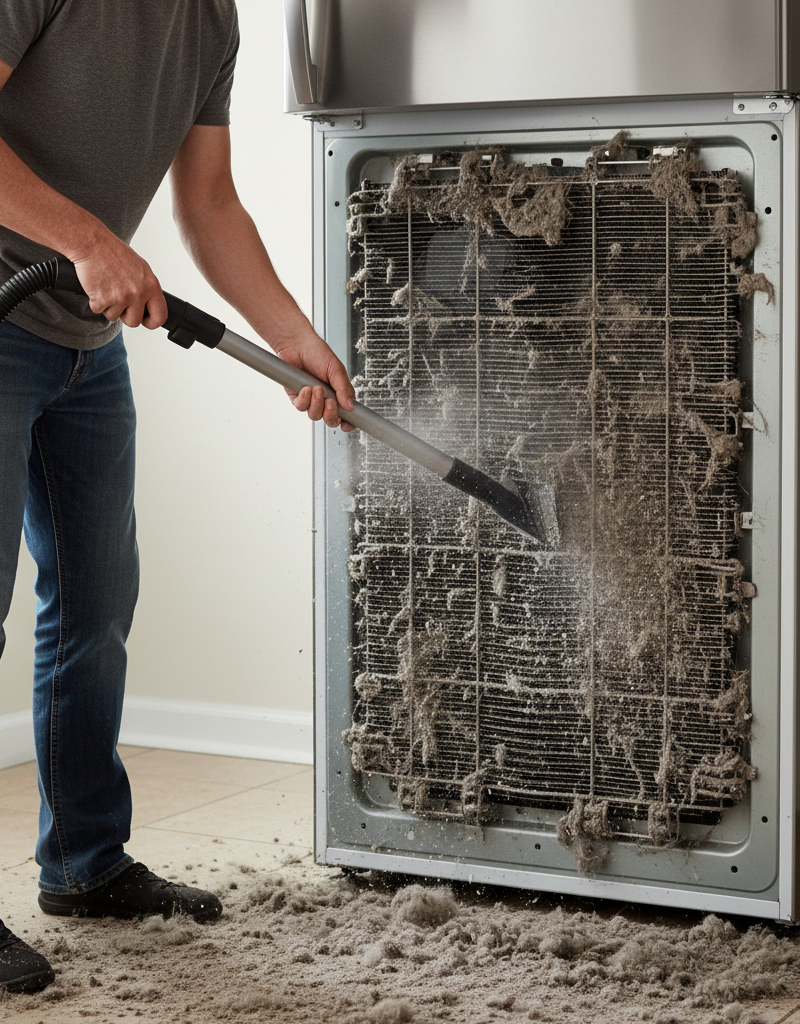
- Vacuum the Lower Rear Mechanical Compartment Annually: Dust clogs on the condenser coils raise compressor temperatures and bake lint onto the duckbill valve. Pull the fridge out once a year, take off the rear cover, and vacuum the compressor bay and rubber valve.
- Check the Door Seal with the Dollar Bill Test: Close the refrigerator and freezer doors on a crisp dollar bill. Pull the bill out slowly; you should feel firm, even resistance. If the bill slides out freely with zero drag, adjust your door hinges or replace the magnetic gasket to stop humid air infiltration.
- Maintain Clear Airflow in the Freezer: Avoid stacking frozen food boxes tightly against the rear evaporator cover. Packing items hard against that back wall blocks natural convection, creating super-cold pockets that freeze the drain trough solid.
- Keep Fresh Food at 37°F and Freezer at 0°F: Setting your freezer dial to maximum cold (-10°F or lower) won't keep food significantly fresher, but it drastically increases the speed at which drain water re-freezes in the pan before it can escape.
When to Call a Professional
Most water-under-crisper issues are simple mechanical clogs you can resolve with hot water and patience. But there are clear lines where DIY ends and trade certifications take over.
If you clear the drain line and water immediately reappears alongside a heavy sheet of continuous frost covering the entire back freezer wall, you are likely dealing with a broken defrost control board, a burned-out defrost timer, or a dead heating element. Diagnosing these requires live voltage testing and multimeter continuity checks across terminal harnesses.
More critically, if you smell an odd sweet or chemical odor, notice oily residue around the coil tubing, or see that your compressor runs non-stop while temperatures climb above 45°F, your sealed refrigerant system has failed. Sealed system repairs require an EPA Section 608 certification to recover and recharge refrigerant. If you hear loud clicking or buzzing from the compressor accompanied by clicking relays, call a factory-certified appliance technician. You've stepped past plumbing maintenance into high-voltage electrical and sealed-loop diagnostics.
Related Articles
Keep troubleshooting with these hand-picked guides from FixlyGuide:
- The $5 Part That Stops Your Fridge From Leaking (And Why It Fails) — A leaking refrigerator can lead to serious floor damage and appliance issues. Often, the culprit is a clogged defrost drain, a simple fix m…
- Your Dishwasher Dishes Come Out Cloudy? It's This, Not Soap — Tired of cloudy glasses and spotty plates? The unsightly white residue from your dishwasher is almost always caused by hard water mineral d…
- Dishwasher Won't Fill With Water? 5 Causes and the Step-by-Step Fix — Dishwasher running dry? Learn how to diagnose a stuck float switch, unclog a water inlet valve, and test solenoid continuity with step-by-s…
- That 15-Minute Brew? Your Coffee Maker's Secret Clog — A slow-dripping coffee maker is almost always a sign of internal mineral buildup, not a faulty machine, and a simple vinegar descaling can…
- Freezer Frost Buildup? 6 Causes and How to Fix the Ice Yourself — Stop thick ice from choking your freezer. Step-by-step diagnosis and repairs for blocked drains, failed defrost heaters, bad bimetal switch…
- The Nasty “Secret” Hiding in Your AC: 30-Minute Clear for a Clogged Drain Line — A clogged AC drain line can lead to water leaks, mold growth, and inefficient cooling, but it’s a fix most homeowners can tackle in under a…
Should you do this yourself?
Answer five quick questions before you start. Safety outranks savings every time.
Your experience with work like this
How high do you have to work?
Does the job involve any of these?
Will it need a permit?
Specialty tools
Free and instant. Educational guidance only — not a quote, inspection, or professional diagnosis.
What should this project cost?
Enter your project details for a realistic cost range before you call anyone.
Common repairs run $150–$650; repipes and water-heater replacements reach $1,500–$4,500.
- Regional adjustment
- National average
- Labor share (typical)
- ~$754
- Quotes to collect
- 3 written estimates
Educational estimate based on national averages — not a binding quote. Always confirm with written local estimates.
Fixly Project Decision Box
- DIY difficulty
- Moderate
- Estimated time
- 30 minutes – half a day
- Cost level
- Moderate
Main tools / materials
- Adjustable wrench
- Plunger or drain auger
- Bucket and towels
- Thread tape
When to stop and call a pro
- Water you cannot shut off at the fixture or main
- Sewage backing up into more than one fixture
- Water near electrical panels or outlets
- Gas water heater work beyond relighting a pilot
Need professional help?
Get a Licensed PlumberGet the print-ready PDF of this guide
A clean, ad-free, printable version you can keep on your phone or pin to the workshop wall. Free with a FixlyGuide account.
- Print-optimized layout
- Tools, materials & every step included
- Saved to your account
Frequently asked questions
Is food safe to eat if water has been sitting under the crispers?+
Yes, absolutely. The water pooling on the floor is clean, melted condensation from your defrost cycle that failed to drain outside the cabinet. As long as the water hasn't sat stagnant for weeks growing visible mildew or contacting raw unwrapped meat, your produce is perfectly fine. Wash the drawers thoroughly with warm soapy water before reloading them.
Can I pour boiling water down the refrigerator drain?+
Boiling water can warp thin plastic interior liners and crack cold fittings through extreme thermal shock. Instead, use hot tap water around 130°F to 140°F. It holds more than enough thermal energy to dissolve an ice dam without risking structural damage to your appliance.
Why do I need a turkey baster for this repair?+
A turkey baster is ideal because it lets you inject a concentrated, pressurized stream of hot water directly into a narrow drain opening without splashing water all over your electrical components and interior freezer floor. It gives you precision control that a standard cup or pitcher cannot match.
What is a duckbill valve and where is it located?+
A duckbill valve is a small, one-way rubber grommet attached to the end of the drain tube in the rear mechanical compartment. Its flattened tip allows drain water to trickle out into the evaporator pan while preventing warm, humid air, insects, and dust from migrating backward up into your refrigerator.
Why does my refrigerator drain keep freezing up repeatedly?+
If the drain freezes again within two to three weeks, your defrost drain heater clip is either missing or misplaced. Alternatively, your door gaskets may be leaking humid kitchen air into the compartment, or the defrost heater isn't staying energized long enough due to a failing bi-metal thermostat.
Can I use a wire coat hanger to snake the drain line?+
A wire coat hanger has sharp, cut metal ends that can puncture the soft rubber or vinyl drain tube embedded deep inside the refrigerator cabinet insulation. A puncture creates an unfixable internal water leak inside your cabinet walls. Use flexible 1/4-inch vinyl tubing, heavy weed trimmer string, or smooth 12-gauge electrical wire instead.
How does water from the freezer end up in the refrigerator crisper drawers?+
In bottom-freezer and French door models, the evaporator coils sit in the bottom freezer compartment directly behind the rear wall panel, which sits directly beneath the fresh food compartment above. When that lower drain pan freezes and overflows, water climbs the liner seams or drips directly down into the lowest basin—the floor of the fresh food cabinet beneath the crisper bins.
Can I use vinegar to clean the drain tube?+
Yes, vinegar is an excellent natural cleaner for refrigerator drain lines. Mix a 50/50 solution of distilled white vinegar and hot tap water, then flush it through the line after clearing the ice plug. The mild acetic acid kills algae, dissolves mineral buildup, and cuts through sour odors without leaving toxic chemical residues near your food.
Discussion
Loading comments…