- Empty the freezer and stage your food — Pack the frozen stuff into insulated coolers with ice packs or frozen gel blocks. You’ve usually got about 2 to 3 hours before things start softening, so don’t dawdle.
- Tools needed: Two large coolers, heavy-duty bath towels.
- Safety tip: Toss raw meats or poultry if they thaw above 40°F during the repair.
Plumbing · Leak
| Project category | Plumbing |
|---|---|
| Problem type | Leak |
| Trade required | Plumbing |
| Urgency | Emergency — act now |
| Safety risk | High safety risk |
| DIY suitability | DIY for experienced homeowners |
| Cost category | Low cost |
| Typical timeline | Shut water off now; repair usually same or next day |
| Contractor type | Licensed plumber |
Repair option
Isolate at the shutoff, replace the failed component, and dry the cavity fully.
Replacement option
Repipe the run or the branch when corrosion is widespread.
Common causes
- Failed supply line or shutoff valve
- Worn washers, cartridges, or P-trap connections
- Pinhole corrosion in older copper
Relevant tools:emergency checklistdiy or hire a pro
Published October 27, 2026Last updated October 27, 2026
Tools & materials you'll need
Affiliate links- AmazonDigital multimeter1 · must test ohms and continuity
- Amazon1/4-inch magnetic nut driver1 · for back panel and ground screws
- Amazon5/16-inch magnetic nut driver1 · for cabinet and bracket screws
- AmazonHandheld hair dryer1 · keep on medium heat; avoid heat guns
- AmazonTurkey baster or 60cc syringe1 · for flushing hot water into drain hole
- AmazonPlastic weed-trimmer line2 ft · about 2 feet long to snake the drain tube
As an Amazon Associate FixlyGuide earns from qualifying purchases — at no extra cost to you. Prices and availability are accurate as of publication and subject to change.
Quick Answer
When you’ve got a buildup of frost or sheets of ice across the back wall of your freezer, I’d start with three suspects: a failed defrost cycle, a blocked drain, or a tired door gasket. Check the rubber door seal with a dollar bill, clear out any ice jammed in the drain trough under the evaporator, and test the defrost heater and bimetal thermostat with a multimeter. If the heater reads between 10 and 50 ohms and the thermostat has continuity when it’s frozen, odds are you’re looking at a bad defrost control board.
The Problem
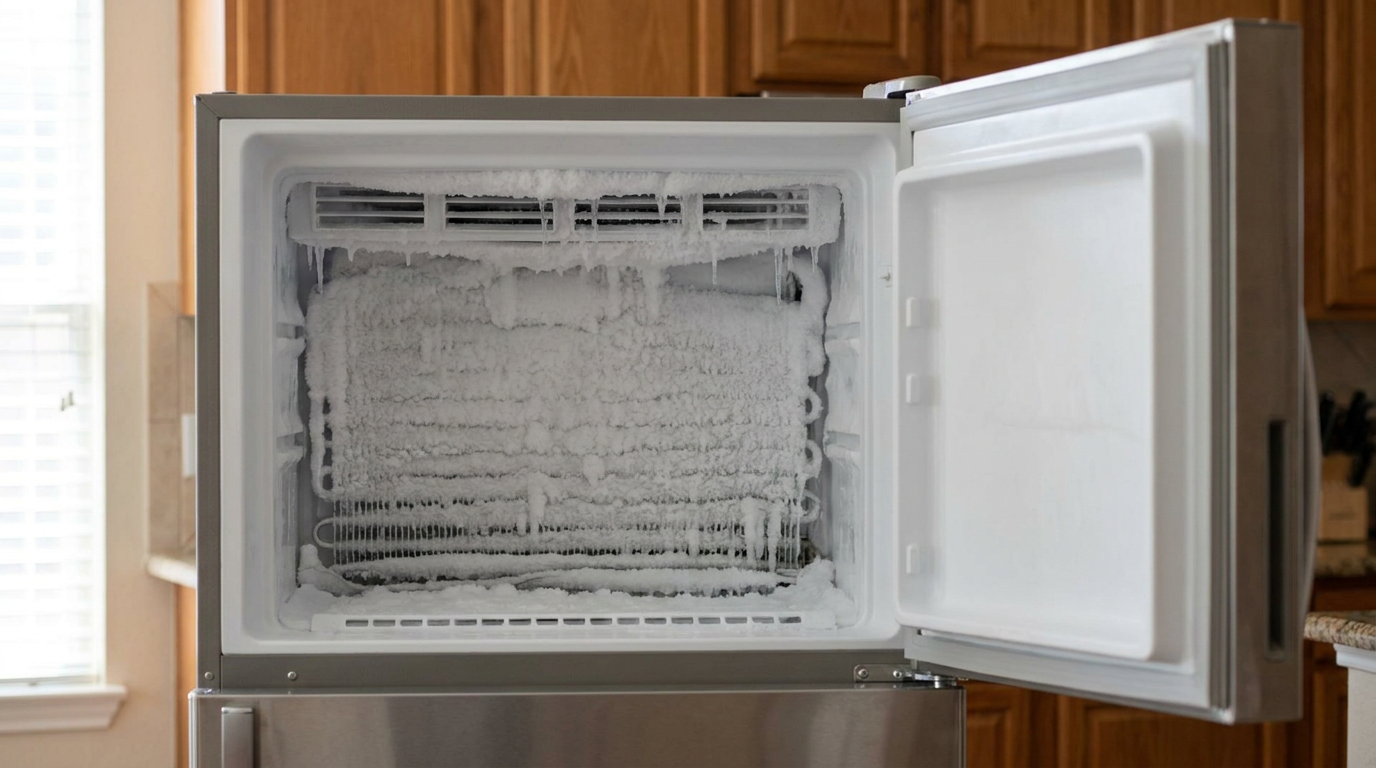
You open the freezer drawer or swing the door wide, expecting a bag of frozen peas, and instead you’re staring at a little ice age. Frost starts climbing the back panel. Sometimes it gets worse—a solid sheet of clear ice under the bottom crisper drawer, or frozen slush on the freezer floor that turns into a puddle on your kitchen tile every time the unit goes through a heat cycle.
That’s not just ugly. It steals storage space, sure, but it also chokes off airflow when ice blankets the evaporator cover panel. Then the refrigerator section starts running warm, maybe 45°F or 50°F, and your milk goes south while the freezer stays packed in frost. If you leave it alone, that ice creeps into the evaporator fan housing until the plastic blades smack into the ice and start rattling like crazy before the fan motor gives up for good.
How It Works
Modern frost-free refrigerators don’t stay frost-free by magic. They melt it on purpose, on a timer. Every 8 to 12 hours of compressor run time, the appliance shuts off the cooling cycle and powers an electric heating element clamped under the evaporator coils behind the rear freezer panel.
That defrost heater—usually a calrod metal tube or a quartz glass sheath—pulls 300 to 500 watts and warms the coils to around 40°F to 50°F so the frost melts off. A little safety device called a bimetal defrost thermostat (or, on some units, an electronic defrost thermistor) clips right to the top copper tubing of the evaporator. Its whole job is to watch coil temp. Once the ice is gone and the metal gets up around 45°F to 60°F, the bimetal snaps open and cuts power to the heater so your frozen food doesn’t thaw out.
All that meltwater is supposed to drip into a V-shaped aluminum drain trough under the coils, then run through a small 1/2-inch drain hole. From there, gravity sends it down a vinyl tube into a shallow drain pan beside the compressor underneath the fridge, where the hot compressor and condenser fan evaporate it back into the room air. If any part of that chain quits—burned-out heater, stuck bimetal, fried control board, frozen drain hole—the frost just stays put. It stacks up day after day.
I pulled a bottom-freezer unit in Frisco last month that had exactly this mess: back wall packed solid, fan blades chattering, and a drain trough frozen into a little hockey rink. Same story, different kitchen.
Step-by-Step Fix
Diagnosing and clearing freezer frost takes basic hand tools and a little patience. Unplug the refrigerator before you start pulling panels or sticking a meter on terminals.
-
Empty the freezer and stage your food — Pack the frozen stuff into insulated coolers with ice packs or frozen gel blocks. You’ve usually got about 2 to 3 hours before things start softening, so don’t dawdle.
- Tools needed: Two large coolers, heavy-duty bath towels.
- Safety tip: Toss raw meats or poultry if they thaw above 40°F during the repair.
-
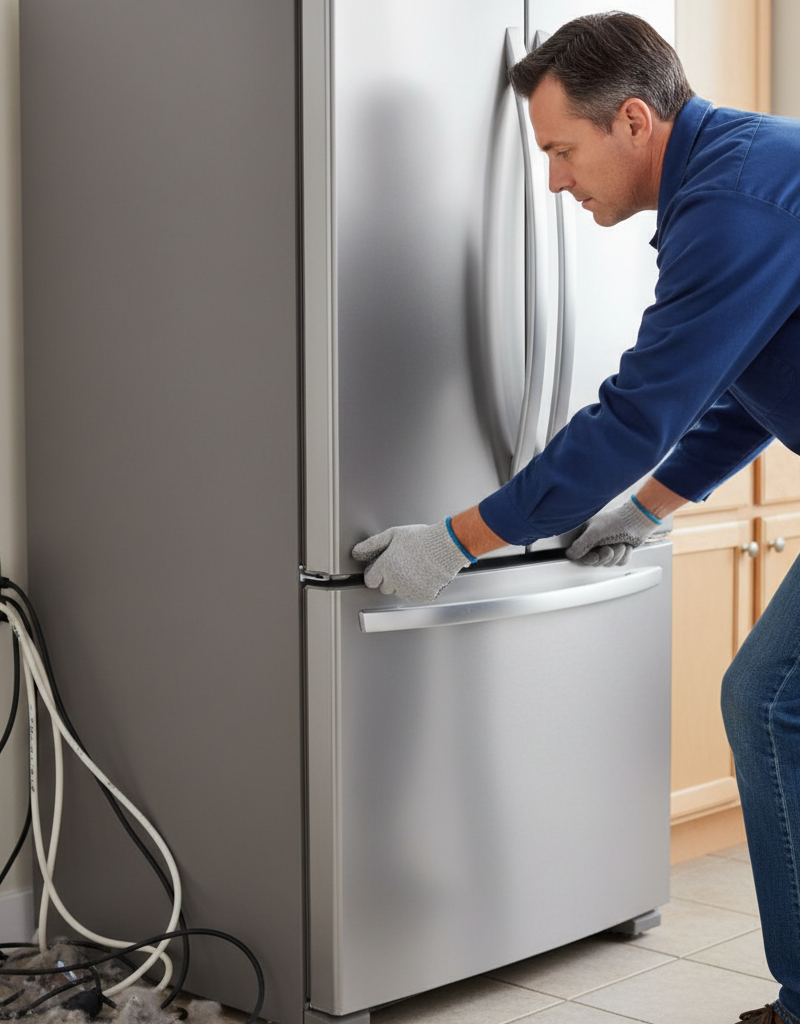
Cut power to the refrigerator — Pull the unit out from the wall and unplug the 120-volt grounded cord, or shut off the dedicated 15-amp or 20-amp breaker at the main panel.
- Safety check: Make sure the interior cabinet lights are dead before you go any farther.
- If the plug is stuck: Wiggle the plug head straight back. Don’t yank the cord.
-
Remove interior shelving, drawers, and brackets — Take out the ice bucket, unclip the wire shelves, and slide the storage bins all the way out. On bottom-freezer models, you may need to pop a few plastic tabs on the drawer slides with a flat-head screwdriver to lift the whole drawer bin free.
- Tools needed: Flat-head screwdriver, 1/4-inch nut driver.
- Inspection point: Look at where the ice is thickest. Heavy crust over the back wall vents points to a defrost failure, while ice on the floor screams drain clog.
-
Take off the rear evaporator access panel — Find the screws holding the metal or plastic back wall inside the freezer compartment. They’re usually 1/4-inch or 5/16-inch hex-head sheet metal screws, though some units hide Philips-head fasteners under little pop-off plastic caps.
- Tools needed: 1/4-inch and 5/16-inch magnetic nut drivers, plastic pry tool.
- Watch out: Don’t yank the panel off like you’re mad at it. The evaporator fan wiring harness or ground wire is often clipped to the back side and can rip right out. Reach behind and squeeze the connector tab to unplug it.
-
Examine the frost pattern on the evaporator coils — Snap a clear photo before you touch anything. The frost pattern tells the story.
- Heavy, solid frost across all coils: Points straight at an electrical defrost circuit problem—heater, bimetal, or board.
- Thick ice ball only at the very top tube inlet: Usually means low refrigerant or a tired compressor—stop there and call a pro.
- Clean coils but solid ice in the bottom trough: That’s a plain old blocked drain line.
-
Defrost the coils manually with controlled heat — Melt the ice so you can inspect parts without snapping those fragile copper and aluminum tubes.
- Tools needed: Handheld hair dryer, old bath towels, plastic putty knife.
- Critical safety warning: Keep the hair dryer on medium heat and move it constantly 6 to 8 inches away from the plastic liners. Don’t use a high-temp heat gun—it’ll warp the cabinet interior in five seconds flat—and don’t chip at the aluminum coils with an ice pick, screwdriver, or metal blade. One tiny puncture in an evaporator tube dumps the refrigerant and ruins the refrigerator permanently.
-
Test the defrost bimetal thermostat with a multimeter — The bimetal thermostat is that small round metal-and-plastic cylinder clipped right to the copper pipe at the top or side of the coils. It has to be cold (under 30°F) to close its contacts.
- Tools needed: Digital multimeter set to continuity or low ohms (200-ohm scale).
- Procedure: While the bimetal is still iced up or sitting in ice water below 30°F, disconnect its wire leads and touch your meter probes to the terminals. You should see 0 to 1 ohms (continuity / beep). If it reads OL (open loop) while freezing cold, the internal disc is stuck open. Replace it.
-
Test the defrost heating element — Find the heating element running along the bottom perimeter of the coils. Pull off the two slip-on wire terminals from the heater ends.
- Tools needed: Digital multimeter set to ohms (200-ohm range).
- Reading to look for: Put one test lead on each heater terminal. A working calrod element usually reads between 10 and 50 ohms depending on wattage. An open loop (OL or infinite resistance) means the heating wire inside the sheath is burned through; the element’s toast and needs replacement.
-
Clear and flush the defrost drain hole — The drain hole sits centered directly beneath the coils in the metal drip trough. If it’s frozen shut, meltwater has nowhere to go.
- Tools needed: Turkey baster or 60cc syringe, hot water (140°F), 1/4-inch flexible plastic tubing or weed-trimmer line.
- Procedure: Feed hot water straight into the hole with the baster. Thread 12 to 18 inches of plastic weed-trimmer line gently down the drain hole to knock loose mineral scale, food debris, or algae slime. Keep flushing until you hear it draining freely and splashing into the pan under the fridge.
-
Inspect and clean the rear duckbill drain valve — Pull the refrigerator away from the wall and remove the lower cardboard or sheet-metal access cover near the compressor.
- Tools needed: 1/4-inch nut driver, warm soapy water.
- Procedure: Find the end of the drain tube dripping into the pan. A lot of Whirlpool, GE, and Samsung units use a rubber "duckbill" or slotted grommet on the end to keep bugs from crawling up. Those pinch valves get glued shut by grime. Squeeze the rubber tip open, rinse it in warm water, or snip a tiny 1/8-inch triangle out of the rubber slit with scissors so it can’t stick closed again.
-
Reassemble the freezer interior — Reconnect the evaporator fan wire clip, seat the back panel flush to the frame, and run the hex screws back in until they’re snug. Don’t overtighten or you’ll strip the plastic screw anchors. Put the slide rails, shelves, and bins back where they belong.
-
Restore power and test door seal compression — Plug the refrigerator back in and listen for the compressor and evaporator fan to kick on. Close the door on a dollar bill at five spots around the perimeter. Pull it out; you should feel firm, even resistance. If it slides out too easy, warm the magnetic gasket with a hair dryer on low to soften the vinyl and pull it out a bit so it seats tight against the steel face.
Common Causes
Freezer frost always comes down to unwanted moisture getting into the box, or meltwater not draining like it should during the heat cycle:
- Stuck-Open Defrost Bimetal Thermostat: This little temperature switch tells the system the coils are hot enough. If the bimetal fails, it stays open all the time, tricking the control board into thinking the coils are already warm, so the heating element never gets power.
- Burned-Out Defrost Heater: Those elements take a beating. They swing from 0°F to 100°F over and over every day. Eventually, the internal resistance wire burns out just like an old lightbulb filament.
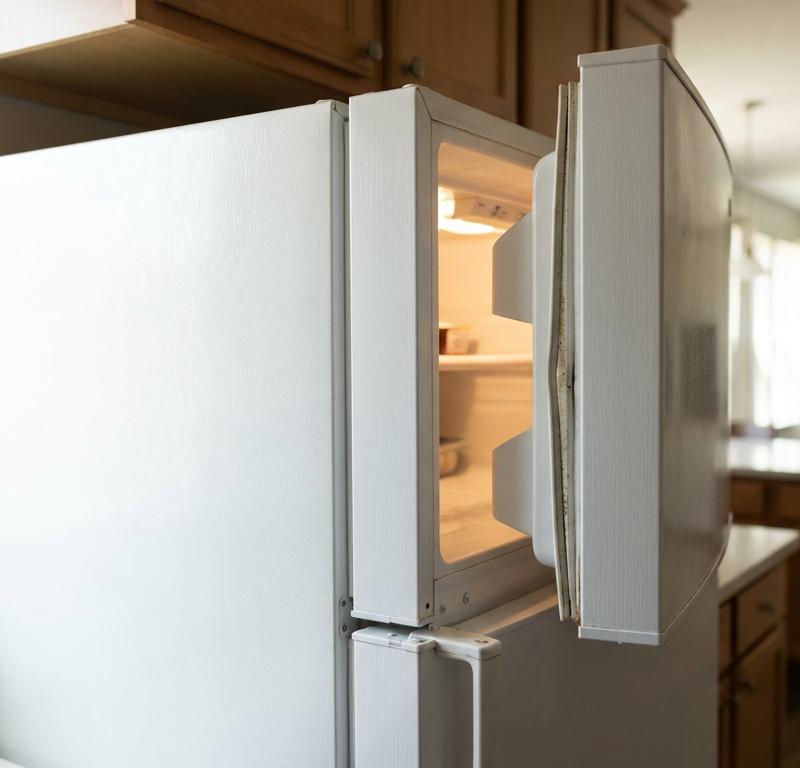
- Torn or Warped Door Gasket: Kitchen air holds moisture. When humid 70°F air sneaks through a crimped corner or torn magnetic seal, that moisture condenses on the sub-zero surfaces and turns into snow-like frost within 24 hours.
- Clogged Defrost Drain Hole: When dust, breadcrumbs, or mold clog the 1/2-inch drain outlet, meltwater from the defrost cycle has nowhere to go. It backs up in the trough, freezes into a solid dam on the next run cycle, and pushes future water into the freezer floor and vents.
- Faulty Main Control Board or Defrost Timer: Older units use a mechanical clock motor that slowly turns a cam into defrost. Newer models use a solid-state board. When the relay burns out, power never makes it to the defrost circuit.
- Door Left Ajar or Misaligned Hinges: A drawer bumped out of alignment by heavy frozen food can leave a tiny 1/16-inch gap at the top rail. That little crack acts like a vacuum, pulling kitchen humidity inside all day long.
Common Mistakes
- Chipping ice with knives, screwdrivers, or ice picks. The aluminum tubes carrying refrigerant are paper-thin—often less than 0.035 inches thick. One slipped screwdriver tip punches a hole and lets the refrigerant charge hiss out. That turns a $25 DIY repair into a $1,200 compressor-system replacement or a whole new appliance.
- Using an industrial heat gun. High-output heat guns reach 750°F to 1,000°F. The plastic inner liner of your freezer cabinet (polystyrene) starts melting and deforming around 200°F. Once that liner warps, the evaporator cover panel won’t seal flat again. Stick with a standard 1,500-watt hair dryer on medium heat.
- Replacing parts before running a continuity test. Homeowners buy a $150 main control board when the real problem was a $15 bimetal switch or a $25 heater. Always check continuity and resistance with a $15 digital multimeter before you spend money on parts.
- Ignoring the drain tube duckbill valve behind the unit. People’ll spend two hours melting the ice in the freezer drain trough, only to have it freeze solid again three days later. If you don’t clean the rubber duckbill valve down by the compressor pan, the drain line stays blocked at the bottom exit.
- Failing to let the bimetal get cold before testing. A bimetal thermostat is normally open at room temperature (70°F). If you pull it out, let it sit on the warm counter, and slap meter probes on it, it’ll read open—and you’ll think it’s bad. You’ve got to test it while it’s covered in ice or after it’s sat in a bowl of ice water for 10 minutes.
Cost & Time Breakdown
| Task | DIY Cost | Pro Cost | Time |
|---|---|---|---|
| Clear clogged defrost drain & flush line | $0–$10 | $150–$250 | 45–60 mins |
| Replace defrost bimetal thermostat | $15–$35 | $175–$275 | 45–60 mins |
| Replace calrod or quartz defrost heater | $25–$65 | $200–$325 | 60–90 mins |
| Replace magnetic door gasket seal | $45–$95 | $180–$280 | 30–45 mins |
| Replace adaptive defrost control board | $80–$160 | $250–$425 | 45–60 mins |
Tips & Prevention
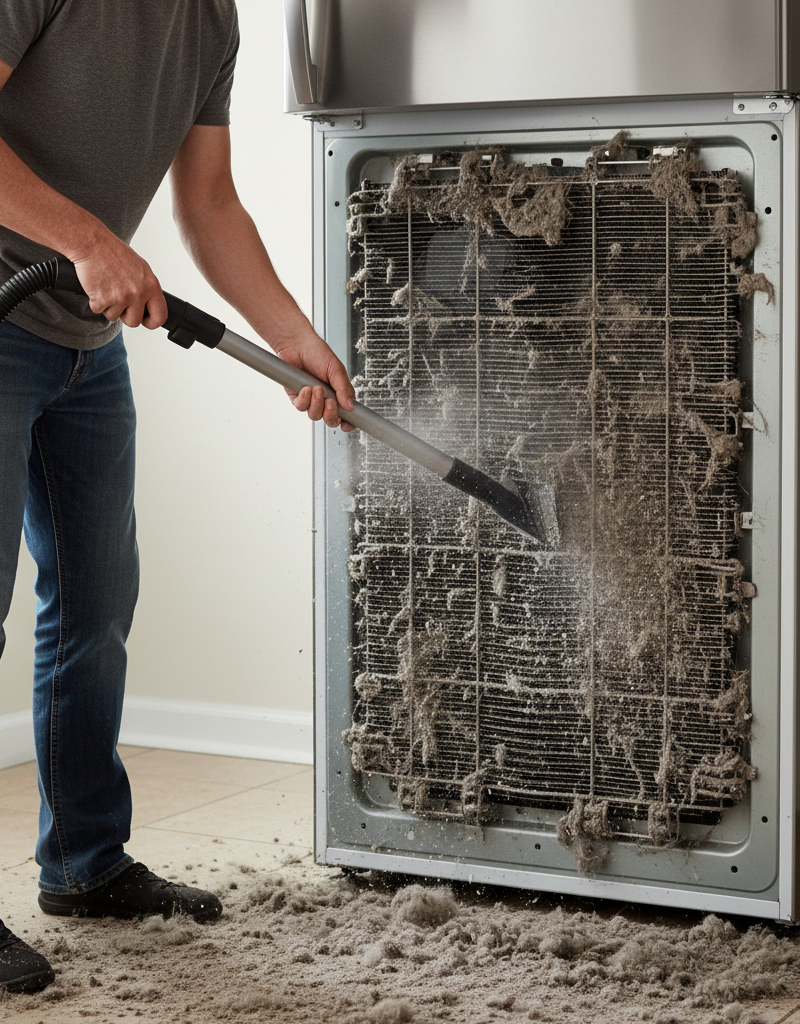
- Clean your condenser coils every 6 to 12 months. Dirty coils underneath or behind the fridge make the compressor run hotter and longer. That throws off the normal cooling-to-defrost run-time math on adaptive defrost control boards.
- Keep food packages 2 inches away from interior air vents. If a bulk box of frozen burgers is shoved right against the cold-air return grill, air can’t circulate. Cold air stalls, local moisture freezes, and frost starts marching across the back panel.
- Check the magnetic seal every seasonal change. Wipe the accordion folds of the door gasket with warm water and mild dish soap. Sticky syrup, milk drips, and crumbs dry hard and keep the magnetic strip inside the vinyl from grabbing the cabinet frame.
- Level the refrigerator with a slight backward tilt. Set the front leveling legs so the front of the cabinet sits roughly 1/4 inch higher than the back. That uses gravity to help the doors shut if somebody walks away without pushing them all the way closed.
- Listen for new fan sounds. If you hear a faint ticking or buzzing that stops the second you open the freezer door, that’s the evaporator fan blades brushing the first edge of creeping ice. Catch it there and you can melt the frost before the coils choke up.
When to Call a Professional
If you pull off the rear panel and find only a single, dense fist-sized ball of ice around the top tube inlet while the rest of the evaporator coils are dry and bare, stop. That pattern points to an internal refrigerant leak or a failing compressor piston, not a defrost part problem. Federal law says an EPA Section 608 certified technician has to handle and recover refrigerant.
Call a pro right away if you smell sharp, acrid chemical odors or hear a hissing leak—that points to breached sealed-system tubing. And if you’ve tested the heater, bimetal thermostat, and sensors and they all read perfect continuity, but the unit still won’t start a defrost cycle even with a brand-new main board, you’re probably into brand-specific diagnostics. An experienced appliance tech can flash the firmware or find broken wiring harnesses buried inside foamed-in-place cabinet walls.
Related Articles
Keep troubleshooting with these hand-picked guides from FixlyGuide:
- Dishwasher Door Won't Latch? 6 Reasons It's Not Closing Securely—and How to Fix It — If your dishwasher door won't latch or close properly, it won't start. Here are the 6 most common causes and how to fix them, from a misali…
- The $5 Part That Stops Your Fridge From Leaking (And Why It Fails) — A leaking refrigerator can lead to serious floor damage and appliance issues. Often, the culprit is a clogged defrost drain, a simple fix m…
- The Real Reason Your Dishwasher Leaks (It’s Not Always the Hose) — A leaking dishwasher can be a homeowner's headache, but often the culprit isn't a failed hose, but rather a simple fix around the door or t…
- Dishwasher Won't Fill With Water? 5 Causes and the Step-by-Step Fix — Dishwasher running dry? Learn how to diagnose a stuck float switch, unclog a water inlet valve, and test solenoid continuity with step-by-s…
- Oven Baking Unevenly? 6 Causes for Hot Spots and the Step-by-Step Fix — Baking unevenly with scorched bottoms or raw tops? Here is how to diagnose failing elements, test your oven sensor, and balance cavity heat…
- Roof Deck Leaking Into House? 7 Causes and the Fix for Each — A roof deck leaking into your house is a serious problem. We’ll walk through the 7 most common causes, from failed flashing to clogged drai…
Should you do this yourself?
Answer five quick questions before you start. Safety outranks savings every time.
Your experience with work like this
How high do you have to work?
Does the job involve any of these?
Will it need a permit?
Specialty tools
Free and instant. Educational guidance only — not a quote, inspection, or professional diagnosis.
What should this project cost?
Enter your project details for a realistic cost range before you call anyone.
Common repairs run $150–$650; repipes and water-heater replacements reach $1,500–$4,500.
- Regional adjustment
- National average
- Labor share (typical)
- ~$754
- Quotes to collect
- 3 written estimates
Educational estimate based on national averages — not a binding quote. Always confirm with written local estimates.
Fixly Project Decision Box
- DIY difficulty
- Advanced
- Estimated time
- Homeowner checks 20–30 minutes
- Cost level
- Moderate
Main tools / materials
- Clean air filter
- Garden hose for condenser coils
- Shop vac for the condensate line
When to stop and call a pro
- Burning smell, smoke, or a tripping breaker
- Refrigerant lines iced over or hissing
- Any work inside the sealed refrigerant circuit (EPA-licensed only)
- Gas smell near a furnace — leave and call the utility
Need professional help?
Find an HVAC Pro Near YouBefore you start
Check the difficulty, permits, and safety risk — then decide whether to call a pro.
- Estimate this projectGet a cost range for your scope and ZIP before you call anyone.Open
- Get local estimatesSend one request and compare written estimates from vetted pros.Open
Free, no signup required. Estimates are educational guidance, not a quote or an inspection.
Get the print-ready PDF of this guide
A clean, ad-free, printable version you can keep on your phone or pin to the workshop wall. Free with a FixlyGuide account.
- Print-optimized layout
- Tools, materials & every step included
- Saved to your account
Frequently asked questions
Will freezer frost go away on its own if I fix the door seal?+
Frost will naturally form over a few days if you leave the door cracked. Close the door completely and wait 24 to 48 hours. If the frost begins receding or clears during regular defrost cycles, your components are fine. If the frost remains thick and hard after two days, the defrost system cannot keep up and you will need to manually defrost and test the parts.
Can I use a hair dryer to melt freezer ice quickly?+
A hair dryer is safe if you keep it moving constantly at medium heat and hold it at least 6 to 8 inches away from plastic liners. Never use a high-temperature industrial heat gun, and never use open flames, propane torches, or boiling water poured indiscriminately over wiring harnesses. Never chip ice with knives or metal tools.
How often should a refrigerator defrost cycle turn on?+
In modern refrigerators, an automatic defrost cycle runs every 8 to 14 hours of compressor operation. The heating element typically stays energized for 15 to 30 minutes until the bimetal thermostat reaches shutoff temperature (around 45°F to 55°F).
Why does my freezer keep icing up after I already thawed it out?+
A hair dryer thaw only buys you 3 to 7 days of normal cooling. If the root problem—like an open heating element, a broken bimetal switch, or a plugged drain—is not repaired, the frost will return in full force within a week and choke your airflow again.
Can ice buildup in the freezer make the refrigerator section warm?+
Yes, absolutely. Most refrigerators draw cold air from the freezer into the fresh food section through a motorized damper door. When the evaporator coils freeze into a solid block of ice, the fan cannot pull air across the coils or push it through the vent. The freezer stays frozen, but the refrigerator warms up to 50°F.
How do I know if my defrost heater is burned out?+
Use a digital multimeter set to low ohms (200-ohm scale) and probe both terminal leads. A healthy calrod or quartz defrost heater should read between 10 and 50 ohms of resistance. If the meter displays OL (open loop) or 1 (infinite resistance), the internal wire filament is broken and the heater must be replaced.
Why does my defrost thermostat test open at room temperature?+
A freezer bimetal thermostat is designed to be open at room temperature and closed only when cold. Place the bimetal in a glass of ice water or directly against ice for 10 minutes so its temperature drops below 30°F. Test continuity across the two leads; it should beep or show near 0 ohms. If it shows open loop while freezing cold, it is defective.
Why is there a sheet of ice on the bottom floor of my freezer?+
When the small drain hole under the coils freezes over, water from normal defrost cycles cannot exit down the tube into the pan. Instead, it overflows the drain pan inside the freezer, runs across the plastic floor, and freezes into a solid sheet. Once the sheet gets thick enough, excess water leaks out under the door onto your kitchen floor.
Discussion
Loading comments…