- Verify Cavity Levelness — Grab a 9-inch torpedo level and set it right on the center oven rack, front to back, then left to right. If the bubble’s off, check the leveling legs under the range.
- Use an adjustable crescent wrench or channel locks to turn the front hex-head feet until the frame sits flat.
- If the floor under the stove has sagged (happens a lot in older Dallas-area pier-and-beam houses), shim the rear feet with metal shims instead of cranking the threaded legs to the end.
HVAC · High energy usage
| Project category | HVAC |
|---|---|
| Problem type | High energy usage |
| Trade required | HVAC |
| Urgency | Planned project |
| Safety risk | Low safety risk |
| DIY suitability | DIY for experienced homeowners |
| Cost category | High cost |
| Typical timeline | Assessment within weeks; replacement planned off-season |
| Contractor type | Licensed HVAC technician |
Repair option
Duct sealing, insulation, and a tune-up before touching the equipment.
Replacement option
High-efficiency replacement sized by a load calculation, not a rule of thumb.
Common causes
- Aging, low-efficiency equipment
- Leaking ducts losing conditioned air
- Insufficient attic insulation
- Oversized system short-cycling
Relevant tools:project cost estimatorrepair or replace
Published October 25, 2026Last updated October 25, 2026
Tools & materials you'll need
Affiliate links- AmazonDigital multimeter1 · capable of measuring ohms (Ω)
- Amazon1/4-inch nut driver1 · for panel and element screws
- Amazon9-inch torpedo level1 · for rack and frame check
- AmazonNeedle-nose pliers1 · to pull spade wire terminals
- AmazonNon-contact voltage tester1 · for verifying circuit power is cut
- AmazonAdjustable crescent wrench1 · to adjust stove leveling feet
- AmazonReplacement RTD sensor or bake element1 · OEM specific to your stove model
As an Amazon Associate FixlyGuide earns from qualifying purchases — at no extra cost to you. Prices and availability are accurate as of publication and subject to change.
Quick Answer
When an oven bakes food unevenly—scorching cookies in the back while leaving the front raw, or burning pie crusts on the bottom—the culprit is usually an uncalibrated temperature sensor, a failing lower bake or upper broil element, or a warped oven rack sitting crooked. I’d check rack level first with a torpedo level. If the rack’s flat, test the oven sensor with a multimeter; at 70°F room temperature, an RTD sensor should read around 1,080 ohms. If that resistance checks out, look at the heating elements for blisters, dark spots, or cold zones while the oven’s preheating.
The Problem
Few things wreck dinner faster than a sheet of biscuits where half look like charcoal and the other half look like pale dough. Uneven baking isn’t just annoying; it ruins groceries and burns up your time. Folks try to baby it by spinning trays every five minutes, cracking the door open, or cranking the temp up an extra 25°F. No dice.
That just leaks heat and throws the whole cavity off. In a healthy oven, heat moves in a steady pattern, balanced between the floor and ceiling. When one side of that system quits—or the control board starts getting bad info—you end up with hot spots and dead zones.
OVEN AIRFLOW & DUAL-HEAT SYSTEM:

   +------------------------------------+
   |     [ ] [ ] BROIL ELEMENT [ ]      | <-- Cycles to balance top crust
   |  ^                               ^ |
   |  |   Natural Convection Plume    | |
   |  |                               | |
   | [=== RACK (Level Check Here) ===]  |
   |                                    |
   |  +------------------------------+  |
   |  |    [=== BAKE ELEMENT ===]    |  | <-- Carries 80-90% of baking load
   +--+------------------------------+--+
How It Works
Electric and gas ovens don’t just shove steady heat from the bottom. Modern units cycle the heat. During a standard 350°F bake cycle, the lower bake element—or lower gas burner—handles roughly 80% to 90% of the thermal load, while the upper broil element kicks on and off to keep the top of the cavity from going cold. If that broil element’s shot, all the heat rises from the floor, and now you’re burning bottoms while the tops stay soft.
Air movement inside the oven matters too. Standard radiant ovens depend on natural convective loops—hot air rises along the walls, cools a little at the ceiling center, then drops back down. For that to work, the racks need room to breathe, at least 1.5 to 2 inches of space between the bakeware and the cavity walls.
Temperature control comes from the Resistance Temperature Detector (RTD) sensor probe sticking out of the rear wall. It’s basically a variable resistor. As temp rises, resistance goes up in a predictable way. The electronic control board reads that resistance in real time, cycling 240 volts—or opening gas safety valves—to keep the oven within a tight 15°F to 20°F band around your set temp. If that sensor gets bent, touches the metal wall, or drifts out of spec, the control board starts short-cycling heat or overshooting badly, and your bakes come out lopsided.
Step-by-Step Fix
Figuring out an uneven oven usually takes about 45 minutes with basic hand tools. Start simple and work your way into the electrical stuff.
-
Verify Cavity Levelness — Grab a 9-inch torpedo level and set it right on the center oven rack, front to back, then left to right. If the bubble’s off, check the leveling legs under the range.
- Use an adjustable crescent wrench or channel locks to turn the front hex-head feet until the frame sits flat.
- If the floor under the stove has sagged (happens a lot in older Dallas-area pier-and-beam houses), shim the rear feet with metal shims instead of cranking the threaded legs to the end.
-
Inspect the Oven Racks for Warping — Pull each rack out and lay it on something flat, like a granite countertop or kitchen island. A bent rack creates an uneven baking plane, and that’s enough to make batters and liquids drift to one side.
- If a rack rocks corner-to-corner more than 1/8 inch, flex it back by hand or replace it.
- Check the side-support ladders stamped into the cavity walls too. If they’ve sagged or pulled loose, that thing’s toast.
-
Perform a Visual Burnout Check on Both Elements — Kill power at the dedicated 40-amp or 50-amp double-pole breaker before you stick your hands inside. Look over the lower bake element and upper broil element with a bright flashlight.
- Watch for pinholes, blistering, thin spots, flaking metal, or chalky white discoloration along the sheath.
- Any visible defect means the internal nickel-chromium wire has failed or is about to go open; replace the element.
-
Observe the Preheating Pattern — Flip the breaker back on and set the oven to 350°F. Watch the elements through the glass window during the first 10 minutes of heating; don’t touch them.
- Both elements should glow a uniform dull orange across the full length, with no dark dead spots.
- If one corner stays black while the rest glows, the heating coil’s failed in that section and you’ve got a nasty cold zone.
-
Discharge Power and Unmount the Temperature Sensor — Shut the breaker off again and confirm zero voltage with a non-contact tester. Find the pencil-shaped sensor probe in the top-left or top-right rear corner of the oven cavity.
- Remove the two 1/4-inch hex screws holding the sensor bracket to the rear liner.
- Ease the sensor forward into the cavity until the plastic wire harness clears the hole. Don’t yank on it; if that harness pops loose behind the back wall, you’ll be pulling the whole stove out to fish it back.
-
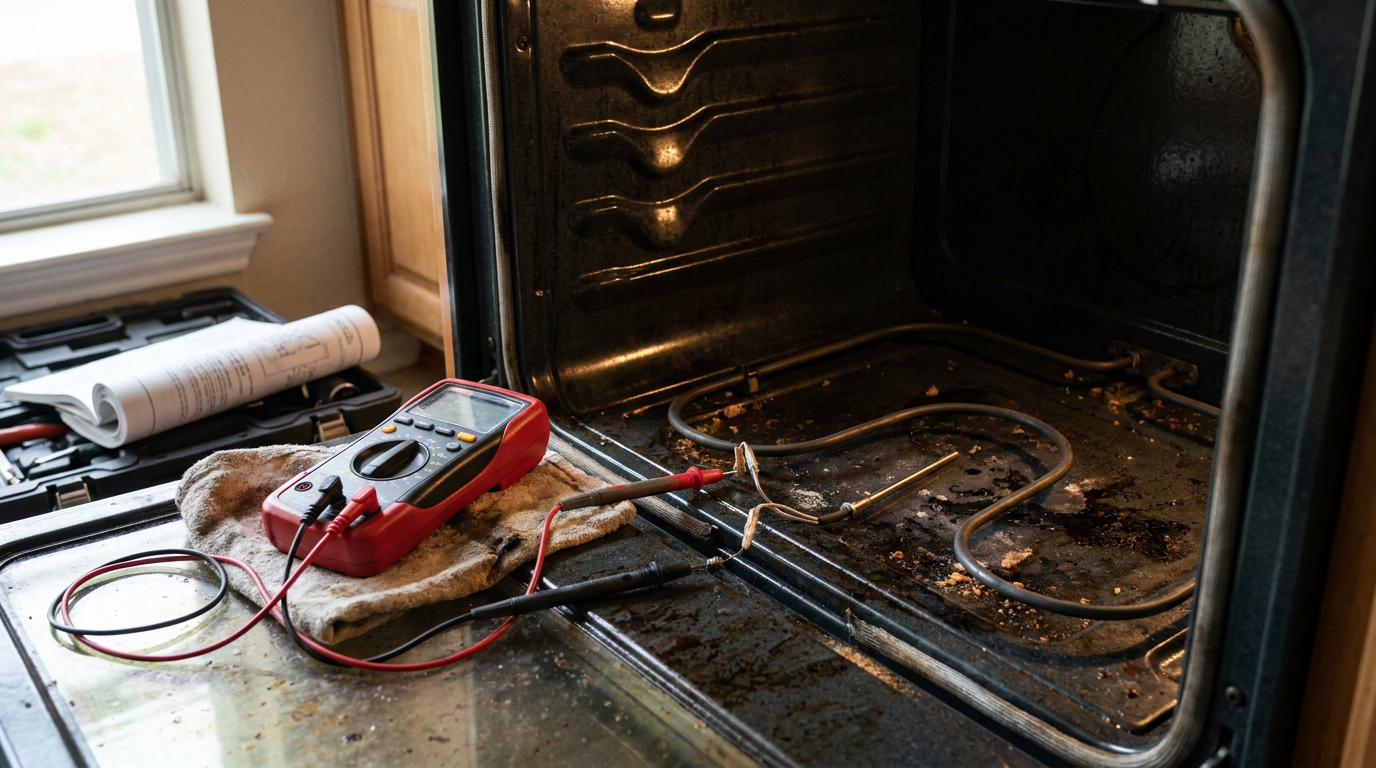
Test Sensor Resistance with a Multimeter — Unplug the plastic terminal connector. Set your digital multimeter to the ohms (Ω) setting at the 2k or lowest range.
- Put your meter probes on the two terminal pins on the sensor harness.
- At room temperature (around 70°F to 72°F), a standard RTD sensor should read between 1,070 and 1,090 ohms.
- If you see under 900 ohms, over 1,200 ohms, or an "O.L" (open loop), the probe’s bad. Replace it with an OEM sensor.
-
Verify the Bake Element with a Continuity Test — If the sensor checks out, test the lower heating element directly. Remove the two 1/4-inch screws at the back mounting plate and gently pull the terminals through the back insulation.
- Slip off the spade connectors with needle-nose pliers. Tape the loose wires to the opening so they don’t disappear back inside the wall.
- Put your multimeter leads across the two element terminals. A healthy 240-volt bake element should read between 18 and 30 ohms. Infinity, or O.L, means the element’s burned out internally.
-
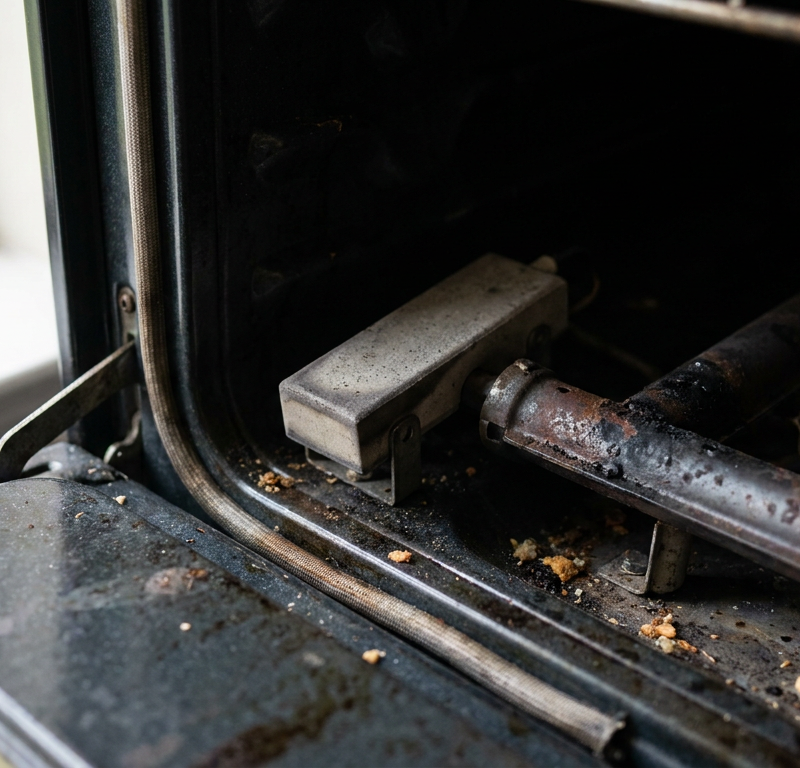
Inspect the Door Gasket and Latch Seal — Close the oven door on a standard crisp dollar bill along the top edge, sides, and bottom corners. Pull the bill gently outward with the door latched.
- You should feel moderate, steady resistance all the way around.
- If the dollar slides out easy at the top or corners, heat’s escaping the whole time you bake, and the front rack zone stays cooler.
- Replace the braided fiberglass gasket if it’s compressed flat, frayed, or torn.
-
Calibrate the Control Board Offset — If everything tests good, the control board may just need a reset on its baseline. Most digital oven controls let you shift the factory temp up or down by 35°F.
- Press and hold the "Bake" button—or "Bake" and "Broil" together, depending on the brand—for 5 seconds until "00" or "CAL" shows on the display.
- Use the temp arrows to offset the reading based on an independent dial thermometer sitting on the center rack. If your baked goods keep coming out underdone in the center, bump it +10°F to +15°F.
OVEN TEMPERATURE SENSOR (RTD) RESISTANCE BENCHMARKS:
Room Temp (70°F)  -------> 1,080 Ω  (+/- 10 Ω is normal)
Ice Water (32°F)   -------> 1,000 Ω
Boiling (212°F)    -------> 1,385 Ω
Defective/Burned   -------> Open Loop (O.L) or < 900 Ω
Common Causes
- Failing Upper Broil Element: A lot of people figure the bottom bake element does all the work. Not so. If the top broil element burns out, the oven loses that top-down radiant heat, and you’ll get raw tops with burnt bottoms.
- Drifting RTD Temperature Sensor: Oven sensors wear out over hundreds of heat cycles. Moisture, grease vapor, and a good bump from a roasting pan can make the sensor read 30°F higher than the real cavity temp, which shuts the heat off too soon.
- Unlevel Stove Base: If the range slopes front to back, batter and cookie fat run toward the rear. The deeper side takes longer to bake through, and people think the oven’s failing when it’s really just sitting crooked.
- Worn Door Gasket: Heat rises and takes the easiest path out. A worn gasket along the upper edge lets air leak, and that creates a draft that can cool the front 4 inches of the rack by up to 40°F compared to the back.
- Convection Fan Motor Failure: In true convection ovens, a third circular heating element and fan move the hot air around. If grease buildup or a blown motor stops that fan, the oven falls back on passive airflow it wasn’t built to use, and hot spots get ugly.
- Poor Pan Spacing & Dark Bakeware: Heavy, dark steel pans soak up radiant heat twice as fast as shiny aluminum pans. Crowd two dark sheet pans against the back and side walls, and natural convection shuts down quick.
Common Mistakes
- Lining the Oven Floor with Aluminum Foil: Don’t do it. Modern ovens vent heat and combustion gases around the cavity floor. Foil blocks airflow, throws heat back onto the lower element, and can melt into the porcelain liner, leaving permanent hot pockets.
- Ignoring Bakeware Finish: If one baking sheet gives you burnt cookies and the other gives you pale ones in the same rack position, the oven probably isn’t the problem. Dark, nonstick, or matte pans brown a lot faster than light reflective aluminum. Match the pans before you start tearing into wires.
- Opening the Door to Peek Every 5 Minutes: Every time you open the door, cavity temp drops between 25°F and 50°F. The rear walls keep that heat way better than the open front, and that’s how you end up with a raw front and scorched back. Use the interior light instead.
- Letting Sensor Probe Touch the Cavity Wall: If someone bumped the RTD sensor sliding in a big Dutch oven, it might be pressed tight against the back wall. It needs to float in open air. If it touches metal, it reads the steel’s conductive temp instead of the actual air temp, and the control board gets fooled.
- Crowding Pans Together: Leaving less than 2 inches between baking sheets forces air up the perimeter walls only, which chokes the middle of the rack. Stagger pans on separate racks if you need to run two batches at once.
Cost & Time Breakdown
| Task | DIY Cost | Pro Cost | Time |
|---|---|---|---|
| Leveling stove & straightening racks | $0 | $100–$150 | 15–20 mins |
| Replacing RTD temperature sensor | $20–$55 | $175–$250 | 25–35 mins |
| Replacing lower bake heating element | $25–$65 | $200–$290 | 30–45 mins |
| Replacing braided door perimeter gasket | $30–$70 | $160–$220 | 20–30 mins |
| Replacing convection fan motor | $60–$130 | $250–$375 | 45–60 mins |
| Recalibrating control board temperature offset | $0 | $110–$160 | 10–15 mins |
Tips & Prevention
- Hang a Commercial Bi-Metal Oven Thermometer: Don’t trust the digital display blindly. Stick an analog dial thermometer on the center rack and check it through the window at the 20-minute mark so you catch temp drift before dinner’s ruined.
- Clean the Sensor Probe Annually: Heavy grease on the RTD probe insulates it and slows the response. Wipe it gently with warm water, mild dish soap, and a soft nylon pad when the oven’s cold.
- Skip the Self-Clean Cycle Before Holidays: The 900°F heat from self-clean cycles is hard on elements, can blow thermal fuses, and can shift sensor resistance. Clean by hand with baking soda paste if you want to avoid a holiday meltdown.
- Rotate Bakeware Only Once at the 75% Mark: If your oven has a small natural bias, rotate sheet pans 180 degrees once, about three-quarters of the way through the bake time. Do it too early and you’ll flatten cakes and breads.
- Leave 2 Inches of Air Clearance: Keep all pans at least 2 inches from the back, sides, and front door so natural convection can do its job.
When to Call a Professional
If you test both heating elements and the temperature sensor with your multimeter and everything reads right on the money within factory ohm specs, the uneven heating is probably coming from bad relay contacts on the main control board. When relay contacts pit or arc, they feed the elements unevenly and you get phantom heat loss that bench testing won’t always catch.
Call an appliance repair technician or a licensed electrician if you see scorch marks on the control board wiring harness, smell burning plastic behind the console, or spot 240-volt supply trouble at the terminal block. Working around the main control module or live 240V junction boxes is no joke. If you’re not comfortable checking supply voltage with the stove pulled away from the wall, let a licensed pro handle it.
Related Articles
Keep troubleshooting with these hand-picked guides from FixlyGuide:
- Dishwasher Won't Fill With Water? 5 Causes and the Step-by-Step Fix — Dishwasher running dry? Learn how to diagnose a stuck float switch, unclog a water inlet valve, and test solenoid continuity with step-by-s…
- Why Your Oven's Set Temperature Is a 50-Degree Lie — Your oven is likely off by 25-50°F, ruining your recipes; learn if it's a simple calibration issue you can fix in minutes or a faulty senso…
- Why Your Dishwasher Leaves Dishes Soaking Wet (And It's Not Your Rinse Aid) — Discover the real reasons your dishwasher isn't drying dishes and how to fix them, from blocked vents to faulty heating elements. Don't let…
- The Invisible Leak: Why Your Microwave Door Won't Seal (And How to Test It) — If your microwave door isn't sealing right, you're losing heat, increasing cook times, and potentially exposing yourself to stray radiation…
- Why Your Electric Stove Burners Are Weak (And Not Getting Hot Enough) — If your electric stove burners are heating up but not reaching full temperature, it's often a sign of a loose terminal, a failing infinite…
- No Hot Water From Your Water Heater? 9 Causes and the Fix for Each — If you have no hot water, it's a cold shower for you and a major headache. We'll show you how to diagnose the cause, from a tripped breaker…
Should you do this yourself?
Answer five quick questions before you start. Safety outranks savings every time.
Your experience with work like this
How high do you have to work?
Does the job involve any of these?
Will it need a permit?
Specialty tools
Free and instant. Educational guidance only — not a quote, inspection, or professional diagnosis.
What should this project cost?
Enter your project details for a realistic cost range before you call anyone.
Cost depends heavily on which system turns out to be the source.
- Regional adjustment
- National average
- Labor share (typical)
- ~$1,620
- Quotes to collect
- 3 written estimates
Educational estimate based on national averages — not a binding quote. Always confirm with written local estimates.
Get the print-ready PDF of this guide
A clean, ad-free, printable version you can keep on your phone or pin to the workshop wall. Free with a FixlyGuide account.
- Print-optimized layout
- Tools, materials & every step included
- Saved to your account
Frequently asked questions
What should an oven temperature sensor read on a multimeter?+
At 70°F room temperature, a standard oven RTD temperature sensor should read between 1,070 and 1,090 ohms on a multimeter. If your meter reads open loop (O.L) or drops below 900 ohms, the internal platinum winding has degraded and the sensor must be replaced.
Does the top broil element turn on during a normal bake cycle?+
Yes, absolutely. During a standard bake cycle, the broil element pulses periodically to supply radiant heat across the top of your food while the bake element carries the bulk of the heating load. If the broil element burns out, baked goods will brown poorly on top while burning on the bottom.
How do I calibrate my oven temperature if it runs too cold or too hot?+
Place an independent, calibrated oven thermometer in the center of the middle rack. Heat the oven to 350°F and let it cycle for 30 minutes. If the reading is consistently off by 15°F to 35°F, use your oven's calibration mode (usually accessed by holding the Bake button for 5 seconds) to offset the digital baseline up or down.
Can lining the oven bottom with foil cause uneven baking?+
Aluminum foil disrupts designed airflow patterns along the floor and sides of the oven, reflecting heat unevenly back onto the lower element. It can also melt onto the porcelain enamel liner under high heat, permanently damaging your oven cavity and creating persistent hot spots.
Why do cookies burn on dark baking sheets but not light ones?+
Dark, matte bakeware absorbs radiant heat rapidly, causing bottoms and edges to brown and crisp much faster than the center. Shiny aluminum or light-colored pans reflect radiant heat, producing much gentler, more even heat transfer across cookies and cakes.
How do I know if my oven door gasket is leaking heat?+
Close the oven door on a crisp dollar bill at several points along the top, sides, and bottom corners. If you can slide the bill out with little to no resistance, the gasket is worn, compressed, or torn. This leak lets heat escape continually, creating a cold pocket in the front third of the cavity.
Why does a convection oven bake more evenly than a conventional oven?+
Convection ovens have an internal fan that actively circulates heated air, breaking up thermal boundary layers and eliminating hot and cold spots. Radiant ovens rely strictly on natural air movement, which makes them far more vulnerable to cold fronts near the door and hot spots near the elements.
How long does an oven bake element typically last before failing?+
A typical bake element lasts between 5 and 10 years depending on use. Regular thermal cycling eventually causes the internal nichrome heating wire to oxidize, blister, thin, and break. Avoid running high-heat self-clean cycles frequently if you want to extend its operating lifespan.
Discussion
Loading comments…