- Tripped Circuit Breaker: This is the most common and easiest fix. Overcurrent, a short, or even an old touchy breaker can cause it.
- Blown Thermal Fuse: The next most common culprit. This safety device blows when the oven gets too hot, often during a long self-clean cycle, a bad thermostat, or poor airflow around the unit.
- Loose Power Cord Connection: Could be at the wall outlet or where the cord lands on the oven's terminal block. Vibration or a sloppy install can loosen things up.
- Faulty Wall Outlet: Less common, but it happens. One side of a 240V outlet can lose power, or a 120V outlet for a gas oven can go dead.
- Main Control Board Failure: The brains of the operation. If the board goes bad, nothing powers up. That repair usually costs more.
HVAC · High energy usage
| Project category | HVAC |
|---|---|
| Problem type | High energy usage |
| Trade required | HVAC |
| Urgency | Planned project |
| Safety risk | Low safety risk |
| DIY suitability | DIY for experienced homeowners |
| Cost category | High cost |
| Typical timeline | Assessment within weeks; replacement planned off-season |
| Contractor type | Licensed HVAC technician |
Repair option
Duct sealing, insulation, and a tune-up before touching the equipment.
Replacement option
High-efficiency replacement sized by a load calculation, not a rule of thumb.
Common causes
- Aging, low-efficiency equipment
- Leaking ducts losing conditioned air
- Insufficient attic insulation
- Oversized system short-cycling
Relevant tools:project cost estimatorrepair or replace
Published September 17, 2026Last updated September 17, 2026
Tools & materials you'll need
Affiliate linksAs an Amazon Associate FixlyGuide earns from qualifying purchases — at no extra cost to you. Prices and availability are accurate as of publication and subject to change.
Quick Answer
Your oven refusing to power on can feel like a real mess, but I've been out on enough calls to know it's often something surprisingly simple. Before you start shopping for a new range, check your circuit breaker first. If that doesn't fix it, a blown thermal fuse is a very common culprit — it's a cheap safety part meant to protect your oven from overheating, and it's usually a pretty straightforward DIY fix.
The Problem
You head into the kitchen, ready to bake, and the oven's just… dead. No lights, no display, no heat — nothing. It's not just that it's not heating up; it's completely unresponsive. This isn't uneven cooking or one stubborn burner. This is a full power loss to the unit, and it leaves you staring at cold food and wondering what went sideways. You may be thinking the whole thing's toast, but hold on a second. In my experience, this usually comes down to one of two things: a power interruption or a safety part that's done exactly what it was built to do — maybe a little too well.
How It Works
Let's talk about how your oven gets power. It's a simple setup on paper, but there are a few important safety pieces in the mix. Most electric ovens run on a dedicated 240-volt circuit — that's two separate 120-volt lines plus a neutral and a ground. So it'll have its own breaker in your electrical panel, usually a double-pole breaker that shuts off both hot legs at the same time. Gas ovens still need 120 volts for the controls, igniter, and oven light, so they use a standard plug and a single-pole breaker.
Power comes from the wall outlet, through the cord, and into the oven's main control board. Along that path, especially in electric ovens, you'll find a little safety part called the thermal fuse. This isn't your regular house fuse; it's a one-time-use device, usually rated for around 300-450°F (150-230°C). Its job is plain: if the oven ever gets too hot — maybe during a long self-clean cycle, or because a thermostat's gone bad — this fuse blows and cuts power to the oven. That's how it keeps a fire from starting. Once it blows, that's it. No reset. You replace it. Think of it like a breaker inside the oven, except it's a one-and-done deal.
The control board handles the rest: temperature settings, igniting the burner on gas units, firing the elements on electric ones, and showing you the readout. If any part of that chain fails — breaker, cord, fuse, or board — the oven goes dark. Knowing that path helps you figure out where the trouble really is.
Step-by-Step Fix
Alright, let's get after it. We're going to track down why your oven's gone quiet. And remember: electricity isn't something to fool with. If you're not sure, stop and call a pro. Better to take a breather than end up with a bad day.
-
Check the Breaker First — The Obvious Starting Point
- Go to your main electrical panel. Find the breaker labeled for your oven. It's usually a double-pole breaker for electric ovens (two switches tied together) or a standard single-pole for gas. If it's tripped, it'll be sitting somewhere between "ON" and "OFF" — sometimes with a little red indicator showing. Turn it all the way OFF, then snap it back to ON. If it trips again right away, you've got a bigger electrical issue, and it's time to call an electrician.
-
Inspect the Power Cord & Outlet — Wiggle, See, Feel
- Pull the oven out a bit (easy does it, they're heavy). Unplug the oven. Take a close look at the cord and the outlet. Any scorch marks? Frayed wires? Is the plug seated tight? A loose connection can cause no power or weird intermittent problems. For gas ovens, you can plug a lamp into the outlet and see if it comes on. For electric, checking the outlet takes a voltage tester — if you don't have one and don't know how to use it safely, skip it and move on, or call an electrician.
- Safety Note: Never work on an oven that's still plugged in. Kill the breaker and unplug it.
-
Access the Rear Panel — Getting Inside
- With the oven unplugged and the breaker off, you'll need to get to the back of the appliance. Usually it's just a few Philips head screws holding a metal panel in place. Toss down a blanket or a piece of cardboard if you're pulling a heavy range out so you don't chew up the floor. Once the screws are out, gently pull the panel off. That opens up the internal wiring and components.
-
Locate the Thermal Fuse — Your Oven's Sacrificial Lamb
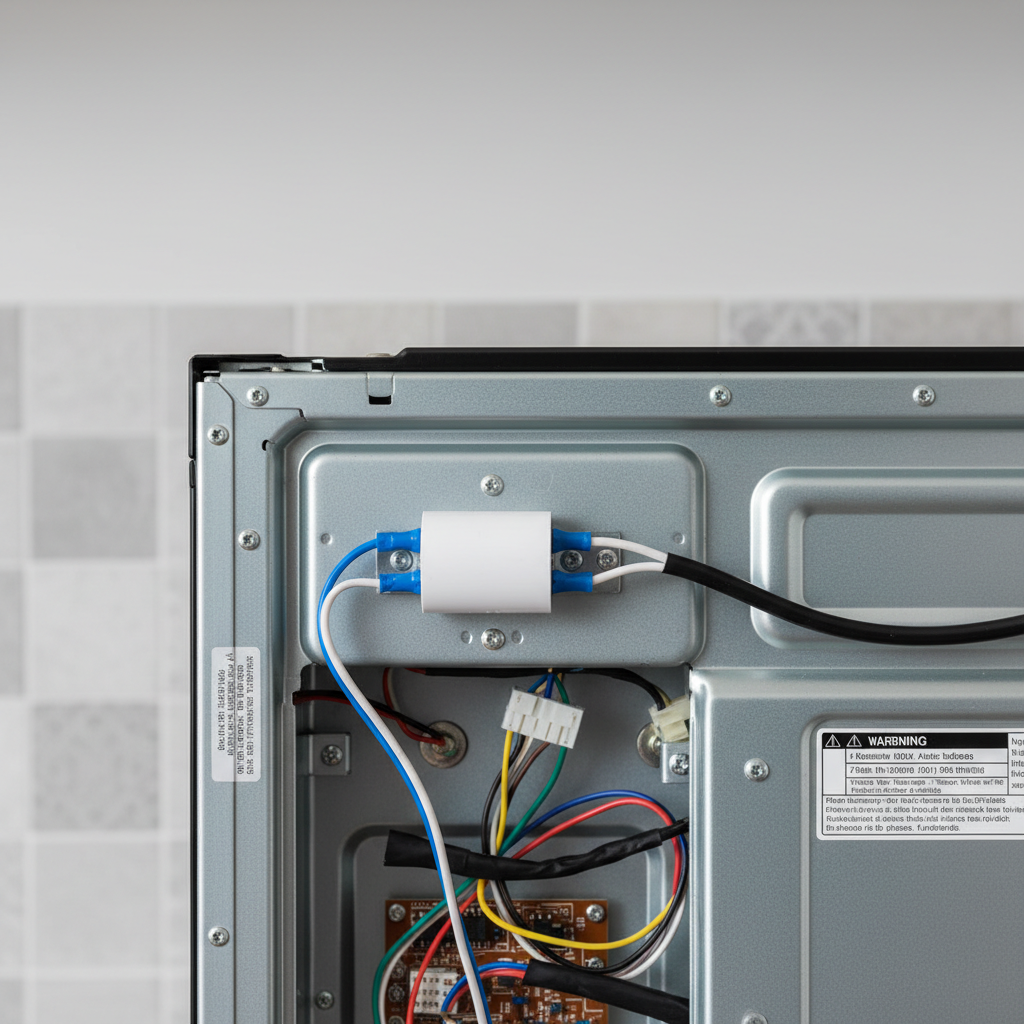
- The thermal fuse is usually a small cylindrical part with two wires connected to it. It's often near the oven's main power input or tucked by the exhaust vent in back. Sometimes it's wrapped in heat-resistant sleeving. Look for a small plastic or ceramic tube, often white or black. It'll have a temperature rating printed on it. It might be labeled "Thermal Cutoff" or "TCO."
-
Test the Thermal Fuse (Continuity) — The Go/No-Go Test
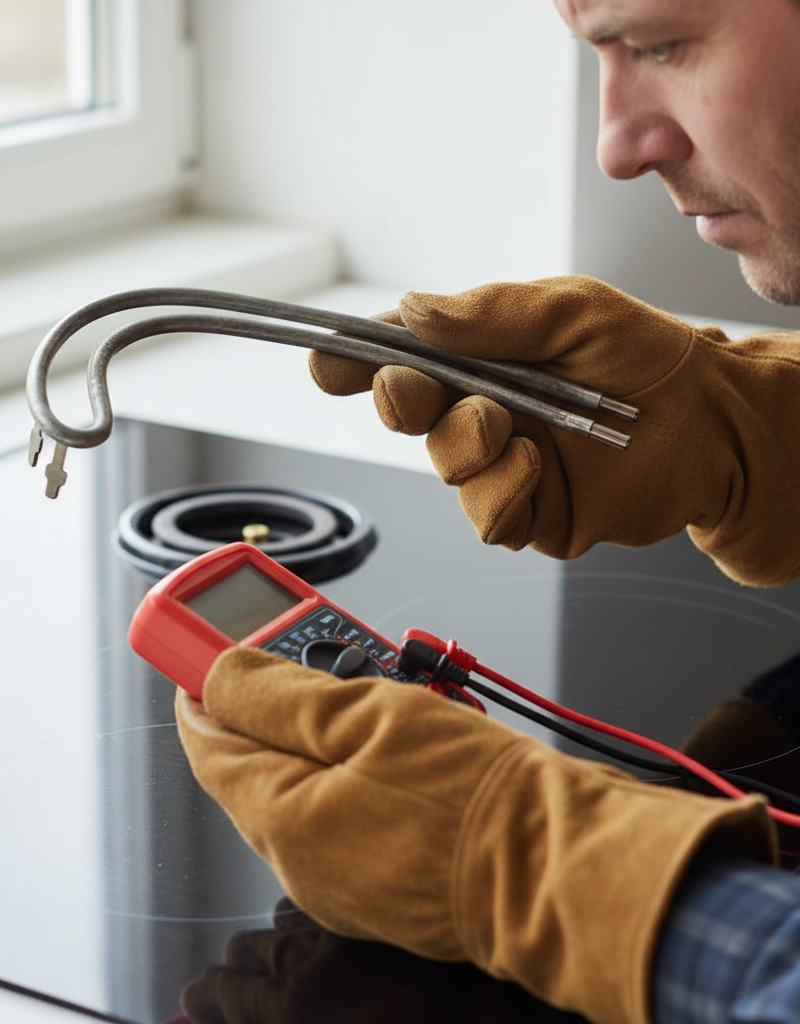
- Tool: Multimeter set to continuity or ohms (Ω).
- Pull both wires off the thermal fuse. Put one probe of your multimeter on each terminal. If you hear a beep or the meter shows near zero ohms (0Ω), the fuse is good. If it reads "OL" (Open Line) or "1" (meaning infinite resistance) and stays quiet, the fuse is blown and needs replacement.
- Pro Tip: I had a call in Frisco last month where the homeowner was convinced the fuse was toast. He'd already ordered a new one. Took me two minutes with a meter to find out the fuse was fine and the real problem was a loose wire at the control board. Test first. Save yourself the headache.
-
Replace the Blown Thermal Fuse — The Simple Swap
- If the multimeter says the fuse is bad, get an exact replacement. Match the voltage and temperature ratings to the old one. Hook up the new fuse and make sure the wires are snug. You might use crimp connectors or screw terminals, depending on the model. Double-check everything's tight. This is usually a sub-$20 part.
-
Check for Other Obvious Damage — A Quick Visual Scan
- While you've got it open, take a quick look for any other obvious trouble: burnt wires, loose connections, or melted parts. A power surge can scorch more than one spot. If you find anything ugly, snap a picture and call in a pro.
-
Reassemble and Test — The Moment of Truth
- Put the back panel on carefully and make sure no wires get pinched. Slide the oven back into place. Plug it in, then flip the breaker back to ON. Cross your fingers and try the oven. If the display lights up and it responds, you've got it sorted.
Common Causes
- Tripped Circuit Breaker: This is the most common and easiest fix. Overcurrent, a short, or even an old touchy breaker can cause it.
- Blown Thermal Fuse: The next most common culprit. This safety device blows when the oven gets too hot, often during a long self-clean cycle, a bad thermostat, or poor airflow around the unit.
- Loose Power Cord Connection: Could be at the wall outlet or where the cord lands on the oven's terminal block. Vibration or a sloppy install can loosen things up.
- Faulty Wall Outlet: Less common, but it happens. One side of a 240V outlet can lose power, or a 120V outlet for a gas oven can go dead.
- Main Control Board Failure: The brains of the operation. If the board goes bad, nothing powers up. That repair usually costs more.
Common Mistakes
- Ignoring the Breaker: Don't jump straight to yanking the oven out. Start with the easy check first.
- Replacing Parts Without Testing: Classic DIY miss. Just because you think it's the fuse doesn't make it so. Use a multimeter before you spend money.
- Not Disconnecting Power Safely: Working with 240V is no joke. Always shut off the breaker and unplug the unit. A shock can put you in the ER fast.
- Pinching Wires During Reassembly: When you put the back panel back on, make sure no wires are trapped between the panel and the frame. That can cause shorts or keep the panel from sitting right.
- Using the Wrong Replacement Part: Match the specs exactly, especially the temperature rating on a thermal fuse. A lower temp rating can blow too soon; a higher one won't protect the oven properly.
- Ignoring Scorched Wires: If you see heat damage on wires or connectors, that's a red flag. A new fuse won't fix the problem that caused the damage in the first place.
Cost & Time Breakdown
Here's a rough idea of what you're looking at if your oven goes dark:
| Task | DIY Cost | Pro Cost (Parts & Labor) | Time |
|---|---|---|---|
| Check Breaker | $0 | $0 (if you call) | 2 minutes |
| Thermal Fuse Replacement | $10–$25 | $150–$300 | 30–60 minutes |
| Power Cord Replacement | $20–$40 | $120–$250 | 30 minutes |
| Outlet Repair | $15–$50 (DIY) | $150–$350 (Electrician) | 1 hour |
| Control Board Swap | $100–$300 | $300–$600 | 1–2 hours |
| Wiring Repair | $5–$20 (DIY) | $100–$250 | 1 hour |
Tips & Prevention
- Regular Panel Check: Every few months, crack open your electrical panel and take a look. If a breaker looks a little off, don't ignore it.
- Cleanliness is Key: Keep the area around your oven clean and free of junk. Good ventilation helps keep things from overheating, and that matters for parts like the thermal fuse.
- Avoid Overloading: Don't try to run every appliance in the kitchen at once, especially if they're sharing circuits. Know what's dedicated and what's not.
- Self-Clean Cycle Smartly: Self-cleaning cycles run hot. Really hot. If your oven's older, or you smell something burning, think about shorter cycles or cleaning by hand. Excess heat kills thermal fuses all the time.
- Professional Check-ups: If your oven's getting up there in years (10+ years), have a technician give it a once-over. They'll catch stuff before it turns into a real failure.
- Know Your Breaker: Label your breakers clearly. Trust me, trying to guess which one is the oven when the kitchen's dark and you're already frustrated isn't fun. I've seen labels like "OVEN" hanging by a thread or gone completely.
When to Call a Professional
Look, I'm all for homeowners getting their hands dirty, but there are times you need to step back and call in the cavalry. If you check the breaker and it keeps tripping immediately, that's a sign of a short circuit or a serious overload, and you need an electrician, pronto. If you've tested the thermal fuse and it's good, and you're not comfortable poking around the control board or testing for voltage, then it's time for an appliance repair tech. Any signs of scorched wiring, melted plastic, or burning smells mean stop right there and get a pro involved — that's a fire hazard. Don't ever mess with a gas line if you smell gas; open windows, get out, and call your utility company immediately. This isn't the kind of job where you want to guess or learn by trial and error if you're out of your depth.
Related Articles
Keep troubleshooting with these hand-picked guides from FixlyGuide:
- The Surprising Reason Your Dishwasher Won't Start (It's Not Always the Door) — Don't rush to call a repairman when your dishwasher refuses to start; often, the culprit is a simple, overlooked issue you can fix yourself…
- Why Does Self-Clean Kill Your Oven? A $15 Fuse Is The Clue — Discover why your oven's self-cleaning cycle repeatedly trips the thermal fuse, leaving it dead, and learn the real cause beyond just the f…
- The Annoying Hum: The Real Reason Your Fridge Vibrates (And How to Silence It) — Is your refrigerator buzzing or vibrating loudly? Don't ignore that annoying hum. This guide uncovers the common culprits behind fridge vib…
- The Mystery of the Warm Fridge: Why Your Food Is Spoiling (and When to Call a Pro) — If your refrigerator isn't keeping food cold, it could be a simple fix or a serious problem requiring a professional. Learn what to check a…
- The Annoying Drip: Why Your Refrigerator's Leaking Water (and the 10-Minute Fix) — Don't let a leaky refrigerator ruin your floor! Discover the common culprits behind water leaks and how you can fix most of them in just 10…
- The $5 Part That Stops Your Dryer From Heating (And How to Replace It in 30 Minutes) — A dryer that tumbles but doesn't heat often points to a blown thermal fuse, a simple and inexpensive fix most homeowners can do themselves.
What should this project cost?
Enter your project details for a realistic cost range before you call anyone.
Cost depends heavily on which system turns out to be the source.
- Regional adjustment
- National average
- Labor share (typical)
- ~$1,620
- Quotes to collect
- 3 written estimates
Educational estimate based on national averages — not a binding quote. Always confirm with written local estimates.
Fixly Project Decision Box
- DIY difficulty
- Professional Recommended
- Estimated time
- Diagnosis 1–2 hours
- Cost level
- Moderate
Main tools / materials
- Non-contact voltage tester
- Outlet tester
- Flashlight
When to stop and call a pro
- Burning smell, scorch marks, or a warm outlet or switch plate
- A breaker that trips again right after being reset
- Any work inside the service panel
- Aluminum wiring or cloth-insulated wiring
Need professional help?
Talk to a Licensed ElectricianGet the print-ready PDF of this guide
A clean, ad-free, printable version you can keep on your phone or pin to the workshop wall. Free with a FixlyGuide account.
- Print-optimized layout
- Tools, materials & every step included
- Saved to your account
Frequently asked questions
Why would my oven suddenly stop getting power?+
The most common reasons are a tripped circuit breaker, a loose power cord, or a blown thermal fuse. The thermal fuse is a safety device that permanently cuts power if the oven overheats, often during a self-clean cycle.
How do I check if my oven's circuit breaker is tripped?+
Go to your main electrical panel and locate the breaker labeled for your oven. If it's tripped, it will be halfway between the 'ON' and 'OFF' positions. Flip it completely to 'OFF' and then firmly back to 'ON'.
What does a thermal fuse do in an oven?+
A thermal fuse is a one-time safety device designed to protect your oven from overheating. If the internal temperature gets too high, the fuse blows, cutting all power to the oven to prevent fire or damage.
Can I replace a thermal fuse myself?+
Yes, replacing a thermal fuse is often a straightforward DIY task. You'll need to access the back of the oven, locate the fuse, test it with a multimeter, and if it's blown, replace it with an exact matching part.
What tools do I need to test a thermal fuse?+
You'll need a multimeter (set to continuity or ohms) to test the thermal fuse. You'll also likely need screwdrivers (Philips head) to remove the oven's back panel.
Is it safe to work on my oven's electrical components?+
Only if you're comfortable and take proper safety precautions. Always disconnect power at the circuit breaker and unplug the oven before attempting any repairs. If you're unsure, call a professional.
What if my oven's breaker keeps tripping?+
If the breaker trips immediately after resetting, or repeatedly, this indicates a serious electrical problem like a short circuit or overload. Stop attempting to reset it and call a licensed electrician immediately to diagnose the issue.
How much does a new thermal fuse cost?+
A replacement thermal fuse is usually inexpensive, typically costing between $10 and $25. Labor from a professional appliance technician will add significantly to that cost.

Discussion
Loading comments…