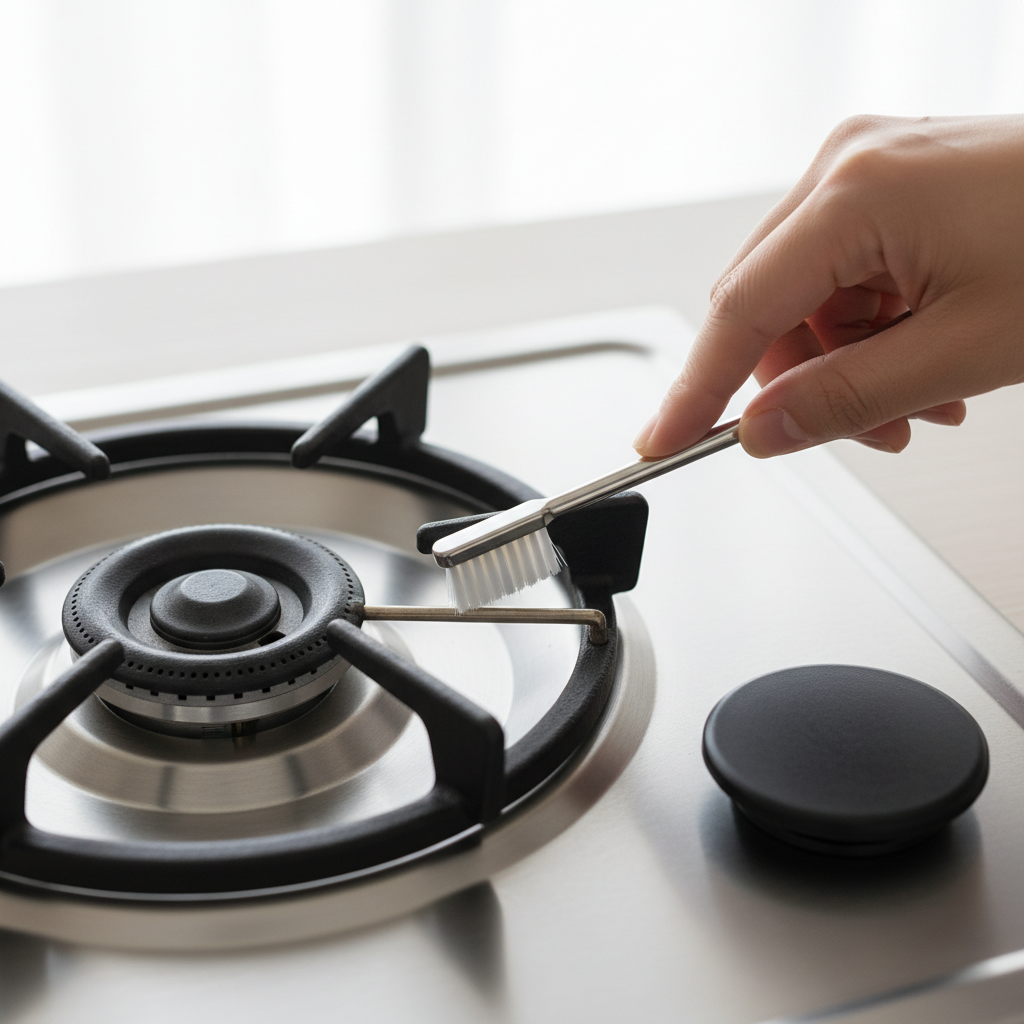
- Dirty Thermocouple/Flame Sensor: This is the big one. Carbon, grease, and food splatter coat the sensor and insulate it, so it can’t read the flame heat and keep the gas valve open.
- Misaligned Thermocouple/Flame Sensor: If it’s bent or sitting out of position, it won’t get hot enough to send the right signal.
- Faulty Thermocouple/Flame Sensor: Sometimes the part just wears out. Internal wiring breaks down, or the sensor loses the ability to generate that micro-current.
- Clogged Burner Ports: If gas isn’t reaching the igniter evenly, or the flame is weak and ragged, the sensor may not see a steady flame.
- Weak Igniter Spark: Not as common for the “lights then goes out” problem, but a weak spark can make ignition flaky and lead to sensor issues.
HVAC · High energy usage
| Project category | HVAC |
|---|---|
| Problem type | High energy usage |
| Trade required | HVAC |
| Urgency | Planned project |
| Safety risk | Low safety risk |
| DIY suitability | DIY for experienced homeowners |
| Cost category | High cost |
| Typical timeline | Assessment within weeks; replacement planned off-season |
| Contractor type | Licensed HVAC technician |
Repair option
Duct sealing, insulation, and a tune-up before touching the equipment.
Replacement option
High-efficiency replacement sized by a load calculation, not a rule of thumb.
Common causes
- Aging, low-efficiency equipment
- Leaking ducts losing conditioned air
- Insufficient attic insulation
- Oversized system short-cycling
Relevant tools:project cost estimatorrepair or replace
Published September 8, 2026Last updated September 8, 2026
Tools & materials you'll need
Affiliate linksAs an Amazon Associate FixlyGuide earns from qualifying purchases — at no extra cost to you. Prices and availability are accurate as of publication and subject to change.
Quick Answer
Ever stand there clicking a gas burner, watch it light, and then—poof—it goes out? Yeah, that’ll make you mutter at the stove. That quick flash of flame followed by dead air usually points to a safety device acting up. Most of the time, you’re looking at a thermocouple or flame sensor that isn’t doing its job. It feels the flame heat and tells the gas valve to stay open. If it’s dirty, bent, or plain worn out, it misses the heat, the valve shuts, and the flame disappears. Good news: a lot of the time, it’s a fairly simple fix.
The Problem
I’ve seen this a hundred times. Homeowners call me up, irritated because one gas burner—sometimes just one, sometimes the whole stove—lights for a second, then cuts right out. You hold the knob. You let go. Same thing. Click, whoosh of flame, then poof—gone. It’s not just a nuisance; it means dinner’s off and you’re standing there hungry. What’s happening is the stove’s safety system is doing its job, just at the wrong time. It’s built to stop gas if there’s no flame, which is exactly what you want. But when it thinks there’s no flame when there clearly is, that’s where the mess starts.
How It Works
Let’s talk about what’s actually happening under that grate. Most modern gas stovetops use an electronic ignition system. Turn the knob and you’re doing two things: opening the gas valve and sending a signal to the igniter. The igniter sparks, makes a tiny arc, and lights the gas. But here’s the key part: right next to that igniter, or sometimes built into the same setup, is a part called a thermocouple or a flame sensor. Don’t get hung up on the name; they’re doing a similar job. The thermocouple is a small metal rod that, once the flame heats it up, generates a tiny electrical current. That current tells the safety valve, “Hey, there’s flame here. Keep the gas flowing.” If that current never shows up—because the thermocouple’s dirty, bent, or bad—the valve gets the opposite message: “No flame. Shut it down.” And snick, the gas stops. It all happens fast, usually 5 to 10 seconds after ignition.
That’s the whole idea. Keep gas from pouring into the kitchen if the flame isn’t there. Smart design. Same basic deal on the oven side too, just a different setup.
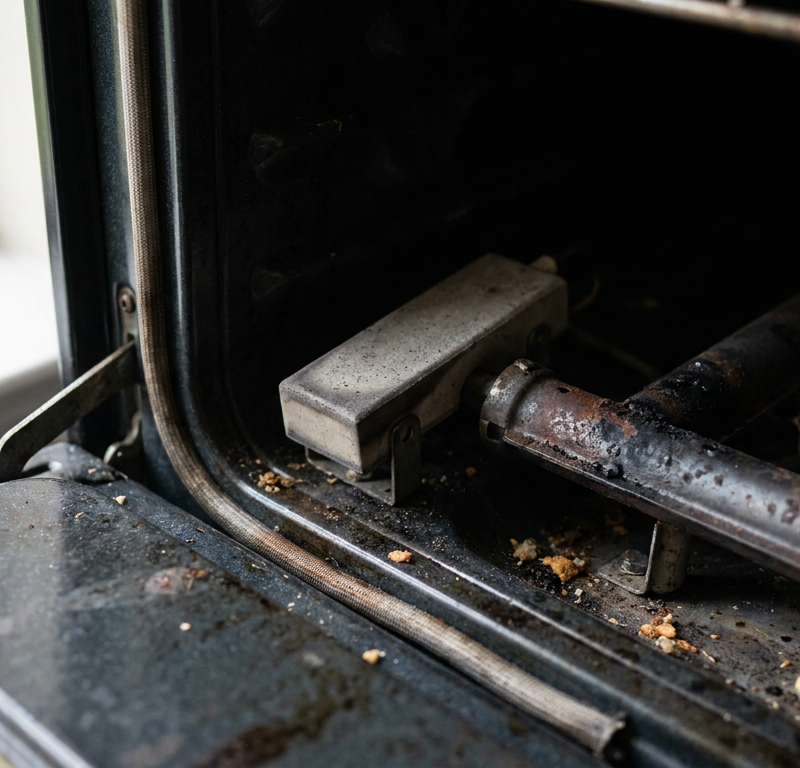
Over time, grease, food crumbs, and plain old wear can mess with that little process. I once pulled apart a 15-year-old Frigidaire range in an old Victorian out in Alameda; the homeowner said she cleaned it all the time, but that thermocouple was buried under years of cooked-on grime. A careful scrub later, and she was back in business. No magic. Just grime.
Step-by-Step Fix
Alright, let’s get you cooking again. First off, make sure the stove is completely cool and you’ve got decent light. Don’t rush this part.
-
Safety First: Kill the Power and Gas — Don’t skip this one!
- Turn off the burner and let it cool all the way down. Even a warm stove can bite you. Best move is to flip the circuit breaker that feeds the stove or unplug it from the wall. For gas, find the main shut-off valve behind the range or the smaller valve on the gas line itself and turn it to the 'OFF' position. You don’t want gas flowing while you’re poking around.
-
Remove Grates and Burner Caps — Clear the decks.
- Lift off the burner grates and set them aside. Then pull the burner caps and burner heads. Those are the pieces sitting right over the igniter. Most of the time they just lift straight up. Snap a quick photo with your phone if you’re worried about putting them back wrong—saves a headache later.
-
Locate the Igniter/Thermocouple — Spot the sensor.
- Look closely at the burner base. You’ll see a small metal rod, often with a ceramic tip, sticking up near the gas port. That’s the igniter. Right beside it, or sometimes part of the same assembly, there’ll be another thinner metal probe. That’s your thermocouple or flame sensor. That’s the piece we’re after. It may look discolored, crusty, or just plain tired.
-
Inspect for Obstructions or Damage — Give it the once-over.
- Check for the obvious stuff. Is the igniter cracked? Is the thermocouple bent, broken, or badly corroded? Sometimes a spill or a chunk of food is physically blocking the flame path. If anything looks snapped or chewed up, cleaning won’t fix it, and you’ll probably need a new part.
-
Clean the Igniter/Thermocouple — The main event.
- Tools: Grab a soft-bristled toothbrush, an old one is fine as long as it’s clean, a fine-grit Emory board, or very fine sandpaper (300-400 grit is good), plus some rubbing alcohol. Skip the harsh cleaners and wire brushes; they can wreck the ceramic or score the metal.
- Process: Gently scrub the ceramic tip of the igniter and the metal probe of the thermocouple. You’re trying to get rid of carbon, grease, and cooked-on food. For stubborn buildup on the metal probe, lightly sand it with the Emory board or fine sandpaper. You want clean metal showing. Don’t bear down on it. Just scuff the crud off. Finish by wiping everything with a cloth dampened with rubbing alcohol to clear off the residue.
-
Clean Burner Ports — While you’re in there.
- Take a paperclip or a small needle and carefully clear the tiny holes (ports) around the burner head. That’s where the gas comes out. They get clogged with gunk all the time, and then you get weak flames or bad ignition. Don’t widen the holes—just open them up. A blast of compressed air can help, too, if you’ve got it.
-
Reassemble the Burner — Put it all back.
- Make sure every part is completely dry before you put it back together. Set the burner heads back in their proper spots. They usually only fit one way. Then reinstall the burner caps. Finish by putting the grates back on.
-
Restore Power and Gas, Then Test — The moment of truth.
- Turn the gas back on and restore power to the stove. Go to the trouble burner, turn the knob to 'light,' and hold it for 5-10 seconds. Let go. Does the flame stay on? If it does, nice work. Try it a few times to make sure. If not, don’t panic—sometimes you’ve got a deeper problem.
-
Adjust Flame if Needed — For a perfect blue.
- Once the burner stays lit, look at the flame. It ought to be mostly blue, with a small yellow tip. If it’s too yellow or too small, you may have an air shutter that needs adjusting, but that’s a job for another day—or a pro if you’re not comfortable. For now, just make sure it lights reliably and stays lit.
Common Causes
- Dirty Thermocouple/Flame Sensor: This is the big one. Carbon, grease, and food splatter coat the sensor and insulate it, so it can’t read the flame heat and keep the gas valve open.
- Misaligned Thermocouple/Flame Sensor: If it’s bent or sitting out of position, it won’t get hot enough to send the right signal.
- Faulty Thermocouple/Flame Sensor: Sometimes the part just wears out. Internal wiring breaks down, or the sensor loses the ability to generate that micro-current.
- Clogged Burner Ports: If gas isn’t reaching the igniter evenly, or the flame is weak and ragged, the sensor may not see a steady flame.
- Weak Igniter Spark: Not as common for the “lights then goes out” problem, but a weak spark can make ignition flaky and lead to sensor issues.
- Gas Pressure Issues: Not common on a single burner, but if multiple burners are acting up, low gas pressure could be the culprit. Usually that’s a utility issue.
Common Mistakes
- Using Abrasive Cleaners: Don’t use steel wool, harsh chemical cleaners, or wire brushes on the ceramic igniter or metal sensor. You can scratch the ceramic, strip protective coatings, or warp the metal, and then you’ve made a small problem worse.
- Forgetting to Disconnect Power and Gas: I’ve seen guys get shocked or accidentally leak gas because they were in a hurry. Always cut the power and gas. No dice otherwise.
- Bending the Thermocouple Aggressively: The thermocouple has some flex, but if you bend it too hard or too sharply, you can break the internal connection. Easy does it if you’re trying to reposition it.
- Ignoring Other Burner Issues: If one burner’s acting goofy, don’t assume the rest are fine. Give all of ’em a quick look while the grates are off. A little preventive maintenance saves headaches.
- Not Fully Drying Components: Water and electricity or gas don’t mix. Make sure everything’s bone dry before you put it back together and restore power or gas. Even a little moisture can cause trouble.
- Not Testing After Cleaning: Don’t just clean it and walk away. Test the burner right away so you know the fix worked and the flame’s steady. If it’s still acting up, you’ll know immediately.
Cost & Time Breakdown
Sometimes it’s just a cleaning. Sometimes you need a part. Here’s what you’re looking at:
| Task | DIY Cost | Pro Cost | Time |
|---|---|---|---|
| Basic Cleaning (DIY) | $0 (existing tools) | N/A | 30 minutes |
| Thermocouple/Sensor Replacement (DIY) | $15–$50 | N/A | 45–60 minutes |
| Burner Head/Igniter Replacement (DIY) | $30–$100 | N/A | 45–75 minutes |
| Pro Service Call | N/A | $150–$300 (trip+labor) | 1–2 hours (total visit) |
| Full Stove Repair (Pro) | N/A | $250–$600+ | Varies |
Tips & Prevention
- Regular Cleaning: Make burner cleanup part of your normal kitchen routine. Wipe spills right away. Every few months, pull the grates and give the igniters and sensors a quick wipe. Keeps buildup from getting ahead of you.
- Check Flame Color: A healthy gas flame is blue with maybe a tiny yellow tip. If the flame’s mostly yellow or orange, that usually means incomplete combustion or dirty burner ports, and that can contribute to thermocouple trouble.
- Inspect Annually: Once a year, pull off all the burner parts and give them a good cleaning and inspection, even if everything seems fine. Think of it like a tune-up for the stovetop.
- Avoid Over-Boiling: Try not to let pots boil over like crazy. Starchy water, grease, and sauces are the worst for gumming up those delicate burner parts.
- Know Your Parts: If you’ve got an older stove, it helps to know the make and model number. If you ever need a replacement part, you’ll have the info ready. You can usually find it on a sticker inside the oven door or on the back of the range.
- Gentle Handling: When you’re cleaning around the igniter and thermocouple, be gentle. They’re not made of glass, but rough handling can bend or break them and turn a cleaning job into a parts swap.
When to Call a Professional
Look, I’m all for DIY, but some jobs are better left to the folks who do ’em every day. If you’ve cleaned the igniter and thermocouple well and the problem still won’t quit, odds are you’ve got a bad part that needs replacing. Replacing a thermocouple isn’t rocket science, but some stoves make it a royal pain to access—you may have to pull the whole cooktop or partially tear down the range just to get at it. If multiple burners are failing, you smell gas even faintly, or you’re not comfortable working around gas lines and electrical parts, stop right now and call a licensed appliance repair technician. Messing with gas isn’t a game; a bad connection or sloppy repair can lead to dangerous gas leaks or carbon monoxide buildup. If you’re unsure, call a pro. Your family’s safety is worth the service call.
Related Articles
Keep troubleshooting with these hand-picked guides from FixlyGuide:
- Your Refrigerator's Loud Hum? The Fix Most People Miss — A constant, loud refrigerator hum is more than annoying—it's a warning sign. Before you call a pro, discover the #1 most overlooked cause a…
- The Surprising Reason Your Dishwasher Won't Start (It's Not Always the Door) — Don't rush to call a repairman when your dishwasher refuses to start; often, the culprit is a simple, overlooked issue you can fix yourself…
- Why Your Oven's Set Temperature Is a 50-Degree Lie — Your oven is likely off by 25-50°F, ruining your recipes; learn if it's a simple calibration issue you can fix in minutes or a faulty senso…
- Why Your Microwave Sparks and How to Prevent a Fire — A sparking microwave is alarming, but often an easy fix. Discover the common causes of microwave arcing, from forgotten forks to hidden dam…
- Why Your Dishwasher Leaves Dishes Soaking Wet (And It's Not Your Rinse Aid) — Discover the real reasons your dishwasher isn't drying dishes and how to fix them, from blocked vents to faulty heating elements. Don't let…
- The #1 Mistake Homeowners Make When a Gas Burner Won't Light (And the Easy Fix) — A gas stove burner that won't light is a common issue, often due to a clogged igniter or burner port, which homeowners frequently misdiagno…
Should you do this yourself?
Answer five quick questions before you start. Safety outranks savings every time.
Your experience with work like this
How high do you have to work?
Does the job involve any of these?
Will it need a permit?
Specialty tools
Free and instant. Educational guidance only — not a quote, inspection, or professional diagnosis.
What should this project cost?
Enter your project details for a realistic cost range before you call anyone.
Cost depends heavily on which system turns out to be the source.
- Regional adjustment
- National average
- Labor share (typical)
- ~$1,620
- Quotes to collect
- 3 written estimates
Educational estimate based on national averages — not a binding quote. Always confirm with written local estimates.
Get the print-ready PDF of this guide
A clean, ad-free, printable version you can keep on your phone or pin to the workshop wall. Free with a FixlyGuide account.
- Print-optimized layout
- Tools, materials & every step included
- Saved to your account
Frequently asked questions
Why does my gas burner light then immediately go out?+
This usually indicates an issue with the thermocouple or flame sensor. This safety device needs to detect the flame's heat to keep the gas valve open. If it's dirty, misaligned, or faulty, it can't send the signal, and the gas shuts off.
How do I clean a gas stove thermocouple?+
First, turn off the gas and electricity to the stove. Remove burner grates and caps. Gently scrub the metal probe of the thermocouple with a soft-bristled toothbrush or a fine-grit Emory board to remove carbon buildup and grease. Finish with rubbing alcohol.
Can I replace a thermocouple myself?+
Yes, replacing a thermocouple is often a DIY task, but accessibility can vary by stove model. Ensure you buy the correct replacement part for your specific range and follow the manufacturer's instructions carefully. Always shut off gas and power first.
What happens if a gas stove thermocouple is bad?+
If a thermocouple is bad, it won't be able to generate the necessary electrical signal when heated by the flame. This will cause the safety valve to close, preventing the burner from staying lit, even if it initially ignites.
How long should a gas burner stay lit after releasing the knob?+
After you turn the knob to 'light' and the burner ignites, you typically need to hold the knob in for about 5 to 10 seconds. This allows the thermocouple to heat up and signal the gas valve to remain open. Once released, the flame should stay lit continuously.
Why would cleaning not fix my gas burner issue?+
If cleaning doesn't resolve the problem, the thermocouple or igniter might be faulty, misaligned, or the burner ports could be severely clogged. Less commonly, there could be issues with the gas valve or gas supply, which would require professional attention.
Is it dangerous if my gas burner won't stay lit?+
While the safety system is designed to shut off gas if no flame is detected, a malfunctioning burner can still release a small amount of unignited gas before cutting off. Persistent gas smells are a serious concern and warrant immediate professional help.
What's the difference between an igniter and a thermocouple?+
The igniter creates the spark that lights the gas. The thermocouple (or flame sensor) is a separate safety device that senses the heat of the flame and tells the gas valve to stay open, ensuring gas only flows when there's an active flame.
Can low gas pressure cause this problem?+
Low gas pressure can sometimes contribute, especially if multiple burners are affected. However, for a single burner issue, a dirty or faulty thermocouple is far more common. If you suspect low gas pressure, contact your gas utility company.
How often should I clean my gas stove burners?+
For optimal performance and to prevent issues like this, it's a good idea to wipe down the burner area regularly after spills and perform a more thorough cleaning of the igniters and thermocouples every few months, or annually as part of a deeper kitchen clean.
Discussion
Loading comments…