- That Mildew Smell in Your Washer? Here’s the Real Reason — Is a musty odor taking over your laundry room? That mildew smell from your washing machine isn't just unpleasant—it's a sign of a deeper pr…
- My Toaster Only Toasts One Side: The Hidden Thermostat Flaw — If your toaster only toasts one side, the cause is often an imbalanced internal thermostat or misaligned heating element, a specific flaw y…
- The Mystery of the Warm Fridge: Why Your Food Is Spoiling (and When to Call a Pro) — If your refrigerator isn't keeping food cold, it could be a simple fix or a serious problem requiring a professional. Learn what to check a…
- The 1 Dryer Mistake That Adds Hours to Laundry Day (and Costs You Money) — Discover the most common, overlooked reason your dryer is taking too long to dry clothes and how a simple fix can save you time and energy.
- Why Does Self-Clean Kill Your Oven? A $15 Fuse Is The Clue — Discover why your oven's self-cleaning cycle repeatedly trips the thermal fuse, leaving it dead, and learn the real cause beyond just the f…
Plumbing · Leak
| Project category | Plumbing |
|---|---|
| Problem type | Leak |
| Trade required | Plumbing |
| Urgency | Emergency — act now |
| Safety risk | High safety risk |
| DIY suitability | DIY for experienced homeowners |
| Cost category | Low cost |
| Typical timeline | Shut water off now; repair usually same or next day |
| Contractor type | Licensed plumber |
Repair option
Isolate at the shutoff, replace the failed component, and dry the cavity fully.
Replacement option
Repipe the run or the branch when corrosion is widespread.
Common causes
- Failed supply line or shutoff valve
- Worn washers, cartridges, or P-trap connections
- Pinhole corrosion in older copper
Relevant tools:emergency checklistdiy or hire a pro
Published August 27, 2026Last updated August 27, 2026
Tools & materials you'll need
Affiliate linksAs an Amazon Associate FixlyGuide earns from qualifying purchases — at no extra cost to you. Prices and availability are accurate as of publication and subject to change.
Quick Answer
That stubborn gap in your oven door isn't just ugly — it’s bleeding heat and drying out your food while it does it. Most of the time, you’re chasing a worn-out door gasket, tired hinges, or a door that’s just a hair out of line. The good news? For most homeowners, this is a pretty simple fix. A quick look usually tells you where the trouble is, and with a few basic tools, you can get that door sealing back up tight, save some energy, and get a roast that actually stays juicy.
The Problem
I’ve been in kitchens where folks swear their oven’s acting possessed — takes forever to preheat, bakes unevenly, or turns the whole room into a sauna every time they cook. Nine times out of ten, I’m looking at an oven door that isn’t sealing the way it should. Maybe there’s a visible gap. Maybe it feels sloppy. Maybe you can literally feel hot air sneaking out. That’s heat that ought to be doing its job inside the oven, not warming your elbows.
This isn’t just about comfort. It’s about performance and wasted money. An oven with a leaky door has to work harder to hold temp, and that means more gas or electricity burned for no good reason. I pulled a water heater in Frisco last month that had exactly this kind of “just a little leak” story — and by the time the homeowner got around to it, the utility bills had already done the talking. Same deal here. A gappy oven door won’t hold steady heat, and your cookies, casseroles, and Sunday chicken all pay the price.
How It Works
Your oven door’s supposed to make a sealed box. That’s the whole trick. Trap the heat inside, and the food cooks even. Let that heat leak out, and everything starts getting weird.
A few parts make that seal happen. First, there’s the door panel itself, usually built with multiple layers of glass and an air gap for insulation. Then you’ve got the hinges — usually spring-loaded — which let the door swing open and also pull it snug when it closes. The big player is the gasket, sometimes called the seal. That’s the flexible strip, usually heat-resistant rope material or a rubbery band, that runs along the edge of the oven opening or the door.
When the door shuts, that gasket compresses. Nice and tight. That’s what keeps hot air in and cooler air out. If that seal’s weak, heat spills out, the temp swings around, and the thermostat keeps kicking the burner or element on and off trying to catch up. It’s like trying to heat a house with a window cracked open — no dice.
And if the hinges get loose, or the gasket gets stiff, cracked, or pops out of its channel, that seal’s toast. You might notice a draft, see steam escaping, or find one side of the oven cooks hotter than the other. Once you know how those pieces work together, the gap stops being mysterious real quick.
Step-by-Step Fix
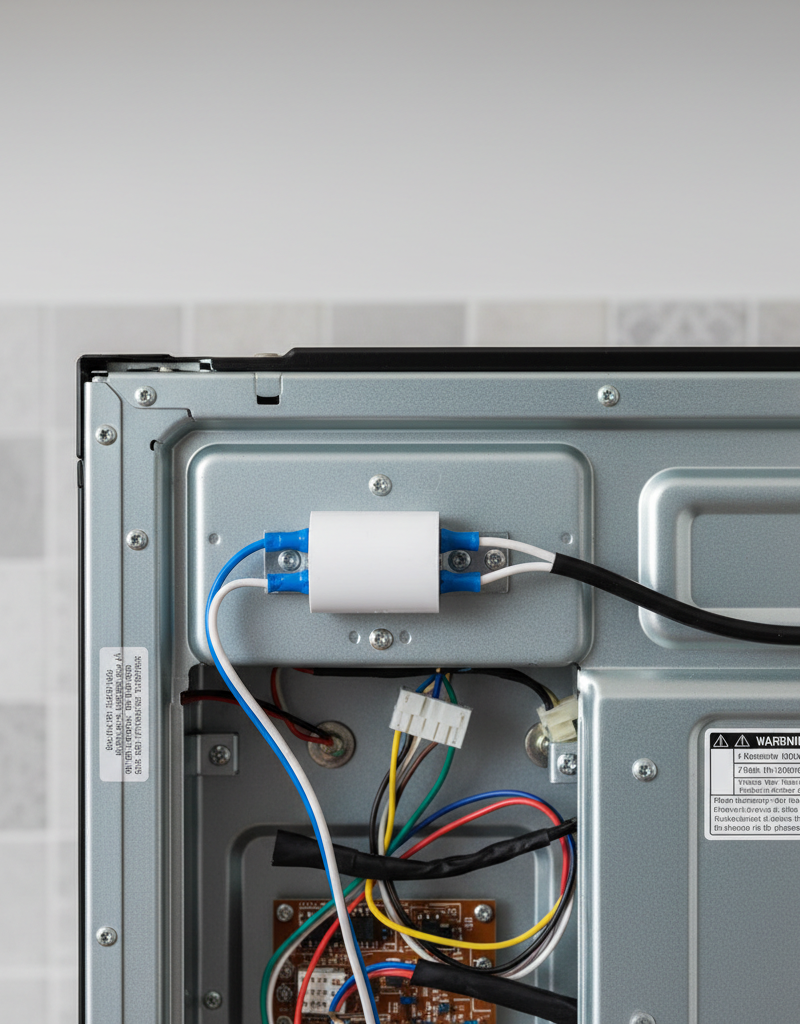
Before you touch anything, make sure the oven’s cold and unplugged. If it’s a gas oven, shut off the gas supply at the valve behind the range. Don’t skip that part.
-
Inspect the Gasket — The usual suspect
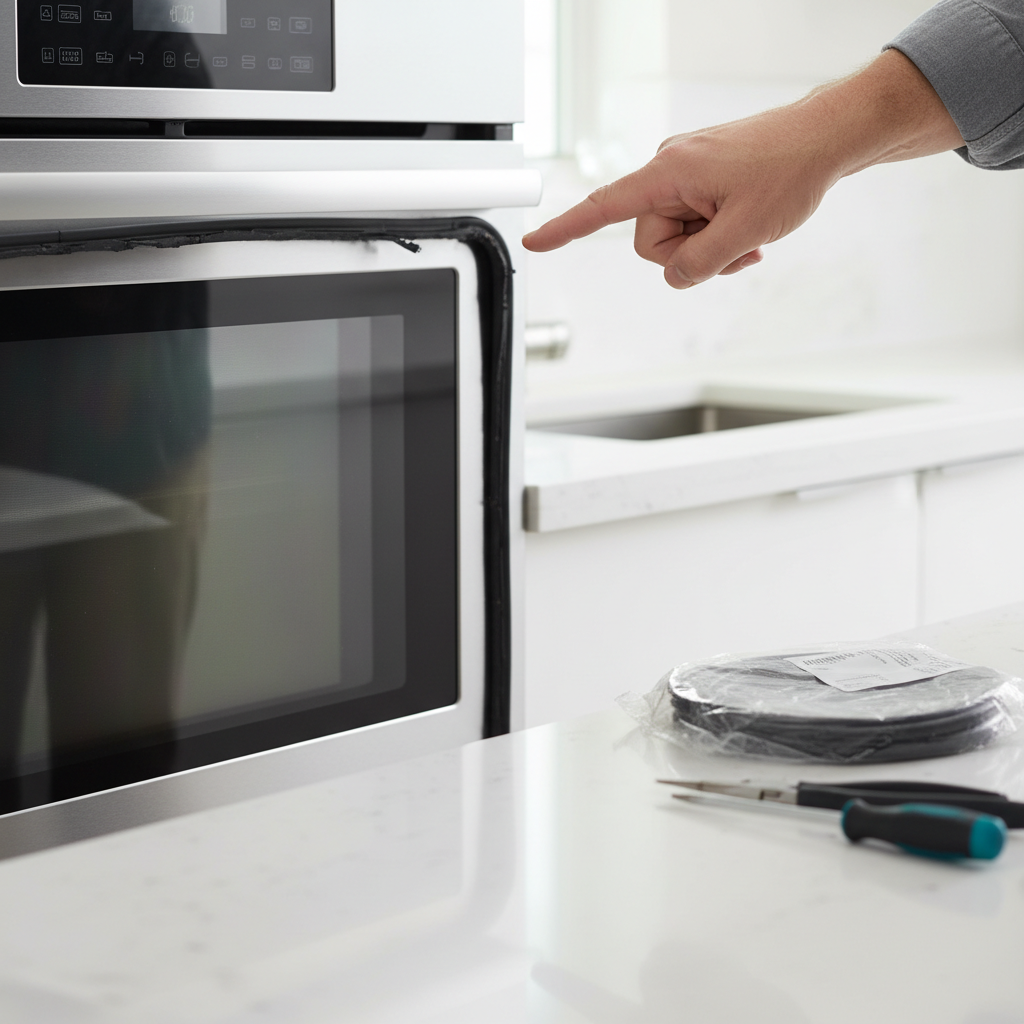
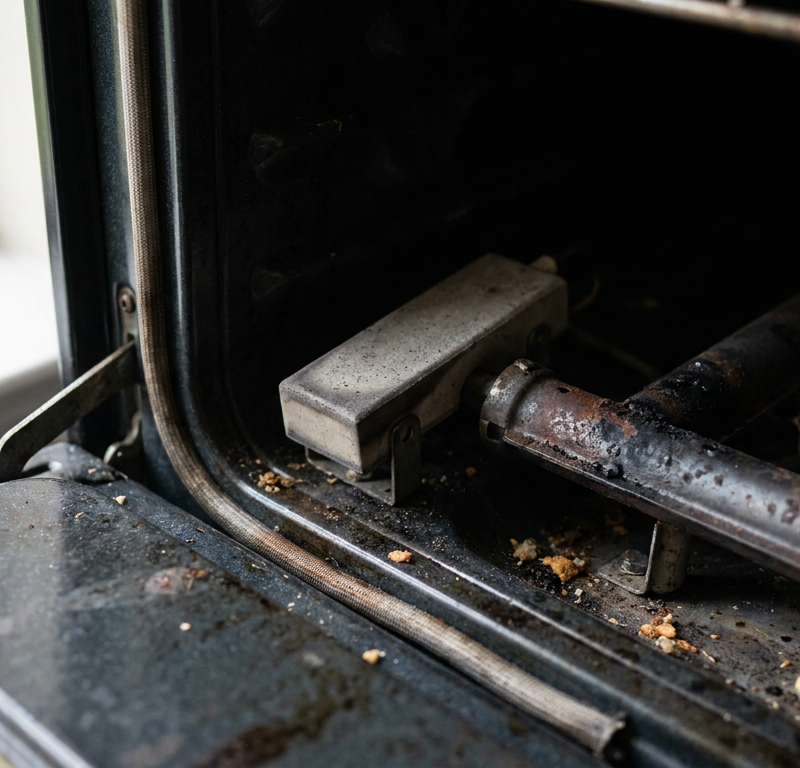
- Open the door and run your hand along the gasket, that rubber or fabric-like seal around the oven opening or on the door itself. Look for tears, cracks, brittle spots, or sections that’ve come loose from clips or grooves. If it feels hard as a rock or looks damaged, that’s probably your culprit. On a lot of ovens, that gasket just presses into a channel or clips in place. Sometimes it’s not broken — it’s just popped loose. Gently work it back in all the way around.
-
Test the Paper Trick — Quick seal check
- Close the door on a dollar bill or a thin sheet of paper. Try pulling it out. You should feel some resistance. Check a few spots — top, bottom, both sides. If it slides out easy in one area, that’s where the seal’s weak. Handy little test. Fast too.
-
Tighten Door Hinges — Sometimes they just get wobbly
- Open the oven door all the way. On plenty of models, you’ll see screws holding the hinges to the frame or the door. Those can back out over time. Grab a screwdriver — usually a Philips head — and snug up any visible screws. Don’t crank on them like you’re hanging a gate; you can strip the heads. If the screws are tight but the hinge still feels sloppy, that hinge may be worn out.
-
Examine Hinge Condition — Wear and tear over years
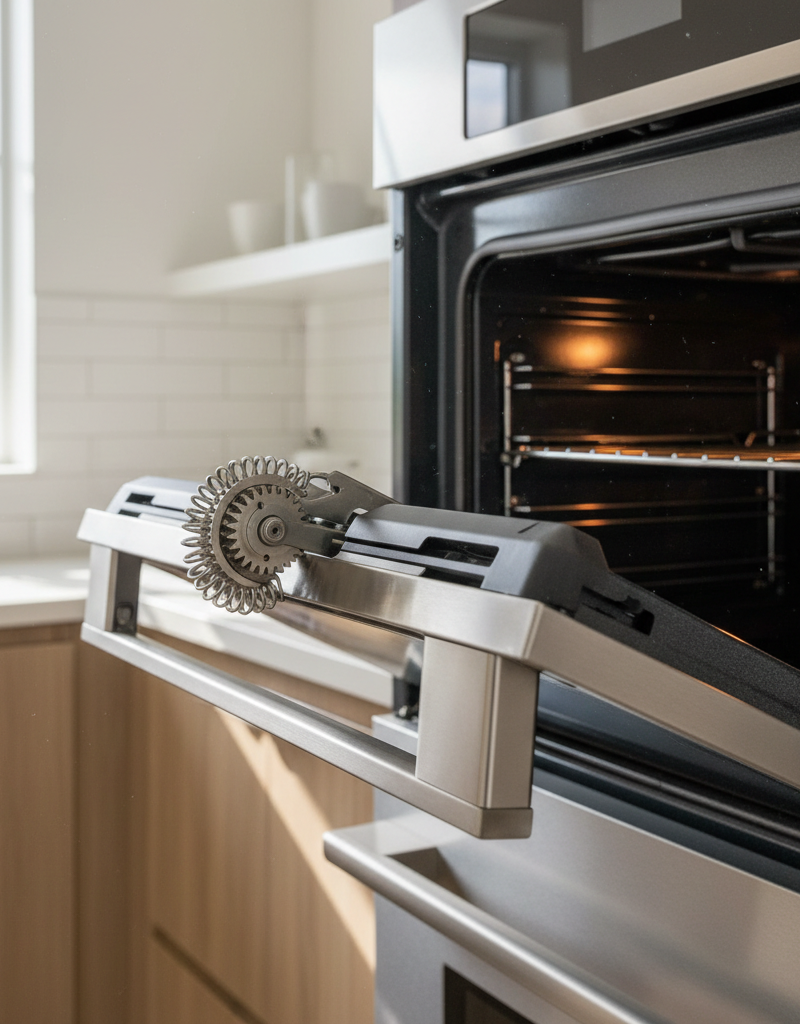
- With the door open, carefully lift it a few inches. Some doors can come right off if you lift them straight up and out of their slots. Take a good look at the hinge mechanism, the part that pivots. Bent metal? Stretched springs? Anything cracked or sloppy? If you see damage or a lot of play, you’re probably looking at hinge replacement. On older ovens, those hinge pins wear down and start causing grief.
-
Clean Door and Cavity Edges — Buildup can block the seal
- Use a degreaser and a scrub brush to clean the edges of the oven door and the cavity where the gasket seals. Grease, crumbs, and baked-on junk can keep the door from closing all the way. I’ve scraped out some pretty ugly messes on old ranges — amazing how much crud can hide in that little gap.
-
Replace the Door Gasket — The most common solution
- If the gasket’s cracked, hard, or falling apart, it’s time for a new one. Pull the old gasket out. Take a picture first so you know how it sits. Most of them just pull free from a channel. Clean that channel well. Then press the new gasket in, making sure it seats all the way around. Don’t stretch it; just ease it into place. Make sure the corners are snug. Check your oven’s make and model number — usually inside the door or on the frame — so you order the right part. A generic gasket won’t seal worth a darn.
-
Replace Door Hinges — When tightening isn't enough
- This one’s a little more involved. You’ll likely need to pull the oven door off completely. Most doors have a locking setup on the hinges — little levers or pins — that you flip before lifting the door off the frame. Set the door on a protected surface. Remove the old hinges and install the new ones, making sure they’re facing the right direction. Then remount the door carefully. If the door’s heavy, this can be a two-person job. Always refer to your owner's manual for specific hinge replacement instructions, as designs vary widely.
-
Adjust Door Alignment (If Applicable) — The trickier fix
- Some oven doors, especially on nicer models, allow a little alignment adjustment. That usually means loosening screws on the hinge mounting plates and shifting the door just a bit before tightening it back down. If your oven’s got that feature, the manual’ll spell it out. Not every range does, though, so don’t be shocked if yours doesn’t. This is usually the last stop if everything else looks fine but the door still sits crooked.
-
Test the Seal Again — Double-check your work
- Once you’ve made the repair, run the paper test again all the way around the door. Close it firmly. Does it feel snug? Is the gap gone? If yes, plug the oven back in (or turn the gas back on), set it to a low temperature like 200°F (93°C), and let it run for 10-15 minutes. Carefully feel around the edges of the door. You want very little heat escaping. If you still feel a hot draft, you’ve still got a leak somewhere.
Common Causes
- Worn-Out Door Gasket: This is the big one. Heat and repeated use make the rubber or woven fabric seal harden, crack, or lose its flex, so it can’t compress and seal right anymore. I’ve pulled out gaskets that looked like petrified rope from ovens in homes around Albany, New York — totally useless for sealing anything.
- Loose or Damaged Hinges: Over time, the screws holding the hinges can loosen, or the hinge itself can bend, wear out, or break. That keeps the door from swinging shut properly and pulling tight against the frame. The springs inside the hinges can lose tension too.
- Misaligned Door: Sometimes the door isn’t broken, it’s just crooked. That can happen if the oven got moved, bumped, or if the hinges shifted a little. If one side hangs lower than the other, that’s an alignment issue.
- Excessive Grease/Food Buildup: Hardened food debris or layers of baked-on grease around the oven opening or door edge can physically stop the door from closing all the way, leaving a small but real gap.
- Self-Clean Cycle Abuse: Running the self-clean cycle too often or too long can wear out gaskets early because of the extreme heat. The temperature inside during a self-clean cycle can hit 800-900°F (427-482°C), which is rough on just about any material.
Common Mistakes
- Ignoring the problem: A little gap might not look like much, but it’ll waste energy and give you lousy, uneven cooking. Don’t let it sit there — fix it before it turns into a bigger headache.
- Buying the wrong gasket: Not all gaskets are the same. You must get the exact part for your oven's make and model number. A generic
Related Articles
Keep troubleshooting with these hand-picked guides from FixlyGuide:
- That Mildew Smell in Your Washer? Here’s the Real Reason — Is a musty odor taking over your laundry room? That mildew smell from your washing machine isn't just unpleasant—it's a sign of a deeper pr…
- My Toaster Only Toasts One Side: The Hidden Thermostat Flaw — If your toaster only toasts one side, the cause is often an imbalanced internal thermostat or misaligned heating element, a specific flaw y…
- The Mystery of the Warm Fridge: Why Your Food Is Spoiling (and When to Call a Pro) — If your refrigerator isn't keeping food cold, it could be a simple fix or a serious problem requiring a professional. Learn what to check a…
- The #1 Dryer Mistake That Adds Hours to Laundry Day (and Costs You Money) — Discover the most common, overlooked reason your dryer is taking too long to dry clothes and how a simple fix can save you time and energy.
- Why Does Self-Clean Kill Your Oven? A $15 Fuse Is The Clue — Discover why your oven's self-cleaning cycle repeatedly trips the thermal fuse, leaving it dead, and learn the real cause beyond just the f…
- The 5 Hidden Culprits Behind Your Drafty Windows (and the $15 Fix) — Don't let drafty windows steal your home's warmth and inflate your energy bills; learn how to diagnose and seal common air leaks yourself.
Should you do this yourself?
Answer five quick questions before you start. Safety outranks savings every time.
Your experience with work like this
How high do you have to work?
Does the job involve any of these?
Will it need a permit?
Specialty tools
Free and instant. Educational guidance only — not a quote, inspection, or professional diagnosis.
What should this project cost?
Enter your project details for a realistic cost range before you call anyone.
Cost depends heavily on which system turns out to be the source.
- Regional adjustment
- National average
- Labor share (typical)
- ~$1,620
- Quotes to collect
- 3 written estimates
Educational estimate based on national averages — not a binding quote. Always confirm with written local estimates.
Before you start
Check the difficulty, permits, and safety risk — then decide whether to call a pro.
- Estimate this projectGet a cost range for your scope and ZIP before you call anyone.Open
- Get local estimatesSend one request and compare written estimates from vetted pros.Open
Free, no signup required. Estimates are educational guidance, not a quote or an inspection.
Get the print-ready PDF of this guide
A clean, ad-free, printable version you can keep on your phone or pin to the workshop wall. Free with a FixlyGuide account.
- Print-optimized layout
- Tools, materials & every step included
- Saved to your account
Frequently asked questions
How do I know if my oven door seal is bad?+
The easiest way is the 'paper test.' Close the oven door on a piece of paper or a dollar bill. If you can pull the paper out easily without resistance at various points around the door, your seal is likely compromised. You might also see visible cracks, tears, or hardening of the gasket material.
Can I replace an oven door gasket myself?+
Absolutely, it's one of the most common and easiest DIY oven repairs. Most gaskets simply pull out of a channel or are held by clips. Just make sure to get the correct replacement part for your oven's make and model number, and gently press the new one into place.
How much does it cost to replace an oven door seal?+
A new oven door gasket typically costs between $20 and $60, depending on your oven's make and model. It's a relatively inexpensive part that can significantly improve your oven's efficiency and cooking performance.
My oven door won't close all the way, what could be wrong?+
The most common culprits are a worn-out door gasket, loose or damaged hinges, or sometimes even excessive grease and food buildup around the door frame that physically blocks it from closing fully. Start by inspecting the gasket and tightening any hinge screws.
How do I fix a loose oven door?+
First, check and tighten any visible screws on the hinges. If that doesn't work, the hinges themselves might be worn or bent and need replacement. Sometimes, just cleaning the area around the hinges and the door frame can help improve its closure.
Is an oven door gap dangerous?+
While generally not dangerous in terms of immediate safety hazards, a significant gap can lead to hot air escaping, which can be a burn risk if you're not careful. It also wastes energy and can cause your oven to overheat components or even trip breakers over time due to continuous cycling.
How often should I replace my oven door gasket?+
There's no set schedule; it depends on usage and how well it's maintained. However, if you notice tears, cracks, hardening, or if your oven isn't holding temperature well, it's time for a replacement. Many gaskets last 5-10 years with regular use.
Can a leaky oven door increase my energy bill?+
Definitely. When hot air escapes, your oven has to work harder and longer to maintain its set temperature. This constant heating consumes more electricity or gas, directly leading to higher utility bills over time. A good seal ensures your oven operates efficiently.
Why does my oven door feel loose or wobbly?+
A loose or wobbly door almost always points to issues with the hinges. The screws holding the hinges might be loose, or the hinge mechanism itself (including the springs) could be worn, bent, or broken. Inspect the hinges closely for any visible damage or play.
Can I use silicone caulk to seal an oven door gap?+
No, you should never use silicone caulk or any other sealant not specifically designed for oven use. Oven temperatures far exceed what standard caulk can handle, leading to melting, toxic fumes, and a fire hazard. Always use an OEM replacement gasket.
Discussion
Loading comments…