- Empty and Access the Freezer — You’ve got to get to the back wall of the freezer compartment. Pull out all the food, ice bins, and shelves. Toss towels down on the floor; odds are you’ll run into some ice or water.
- Tools: Your hands, maybe a scraper for stubborn ice.
- Safety: Unplug the fridge before you start messing around inside.
Plumbing · Leak
| Project category | Plumbing |
|---|---|
| Problem type | Leak |
| Trade required | Plumbing |
| Urgency | Emergency — act now |
| Safety risk | High safety risk |
| DIY suitability | DIY for experienced homeowners |
| Cost category | Low cost |
| Typical timeline | Shut water off now; repair usually same or next day |
| Contractor type | Licensed plumber |
Repair option
Isolate at the shutoff, replace the failed component, and dry the cavity fully.
Replacement option
Repipe the run or the branch when corrosion is widespread.
Common causes
- Failed supply line or shutoff valve
- Worn washers, cartridges, or P-trap connections
- Pinhole corrosion in older copper
Relevant tools:emergency checklistdiy or hire a pro
Published September 2, 2026Last updated September 2, 2026
Tools & materials you'll need
Affiliate linksAs an Amazon Associate FixlyGuide earns from qualifying purchases — at no extra cost to you. Prices and availability are accurate as of publication and subject to change.
Quick Answer
I’ve seen this scene a hundred times: you open the kitchen, grab a drink, and there’s a puddle under the fridge. Don’t lose your head. Most of the time, that water trail isn’t the end of the appliance. It’s usually a clogged defrost drain — small problem, big annoyance, and one you can clear with basic tools and a little elbow grease. I’ll show you how I’d tackle it and save yourself a pile of money.
The Problem
So you’ve got a refrigerator leaking water. Could be a slow drip. Could be a little pool under the kick plate. Sometimes it’s even standing water in the crisper drawers. It’s not just annoying, either. Water can wreck your flooring, kick mold into gear, and if it gets where it shouldn’t, it can short out electrical parts. That’s a bad day. And a lot of folks jump straight to “new fridge” or some expensive repair, when the real culprit is often a tiny tube packed with gunk.
How It Works
Every refrigerator, especially modern frost-free models, has to handle the frost that builds up on the evaporator coils. That’s what the defrost cycle is for. Every so often, a heating element kicks on and melts that frost into water. That meltwater’s gotta go somewhere. It drips into a collection pan, usually just below the evaporator coils, then runs through a small tube — the defrost drain line — down to a drain pan at the bottom of the fridge, near the compressor. Heat from the compressor evaporates the water. Pretty slick setup, honestly. Keeps the freezer frost-free and the fridge humming.
But here’s where it goes sideways: over time, food bits, crumbs, dust, mold, and mildew can build up in that drain line. Pretty soon, you’ve got a blockage. When the defrost cycle runs and the ice melts, the water can’t get through the clogged drain. So instead of heading to the evaporation pan, it backs up and spills onto your kitchen floor, or worse, into the fridge compartment. You’ll see it in the crisper drawers or seeping out from under the appliance. It’s basically a little plumbing backup inside your fridge, and it needs to be cleared.
Step-by-Step Fix
Before you touch anything, always unplug the refrigerator. I mean it. Don’t skip that step. You’re dealing with water and electricity, and that’s a mess you don’t want.
-
Empty and Access the Freezer — You’ve got to get to the back wall of the freezer compartment. Pull out all the food, ice bins, and shelves. Toss towels down on the floor; odds are you’ll run into some ice or water.
- Tools: Your hands, maybe a scraper for stubborn ice.
- Safety: Unplug the fridge before you start messing around inside.
-
Remove the Freezer Back Panel — There’s usually a panel on the inside back wall of the freezer, held in with screws. Back those out and lift the panel off carefully. That’ll expose the evaporator coils and the drain trough below them. Be gentle; sometimes wires or foam insulation are tied in there.
- Tools: Philips head or nut driver (often 1/4-inch or 5/16-inch).
- If Stuck: If the panel’s iced over, use a hairdryer on a low setting to ease the ice off, but don’t aim it directly at plastic components for too long.
-
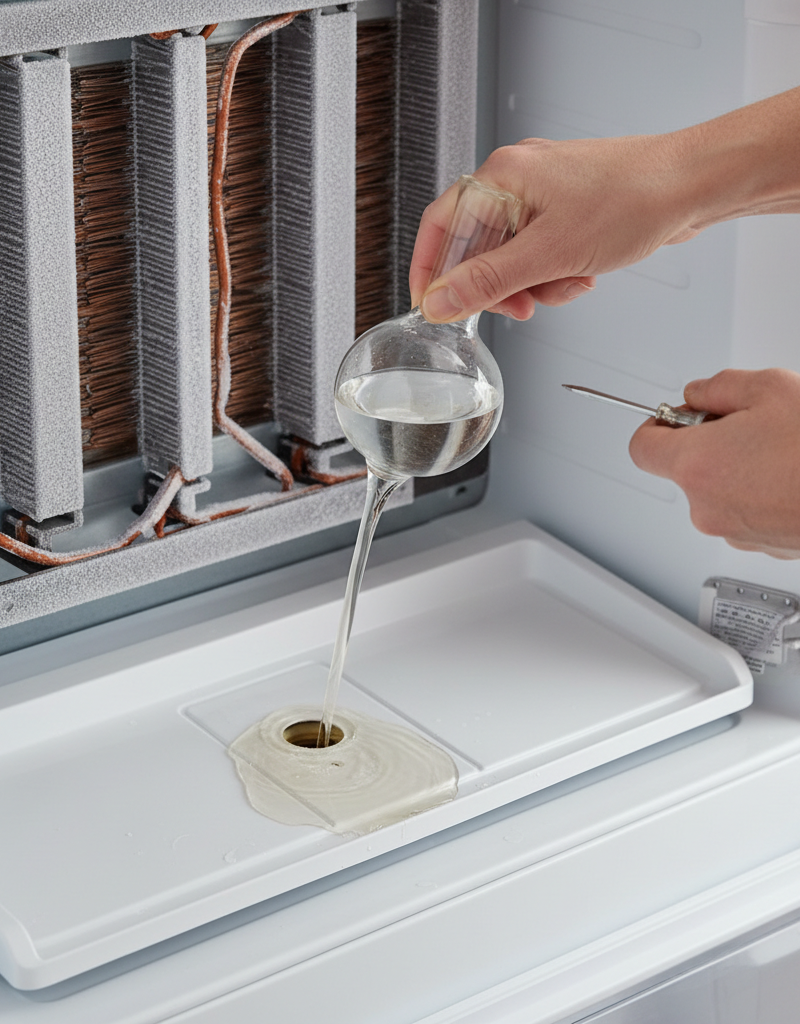
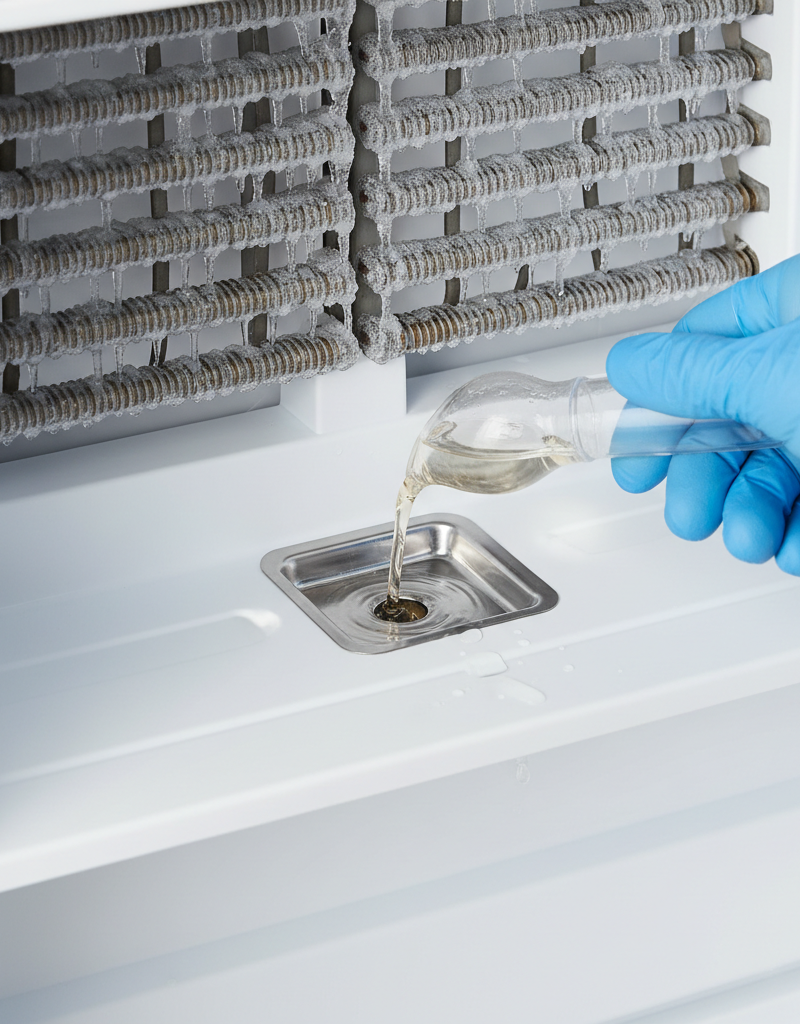
Locate the Defrost Drain Opening — At the bottom of the evaporator coil area, you’ll see a small trough. In the center or off to one side of that trough is a little hole — that’s the drain opening. Might be ice. Might be gunk. That’s your spot.
-
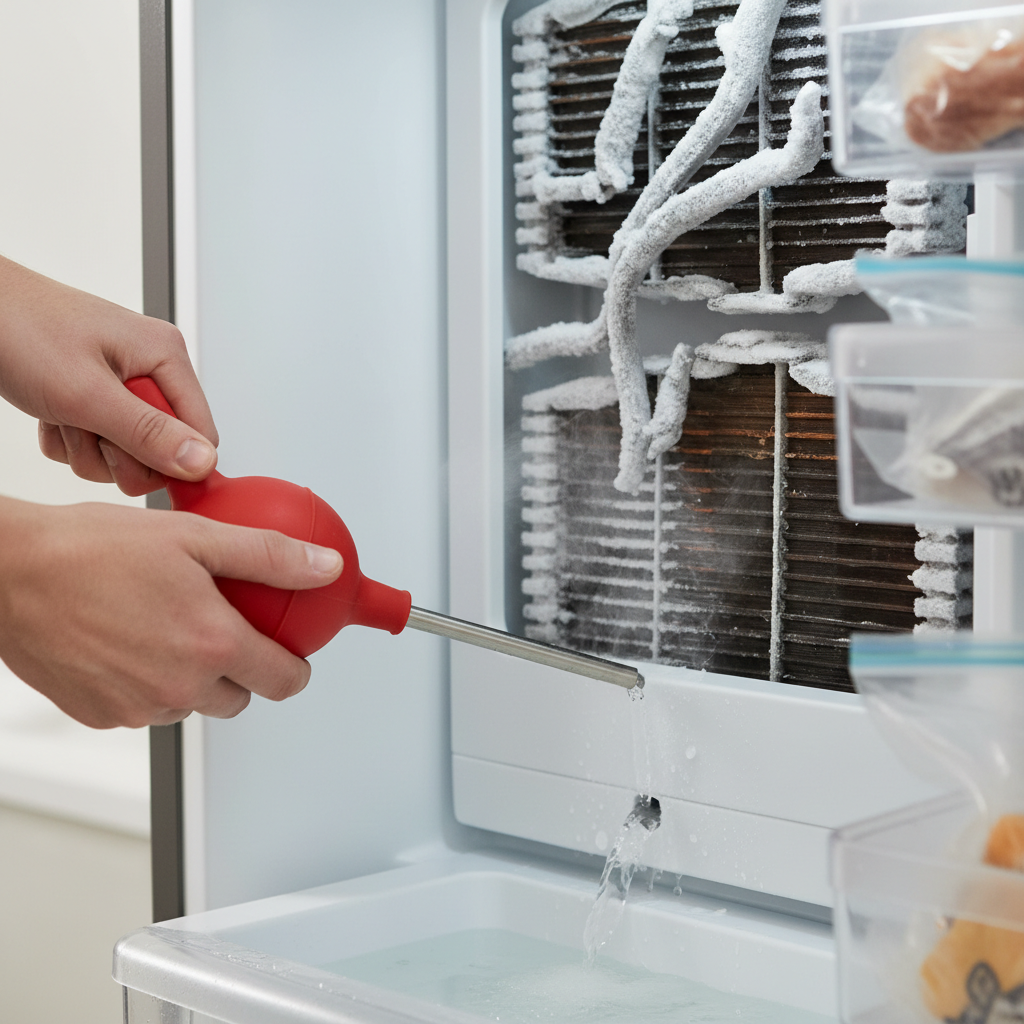
Clear Any Visible Ice — If the drain opening’s frozen over, you need to melt it. A turkey baster with hot water works like a champ. Slowly squirt hot, not boiling, water straight into the drain hole. Wait a minute, then do it again. You may hear gurgling once it starts opening up. Don’t rush it. Let the hot water do the heavy lifting.
- Tools: Turkey baster, small bowl for hot water.
- Note: Don’t go at it with sharp tools. You can puncture the drain line or evaporator coils, and that turns into a major, expensive repair — maybe even a new fridge.
-
Flush the Drain Line — After the visible ice is gone, keep flushing with hot water. Watch the drain pan at the bottom of the fridge; you might have to pull the fridge out a bit to see it. You should see water coming through. If it’s still not flowing right, there’s probably a deeper clog.
-
Use a Drain Clearing Tool (If Needed) — For stubborn clogs, use a small flexible drain brush or a piece of weed trimmer line. Feed it gently down the drain line. Don’t force it. Twist, nudge, push a little, and try to break up the blockage. Then flush it again with hot water.
- Tools: Flexible drain brush, weed trimmer line (about 1/8-inch thick).
- Contractor Tip: Back in '08, I was on a job in Brighton, and a guy kept telling me the fridge was toast. Turned out his kids had dropped a toy car down the drain line. Took me 10 minutes with a piece of fishing line to pull it out. You never know what ends up in there.
-
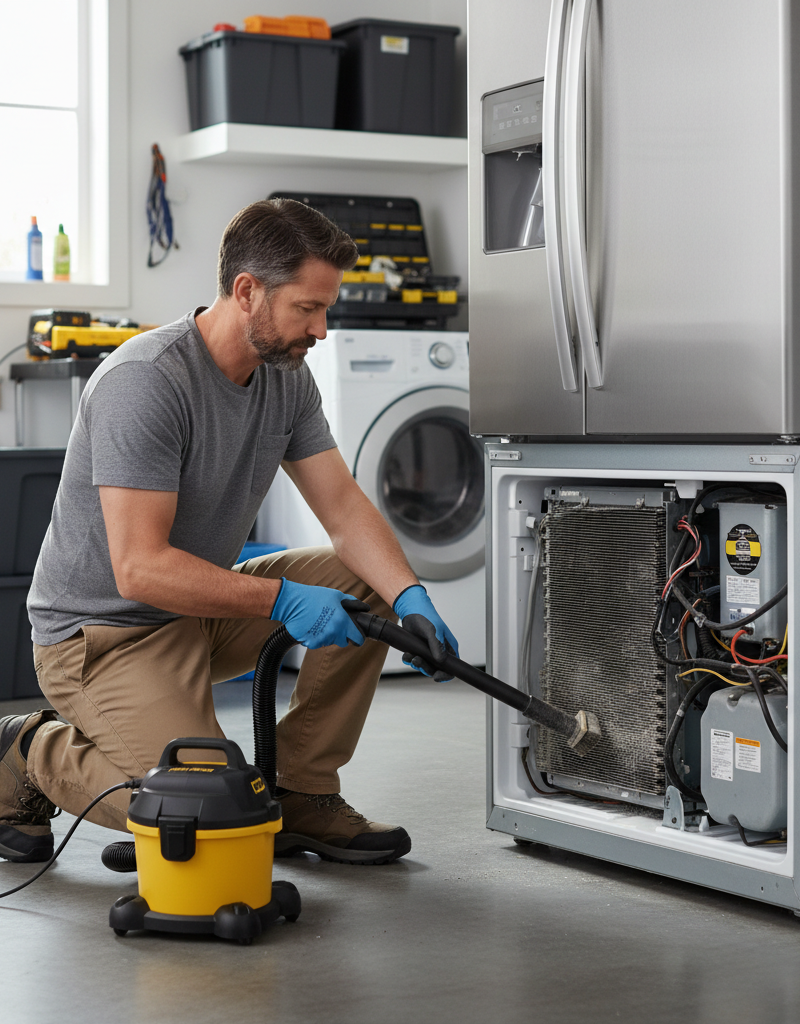
Check the Drain Pan and Grommet — Pull the fridge away from the wall. Down low, usually on the back, you’ll find the drain pan. Sometimes the real problem is a rubber grommet or duckbill valve at the end of the drain tube — clogged up or stiff as a board. Pull the pan, clean it out, and inspect that grommet. If it’s gunked up, wash it with warm soapy water. If it’s cracked or too stiff, replace it. That little $5 part can be the whole fix.
- Tools: Screwdriver (for pan access), warm soapy water.
- Pro Insight: A lot of fridge models, especially older Whirlpools and Samsungs, use those duckbill valves that collect junk. Cleaning or swapping it is often the real trick.
-
Clean Up and Reassemble — Once the drain’s clear and water’s flowing into the drain pan like it should, clean up any spilled water. Put the freezer back panel on, plug the fridge back in, and load your food back in. Keep an eye on it for a day or two to make sure the leak’s gone.
Common Causes
- Food Debris: Crumbs, spilled drinks, or tiny food bits working their way into the drain trough and slowly plugging the line.
- Mold and Mildew: Warm, damp spots are perfect for growth. That stuff can narrow the drain or block it solid.
- Ice Build-up: If the defrost heater’s weak, or the door seal’s bad, too much frost can build up and freeze the line shut.
- Blocked Drain Pan: Sometimes the line’s fine, but the pan at the bottom’s full of sludge or cracked.
- Faulty Defrost Heater/Sensor: Less common for a simple leak, sure, but if the defrost cycle isn’t happening, ice can build up until it causes trouble.
Common Mistakes
- Ignoring the Leak: A small leak now can turn into thousands in floor damage or electrical problems later. Don’t sit on it.
- Using Sharp Objects: Poking a screwdriver or knife into an iced-over drain can punch right through the evaporator coil. Then you’re looking at refrigerant leaks and a very expensive repair.
- Not Unplugging the Fridge: Water and electricity don’t mix. Cut the power first. Every time.
- Forgetting the Drain Pan/Grommet: Clearing the upper drain helps, but if the lower grommet’s blocked, the problem comes right back.
- Overlooking a Door Seal Issue: If the door isn’t sealing tight, warm moist air sneaks in, makes extra frost, and overwhelms the defrost system. Check those seals.
- Applying Boiling Water: Hot water helps. Boiling water can warp plastic parts inside the freezer. Stick with hot tap water.
Cost & Time Breakdown
| Task | DIY Cost | Pro Cost | Time |
|---|---|---|---|
| Clearing Clogged Defrost Drain | $0–$10 | $150–$300 | 30–60 min |
| Replacing Drain Pan/Grommet | $5–$25 | $180–$350 | 45–90 min |
| Diagnosing Defrost Heater Issue | $0 | $100–$200 | 15–30 min |
| Replacing Defrost Heater/Sensor | $30–$100 | $250–$500 | 1–2 hours |
| Floor Repair (if leak persists) | $50+ | $500+ | Variable |
Tips & Prevention
- Keep It Clean: Wipe down the inside of your fridge and freezer now and then so crumbs and spills don’t wander into the drain.
- Check Door Seals: Make sure the refrigerator and freezer doors shut tight. Easy test: close the door on a dollar bill. If it slides out easy, the seal might be junk.
- Defrost Cycle Awareness: Listen for the defrost cycle. Some fridges have a little hum or click. You usually only notice it when it quits.
- Annual Drain Flush: Once a year, give that defrost drain a preventative flush with a turkey baster full of hot water. Five minutes. Big payoff.
- Proper Food Storage: Keep food covered. Less humidity inside the fridge, fewer spills, less ice buildup, fewer clogs.
When to Call a Professional
Look, I’m all for DIY, but sometimes you’ve gotta call in the cavalry. If you’ve gone through these steps and the fridge’s still leaking, or the leak seems to be coming from the water dispenser line instead of the internal drain, it’s time for an appliance repair pro. Same deal if you think the trouble’s in the sealed refrigerant system, the defrost heater, or the main control board — those parts take special tools and know-how. Don’t mess with refrigerant leaks. They’re dangerous. Electrical work can get tricky too. A trained tech can usually figure it out fast and fix it safely, which beats making a bigger, pricier mistake later. They’ve got the training, and they’ve got the tools to get it done right.
FAQ
Why is there water leaking from the bottom of my refrigerator?
Most of the time, water leaking from the bottom of your refrigerator comes from a clogged defrost drain line. Ice and food debris can block that little tube, and then meltwater overflows from the freezer’s evaporator area and ends up under the appliance.
Can I fix a refrigerator water leak myself?
Yes, plenty of refrigerator water leaks — especially the ones caused by a clogged defrost drain — are fair DIY jobs. You’ll need to get to the freezer’s back panel, clear out any ice, and flush the drain line with hot water.
How often should I clean my refrigerator's defrost drain?
There’s no hard rule, but I’d suggest flushing the defrost drain line once a year with hot water. That helps keep mold, mildew, and food debris from building up into a problem.
What tools do I need to clear a clogged defrost drain?
Usually, you’ll need a Philips head screwdriver or nut driver, a turkey baster for hot water, and maybe a small flexible drain brush or a piece of weed trimmer line for the stubborn stuff. Don’t forget towels for cleanup!
Is it dangerous if my refrigerator is leaking water?
A leaking refrigerator can cause a few headaches. Water can damage flooring, feed mold growth, and if it reaches electrical parts, it can create a shock hazard or damage the appliance’s electronics. Deal with leaks quick.
Why does water sometimes appear inside my refrigerator crisper drawers?
Water in the crisper drawers is a dead giveaway that the defrost drain’s clogged. The meltwater from the freezer’s got nowhere to go except back into the refrigerator compartment, and it usually settles in the lowest spots — like those drawers.
What is the rubber grommet or duckbill valve on the drain line for?
That small rubber piece sits at the end of the defrost drain tube, usually near the drain pan at the bottom of the fridge. It works like a one-way valve, keeping air out of the drain line and letting water escape. It can get clogged with junk or stiff up, and then drainage suffers.
What if clearing the drain doesn't stop the leak?
If clearing the defrost drain doesn’t fix the leak, you may be dealing with something more involved. Could be a bad water inlet valve, a cracked drain pan, or an issue with the defrost heating element itself. At that point, I’d bring in a professional appliance repair technician.
Can a bad door seal cause my fridge to leak?
Yes, a bad door seal can absolutely contribute to leaks. A poor seal lets warm, moist air into the freezer, which builds up extra frost and ice on the evaporator coils. That can overwhelm the defrost system and clog the drain line more often, which leads to leaks.
Related Articles
Keep troubleshooting with these hand-picked guides from FixlyGuide:
- The #1 Mistake Homeowners Make When Their Ice Maker Stops (And the Easy Fix) — Is your refrigerator ice maker on strike? Often, a simple oversight or minor clog is the culprit, easily fixable with basic tools.
- The Secret Reason Your Ice Maker Stopped (It's Not Clogged!) — Discover the surprisingly common culprit behind a non-functioning refrigerator ice maker and how to fix it with simple steps.
- The #1 Mistake Homeowners Make When Their Dryer Stops Drying (And How to Fix It Free) — If your dryer is taking too long to dry clothes, the most common culprit is a clogged vent, which can be easily fixed with simple tools.
- The 30-Minute Trick When Your Dishwasher Won't Drain (Plumbers Keep Secret) — Discover the real reasons your dishwasher isn't draining and how to fix it in under an hour, without calling a plumber.
- The Mystery of the Warm Fridge: Why Your Food Is Spoiling (and When to Call a Pro) — If your refrigerator isn't keeping food cold, it could be a simple fix or a serious problem requiring a professional. Learn what to check a…
- The Secret Culprit Behind Your Leaky Refrigerator (It’s Not Always a Hose) — Discover why your refrigerator might be leaking water and how to diagnose and fix the most common culprits, saving you from costly repairs.
Should you do this yourself?
Answer five quick questions before you start. Safety outranks savings every time.
Your experience with work like this
How high do you have to work?
Does the job involve any of these?
Will it need a permit?
Specialty tools
Free and instant. Educational guidance only — not a quote, inspection, or professional diagnosis.
Questions to ask before you sign
Ask every contractor the same questions and the cheapest bid stops looking cheapest. Check them off as you go — your progress is saved on this device.
Free, no signup. Bring this to every walkthrough so you compare bids on the same terms.
What should this project cost?
Enter your project details for a realistic cost range before you call anyone.
Common repairs run $150–$650; repipes and water-heater replacements reach $1,500–$4,500.
- Regional adjustment
- National average
- Labor share (typical)
- ~$754
- Quotes to collect
- 3 written estimates
Educational estimate based on national averages — not a binding quote. Always confirm with written local estimates.
Fixly Project Decision Box
- DIY difficulty
- Moderate
- Estimated time
- 30 minutes – half a day
- Cost level
- Moderate
Main tools / materials
- Adjustable wrench
- Plunger or drain auger
- Bucket and towels
- Thread tape
When to stop and call a pro
- Water you cannot shut off at the fixture or main
- Sewage backing up into more than one fixture
- Water near electrical panels or outlets
- Gas water heater work beyond relighting a pilot
Need professional help?
Get a Licensed PlumberHandle this before it gets worse
First steps that limit damage, then a way to reach a qualified pro.
- Emergency repair checklistThe first steps that limit damage before a pro arrives.Open
- Get local estimatesSend one request and compare written estimates from vetted pros.Open
- Estimate this projectGet a cost range for your scope and ZIP before you call anyone.Open
Free, no signup required. Estimates are educational guidance, not a quote or an inspection.
Get the print-ready PDF of this guide
A clean, ad-free, printable version you can keep on your phone or pin to the workshop wall. Free with a FixlyGuide account.
- Print-optimized layout
- Tools, materials & every step included
- Saved to your account
Frequently asked questions
Why is there water leaking from the bottom of my refrigerator?+
Most commonly, water leaking from the bottom of your refrigerator is due to a clogged defrost drain line. Ice and food debris can block this small tube, causing meltwater to overflow from the freezer's evaporator area and pool underneath the appliance.
Can I fix a refrigerator water leak myself?+
Yes, many refrigerator water leaks, especially those caused by a clogged defrost drain, are relatively simple DIY fixes. You'll need to access the freezer's back panel, clear any ice, and flush the drain line with hot water.
How often should I clean my refrigerator's defrost drain?+
While there's no strict schedule, a good practice is to perform a preventative flush of your defrost drain line once a year with hot water. This helps prevent buildup of mold, mildew, and food debris before it becomes a problem.
What tools do I need to clear a clogged defrost drain?+
Typically, you'll need a Philips head screwdriver or nut driver, a turkey baster for hot water, and possibly a small, flexible drain brush or a piece of weed trimmer line for stubborn clogs. Don't forget towels for cleanup!
Is it dangerous if my refrigerator is leaking water?+
A leaking refrigerator can pose several risks. Water can damage flooring, promote mold growth, and if it comes into contact with electrical components, it could create a shock hazard or damage the appliance's electronics. Address leaks promptly.
Why does water sometimes appear inside my refrigerator crisper drawers?+
Water in your crisper drawers is a telltale sign that the defrost drain is clogged. The meltwater from the freezer has nowhere to go but back into the refrigerator compartment, often finding its way into the lowest points, like the crisper drawers.
What is the rubber grommet or duckbill valve on the drain line for?+
This small rubber component is located at the end of the defrost drain tube, usually near the drain pan at the bottom of the fridge. It acts as a one-way valve, preventing air from entering the drain line and allowing water to exit. It can get clogged with gunk or become stiff, preventing proper drainage.
What if clearing the drain doesn't stop the leak?+
If clearing the defrost drain doesn't resolve the leak, the problem might be more complex. It could be a faulty water inlet valve, a cracked drain pan, or an issue with the defrost heating element itself. At this point, it's best to consult a professional appliance repair technician.
Can a bad door seal cause my fridge to leak?+
Yes, a bad door seal can contribute to leaks. A poor seal allows warm, moist air to enter the freezer, leading to excessive frost and ice buildup on the evaporator coils. This can overwhelm the defrost system and clog the drain line more frequently, leading to leaks.
Discussion
Loading comments…