- Strip or sand away the existing finish — If the top was coated with polyurethane, lacquer, or heavy drying oils, sand it down to bare wood with an orbital sander. Start with 80-grit sandpaper and work up to 120-grit.
- Why this matters: Moisture can’t get in or out through a film finish. You need both faces back to raw timber so the wood can equalize while you’re flattening it.
- Safety note: Wear an N95 respirator and hook your sander to a HEPA vacuum. Hardwood dust—especially walnut and oak—doesn’t do your lungs any favors.
Kitchen · Kitchen remodel
| Project category | Kitchen |
|---|---|
| Problem type | Kitchen remodel |
| Trade required | General contracting |
| Urgency | Planned project |
| Safety risk | Low safety risk |
| DIY suitability | Pro recommended |
| Cost category | Major investment |
| Typical timeline | Design and cabinet lead time 8–16 weeks; build 4–8 weeks |
| Contractor type | Kitchen remodeler or general contractor |
Repair option
Refacing, new counters, or hardware for a fraction of a gut remodel.
Replacement option
Full remodel when layout, plumbing, or electrical needs to change.
Common causes
- Dated layout
- Failing cabinets or counters
- Adding function or resale value
Relevant tools:project cost estimatorcompare quoteshome improvement material prices
Published November 20, 2026Last updated November 20, 2026
Tools & materials you'll need
Affiliate linksAs an Amazon Associate FixlyGuide earns from qualifying purchases — at no extra cost to you. Prices and availability are accurate as of publication and subject to change.
Quick Answer
A butcher block countertop warps because the top and bottom faces take on moisture at different rates, or dry out unevenly. That’s the whole mess in a nutshell. To flatten a cupped or bowed slab, you’ve got to pull it off the base cabinets, strip any waterlogged finish, wet the concave (dry) side with warm water, and clamp it flat across rigid 2x4 cauls for 24 to 48 hours. After that, seal all six sides—especially the bottom and end grain—with at least three coats of food-safe mineral oil and beeswax or a cure-hardening polyurethane.
The Problem
You splurged on a solid maple, oak, or walnut butcher block countertop. Looked gorgeous. Day one, it’s the star of the kitchen. Six weeks later? You drop a marble on the counter and watch it roll straight toward the sink like it’s got a mind of its own. Or you spot a 1/4-inch gap lifting off your face frames, and the mounting screws are starting to yank out of the cabinet cleats. No fun.
Wood moves. It breathes. When a wood countertop curls up at the edges (cupping) or bows along its span, folks start thinking the slab’s junk. It usually isn’t. The wood’s reacting to humidity differences between the kitchen air and the stale, pipe-warmed air trapped inside the base cabinets. I pulled a water heater in Frisco last month that had exactly this kind of one-sided moisture problem nearby—same story, different material. If you don’t stop the warp and even out moisture transfer across every square inch of that timber, your pretty kitchen upgrade can split along the glue joints and tear itself apart. That’s not me being dramatic. That’s just wood being wood.
How It Works
Wood is hygroscopic. Fancy word, simple deal. Its cellular structure acts like a tight bundle of microscopic straws, swelling as it grabs moisture and shrinking when it dries out. In a kitchen, that happens all day long. Run the dishwasher and you’ve got 120°F to 140°F steam rolling out under the counter. Cook a meal and you’re throwing grease and water vapor everywhere above it.
Butcher block slabs are made from hardwood staves glued edge-to-edge (edge grain) or end-to-end (end grain). If you seal only the top because “nobody sees the bottom,” you’ve built yourself a trap. The exposed bottom face drinks damp air from under the sink or dries out from heat coming off a duct under the cabinet box. The sealed top sits there at a different moisture level.
The dry side shrinks. The wet side swells. Wood hates that. Internal stress makes the timber curl toward the drier side (concave face). End grain is worse—it’ll suck up moisture up to ten times faster than face grain. Unless all six surfaces of the block—top, bottom, both sides, and both ends—get the same vapor barrier and the slab has room to move through slotted mounting holes, those fasteners are going to bend, bind, or tear things loose every season. Seen it too many times.
Step-by-Step Fix
-
Clear and isolate the counter — Get everything off the surface. Appliances, dishware, sink hookups, the whole show. Shut off the water valves under the sink if you’ve got a drop-in basin or prep sink, disconnect the supply lines with an adjustable wrench, and loosen the sink’s underside retaining clips.
- Tools required: 10-inch adjustable wrench, bucket, work light.
- Safety note: Kill power to any dedicated island circuits or garbage disposal outlets at the main electrical panel before you get near exposed under-counter wiring.
-
Back out the mounting screws — Crawl into the base cabinets with a flashlight and remove all the fasteners holding the butcher block to the cabinet corner braces and stretchers.
- Inspection point: Take a hard look at how it was attached. If the installer drove standard drywall screws straight through solid pilot holes with no washer or slot, there’s your problem right there. That setup won’t let the slab move, so it cracks or buckles instead.
- If screws are sheared or stripped: Grab the sticking-out shanks with locking pliers and twist them counterclockwise. Sometimes that’s the only way. No dice with a stripped head.
-
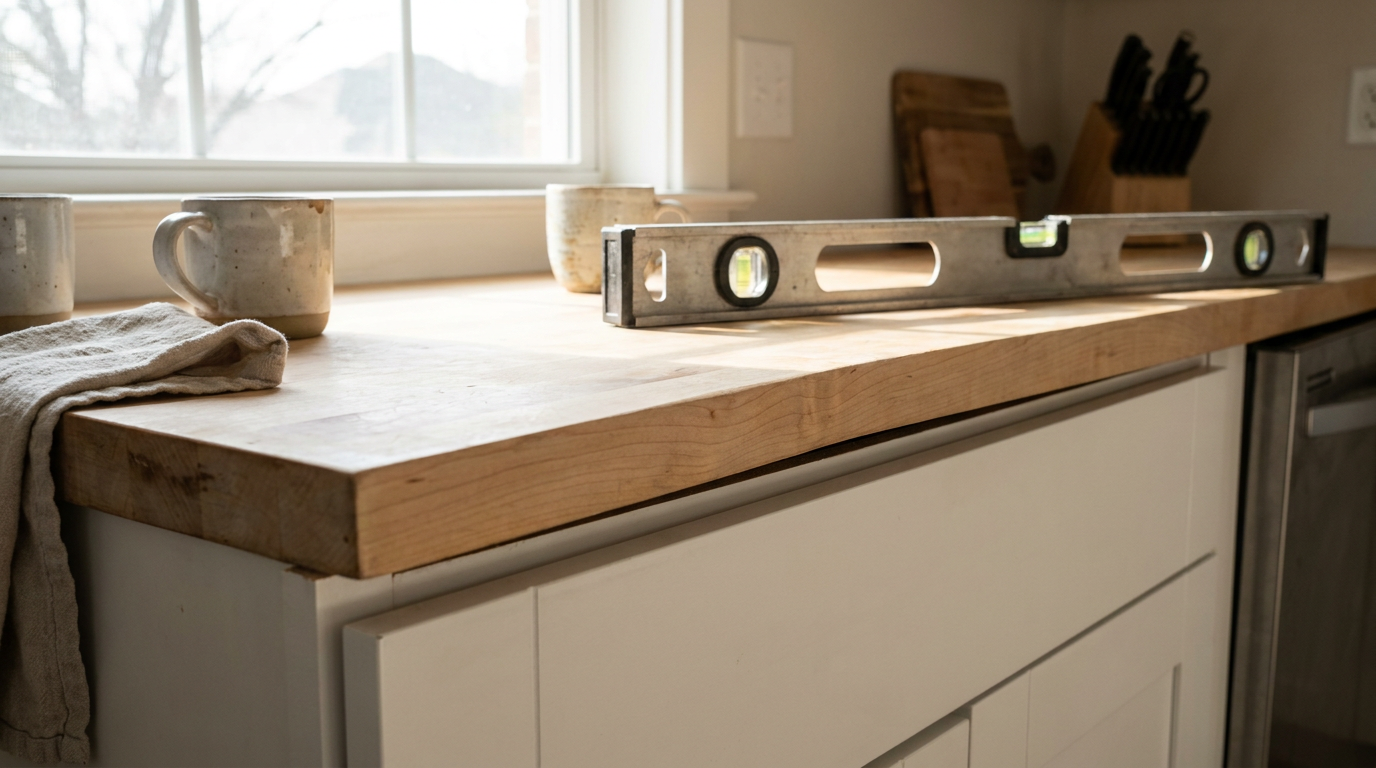
Measure the deflection — Lift the slab off the base cabinets with a helper and set it across two sturdy sawhorses in a climate-controlled room (68°F to 72°F, around 40% to 50% relative humidity). Lay a 48-inch aluminum level across the width of the board to find the high and low spots.
- Measure the biggest gap between the straightedge and the wood using a tape measure or feeler gauge so you know how much correction you need (anything from 1/8 inch to 1/2 inch is repairable; over 3/4 inch often means the glue lines have failed).
-
Strip or sand away the existing finish — If the top was coated with polyurethane, lacquer, or heavy drying oils, sand it down to bare wood with an orbital sander. Start with 80-grit sandpaper and work up to 120-grit.
- Why this matters: Moisture can’t get in or out through a film finish. You need both faces back to raw timber so the wood can equalize while you’re flattening it.
- Safety note: Wear an N95 respirator and hook your sander to a HEPA vacuum. Hardwood dust—especially walnut and oak—doesn’t do your lungs any favors.
-
Expose the concave face to moisture — Flip the slab so the concave (dished-in, dry) side faces up on the sawhorses. Soak clean bath towels in hot tap water (around 110°F to 120°F), wring them out so they’re damp, not dripping, and lay them flat across the whole dished area.
- Leave the damp towels in contact with the wood for 2 to 4 hours, checking every 30 minutes.
- As the collapsed wood fibers drink in moisture, they’ll swell and push the low spot back toward flat.
-
Clamp across stiff hardwood cauls — Once the board starts moving back toward flat, pull the towels off and sandwich the butcher block between pairs of rigid 2x4 or 4x4 structural cauls running across the board’s width.
- Put heavy craft paper between the 2x4s and the block so you don’t bruise the wood or transfer sap.
- Set heavy-duty F-clamps or pipe clamps every 12 inches along the cauls. Tighten them little by little—one turn per clamp down the line—until the slab’s pulled flat against the cauls.
- Leave it clamped under tension for at least 24 to 48 hours so the fibers can settle where they belong.
-
Final smoothing and orbital sanding — Pull the clamps and check the surface with your 48-inch level. You want flat to within 1/16 inch across its length and width. Sand both faces and all edges with random-orbital passes, moving through 120-grit, 150-grit, and finishing with 180-grit.
- Wipe the whole block with mineral spirits or a microfiber cloth to lift fine dust out of the open grain pores.
- Don’t go past 220-grit on butcher block meant for food-grade oil absorption. Polish it too fine and the finish won’t sink into the grain like it should.
-
Slot your cabinet mounting holes — Before you reinstall the slab, inspect the base cabinet corner cleats and stretcher bars. Drill the existing round pilot holes into 1/2-inch wide horizontal slots using a 3/8-inch drill bit or a rotary tool with a high-speed cutter.
- The mechanical rule: Wood expands and contracts across its grain (width), not along its length. Your mounting holes need to be slotted side-to-side so screws can slide laterally when humidity swings.
-
Seal all six sides completely — Coat every square inch of the wood: top, bottom, long edges, and end cuts.
- For food-prep surfaces: Flood the wood with food-grade mineral oil, let it soak for 30 minutes, wipe off the excess, and finish with two coats of melted beeswax/oil paste buffed to a satin sheen.
- For non-prep utility surfaces: Apply a minimum of three thin, even coats of satin oil-modified polyurethane or hardwax oil (like Rubio Monocoat or Osmo), allowing full cure time between coats according to the manufacturer label.
- Pay close attention to sink cutouts and end grain; put four coats here, since exposed end grain drinks water like a straw.
-
Reinstall with expansion washers — Set the slab back on the cabinet boxes with even 1-inch to 1.5-inch overhangs. Drive #10 pan-head wood screws fitted with 1-inch wide fender washers up through the slotted holes from inside the cabinet.
- Torque specification: Drive screws until the washer contacts the wood firmly, then back off 1/4 turn. Don’t crush the fibers. The washer needs to be snug enough to hold the counter flat while still letting the wood slide laterally across the cabinet cleat during seasonal changes.
Common Causes
- One-Sided Sealing: This is the big one, by a mile. Homeowners brush three coats of sealant onto the top where everybody can see it, then leave the bottom raw. The underside grabs humidity while the top stays dry, and the edges start lifting.
- Fixed-Screw Installation: Standard drywall screws driven through rigid, unslotted cabinet rails straight into hardwood. As the slab tries to make its natural 1/8-inch to 1/4-inch seasonal expansion across its width, the trapped fasteners force the block to buckle, crown, or crack right down the glue seams.
- Dishwasher Steam Venting: Modern dishwashers blow hot, moist air right beneath the front edge of the countertop during drying cycles. If the underside doesn’t have a vapor barrier, the wood above that appliance cups before you know it.
- Unsealed Sink Cutouts: Cut an opening for an undermount or drop-in sink and you’ve exposed raw end-grain staves. Leaky plumber’s putty or splashing faucet water works its way into the core, blackens the wood, and causes ugly localized swelling.
- Proximity to Heat Registers or Stoves: Set a butcher block right over an active HVAC floor register or next to an uninsulated slide-in range and you’ll cook moisture out of one spot. That shrinks the staves and makes some nasty bows.
Common Mistakes
- Trying to flatten the wood with brute force screws: When an edge lifts 3/8 inch, people grab 3-inch structural screws and drive them from inside the cabinet into the slab until the screw strips or tears through the cabinet plywood. Wood’s moving with hundreds of pounds per square inch of pressure. You’ll crack the frames or snap screw heads off every time.
- Soaking the wood with a garden hose or standing puddles: Dousing the concave side in standing water causes grain raise, surface checking, and permanent water staining—especially in oak, which can turn black from tannin reactions. Use damp, hot towels or controlled ambient moisture. No standing water.
- Using silicone caulk as a perimeter glue: Running a thick bead of construction adhesive or rigid silicone between the top of the cabinet box and the butcher block locks the slab in place. Then, when the wood moves, it rips the face frames off the cabinet carcasses. Use mechanical fasteners in elongated slots with wide washers instead.
- Neglecting the end-grain cuts: Sanding and finishing the top while ignoring the cut ends at the wall or overhanging edges. End grain handles most of the water vapor exchange; leave it dry and you’re asking for checking and splitting within a single heating season.
Cost & Time Breakdown
| Task | DIY Cost | Pro Cost | Time |
|---|---|---|---|
| Moisture Correction & Clamping | $15–$30 (towels, cauls, clamp rental) | $250–$450 | 2–3 hours active (24–48h clamp time) |
| Surface Stripping & Sanding | $20–$45 (abrasive discs, mineral spirits) | $200–$350 | 2–3 hours |
| Resealing All 6 Sides (Mineral Oil / Beeswax) | $18–$35 (food-grade oil & paste) | $150–$250 | 1–2 hours |
| Resealing All 6 Sides (Hardwax / Polyurethane) | $40–$80 (finish, applicators) | $300–$500 | 2–4 hours (plus 3-day dry time) |
| Drilling Expansion Slots & Reinstalling | $10–$15 (fender washers, pan screws) | $150–$275 | 1–2 hours |
| Full Slab Replacement (if cracked beyond repair) | $250–$600 (new 8-ft maple slab) | $900–$1,800 | 4–6 hours |
Tips & Prevention
- Install an aluminum steam barrier above the dishwasher: Stick a heavy-gauge reflective foil tape or an adhesive plastic vapor sheet along the entire underside of the butcher block spanning the dishwasher opening. That keeps direct condensation and 130°F heat plumes from cooking the wood above.
- Follow the rule of six surfaces: Any time you put oil, wax, or poly on the counter, open the cabinet doors below and coat the bottom side too. Balance matters. Wood doesn’t care about your schedule.
- Maintain indoor humidity between 35% and 55%: Winter heating can drop indoor relative humidity to desert-dry levels below 20%, while humid North Texas summers can push indoor humidity past 65%. Run the AC in summer and a whole-house or room humidifier in winter to keep the woodwork stable.
- Re-oil on a set schedule: For oil/wax finishes, reapply mineral oil once a month for the first six months, then once every three to four months after that. If a water drop splashed on the surface flattens out and darkens the wood instead of beading up tight, your finish is tired and needs attention now.
- Leave a 1/4-inch expansion gap at the wall: Don’t wedge butcher block tight between two plaster or drywall surfaces. Leave a minimum 1/4-inch gap along walls, hidden by your backsplash or a small trim strip, so seasonal swelling doesn’t crush the drywall.
When to Call a Professional
Most butcher block warps can be coaxed back to true with patience, clamps, and controlled moisture. But you still need to know when the wood’s done fighting.
If you see deep black fungal rot more than 1/8 inch down into the grain around your sink cutout, the structural cellulose is shot and it can’t hold fasteners anymore. Call a countertop specialist or carpenter to cut out the rotten run or template a replacement section.
You should also bring in a pro if your slab has sheared along multiple glue lines and you can see daylight between the staves. Re-gluing long structural joints takes a heavy-duty jointer to clean up the edges, industrial biscuit or Domino joinery, and a bank of six to eight heavy cast-iron pipe clamps with serious clamping pressure. And if you need precision sink cutouts routed into an expensive 1.75-inch thick end-grain walnut slab, hiring a finish carpenter keeps you from ruining a $1,200 piece of timber with a shaky jigsaw hand.
Related Articles
Keep troubleshooting with these hand-picked guides from FixlyGuide:
- The Grimy Secret Under Your Bathroom Sink: Why Your Faucet Is Slow — A slow-flowing bathroom faucet is often more than just an annoyance; it's a clear sign of mineral buildup or internal damage that's surpris…
- Why Does My Paint Peel Off in Sheets? The Moisture Mystery — Discover why your paint is peeling off in large sheets and how to diagnose and fix the hidden moisture issues causing it.
- The $10 Shower Fix Plumbers Don't Want You to Know — Stop that annoying drip! I'll show you how to fix a leaky shower faucet yourself, saving you money and preventing water waste.
- Why Your Paint Just Won't Cover (and How to Stop the Struggle) — Struggling with paint that just won't cover the old color, even after multiple coats? I'll show you why it happens and how to fix it for go…
- That Annoying Sawhorse Wobble: The Simple Fix Your Shop Needs — Don't let a wobbly sawhorse ruin your cuts or—worse—cause an accident. I'll walk you through the real reasons your sawhorses are unstable a…
- The Cupped Hardwood Secret: What Your Floor’s Really Telling You — Don't let cupped hardwood floors get you down. This guide tackles the real reasons your wood floor is warping and how to fix it like a pro.
Should you do this yourself?
Answer five quick questions before you start. Safety outranks savings every time.
Your experience with work like this
How high do you have to work?
Does the job involve any of these?
Will it need a permit?
Specialty tools
Free and instant. Educational guidance only — not a quote, inspection, or professional diagnosis.
What should this project cost?
Enter your project details for a realistic cost range before you call anyone.
Cosmetic refreshes start near $5,000; full remodels commonly $25,000–$45,000.
- Regional adjustment
- National average
- Labor share (typical)
- ~$8,550
- Quotes to collect
- 3 written estimates
Educational estimate based on national averages — not a binding quote. Always confirm with written local estimates.
Get the print-ready PDF of this guide
A clean, ad-free, printable version you can keep on your phone or pin to the workshop wall. Free with a FixlyGuide account.
- Print-optimized layout
- Tools, materials & every step included
- Saved to your account
Recommended for DIYers & woodworkers
Sponsored
The Top 20 Tools for Workshops of Any Budget
No stationary machines or power tools required — plus 3 fundamental tools that can't be bought at any price.
Get the free guide
Ted's Woodworking — The #1 Woodworking Resource
Detailed instructions, dimensioned drawings, materials & cutting lists, and 3D schematics for every skill level.
See the plansSponsored: links above are affiliate links. FixlyGuide may earn a commission on qualifying purchases — at no extra cost to you.
Frequently asked questions
What is the difference between a cupped and a bowed butcher block?+
A cupped butcher block curves upward across its width like a shallow trough, with the edges sitting higher than the middle. A bowed butcher block bends along its length, creating an arched or sagging profile from end to end. Cupping is almost always caused by an uneven moisture differential between the top and bottom faces.
Can I flatten a butcher block countertop without taking it off the cabinets?+
Yes, minor cupping under 1/4 inch can often be pulled back down by setting a heavy weight on the high center or dampening the concave side. However, if the slab is fixed tightly to cabinets without slotted holes, any flattening will be temporary; the wood will re-warp on the next weather swing.
Can I use regular olive oil or vegetable oil to seal my butcher block?+
Never use vegetable oil, olive oil, canola oil, or corn oil on a butcher block. These kitchen cooking oils contain natural fats that oxidize, go rancid, turn sticky, and harbor foul-smelling bacteria inside the grain. Only use USP-grade pure food-safe mineral oil, fractionated coconut oil, or dedicated cutting board waxes.
How long does it take for warped butcher block to flatten out?+
Depending on the severity of the warp, raw wood fibers typically swell back to shape within 2 to 6 hours after applying damp heat. However, the slab must remain firmly clamped between rigid cauls for 24 to 48 hours to equalize and restabilize before applying fresh protective finishes.
Can you use steam or an iron to fix a warp faster?+
Use a handheld iron set to medium heat over a damp cotton terry cloth. Move the iron continuously over the warped hollow for 5 to 10 minutes at a time. The steam opens the compressed wood cells and drives moisture deep into dry fibers, accelerating the flattening process before clamping.
Why do I need slotted holes instead of standard round screw holes?+
Wood moves across its width as humidity swings throughout the year. If you screw through round holes directly into the hardwood, the expanding slab has nowhere to slide, forcing it to bow upward or crack down its seams. Slotted holes let the mounting screws glide sideways while keeping the slab flat.
How do I fix a butcher block that has already cracked along a glue seam?+
Splits happen when trapped wood dries out quickly or when rigid screws fight seasonal shrinkage. If the crack is under 1/8-inch wide, vacuum out all debris, inject waterproof PVA wood glue (Type III) or tinted epoxy, clamp across the gap with pipe clamps, and sand flush after a 24-hour cure.
Why did my butcher block warp right next to the sink cutout?+
End grain absorbs moisture up to ten times faster than the face of the wood. If your sink cutout, miter joint, or overhanging cut edge was not saturated with at least three to four coats of sealant, water vapor rushes in, causing rapid expansion and severe corner warps.

Discussion
Loading comments…