- Tools needed: 20-foot or 24-foot aluminum extension ladder, ladder standoff stabilizer, flathead screwdriver.
- Safety check: Don’t lean your ladder against the middle of an unsupported, loose gutter run; use a standoff stabilizer that rests firmly on the roof deck.
- If the wood is soft: If your screwdriver sinks more than 1/4 inch into crumbly, dark wood, the fascia is rotted and has to be replaced before you put in new hangers.
Roofing · Aging roof
| Project category | Roofing |
|---|---|
| Problem type | Aging roof |
| Trade required | Roofing |
| Urgency | Planned project |
| Safety risk | Low safety risk |
| DIY suitability | Pro recommended |
| Cost category | High cost |
| Typical timeline | Plan 4–12 weeks ahead for scheduling and material lead time |
| Contractor type | Licensed roofing contractor |
Repair option
Maintenance repairs to buy a season or two while you budget.
Replacement option
Planned replacement, which is almost always cheaper than a leak-driven emergency.
Common causes
- Normal weathering past the shingle service life
- Poor attic ventilation cooking the shingles from below
- Repeated repairs on the same slopes
Relevant tools:repair or replace roofproject cost estimatorhome improvement material prices
Published October 23, 2026Last updated October 23, 2026
Tools & materials you'll need
Affiliate linksAs an Amazon Associate FixlyGuide earns from qualifying purchases — at no extra cost to you. Prices and availability are accurate as of publication and subject to change.
Quick Answer
Gutter spikes pulling out of your fascia board usually happen because the stuff’s been working against itself for years — expansion and contraction, heavy debris, and a little wood rot loosening that smooth metal shank. I’d replace every loose spike with heavy-duty 6-inch or 7-inch threaded hidden screw hangers driven straight through the gutter and into the rafter tails using a cordless impact driver. That gets your gutter biting again, pulls it tight to the fascia, and kills the sag without those ugly spike heads showing along the roofline.
The Problem
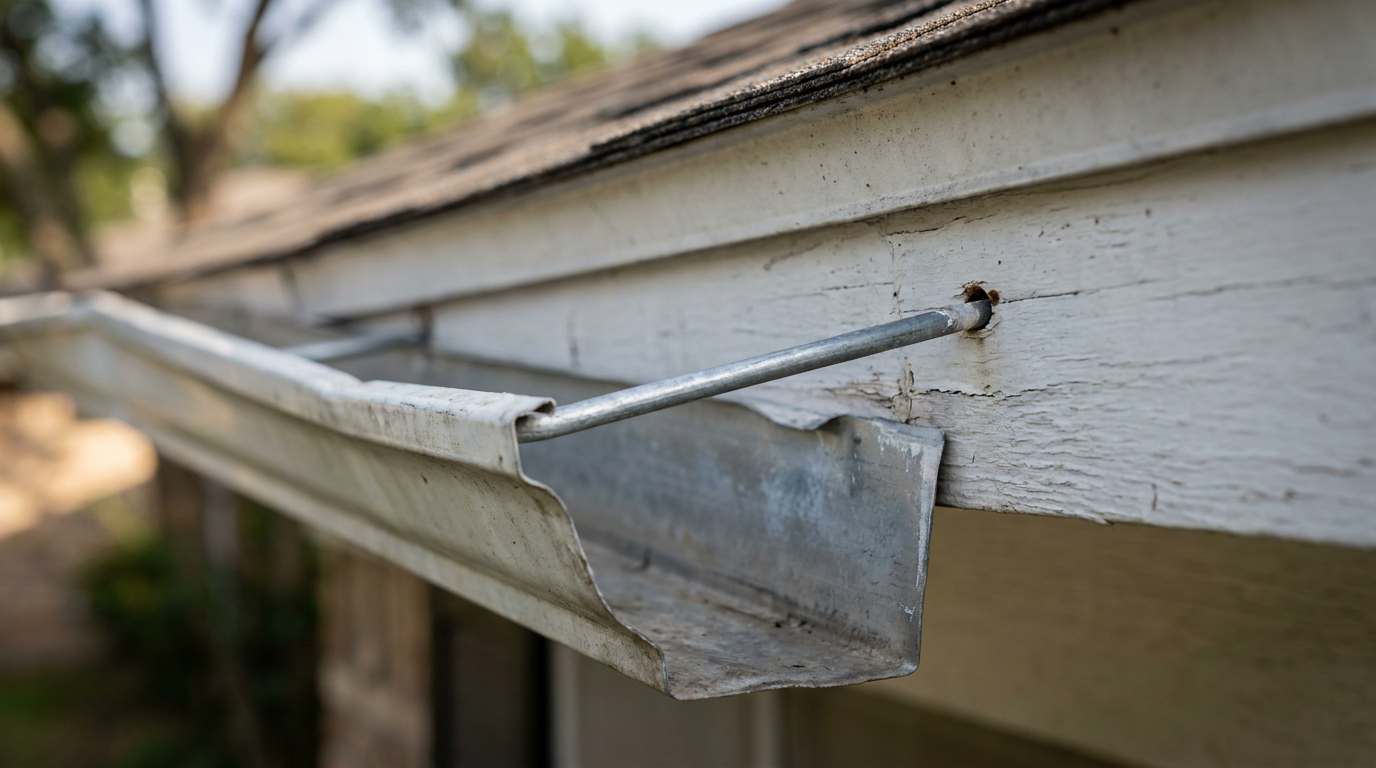
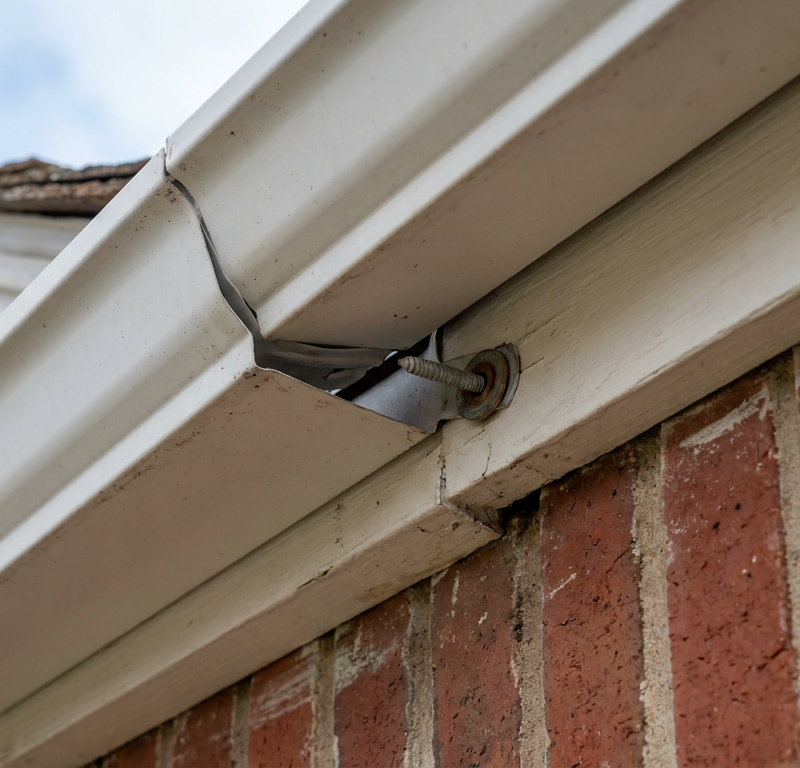
Walk outside after a summer downpour and look up at your eaves. You might see smooth metal nail heads poking out an inch or two from the aluminum lip. Sometimes the spike pulls all the way out, hanging sideways while a 10-foot section of gutter bows outward like an overfilled hammock. Been there.
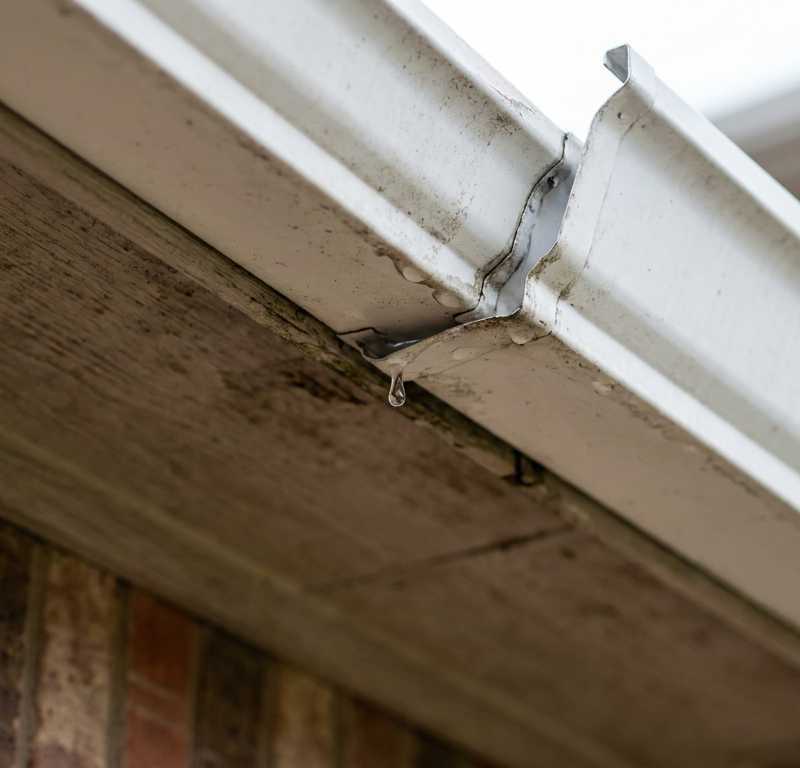
When gutter spikes loosen, your roof drainage geometry falls apart. Gutters need a rigid, continuous plane pitched toward the downspout. As soon as fasteners back out, the aluminum trough starts twisting forward under the weight of water. Instead of carrying rain along its length, the gutter tips forward and dumps gallons straight over the front edge right onto foundation soil, landscape beds, and walkways.
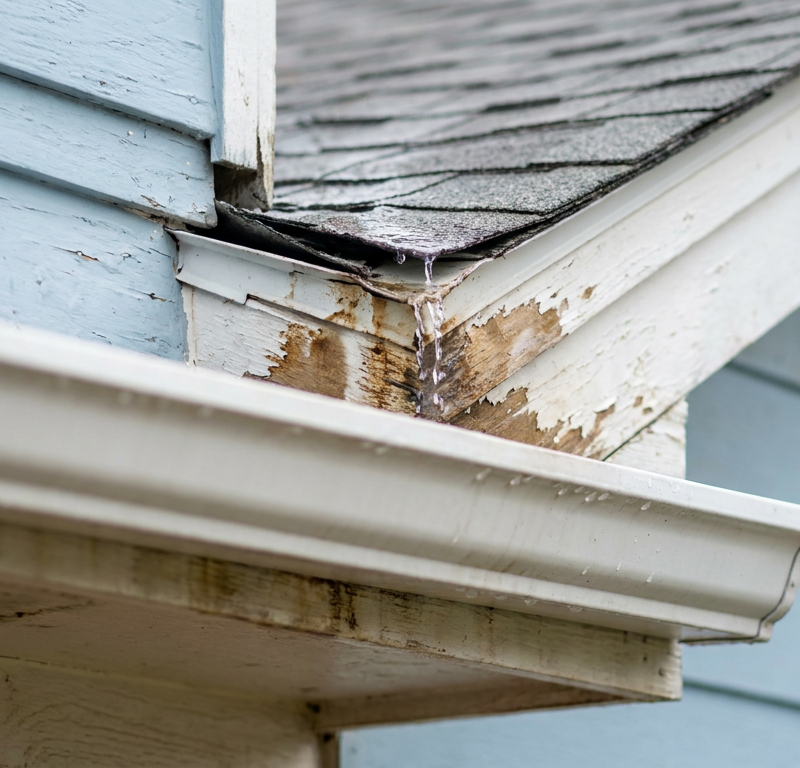
Ignore one backing-out spike and you’re not just risking the shrubs. The leverage from a hanging gutter acts like a crowbar against your roof edge. Every gust of wind rocks the trough and works the neighboring spikes loose down the run. Worse, water sneaks into the wall of the unsealed spike hole, soaks into the 1x6 softwood fascia board, and starts rotting the very wood that’s supposed to hold the drainage system up.
How It Works
Traditional K-style gutters installed before the late 2000s were hung with "spike-and-ferrule" fasteners. A hollow metal tube called a ferrule sits inside the gutter trough, spanning from the front lip to the back wall. An 8-inch smooth aluminum or galvanized steel spike runs through the front lip, slides through the ferrule, passes through the back gutter wall, and bites into the wooden fascia board. The ferrule doesn’t hold anything itself — it just keeps the installer from crushing the gutter while driving the spike home.
       [Spike Head]
            |
            v
   +--------+  <-- Gutter Front Lip
   |        |
   | [Ferrule Tube]  <-- Keeps trough from collapsing
   |        |
   +--------+  <-- Gutter Back Wall
       ||
   [Fascia Board 3/4" Pine]
       ||
   [Rafter Tail / Truss (2x4 or 2x6)]
Here’s why that system gives up: aluminum expands and contracts twice as fast as wood when temperatures swing between a 20°F winter night and a 105°F summer afternoon. Because the spike shank is dead smooth, thermal movement acts like a slow-motion hydraulic jack. The metal pushes outward as it warms, but friction doesn’t drag it all the way back when it cools. Over three to five seasons, the spike creeps free a hair at a time. Once water adds real weight — water weighs roughly 8.34 pounds per gallon, meaning a clogged 10-foot section holds upwards of 60 pounds — the smooth spike strips the wood fibers inside the hole and slides out for good. Modern hidden hangers fix that by swapping smooth friction for deep, coarse screw threads that bite into the fascia and anchor into the solid framing of the rafter tails behind it.
Step-by-Step Fix
Here’s how I swap out failed spikes for threaded hidden hangers that’ll hold for the long haul.
-
Set up ladder safety and inspect the fascia — Set your extension ladder on firm, level ground, keeping the base one foot out for every four feet of working height. Climb up and probe the fascia wood around the loose spike with a flathead screwdriver to make sure it isn’t soft and rotted.
- Tools needed: 20-foot or 24-foot aluminum extension ladder, ladder standoff stabilizer, flathead screwdriver.
- Safety check: Don’t lean your ladder against the middle of an unsupported, loose gutter run; use a standoff stabilizer that rests firmly on the roof deck.
- If the wood is soft: If your screwdriver sinks more than 1/4 inch into crumbly, dark wood, the fascia is rotted and has to be replaced before you put in new hangers.
-
Support the sagging gutter run — Hook a ratcheting strap or temporary rope from an upper roof bracket or ladder rung down under the sagging gutter section to take the dead weight off while you pull the fasteners.
- Tools needed: 1-inch utility strap or bungee cord.
- Pro-tip: If you’ve got somebody helping, have them support the underside of the trough with a push broom wrapped in a shop towel to ease tension on the neighboring spikes.
-
Remove the backed-out gutter spike and ferrule — Slip the claw of a 16-ounce claw hammer or the slot of a mini pry bar behind the protruding head of the spike and pull it out with smooth, straight leverage.
- Tools needed: 16-ounce claw hammer, 7-inch mini pry bar, work gloves.
- Watch out: Don’t pry against the thin front lip of the aluminum gutter or you’ll crush the profile. Set a small 1x3 wood scrap under your hammer head to spread the pressure.
- Retrieve the ferrule: Reach inside the trough and catch the hollow aluminum ferrule sleeve as the spike clears the inside wall. Toss both pieces into your scrap bucket.
-
Locate the rafter tails behind the fascia board — Look under the soffit for nail heads or measure along the roofline to figure out where the structural 2x4 or 2x6 rafter tails sit, usually 16 inches or 24 inches on center.
- Tools needed: Tape measure, small magnetic stud finder or finish nail.
- Why this matters: Securing your replacement fastener into 3/4-inch nominal fascia board alone gives you weak pull-out resistance. Driving through the fascia into a 1-1/2-inch thick rafter tail means your gutter isn’t going anywhere.
-
Seal the old spike penetration hole — Squeeze a generous dab of high-grade tripolymer or polyurethane gutter sealant directly into the empty hole left in the fascia board and the back wall of the aluminum trough.
- Tools needed: Caulk gun, tube of exterior polyurethane or tripolymer gutter lap sealant.
- Crucial step: Skip this and rainwater will head straight into the interior of your soffit and rot the fascia from the inside out. No dice.
-
Position the new hidden screw hanger — Take a 5-inch or 6-inch heavy-duty aluminum hidden hanger (match your gutter's cross-section size) and hook its curved front nose under the front hem of the gutter trough.
- Tools needed: 5-inch or 6-inch K-style hidden hangers with pre-inserted zinc-coated screws.
- Placement: Set the hanger 1 to 2 inches away from the old, wallowed-out spike hole so the new screw bites into virgin wood. Make sure it lines up with a rafter tail.
-
Level and snap the hanger over the back edge — Pivot the rear bracket of the hidden hanger downward until it sits level across the top opening of the gutter, then press the back flange firmly against the inside rear wall of the trough.
- Fit check: The top of the hanger needs to sit level with the top rim of the gutter. If it’s tilted upward, your gutter pitch will get wonky; if it sits too low, water will catch on the hanger during heavy rainfall.
-
Drive the structural screw home — Chuck a 1/4-inch or 5/16-inch magnetic nut driver bit into your 18V or 20V cordless impact driver and run the integrated screw at a slight downward angle (roughly 10 to 15 degrees) through the back of the gutter and deep into the rafter tail.
- Tools needed: 18V/20V cordless impact driver, magnetic hex nut driver bit.
- Torque note: Drive the screw until the rubber or steel washer seats firmly against the hanger bracket. Don’t over-torque it, or you’ll strip the wood threads in the rafter tail.
-
Install reinforcement hangers along the run — Repeat this replacement for any other loose spikes along the run, adding intermediate hidden hangers every 24 to 30 inches between existing solid fasteners to beef up the whole section.
- Spacing standard: In areas with freezing weather, heavy wet snow, or hard downpours, space hangers no more than 24 inches on center. In mild climates, 32 inches is acceptable.
-
Verify pitch with a 4-foot bubble level — Set a 4-foot level in the bottom of the gutter trough to confirm the run keeps a steady downward slope of 1/4 inch of fall for every 10 feet of horizontal run toward the downspout.
- Tools needed: 4-foot aluminum level, pencil.
- Adjustment: If a section is flat or holding water, loosen the hanger screw, raise or lower the back lip of the gutter by 1/8 inch, and drive the screw back in.
-
Perform a bucket flood test — Carry a 5-gallon bucket of water or run a garden hose up to the high end of the gutter run and dump it straight into the channel to watch the flow pattern.
- Verification: Water has to sweep cleanly past every newly installed hanger and exit the downspout without pooling deeper than 1/16 inch anywhere in the trough. Check the rear fascia to confirm zero water is sneaking behind the gutter.
Common Causes
Why do these spikes pull out in the first place? It’s almost always a mix of physics, age, and sloppy installation.
- Smooth-shank fastener design: Older spikes are basically oversized smooth aluminum or galvanized nails. Wood cells swell and grip them when damp, but as the wood dries in hot summer weather, the cell structure shrinks and loses its friction grip on the smooth shaft.
- Freeze-thaw thermal expansion: Aluminum moves a lot with temperature changes. Those seasonal expansion and contraction cycles work smooth spikes loose over a few years.
- Ice dams and heavy slush loads: Frozen slush weighs around 57 pounds per cubic foot. When gutters freeze solid and pack up with ice during winter freezes, that dead weight levers the front lip outward and pries the spikes out like a crowbar.
- Missed rafter tails during original construction: Fast-track builders often hang gutters using spikes driven only into 3/4-inch spruce or pine fascia boards without catching a single rafter tail behind them. A thin board by itself doesn’t have the tensile holding power to support a heavy, water-filled channel.
- Decaying or unprimed fascia wood: Small moisture leaks behind the roof drip edge turn fascia boards spongy over time. Once dry rot or wet rot gets into the wood grain, the spike’s friction fit drops to zero.
Common Mistakes
- Hammering the old spike back into the exact same hole. Classic rookie move. The wood hole’s already stripped out; tapping the spike back in feels tight for about three days until the first breeze or rainstorm pulls it right back out.
- Using standard drywall or interior wood screws. Drywall screws are brittle and’ll snap under the shear load of water-filled gutters. Even standard zinc wood screws will corrode through within two seasons because of galvanic reactions with aluminum gutter metal. Stick with ceramic-coated or exterior-grade zinc-aluminum self-piercing structural screws.
- Neglecting to seal the abandoned spike hole. Leaving a 5/16-inch open hole in your fascia gives wind-driven rain a direct lane into your attic eave and soffit lumber. Fill every void with polyurethane sealant.
- Over-tightening the new screw. An impact driver packs a lot of rotational force. If you bury the trigger until the screw spins freely, you’ve stripped out the wooden pilot path in your rafter tail and wrecked the hanger’s holding strength. Back off as soon as the screw head clamps tight.
- Bending the gutter's front lip during extraction. Pulling straight down on your pry bar uses the front aluminum lip as a fulcrum, which permanently crimps and kinks the metal profile. Always put a block of wood behind the tool to leverage against the solid roof deck or the back wall instead.
Cost & Time Breakdown
| Task | DIY Cost | Pro Cost | Time |
|---|---|---|---|
| Replace 3–5 loose spikes with hidden screw hangers | $15–$25 | $175–$300 | 1–1.5 hours |
| Full run retrofitting (replace all spikes on a 40-ft gutter) | $40–$65 | $350–$550 | 2.5–4 hours |
| Fascia board wood rot repair (8-ft section) | $35–$60 | $250–$450 | 2–3 hours |
| Complete gutter re-pitching and realignment | $10–$20 | $200–$350 | 1.5–2 hours |
Tips & Prevention
- Upgrade to hidden screw hangers before spikes fail: If your home still has visible spike heads, don’t wait for them to loosen up. Walk the perimeter and install one hidden hanger halfway between every existing spike to reinforce the whole roofline.
- Inspect the roofline twice a year: Use binoculars or climb a ladder each spring and fall. Sight down the front edge of the gutter; if you spot a wavy, undulating line instead of a straight plane, fasteners are starting to pull out behind the scenes.
- Check the drip edge overlap: Verify that your metal roof drip edge extends downward into the gutter trough by at least 1/2 inch. If the drip edge sits behind the gutter, rainwater will run down the back of the fascia board and speed up fastener rot.
- Keep gutter troughs free of decomposed sludge: Silt, decayed leaf matter, and shingle granules settle into a dense paste that adds a ton of dead weight to the trough. Cleaning gutters twice a year keeps unnecessary stress off your mounting hardware.
- Verify rafter tail spacing before buying hardware: Hidden hangers come in 5-inch and 6-inch profiles. Measure the top opening of your gutter from the back wall to the front inside edge before you head to the hardware store so you don’t buy the wrong size bracket.
When to Call a Professional
Swapping out loose spikes on a standard single-story ranch home is pretty straightforward, but some red flags mean you should set the ladder aside and hire a licensed gutter or roofing contractor.
First, look at the fascia. If probing with a screwdriver reveals soft, crumbling wood extending across more than two consecutive rafter spans, the fascia board is structurally compromised. Hidden hangers won’t hold in rotted pine; the whole wooden sub-fascia needs to be cut out, replaced, and wrapped in aluminum trim before the gutters can be rehung safely.
Second, call a pro if your home is two or more stories tall or sits on a steep grade where ladder placement calls for leveling jacks or specialized scaffolding. Working above 18 feet while running an impact driver and wrestling awkward, heavy gutter sections carries real fall risk.
Finally, if the aluminum gutter trough itself is twisted, buckled, or creased from a spike ripping completely out during a storm, the metal’s lost its rigidity. It won’t hold a straight pitch even with new hangers, and you’ll need a seamless gutter tech with an on-site roll-forming machine to run a fresh, continuous length of aluminum.
Related Articles
Keep troubleshooting with these hand-picked guides from FixlyGuide:
- Is Your Gutter Sagging After Every Storm? The Hidden Flaw Most Homeowners Miss — Discover the overlooked reason your gutters sag after every storm and learn the lasting fix that most homeowners miss.
- Water Coming Behind Gutter? Why It Happens and How to Fix It — Water spilling behind your gutters can rot your fascia and siding. It's usually caused by a bad gutter installation, not clogs—here's how t…
- Missing Shingles? The Real Trouble Is Under Your Roof — After a storm, missing shingles seem like a simple fix. But the high winds that tore them off likely broke the seals on surrounding shingle…
- The Quiet Threat: How Hidden Flashing Damage Invites Disaster After a Storm — After a storm, visible roof damage is obvious, but often the real trouble hides in damaged flashing, silently inviting water intrusion and…
- Roof Deck Leaking Into House? 7 Causes and the Fix for Each — A roof deck leaking into your house is a serious problem. We’ll walk through the 7 most common causes, from failed flashing to clogged drai…
- That Annoying Sawhorse Wobble: The Simple Fix Your Shop Needs — Don't let a wobbly sawhorse ruin your cuts or—worse—cause an accident. I'll walk you through the real reasons your sawhorses are unstable a…
Should you do this yourself?
Answer five quick questions before you start. Safety outranks savings every time.
Your experience with work like this
How high do you have to work?
Does the job involve any of these?
Will it need a permit?
Specialty tools
Free and instant. Educational guidance only — not a quote, inspection, or professional diagnosis.
What should this project cost?
Enter your project details for a realistic cost range before you call anyone.
Spot repairs commonly run $400–$1,800; full replacement typically $9,000–$18,000 for an average home.
- Regional adjustment
- National average
- Labor share (typical)
- ~$2,948
- Quotes to collect
- 3 written estimates
Educational estimate based on national averages — not a binding quote. Always confirm with written local estimates.
Fixly Project Decision Box
- DIY difficulty
- Professional Recommended
- Estimated time
- Inspection 1–2 hours · repairs 1–3 days
- Cost level
- High
Main tools / materials
- Binoculars for a ground-level look
- Flashlight for attic checks
- Moisture meter
- Roofing cement (temporary patch only)
When to stop and call a pro
- Active leak near lights, fans, or any wiring
- Sagging, bulging, or water-filled ceiling
- Steep, wet, or two-story roof — do not climb it
- Storm or hail damage you plan to claim on insurance
Need professional help?
Free roof assessment first — no phone calls until you ask for them.
Get Local Roofing HelpDecide what your roof needs
Two minutes of questions turns "something is wrong up there" into a clear next step.
- Repair or replace your roof?Answer 10 questions about age, leaks, and damage to get a clear next step.Open
- Compare contractor quotesScore up to four bids on price, warranty, licensing, and timeline.Open
- Get local estimatesSend one request and compare written estimates from vetted pros.Open
Free, no signup required. Estimates are educational guidance, not a quote or an inspection.
Get the print-ready PDF of this guide
A clean, ad-free, printable version you can keep on your phone or pin to the workshop wall. Free with a FixlyGuide account.
- Print-optimized layout
- Tools, materials & every step included
- Saved to your account
Frequently asked questions
Can I just hammer a loose gutter spike back in?+
No. Hammering a loose spike back into the original hole is a temporary fix that rarely lasts more than a few weeks. The wood fibers inside the hole have already been stripped and crushed by the smooth shank, meaning the spike no longer has friction to grip. You must either drive a wider specialized screw or install a modern hidden screw hanger into fresh wood nearby.
What size hidden hangers do I need for my gutters?+
Standard residential K-style gutters use either 5-inch or 6-inch hidden hangers. To determine your size, measure straight across the top opening of the trough from the inside of the back wall to the inside of the front lip. A 5-inch gutter measures roughly 5 inches across, while a 6-inch commercial or high-capacity residential gutter measures 6 inches wide.
Why do gutter spikes keep backing out of the fascia?+
Spikes back out primarily due to thermal expansion and contraction cycles. Aluminum expands and contracts much faster than wood as outdoor temperatures fluctuate. Because the spike shank is completely smooth, this movement gradually wiggles the metal out of the wooden fascia board, especially under the heavy dead weight of trapped rainwater or wet debris.
Can I replace a gutter spike with a threaded screw in the same hole?+
Yes. If the spike is still straight and you want to reuse the exact hole, you can buy an oversized threaded gutter screw (often called a gutter monster screw) that features the same head size but has coarse screw threads along its shank. However, switching to interior hidden screw hangers provides superior strength and looks much cleaner since no hardware shows from the street.
How far apart should gutter hangers be spaced?+
A standard residential gutter run should have a hanger or spike installed every 24 to 32 inches along its length. If you live in an area prone to heavy snow, freezing ice dams, or extreme downpours, tighten that spacing to every 18 to 24 inches for added structural support. Additionally, make sure hangers are placed within 6 inches of any corner miter or downspout drop outlet.
Do hidden gutter screws need to hit rafter tails?+
While securing hangers into a solid 3/4-inch fascia board provides decent holding power, driving screws through the fascia and deep into the structural 2x4 or 2x6 rafter tails or truss ends is significantly stronger. Rafter tails provide solid framing lumber that will never strip out under normal rain, ice, or ladder loads.
What should I do if the new screw spins freely and won't bite?+
If the screw spins without biting, the wood behind it is either rotted or completely stripped out. First, try angling the screw slightly up or down to find fresh wood, or shift the hanger 2 inches to the left or right to hit a solid section of the rafter tail. If the entire area is crumbly, you have localized wood rot that requires patching with wood epoxy or replacing the fascia board entirely.
Can I install hidden hangers on an older gutter system that currently uses spikes?+
Yes, absolutely. You do not need to tear down your gutters to modernize the fastening system. You can leave existing solid spikes in place and simply install hidden screw hangers right alongside them or replace loose spikes one by one as they fail. This significantly reinforces older spike-and-ferrule gutter systems without the cost of whole-house gutter replacement.
Discussion
Loading comments…