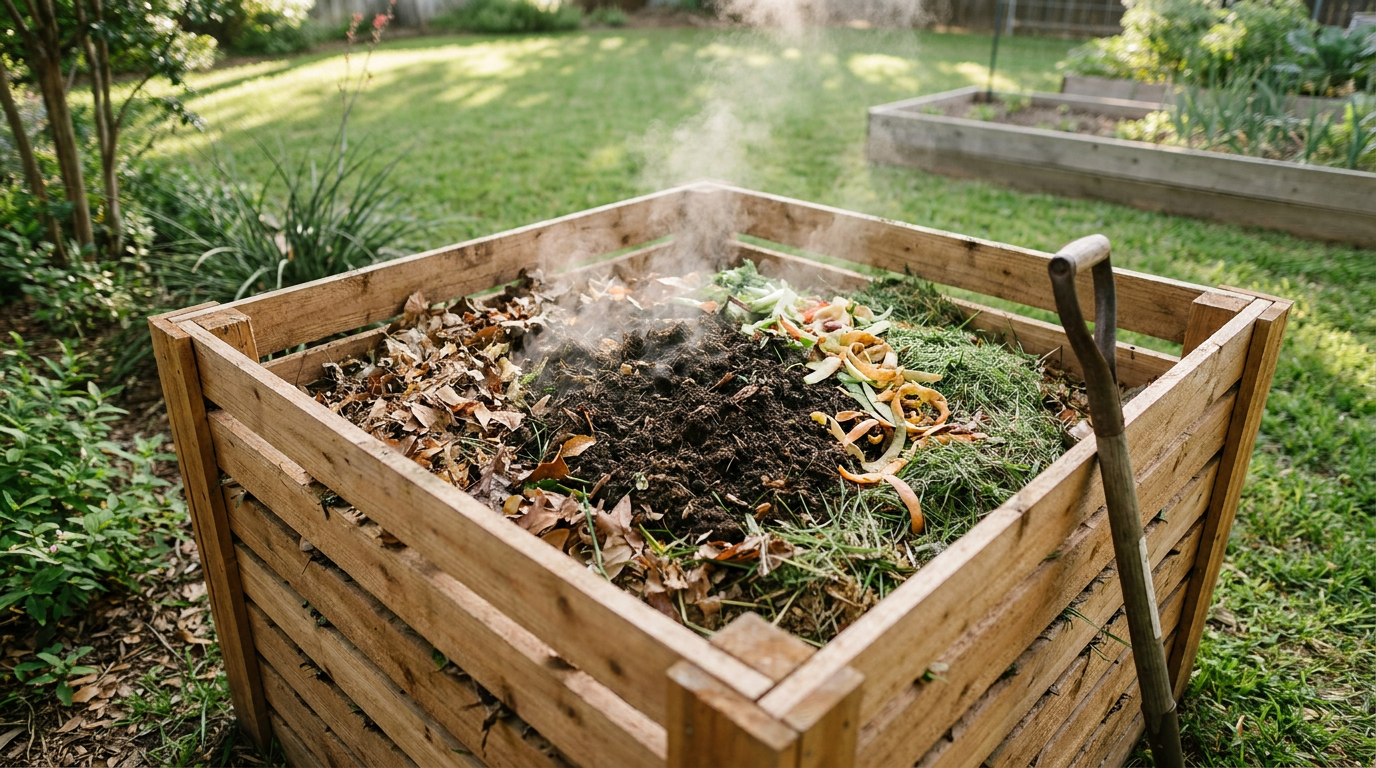
- You need both, plain and simple. Don’t try to start a pile with just a bucket of kitchen scraps. Rake up last fall’s leaves or ask a neighbor if they’ve got extras. Shred cardboard and paper. That’s your brown gold right there.
- Greens (Nitrogen): Fruit and vegetable scraps, coffee grounds and filters, tea bags, fresh grass clippings, plant trimmings, eggshells (crushed).
- Browns (Carbon): Dried leaves, shredded cardboard and newspaper (no glossy magazines), sawdust (from untreated wood), small twigs, pine needles, straw.
Landscaping · Deck or fence project
| Project category | Landscaping |
|---|---|
| Problem type | Deck or fence project |
| Trade required | Landscaping |
| Urgency | Planned project |
| Safety risk | Moderate safety risk |
| DIY suitability | DIY for experienced homeowners |
| Cost category | High cost |
| Typical timeline | Most builds 3–10 days depending on size |
| Contractor type | Landscaping contractor |
Repair option
Replace failed boards, posts, and hardware; reseal the surface.
Replacement option
Rebuild when framing or the ledger connection is unsafe.
Common causes
- Rot at posts and ledger
- Storm damage
- Adding outdoor living space
Relevant tools:home improvement material pricesproject cost estimator
Published October 8, 2026Last updated October 8, 2026
Tools & materials you'll need
Affiliate linksAs an Amazon Associate FixlyGuide earns from qualifying purchases — at no extra cost to you. Prices and availability are accurate as of publication and subject to change.
Quick Answer
Starting a compost pile is one of the best moves you can make for your garden and the environment. You don’t need much, either. A small patch of ground, a container if you want one, and a mix of kitchen and yard waste will get you rolling. The basic recipe is simple: layer your “greens” — stuff like grass clippings and vegetable scraps — with “browns” like dried leaves and cardboard. I usually tell folks to aim for about one part green to three parts brown. Keep the pile damp like a wrung-out sponge, turn it with a pitchfork every week or two so it keeps breathing, and in a few months you’ll have a rich soil amendment your plants will eat up — and it won’t cost you a dime.
The Problem
Your garden soil’s worn out and your plants are looking rough. You’re buying fertilizer, buying soil conditioners, and bagging up kitchen scraps and yard waste just to send it off to the landfill. That means methane, which is nasty stuff, and a whole lot of wasted material. You’ve already got the raw ingredients for good, dark humus — the best soil food going — but getting started feels like a headache. Maybe you’re worried about smell. Maybe pests. Maybe you’ll mess up the mix. Fair enough. It can seem fussy from the outside, but it’s really just a natural process that needs a little help from you.
How It Works
A compost pile is a managed little ecosystem, and the heavy lifting gets done by microorganisms doing what they do best: breaking stuff down. Think of it like a tiny farm for microbes. Billions of bacteria, fungi, and other microscopic critters get to work on your organic waste. To stay happy, they need four things: nitrogen, carbon, water, and oxygen.
- Nitrogen (The "Greens"): This is protein for the microbes. Fresh grass clippings, coffee grounds, and kitchen vegetable scraps are packed with nitrogen. That’s the fuel that lets the microbes multiply fast, which heats the pile up. A hot pile (130-160°F) is a productive pile. It breaks materials down quicker and kills weed seeds and pathogens while it’s at it.
- Carbon (The "Browns"): This is the energy source. Dried leaves, shredded cardboard, newspaper, and small twigs are carbon-heavy. They give the pile body and structure, and they create air pockets so oxygen can move through.
- Water: The microbes need moisture to live and work. Too dry, and the whole thing stalls out. Too wet, and you’ve got a stinky, anaerobic mess because the water pushes the oxygen out. You want it about like a damp sponge.
- Oxygen: That’s why you turn the pile. Aerobic bacteria — the good ones — need air to work right and not stink the place up. Turning mixes everything around, keeps it from packing down, and gets oxygen to the folks in the middle doing the real work.
Balance those four things and you’re just speeding up nature’s own recycling system. You’re setting the stage so decomposition happens on your schedule instead of whenever it feels like it.
Step-by-Step Fix
1. Choose Your Location
- Pick a level spot with decent drainage. Bare soil or lawn is better than concrete because worms and other helpful critters can get in there. Partial sun is the sweet spot; full sun can dry it out too fast, especially in a Texas summer, and deep shade can slow the whole show down. Keep it handy from the kitchen and the garden, but maybe don’t park it right by your patio. And check local HOA rules or city ordinances first — some places have rules about bin placement or what kind you can use.
2. Select a Bin (or Don't)
- No Bin: Cheapest route, and honestly the easiest. Just pile it up free-form. It works, but it can look a little rough and it’s harder to turn.
- DIY Bin: Build a simple enclosure with wood pallets, wire mesh fencing, or cinder blocks. If you’re serious about it, a three-bin setup — one bin for new material, one for “cooking,” one for finished compost — is about as good as it gets.
- Purchased Bin: You can buy plastic composters, often tumblers that make turning a lot easier, or stationary bins. Tumblers are nice for keeping pests out and heat in, though they usually handle less volume. A stationary bin holding at least one cubic yard (3'x3'x3') is a solid starting point.
3. Gather Your Greens and Browns
- You need both, plain and simple. Don’t try to start a pile with just a bucket of kitchen scraps. Rake up last fall’s leaves or ask a neighbor if they’ve got extras. Shred cardboard and paper. That’s your brown gold right there.
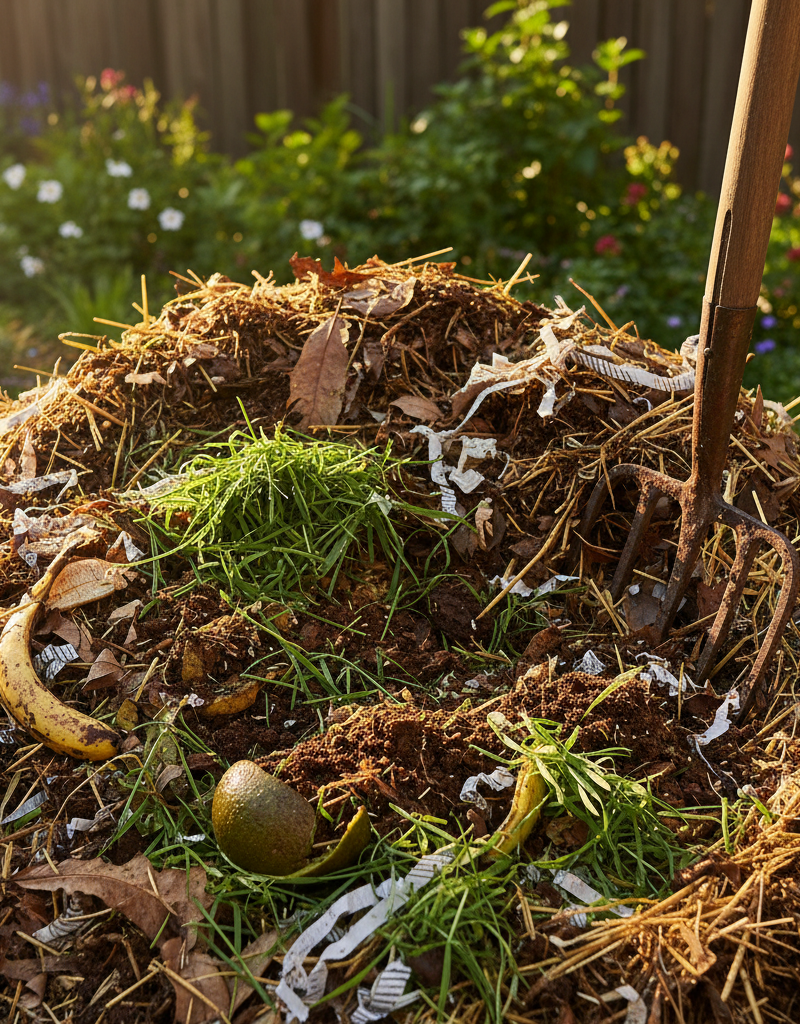
- Greens (Nitrogen): Fruit and vegetable scraps, coffee grounds and filters, tea bags, fresh grass clippings, plant trimmings, eggshells (crushed).
- Browns (Carbon): Dried leaves, shredded cardboard and newspaper (no glossy magazines), sawdust (from untreated wood), small twigs, pine needles, straw.
4. Start Layering
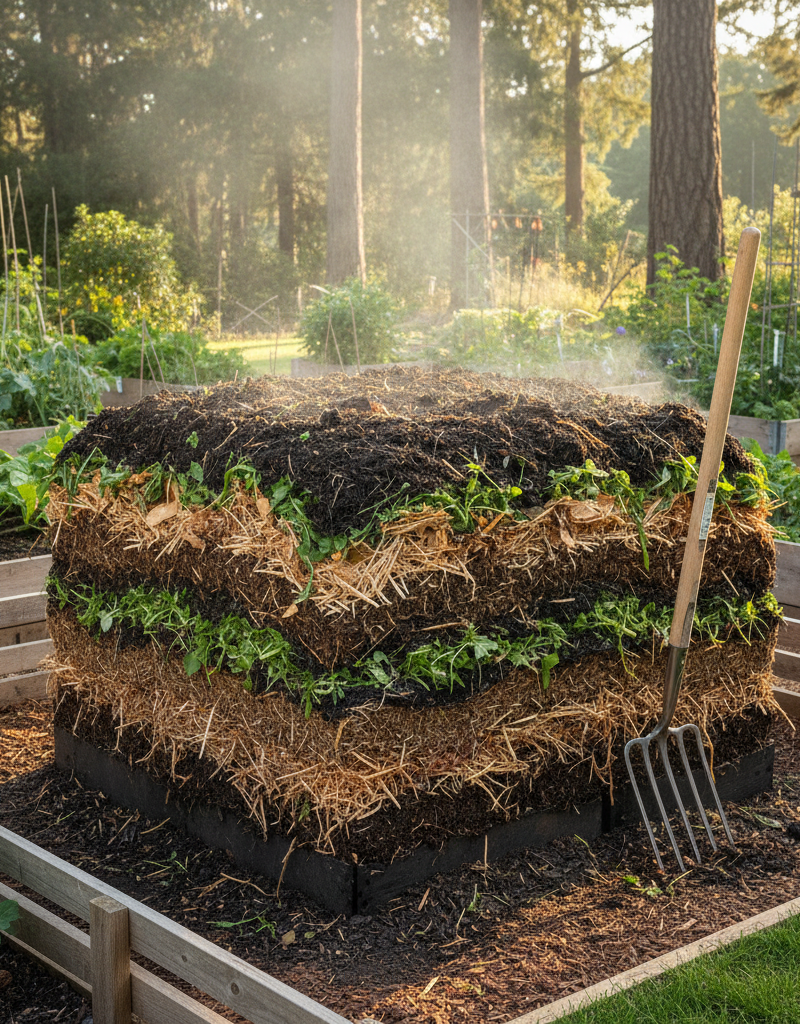
- Think of it like building a lasagna. Start with a 4-6 inch layer of bulky browns, like twigs or shredded cardboard, on the bottom. That helps the air move.
- Add a 2-3 inch layer of greens on top.
- Add a 4-6 inch layer of browns.
- Sprinkle a little water after each layer. Damp, not soaked.
- You can throw in a thin layer of garden soil or finished compost too, just to introduce microbes right away.
- Keep repeating until the pile’s at least 3 feet high and 3 feet wide. That size matters if you want it to build and hold enough heat.
5. What NOT to Compost
- Never add these: Meat, fish, bones, dairy products, oils, greasy foods, or pet waste (from cats or dogs). Those are pest magnets, and they can bring along some ugly pathogens too.
- Be careful with these: Diseased plants (the pile might not get hot enough to kill the pathogens), weeds that have gone to seed (same issue), and woody branches (they take forever unless you shred or chip them).
6. Maintain Your Pile: Water and Oxygen
- Water: Check the moisture weekly. Grab a handful from the center. If you can squeeze out a few drops, you’re in good shape. If it’s dry, hit it with a hose and sprayer nozzle while you’re turning. If it’s slimy and smells like ammonia, it’s too wet; dump in more dry brown material and turn it well.
- Oxygen: This is the big one. Turn your pile every 1-2 weeks with a pitchfork or compost aerator. You’re trying to move the cooler outer material into the hot center and the hot stuff back out. If you’ve got a tumbler, 5-10 spins every few days will do the trick.
- I pulled a backyard bin apart in Frisco last month that had been ignored all summer — no joke, the middle was crusty as a desert floor. One good soak and a thorough turn, and it started coming back to life.
7. Harvest Your "Black Gold"
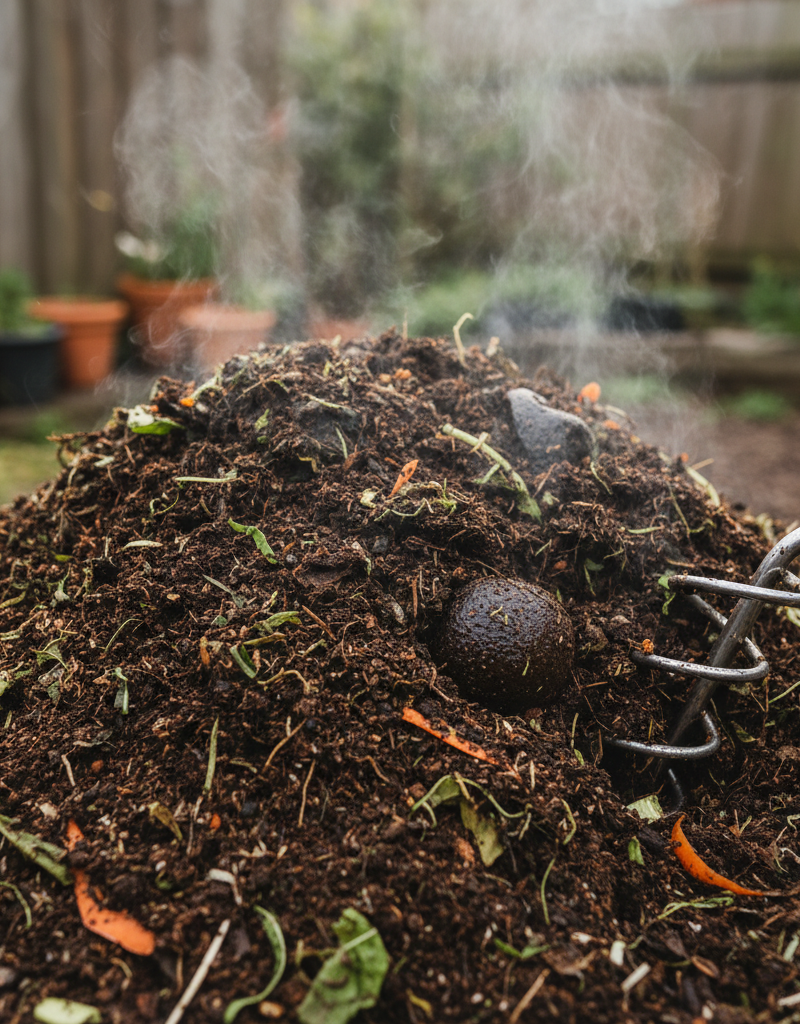
- Your compost’s ready when it’s dark, crumbly, and smells earthy like a forest floor. You shouldn’t be able to pick out the original scraps anymore. That can take anywhere from 2 months to a year, depending on what you put in and how often you turn it.
- To harvest it, stop adding new material to the pile and let it finish “cooking” for a few weeks. Then you can pull compost from the bottom of a stationary pile or empty the whole thing and start fresh. Sift it through a 1/2-inch hardware cloth screen if you want to catch the bigger unfinished chunks — just toss those back into the new pile and call it a day.
8. Using Your Compost
- Soil Amendment: Mix 2-4 inches of compost into your vegetable or flower beds before planting.
- Top Dressing: Spread a 1/2-inch layer around the base of existing plants and shrubs.
- Potting Mix: Blend compost with perlite and coir or peat moss for a stronger potting mix.
- Lawn Booster: Rake a thin layer over your lawn in the spring to improve soil health.
Common Causes of Compost Problems
- Bad Smell (Ammonia/Rotten Eggs): Your pile’s too wet and/or you’ve got too many greens in there. It’s gone anaerobic. The Fix: Stop adding water, pile in a big batch of dry brown material (leaves, shredded cardboard), and turn it thoroughly so air can get back in.
- Pile Isn't Heating Up: It’s probably too small, too dry, or short on nitrogen (greens). The Fix: Add more material until you’ve got at least 3'x3'x3'. Add water if it’s dry. Add a nitrogen source like fresh grass clippings or coffee grounds if it’s mostly brown.
- Pests (Rats, Raccoons): You’re feeding the wrong stuff. Meat, dairy, and oily foods are like ringing the dinner bell. An open pile can make it worse. The Fix: Stop adding forbidden foods right now. If pests keep showing up, switch to a fully enclosed plastic bin or a tumbler.
- Lots of Unbroken-Down Material: That’s normal for things like avocado pits or corn cobs. But if everything’s moving slow, you probably aren’t turning enough or the pieces are too big. The Fix: Turn more often. Chop up bigger vegetable scraps and shred cardboard before you toss them in.
Common Mistakes
- Getting the C:N Ratio Wrong: The most common mistake is dumping in too many kitchen scraps (greens) without enough leaves and cardboard (browns). That’s how you end up with a slimy, stinky mess. Keep a bale of straw or a bag of leaves handy so you can cover those scraps.
- Starting Too Small: A tiny pile just won’t build the heat it needs for good decomposition. You want that 3-foot cube minimum if you’re after a hot pile.
- Not Shredding/Chopping: Tossing in whole pizza boxes or giant broccoli stalks is a slow road. Smaller pieces give microbes more surface area to attack, and they break down faster.
- Forgetting to Water: In hot, dry weather, a pile can dry out in a week. If it’s dry, the process shuts down. Think of your microbes like pets — they need water.
- Giving Up Too Soon: Composting isn’t a weekend project. It takes months sometimes. Be patient, keep turning and watering, and let nature handle it. Don’t expect rich black soil in three weeks. No dice.
Cost & Time Breakdown
| Task | DIY Cost | Pro Cost | Time |
|---|---|---|---|
| Building a DIY Pallet Bin | $0–$30 (for screws/hardware) | N/A | 1–2 hours |
| Buying a Tumbler Bin | $100–$250 | N/A | 30 min assembly |
| Buying a Stationary Bin | $50–$150 | N/A | 30 min assembly |
| Turning the Pile Weekly | $0 | N/A | 5–10 minutes |
| Harvesting & Sifting | $15 (for hardware cloth) | N/A | 1–2 hours |
| Ongoing Material Cost | $0 | N/A | Ongoing |
Tips & Prevention
- Keep a Lid On It: Cover your pile or bin with a tarp or lid. That helps hold heat and moisture in, and it keeps the pile from turning into a swamp after a heavy rain.
- Stockpile Browns: In the fall, when leaves are piling up everywhere, grab them. Bag them and stash them next to your compost pile. That gives you a ready supply of carbon to balance out the kitchen scraps you’ll keep adding all year.
- Get a Kitchen Pail: Use a small container with a tight-fitting lid in your kitchen for scraps. That makes it easy to haul them out every day or two. Sprinkle a little baking soda in there if smell’s a worry.
- Don't Use Chemically Treated Yard Waste: If your lawn gets herbicides or pesticides, don’t compost those clippings. The chemicals can survive the whole process and mess with your garden plants.
- Aerate When You Add: Every time you dump in a bucket of kitchen scraps, poke a few deep holes into the pile with a pitchfork. That helps air get in between the big turnings.
- Know Your Weeds: Don’t add persistent weeds like bindweed or nutsedge — they can survive the process and end up right back in your garden.
When to Call a Professional
Frankly, this is a 100% DIY job. I can’t think of a situation where you’d need to hire somebody to manage a simple backyard compost pile. The only time I’d bring in a pro is if you’ve got a huge property and want a large-scale, professionally built three-bin system, or if a neglected pile has turned into a real pest problem — rats, raccoons, that kind of thing — and you need an exterminator. But for the composting itself, you’re the pro.
Related Articles
Keep troubleshooting with these hand-picked guides from FixlyGuide:
- The 3 Compost Pile Mistakes Even Experienced Gardeners Make — Avoid common pitfalls and build a thriving backyard compost pile with the right mix of greens, browns, and proper aeration for nutrient-ric…
- The 3 Compost Pile Mistakes Sabotaging Your Soil (And How to Fix Them) — Unlock nutrient-rich soil by avoiding common composting errors and learn the simple steps to a thriving backyard compost pile.
- Why Your Compost Pile Isn't Heating Up (And How to Fix It Tonight) — A compost pile that isn't heating up is a common problem, often due to an imbalance of materials, lack of moisture, or insufficient aeratio…
- The #1 Summer Lawn Mistake Turning Your Grass Yellow (and How to Fix It) — Discover the most common summer mistake that causes lawns to turn yellow and learn how to correct it for a greener, healthier yard.
- The Grassy Secret: Why Your Lawn Has Brown Patches (Even After Watering) — Discover the real culprit behind mysterious brown lawn patches—it might not be drought. Learn to identify and eliminate lawn grubs before t…
- Why Your Toilet Clogs Every Few Days (And the #1 Mistake Homeowners Make) — A toilet that clogs frequently is a frustrating problem, often caused by easily overlooked issues like trapway obstructions or ventilation…
Should you do this yourself?
Answer five quick questions before you start. Safety outranks savings every time.
Your experience with work like this
How high do you have to work?
Does the job involve any of these?
Will it need a permit?
Specialty tools
Free and instant. Educational guidance only — not a quote, inspection, or professional diagnosis.
What should this project cost?
Enter your project details for a realistic cost range before you call anyone.
Cost depends heavily on which system turns out to be the source.
- Regional adjustment
- National average
- Labor share (typical)
- ~$1,620
- Quotes to collect
- 3 written estimates
Educational estimate based on national averages — not a binding quote. Always confirm with written local estimates.
Before you start
Check the difficulty, permits, and safety risk — then decide whether to call a pro.
- Estimate this projectGet a cost range for your scope and ZIP before you call anyone.Open
- Get local estimatesSend one request and compare written estimates from vetted pros.Open
Free, no signup required. Estimates are educational guidance, not a quote or an inspection.
Frequently asked questions
What's the best ratio of green to brown for compost?+
A good rule of thumb is to aim for about three parts brown (carbon) material to one part green (nitrogen) material by volume. This isn't an exact science, so don't stress over it. If your pile gets smelly, add more browns; if it's not heating up, add more greens.
How do I know when my compost is ready to use?+
Finished compost will be dark brown, crumbly, and have a rich, earthy smell like a forest floor. You shouldn't be able to identify the original materials you put in. The process can take anywhere from two months to a year depending on your methods.
Can I compost in the winter?+
Yes, you can! The decomposition process will slow down significantly or even go dormant in freezing temperatures. Just keep adding your materials, and the pile will wake up and get active again when the weather warms up in the spring.
My compost pile smells bad. What did I do wrong?+
A bad smell, usually like ammonia or rotten eggs, means your pile is too wet and has too much nitrogen (greens). This creates an anaerobic condition. The fix is to stop adding water and thoroughly mix in a large amount of dry, brown materials like leaves or shredded cardboard to restore balance and aerate the pile.
Do I really need a compost bin?+
No, a bin isn't strictly necessary. You can have a successful open compost pile, which is the cheapest and simplest method. However, bins help keep the pile tidy, retain heat and moisture more effectively, and can deter pests, which is why many people prefer them.
What should I NOT put in my compost pile?+
Never add meat, bones, fish, dairy products, oils, or greasy foods, as they will attract pests and can create foul odors. Also avoid cat and dog waste, which can contain harmful pathogens. Be cautious with diseased plants or weeds that have gone to seed.
Is it okay to add coffee grounds and eggshells?+
Absolutely. Coffee grounds are a fantastic source of nitrogen (a 'green') and microbes love them. Eggshells add valuable calcium but break down very slowly, so it's best to crush them into a powder before adding them to the pile.
Why isn't my compost pile getting hot?+
There are three likely reasons: the pile is too small, it's too dry, or it needs more nitrogen (greens). A pile needs to be at least 3 feet by 3 feet by 3 feet to generate and retain heat. Check the moisture and add water if needed, or mix in some fresh grass clippings or vegetable scraps to kickstart the microbial activity.
Discussion
Loading comments…