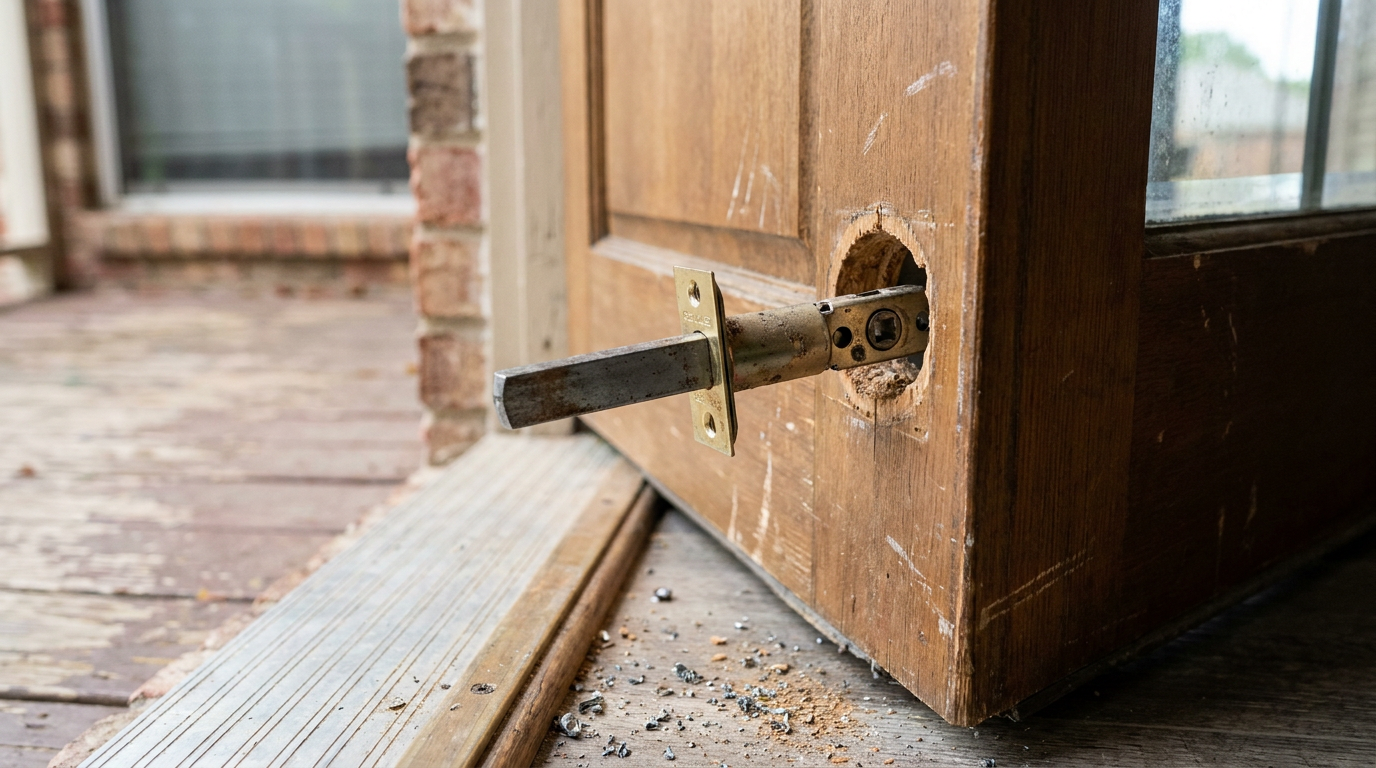
- If the bolt slides in and out smooth: the latch is fine; the trouble’s in your tailpiece or thumbturn timing.
- If the screwdriver spins with zero resistance or binds hard: the internal gear or scissor link inside the latch casing has shattered.
- Emergency open: If the door’s stuck closed, twisting this hub with the flathead screwdriver will manually retract the deadbolt and open the door right now.
General remodeling · Renovation planning
| Project category | General remodeling |
|---|---|
| Problem type | Renovation planning |
| Trade required | General contracting |
| Urgency | Planned project |
| Safety risk | Low safety risk |
| DIY suitability | Pro recommended |
| Cost category | Major investment |
| Typical timeline | Design and permitting often 2–4 months before work starts |
| Contractor type | General contractor |
Repair option
Phase the work and fix the building envelope first.
Replacement option
Full renovation with permits, design, and a general contractor.
Common causes
- Space no longer fits how the household lives
- Resale preparation
- Deferred maintenance stacking up
Relevant tools:project cost estimatorcompare quoteshome improvement material prices
Published November 21, 2026Last updated November 21, 2026
Tools & materials you'll need
Affiliate linksAs an Amazon Associate FixlyGuide earns from qualifying purchases — at no extra cost to you. Prices and availability are accurate as of publication and subject to change.
Quick Answer
If your key turns in the deadbolt or knob cylinder and the latch bolt doesn’t move, the link between the cylinder and the latch has slipped, cracked, or plain given up. I’d start by pulling the interior escutcheon plate with a #2 Phillips screwdriver, checking that flat metal tailpiece for a break or misalignment, and looking at the latch cam to see if it’s sheared. Most of the time, you can realign the tailpiece into the latch hub or swap in a $15 replacement latch assembly and call it a day.
The Problem
You put the key in, turn it, and feel normal drag or maybe a little click—then nothing. The bolt stays put. The door stays locked, or worse, it won’t latch at all and your security’s out the window. Folks usually think the cylinder’s frozen or the key got worn down.
That’s almost never what’s happening.
If the key turns smooth but the bolt ignores it, the trouble is in the little drivetrain between the rotating plug and the sliding bolt inside the door slab. That setup’s got three small metal parts doing the heavy lifting: the cylinder plug, a tailpiece (or spindle), and the latch cam. If one snaps, slips out of its slot, or strips its teeth, the whole bridge is gone. The key spins its side of the lock while the bolt just sits there like it’s on break.
I pulled a water heater in Frisco last month and the homeowner had the same mindset—swore the key had “gone bad.” Nope. The latch cam was busted clean in two. Same story, different door.
How It Works
To fix this without chewing up your door casing, you need a quick picture in your head of how an ANSI Grade 1, 2, or 3 lock turns rotational torque into straight-line motion. Simple enough once you see it.
Inside the outside lock housing sits the cylinder. Slide in the right key, and the bottom pins push the top driver pins past the shear line, so the brass plug can rotate inside the housing. Coming out the back of that plug is a flat, hardened steel bar called the tailpiece (or, on commercial levers, a square spindle).
That tailpiece runs right through a cross-shaped or rectangular hub in the middle of the deadbolt latch casing, sitting dead-center in the 2-1/8-inch cross-bore hole in your door. Twist the key 90° to 180°, and that tailpiece spins an internal drive cam inside the latch. That cam grabs a hardened steel extension arm and pulls the 1-inch deadbolt throw all the way back into the edge bore, or drives it out into the jamb’s strike plate.
If that flat tailpiece snaps—usually from years of forcing a binding door shut—or if the zinc-cast cam inside the latch shatters, the plug just spins in circles. No torque makes it to the bolt. No dice.
+---------------+        +--------------+        +-------------------+
| Cylinder Plug | -----> |  Tailpiece   | -----> | Latch Hub & Cam   |
|  (Key Turns)  |        | (Flat Shaft) |        | (Slides Internal) |
+---------------+        +--------------+        +-------------------+
                             ===> [ 1" Bolt Moves ]
Step-by-Step Fix
Before you grab a screwdriver, open the door if it’s already ajar. If the door’s locked shut and you’re inside, you can still work through this from the interior side. If you’re outside looking at a spinning cylinder, skip to the lock bypass instructions in Step 4.
1. Identify the Lock Brand and Architecture —
Look at the face of the lock or the latch plate on the door edge for brand stamps like Schlage, Kwikset, Yale, or Defiant. Different brands use different tailpiece layouts; Schlage often uses floating or timed tailpieces with a rear retaining cap and pin, while Kwikset usually uses a stamped tailpiece held with a wave washer or C-clip right at the cylinder plug. Knowing that up front keeps you from launching spring-loaded parts across the room.
- Tool required: Flashlight or smartphone light.
2. Back Out the Interior Mounting Screws —
Find the two machine screws holding the thumbturn escutcheon plate on the inside of the door. Use a manual #2 Phillips screwdriver, not an impact driver, or you’ll chew up the soft brass or zinc screw heads in a hurry. Back them out counter-clockwise and keep inward pressure on the exterior cylinder so it doesn’t drop onto the porch or scratch the door face.
- Toss the two mounting screws in a magnetic tray or lay them on a clean rag so they don’t roll into the weeds.
3. Slide Off the Interior and Exterior Assemblies —
Pull the interior thumbturn straight off the door face; take a second and see whether the receiving slot or hub came off clean. Then pull the exterior cylinder straight out from the 2-1/8-inch bore hole on the outside of the door. Look at the back of that exterior cylinder: you should see a flat metal tailpiece sticking out about 1 to 1-1/2 inches past the housing.
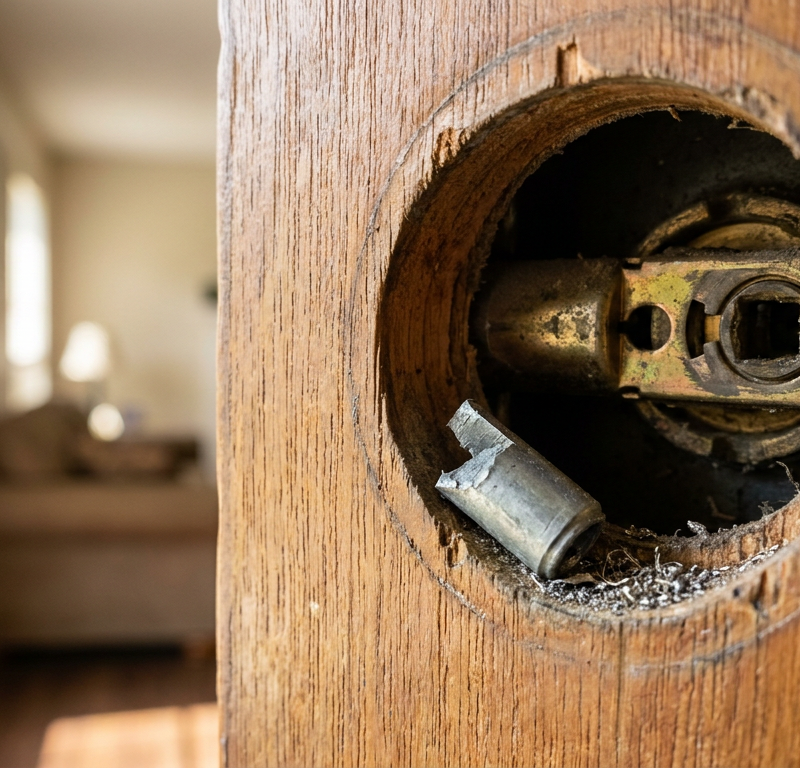
- If the tailpiece falls out in two pieces, it sheared off—you found your problem.
4. Inspect the Latch Hub and Test Manual Retraction —
Look into the open 2-1/8-inch cross-bore hole at the latch sitting in the middle of the door slab. You’ll see a rectangular or cruciform hole, the hub, right in the center of the latch body. Stick a medium flathead screwdriver into that slot and rotate it toward the door jamb with firm pressure.
- If the bolt slides in and out smooth: the latch is fine; the trouble’s in your tailpiece or thumbturn timing.
- If the screwdriver spins with zero resistance or binds hard: the internal gear or scissor link inside the latch casing has shattered.
- Emergency open: If the door’s stuck closed, twisting this hub with the flathead screwdriver will manually retract the deadbolt and open the door right now.
5. Check Tailpiece Timing and Wear —
Take a close look at the flat tailpiece sticking out of the exterior cylinder. On standard deadbolts, the tailpiece needs to sit horizontal when the bolt is retracted and vertical when extended, or the other way around depending on the brand. Turn your key in the detached cylinder while holding the housing in your hand. The tailpiece ought to move right with the key, no lag, no wobble.
- If the key turns 45° before the tailpiece catches, the rear cam collar or retaining clip on the back of the plug is loose or stripped.
6. Tighten or Re-pin the Cylinder Retaining Cap (Schlage Type) —
If you’ve got a Schlage-style cylinder and the tailpiece feels loose or disconnected from the plug, check the little brass pin-and-spring setup under the notched retaining cap on the back. Push the tiny spring-loaded pin with an awl or small paperclip, then thread the retaining cap down clockwise until it’s snug against the housing, then back it off one notch until the pin pops up and locks it.
- Don’t over-tighten this cap. If you crank it down all the way, the key will bind in the keyway and won’t turn at all.
7. Remove and Replace a Shattered Latch Mechanism —
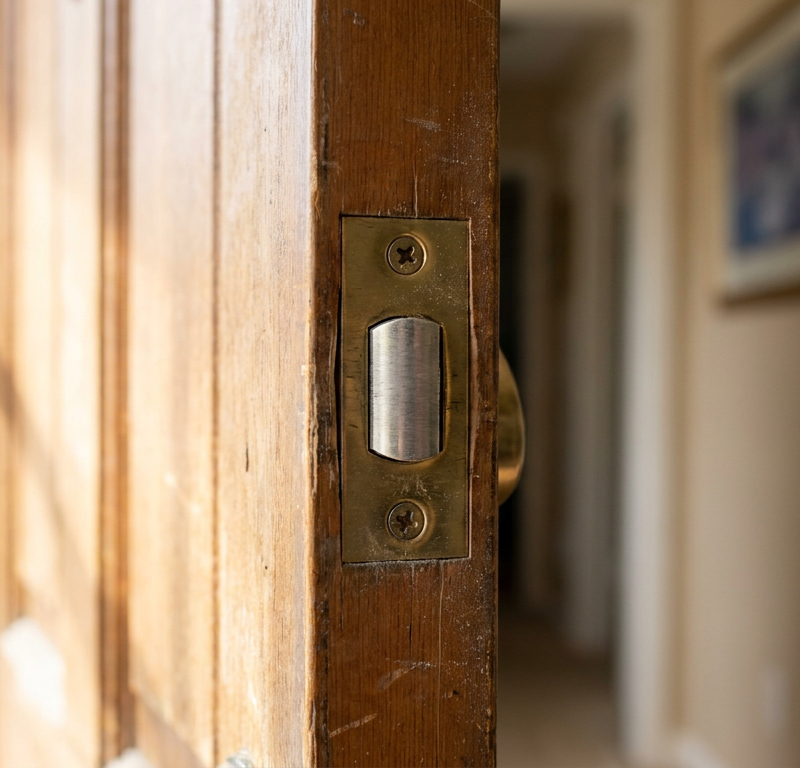
If Step 4 showed the latch hub is stripped, take out the two wood screws on the door edge that hold the latch faceplate in place. Slide the whole latch assembly out through the door edge bore. Measure the backset—the distance from the edge of the door to the center of the 2-1/8-inch hole—which is either 2-3/8 inches or 2-3/4 inches. Most newer replacement latches are adjustable; twist or slide the latch body to match your door’s exact backset before you slide the new one into the edge bore.
- Fasten the new latch loosely with its two faceplate screws; don’t torque them down until the whole lockset is lined up.
8. Align the Tailpiece Through the Latch Hub —
Extend the new or existing latch bolt fully with your flathead screwdriver. Hold the exterior cylinder with the keyway right-side up, and make sure the tailpiece is in the manufacturer’s specified orientation (horizontal for most deadbolts when extended). Slide the exterior cylinder back into the cross-bore, feeding the tailpiece straight through the center hub of the latch mechanism.
- Make sure the tailpiece goes all the way through without rubbing the inside edge of the door hole.
9. Reinstall the Interior Thumbturn Assembly —
Line up the interior thumbturn lever so it matches the bolt position, pointing toward the jamb when the bolt is thrown. Slide the receiver over the tailpiece that sticks through. Thread both mounting screws through the interior plate, catching the threaded bosses on the back of the exterior housing by hand first so you don’t cross-thread anything.
- Run the screws down evenly with your #2 Phillips screwdriver, bouncing back and forth between top and bottom screws three turns at a time until they’re snug, around 25 to 30 in-lbs of torque—firm hand-tight, no power tools.
10. Perform the Air Test and Jamb Test —
With the door wide open, put the key in and rotate it back and forth through five full cycles. The bolt should throw a full 1 inch without hesitation or catching. Then close the door and test it again. If the key feels stiff or won’t drive the bolt all the way home only when the door is shut, the strike plate is out of alignment with the latch bolt, and that’s what started this mess in the first place.
Common Causes
| Component Failure | Typical Symptom | Root Trigger | Repair Action |
|---|---|---|---|
| Sheared Tailpiece | Key spins with no resistance; bolt dead | Repeated door slamming or severe jamb binding | Replace tailpiece or cylinder assembly |
| Stripped Latch Cam | Key turns but skips teeth; grinding noise | Forcing deadbolt against an unaligned strike plate | Install new adjustable backset deadbolt latch |
| Loose Retaining Cap | Tailpiece slops back and forth; key sticks | Retaining pin slipped off spring notch | Depress pin and retighten rear cylinder nut |
| Disconnected Thumbturn Hub | Key works from outside; thumbturn spins free inside | Broken interior cam or sheared cast zinc hub | Replace interior escutcheon plate |
| Dropped Tailpiece Spacer | Cylinder pushes in when turning key | Missing spacer ring on thin (1-3/8") doors | Install exterior cylinder trim spacer ring |
Common Mistakes
- Using an electric impact driver on lock hardware. Running machine screws in with an 18V impact driver will strip the soft cast-zinc mounting bosses or warp the stamped steel plate fast, and then you’re fighting a cocked cylinder and a binding tailpiece. Use a hand tool. Always.
- Throwing away the cylinder over a broken latch. I see homeowners assume they need a whole new lockset and a fresh set of keys, which can run $40 to $120. Nine times out of ten, the keyed cylinder is fine; you only need a cheap $12 to $18 universal replacement latch from the hardware store.
- Ignoring strike plate misalignment. A tailpiece or latch cam snaps because someone had to shove the door with their shoulder to get the deadbolt to throw. If your door needs body weight to lock, seasonal humidity or foundation shifting—real common in Texas clay—has dropped the strike opening below the bolt. Fix the lock without filing the strike plate, and you’ll break the new part within six months.
- Installing the latch upside down or off-backset. A lot of modern deadbolt latches have an arrow stamped “UP.” Flip it the wrong way and you mess up the cam geometry, so the key has to rotate 360 degrees instead of 90 degrees, and eventually the whole thing binds.
- Flooding the cylinder with WD-40. If the lock won’t engage, spraying standard solvent-based lubricant into the keyway won’t fix a broken mechanical linkage. It just turns brass dust and pocket lint into a gummy mess that gums up the delicate tumbler springs. Use dry powdered graphite or PTFE spray only.
Cost & Time Breakdown
| Task | DIY Cost | Pro Cost | Time |
|---|---|---|---|
| Diagnose and Realign Tailpiece | $0 | $95–$140 (Service call) | 15–20 minutes |
| Replace Deadbolt Latch Assembly | $12–$22 | $110–$165 | 20–30 minutes |
| Replace Broken Tailpiece / Cap | $6–$14 | $95–$130 | 25–35 minutes |
| File / Realign Door Strike Plate | $0 | $85–$120 | 15–25 minutes |
| Full Lockset Replacement | $35–$95 | $150–$250 | 30–45 minutes |
Tips & Prevention
- Perform the dollar bill test on your door jamb. Shut the door on a dollar bill at the weatherstripping. If it pulls right out with almost no resistance near the latch, the door isn’t sealing tight and the deadbolt can bind under wind pressure.
- Inspect tailpiece alignment once a year. When you swap batteries in keypad locks or wipe down the hardware, back out the mounting screws and check the tailpiece for twisting, hairline stress cracks, or too much rotational play.
- Widen your strike plate mortise before forcing locks. If you see shiny brass rub marks on the lip of your deadbolt, use a flat metal file and take 1/16 inch of metal off the strike plate opening. The bolt ought to glide into the pocket with no drag.
- Install 3-inch screws in your security strike plate. While you’re at it, replace the short 3/4-inch screws in the strike plate with 3-inch hardened steel screws that bite into the wall studs. That keeps the jamb from shifting when the weather swings around.
- Use dry film lubricant every autumn. Give the keyway and latch bolt bevel a quick puff of powdered graphite or dry PTFE lube once a year. Skip silicone sprays or grease—they’ll grab dust and grit and pack it into the moving parts.
When to Call a Professional
Most tailpiece and latch failures are simple bench swaps that take half an hour with a hand screwdriver. Still, you should call a licensed residential locksmith if your door is locked shut from both sides and the interior latch hub won’t retract with a screwdriver—that points to a deadlocked security failure or a seized anti-saw roller pin.
You’ll also want a pro if you’ve got high-end mortise locks, which are common in older homes and fancy custom builds. Mortise locksets don’t use simple loose tailpieces; they’ve got complex internal spring levers, heavy cast bronze bodies, and threaded brass cylinders pinned by set screws through the faceplate. Tear one down without training and those internal springs can launch across the room, and then you’re looking at total hardware replacement in the $350 to $800 range.
Frequently Asked Questions
Why does my key turn all the way around without stopping?
If a key spins 360 degrees and never hits resistance, the tailpiece has snapped clean off or slipped out of the latch drive hub. It can also mean the cylinder’s rear retaining ring backed off, which lets the plug spin on its own instead of moving the bolt.
Can I replace just the latch without buying a whole new deadbolt?
Yes. Hardware stores and online suppliers sell standalone replacement deadbolt latches from brands like Schlage, Kwikset, and Yale for $10 to $20. Just make sure you get one with an adjustable backset (2-3/8" to 2-3/4") so it matches your door’s hole spacing.
How do I know if the problem is my key or the lock?
If your key slides into the keyway smooth and turns without catching or binding, the key and pins are doing their job. The break is mechanical downstream from the cylinder—usually the tailpiece, the connection hub, or the latch bolt itself.
Can cold weather cause the key to turn without throwing the bolt?
Freezing temps can make moisture trapped in the door expand, which locks the sliding bolt against the wooden door casing. If you force the key while the bolt is frozen to the strike plate, you’ll shear the tailpiece clean off and end up with a key that spins free.
Is a spinning key a sign someone tried to pick or bump my lock?
Usually not. Picking or bumping manipulates the brass tumblers so the cylinder plug turns the right way. If the key turns freely without moving the bolt, it’s almost always plain old metal fatigue or a sheared internal zinc drive gear from years of slamming doors and bad latch alignment.
What does it mean if the key works from the outside, but the inside thumbturn spins freely?
That means the tailpiece is still intact and connected to the outside cylinder, but the inside thumbturn assembly has failed. The interior lever’s cast receiving socket may have cracked, or the tailpiece was cut a little too short during installation and slipped out of the interior plate’s drive slot.
Can I glue or weld a broken tailpiece back together?
No. Tailpieces are stamped from tempered spring steel or case-hardened alloy built to take constant twisting force. Super glue, epoxy, or homemade soldering won’t hold up to the torque needed to throw a deadbolt, and it’ll fail the first time you turn the key.
Why does my deadbolt work perfectly when the door is open, but spins or jams when closed?
Your lock hardware is probably fine—your door frame is out of line. When the door closes, the bolt hits the edge of the metal strike plate instead of sliding into the wall cavity. That resistance stops the bolt, and if you force the key, you’ll strip the internal latch gears in short order. File the strike plate hole so the bolt can move freely.
Related Articles
Keep troubleshooting with these hand-picked guides from FixlyGuide:
- Door Latch Stuck Inside Door? 6 Causes and How to Fix It — Door latch stuck inside the door and won't extend or retract? Here is how to diagnose broken return springs, free a frozen carriage, or swa…
- Door Lock Spinning Freely? 6 Causes and How to Fix It — Is your door lock spinning in full circles without catching? Learn why your deadbolt or knob freewheels and follow our step-by-step guide t…
- The 5-Minute Secret to a Smooth-Turning Door Lock (Stop Jiggling That Key!) — Restore your sticky door lock to butter-smooth operation with this simple, five-minute lubricant trick, saving you frustration and potentia…
- The 3 Hidden Reasons Your Door Won't Latch (And the Easy DIY Fixes) — Frustrated by a door that refuses to latch? Discover the common culprits behind this annoying problem and learn simple, effective DIY fixes…
- Vinyl Plank Flooring Gaps? 5 Reasons Seams Separate—and the Quick DIY Fix — Fix separated vinyl plank floor seams in 15 minutes without pulling baseboards using the simple traction block method and rubber mallet.
- Bathroom Faucet Handle Stuck? 12 Steps to Free It Without Breaking the Stem — Stuck bathroom faucet handle won't budge? Learn how to safely dissolve hard water scale, use a handle puller, and rebuild the valve cartrid…
Should you do this yourself?
Answer five quick questions before you start. Safety outranks savings every time.
Your experience with work like this
How high do you have to work?
Does the job involve any of these?
Will it need a permit?
Specialty tools
Free and instant. Educational guidance only — not a quote, inspection, or professional diagnosis.
What should this project cost?
Enter your project details for a realistic cost range before you call anyone.
Cost depends heavily on which system turns out to be the source.
- Regional adjustment
- National average
- Labor share (typical)
- ~$1,620
- Quotes to collect
- 3 written estimates
Educational estimate based on national averages — not a binding quote. Always confirm with written local estimates.
Before you start
Check the difficulty, permits, and safety risk — then decide whether to call a pro.
- Estimate this projectGet a cost range for your scope and ZIP before you call anyone.Open
- Get local estimatesSend one request and compare written estimates from vetted pros.Open
Free, no signup required. Estimates are educational guidance, not a quote or an inspection.
Recommended for DIYers & woodworkers
Sponsored
The Top 20 Tools for Workshops of Any Budget
No stationary machines or power tools required — plus 3 fundamental tools that can't be bought at any price.
Get the free guide
Ted's Woodworking — The #1 Woodworking Resource
Detailed instructions, dimensioned drawings, materials & cutting lists, and 3D schematics for every skill level.
See the plansSponsored: links above are affiliate links. FixlyGuide may earn a commission on qualifying purchases — at no extra cost to you.
Frequently asked questions
Why does my key turn all the way around without stopping?+
When a key spins 360 degrees continuously without meeting resistance, the tailpiece has snapped completely or slipped out of the latch drive hub. Alternatively, the cylinder's rear retaining ring has backed off, allowing the plug to spin independently of the bolt mechanism.
Can I replace just the latch without buying a whole new deadbolt?+
Yes. Hardware stores and online suppliers sell standalone replacement deadbolt latches from major manufacturers like Schlage, Kwikset, and Yale for $10 to $20. Make sure to purchase one with an adjustable backset (2-3/8 inches to 2-3/4 inches) so it fits your door's hole spacing.
How do I know if the problem is my key or the lock?+
If your key slides smoothly into the keyway and turns without catching or binding, your key and pin tumblers are functioning properly. The breakdown is mechanical downstream from the cylinder—specifically the tailpiece, the connection hub, or the latch bolt itself.
Can cold weather cause the key to turn without throwing the bolt?+
Extreme freezing temperatures cause moisture trapped inside the door to expand, which can lock the sliding bolt against the wooden door casing. If you force the key while the bolt is frozen to the strike plate, you will shear the tailpiece clean off, leaving the key spinning freely.
Is a spinning key a sign someone tried to pick or bump my lock?+
Usually no. Lock picking or bumping manipulates the brass tumblers to turn the cylinder plug legitimately. If the key turns freely without moving the bolt, it is almost always structural metal fatigue or a sheared internal zinc drive gear from years of door-slamming and misaligned latches.
What does it mean if the key works from the outside, but the inside thumbturn spins freely?+
This indicates the tailpiece is intact and connected to the exterior cylinder, but the interior thumbturn assembly has broken. The interior lever's cast receiving socket may have cracked, or the tailpiece was cut slightly too short during installation and slipped out of the interior plate's drive slot.
Can I glue or weld a broken tailpiece back together?+
No. Tailpieces are made from stamped, tempered spring steel or case-hardened alloy designed to withstand continuous rotational torque. Super glue, epoxy, or home soldering cannot withstand the twisting force needed to throw a deadbolt and will fail on the very first turn.
Why does my deadbolt work perfectly when the door is open, but spins or jams when closed?+
Your lock hardware is fine—your door frame is misaligned. When closed, the bolt is striking the edge of the metal strike plate instead of sliding freely into the wall cavity. The resistance stops the bolt, and forcing the key will rapidly strip the internal latch gears. File the strike plate hole to restore free movement.
Discussion
Loading comments…