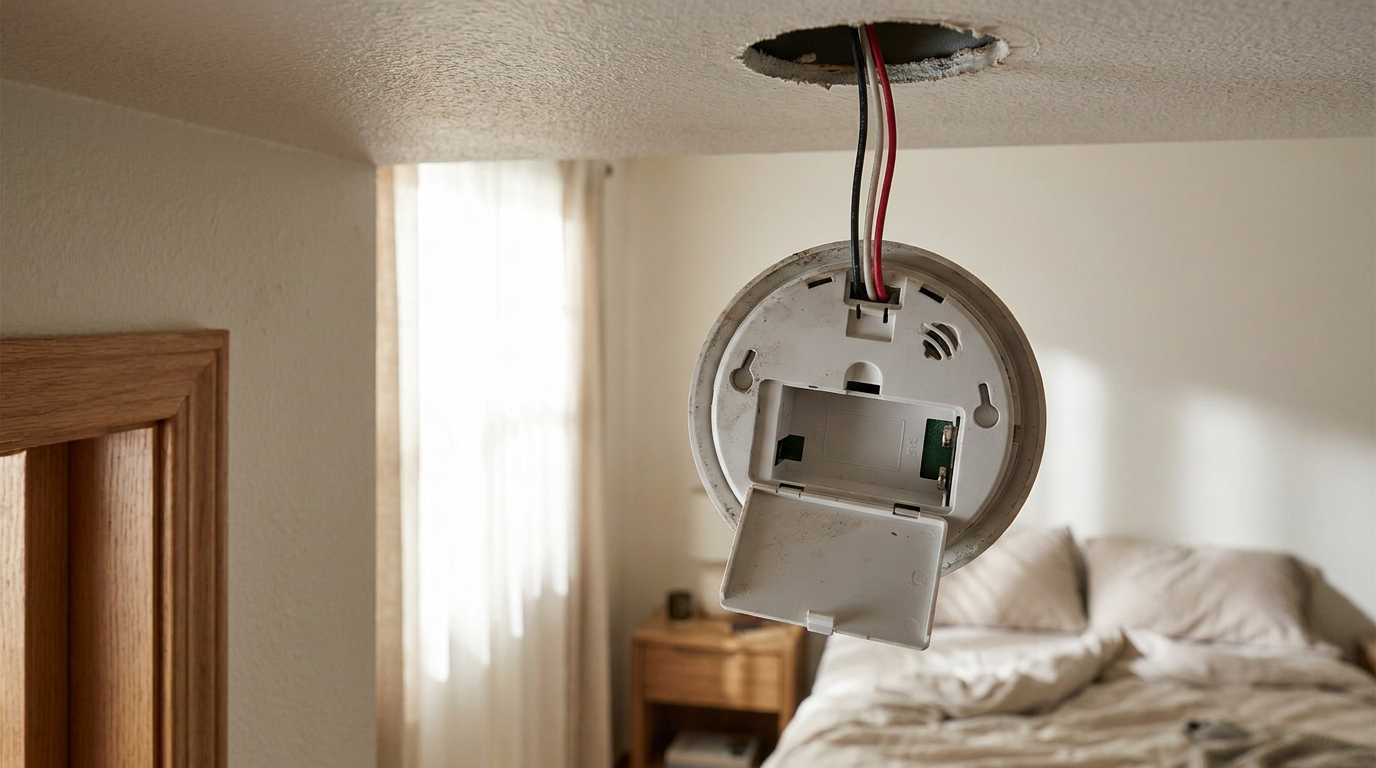
- Kill power at the main breaker box — Go to your electrical panel and switch off the dedicated 15-amp or 20-amp breaker marked "Smoke Alarms" or "Lighting/Detectors."
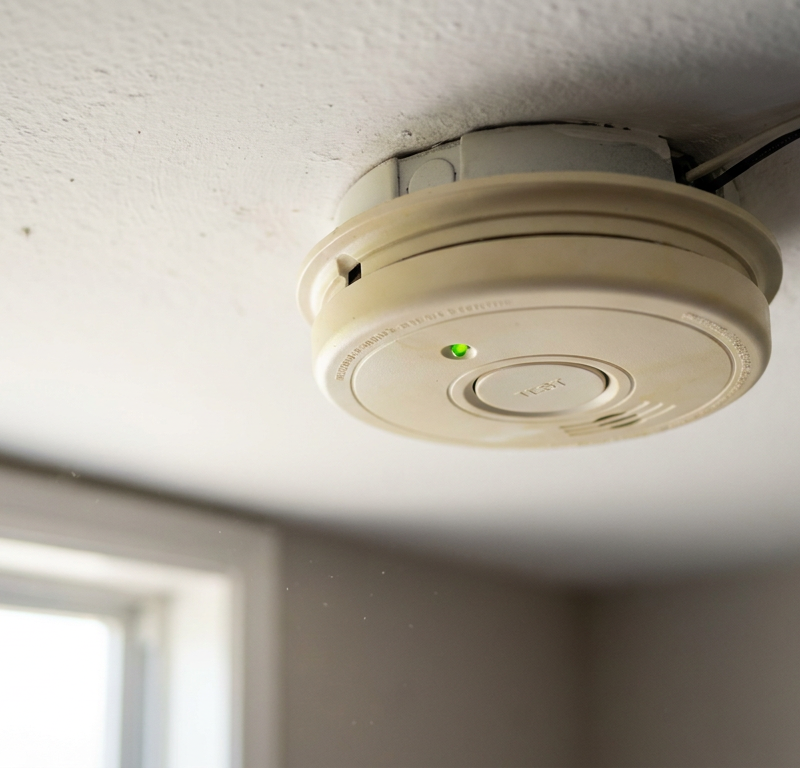
- Check that the green 120V AC power light on the detector face goes dark.
- Safety check: Don’t stick metal tools into a live ceiling junction box; 120V AC can bite hard and cause serious shock or arc flash.
Electrical · Panel or service upgrade
| Project category | Electrical |
|---|---|
| Problem type | Panel or service upgrade |
| Trade required | Electrical |
| Urgency | Planned project |
| Safety risk | High safety risk |
| DIY suitability | Licensed pro only |
| Cost category | High cost |
| Typical timeline | Permit plus utility scheduling, commonly 2–6 weeks |
| Contractor type | Licensed electrician |
Repair option
Add a subpanel when the main service is adequate.
Replacement option
Full service upgrade with utility coordination and permits.
Common causes
- Obsolete or recalled panel brands
- Service capacity too small for added loads
- No room for required AFCI/GFCI breakers
Relevant tools:project cost estimatorcompare quotes
Published October 20, 2026Last updated October 20, 2026
Tools & materials you'll need
Affiliate linksAs an Amazon Associate FixlyGuide earns from qualifying purchases — at no extra cost to you. Prices and availability are accurate as of publication and subject to change.
Quick Answer
Hardwired smoke detectors start chirping in the middle of the night because the house cools off between 2:00 AM and 6:00 AM, which can push a weak backup battery below its low-voltage threshold or let a little condensation form inside a dirty optical chamber. If you want to shut down that 3:00 AM racket, pop the unit off the ceiling ring, unplug the 120V wiring harness, swap in a fresh 9V alkaline battery, blow compressed air through the sensing chamber to clear out dust and spiderwebs, and do a full 15-second capacitor power drain before you button it back up.
The Problem
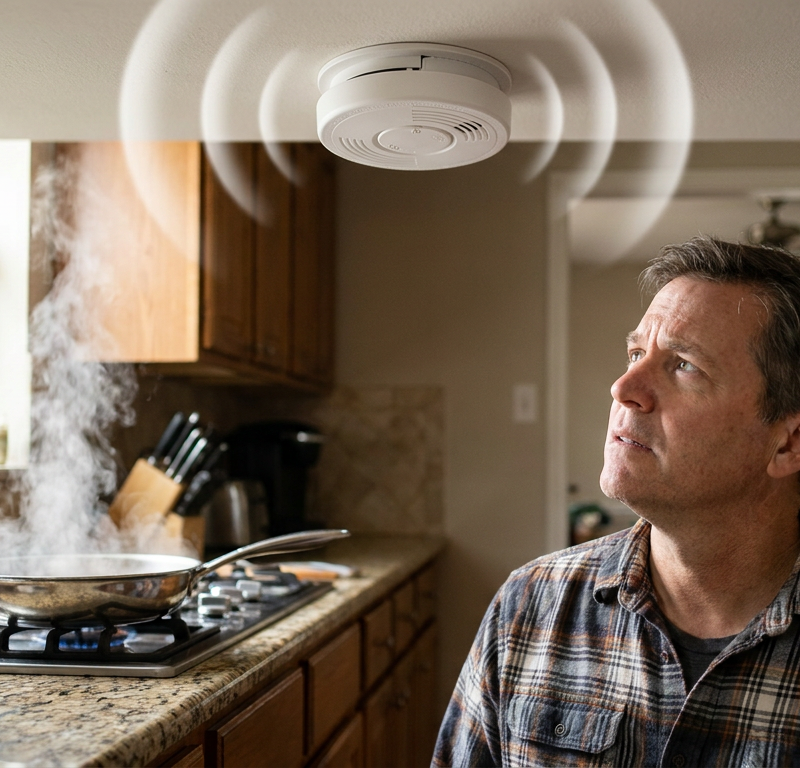
It’s almost always 3:15 AM. You’re dead asleep when that sharp, ear-splitting chirp cuts through the house every 45 to 60 seconds. You grab a broom handle, smack at the ceiling, pull the battery, maybe even rip the whole plastic disc down—been there, seen it a hundred times. By morning, the detector’s sitting on the kitchen counter in pieces while you’re on your phone trying to figure out why it never does this at 2:00 in the afternoon.
The timing isn’t random. Smoke detectors have sensitive monitoring circuits that track voltage down to fractions of a volt, and the optical chambers are touchy enough to notice tiny combustion particles. Once the house cools off, the whole thing starts acting funny. A battery that holds 8.9V while the furnace is running can sag to 8.4V or lower when the bedroom air drops. Toss in cold drafts sneaking out of an unfinished attic and into the ceiling box, and the detector’s little brain decides it can’t promise safe operation.
On interconnected hardwired systems, that problem spreads. One unit getting hit with an early-morning attic draft can send a 9V communication pulse through the orange or red traveler wire, and boom—every alarm in the house wakes up. If you understand what’s going on mechanically and electrically, fixing the midnight chirper gets a whole lot easier—and you won’t be tempted to replace half the wiring on zero sleep.
How It Works
Modern residential smoke alarms use two main sensing styles: photoelectric (optical) and ionization. Photoelectric units shoot an infrared LED beam across a little T-shaped chamber; if smoke particles scatter that light into an offset photodiode, the alarm trips. Ionization units use a trace amount of Americium-241 to ionize the air between two charged plates; once particles interfere with that micro-current, the horn goes off. Dual-sensor units run both.
In hardwired smoke detectors, your home’s 120V alternating current (AC) powers the unit all the time through black (hot) and white (neutral) conductors. Inside the alarm, a transformer and rectifier step that 120V down to roughly 9V direct current (DC) for the circuit board and to keep the internal capacitors charged. A third wire—usually yellow, red, or orange—works as the interconnect traveler line that links alarms across the house.
The 9V backup battery (or built-in lithium cell) sits there in parallel. It takes over when the power goes out. But even when the unit’s running on 120V household power, the detector keeps checking that backup battery under load. Once nighttime hits, the house temperature usually drops 5°F to 10°F. Cooler temperatures slow the battery chemistry down, internal resistance goes up, and the output voltage sags just enough to cross the alarm’s low-battery threshold, usually around 7.5V to 8.0V DC. If dust, drywall crumbs, or insect debris is sitting in the optical chamber, that cool nighttime air can also bump up the relative humidity inside it. Tiny bits of moisture condense on the dust, scatter the light beam, and trigger a false alarm or a fault beep.
I pulled a water heater in Frisco last month that had exactly this kind of “mystery” alarm issue right above the hall bath—turns out the attic draft was hitting the detector like a little freezer vent. Same story, different house.
Step-by-Step Fix
Do this in daylight. Saves your sanity. And your ears.
-
Locate the initiating detector — Before you start pulling units down, look closely at the LED status lights on every alarm in the house. The bad one, the initiator, usually flashes a fast red pulse (once every 1 to 2 seconds) even if the horn has stopped, while the other interconnected units show a solid green light or flash red once every 40 to 60 seconds.
- If all the alarms went off at once, only the initiating alarm keeps the error code in its local memory capacitor.
- Jot down the room location of that detector so you’re not chasing innocent units down the hall.
-
Kill power at the main breaker box — Go to your electrical panel and switch off the dedicated 15-amp or 20-amp breaker marked "Smoke Alarms" or "Lighting/Detectors."
- Check that the green 120V AC power light on the detector face goes dark.
- Safety check: Don’t stick metal tools into a live ceiling junction box; 120V AC can bite hard and cause serious shock or arc flash.
-
Twist the alarm off its mounting bracket — Grab the smoke detector with both hands and rotate it counterclockwise about a quarter-turn (roughly 15 degrees) until it unlocks from the ceiling plate.
- Let the unit hang down gently so you can reach the wire harness.
- Don’t yank it; hardwired harnesses only have about 4 to 6 inches of slack, and pulling too hard can pop wire-nut splices loose inside the box.
-
Disconnect the quick-connect wiring plug — Squeeze the two plastic locking tabs on the sides of the three-wire connector plug (the wiring harness) and pull the plug straight out of the back of the detector.
- Check the harness wires for loose connections: black is 120V hot, white is neutral, and red/orange/yellow is the interconnect traveler line.
- If a wire slips out of a wire nut in the ceiling box, twist the copper ends clockwise with lineman's pliers and cap them with a fresh wire nut.
-
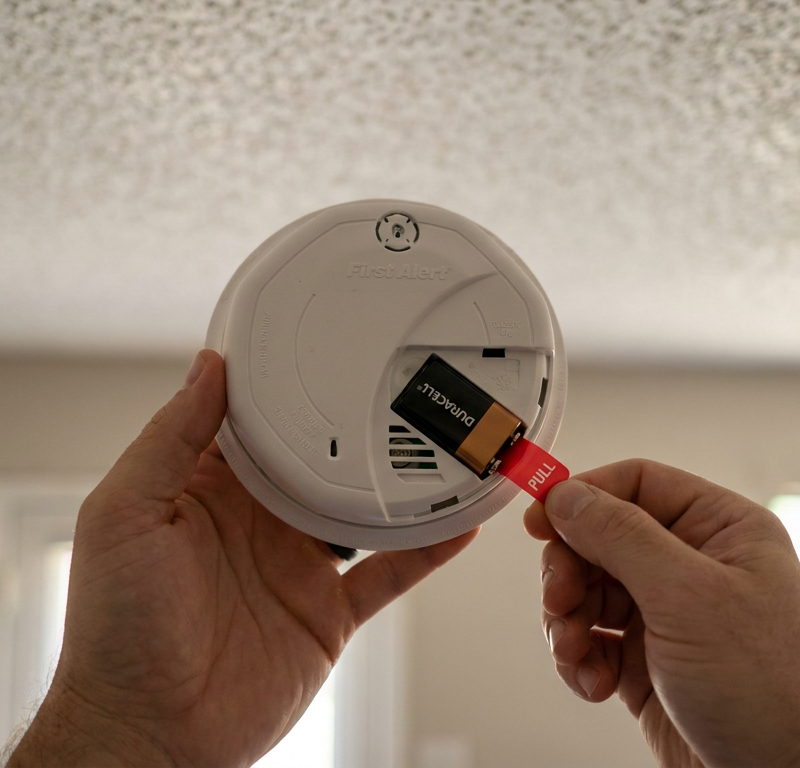
Remove the old backup battery and inspect the compartment — Open the battery hatch on the back or side of the unit and pull out the old 9V battery or AA cells.
- Check the metal battery terminals for corrosion, white crusty powder (potassium carbonate), or bent connector tabs that aren’t making solid contact.
- Look at the manufacture date stamped on the back of the housing; if the detector is older than 10 years (or 7 years for CO combo units), that thing's toast—replace it right away.
-
Bleed out residual capacitor charge (the hard reset) — With the 120V harness unplugged and the battery completely removed, press and hold the front "Test/Hush" button for 15 to 20 full seconds.
- You’ll hear a short, dying chirp as the internal capacitors dump their stored DC voltage.
- Skip this step and the alarm can keep chirping after you put in a fresh battery; the microprocessor has to lose all power to clear the low-voltage fault loop.
-
Clean the internal sensing chamber with compressed air — Grab a can of compressed electronics duster and blow into the side perimeter slots, the center horn vent, and the battery bay using short, sharp 2-second bursts.
- Keep the can upright so you don’t blast freezing liquid propellant into the optical sensors.
- Run a dry vacuum nozzle with a soft brush around the outside vents to pull out pet hair, ceiling fan dust, and little spider webs.
-
Seal the attic draft behind the ceiling plate — Check the junction box behind the mounting bracket for air leaks coming from an unconditioned attic or crawl space.
- Cold nighttime drafts sneaking through the ceiling cutouts can drop detector temperatures 15°F below the actual thermostat reading.
- Pack non-flammable fiberglass insulation around the box exterior or install a foam draft-seal gasket behind the mounting bracket to stop the airflow.
-
Install a brand-new, name-brand alkaline battery — Pop in a fresh 9V or pair of AA alkaline batteries with an expiration date at least 5 years in the future.
- Don’t use generic off-brand batteries, rechargeable NiMH cells, or zinc-carbon "heavy duty" batteries; they fall off harder in cold air and can set off early-morning alarms.
- Make sure the metal battery tab snaps down all the way so the battery door closes tight.
-
Reconnect harness and remount the unit — Push the three-wire harness firmly into the socket on the back of the alarm until the plastic clip clicks locked.
- Tuck the extra wire neatly back into the ceiling electrical box so the detector sits flush against the plate.
- Line up the bracket notches, push up, and twist clockwise until the detector locks solid.
-
Restore breaker power and test the system — Flip the breaker back on at the panel, then confirm the steady green LED lights up on the detector face.
- Press and hold the "Test" button for 3 to 5 seconds until the horn sounds loud (it’ll be loud: 85 decibels at 10 feet).
- If they’re interconnected, make sure pressing the test button sets off every other detector in the house within 2 to 3 seconds.
Common Causes
- Nighttime Ambient Temperature Drop: Thermostats drop a few degrees while you sleep. The chemical reaction inside standard alkaline batteries slows down when temperatures fall below 68°F, which can drag the battery output under the low-voltage cutoff threshold (around 7.5V to 8.0V).
- Attic Draft Infiltration: Unsealed electrical junction boxes act like little chimneys. Cold nighttime air from uninsulated attic spaces drops straight down over the back of the detector and cools the circuit board way below the room temperature.
- Micro-Condensation on Optical Dust: In the early morning, falling indoor temperatures nudge the relative humidity up a bit. Tiny dust specks and spider silk inside the photoelectric chamber soak up that moisture, swell up, and scatter the light beam into the sensor.
- Processor Fault Memory (Uncleared Capacitor Charge): When you get a temporary power flicker or low battery, the logic board stores a fault code in volatile memory. If you swap the battery without holding the test button to bleed off the capacitor charge, the processor keeps beeping even on a new battery.
- Expired Internal Sensor Lifespan: Smoke alarm sensors wear out from constant air exposure. Ionization isotopes decay and optical LEDs dim. After 10 years from the stamped manufacture date, not the install date, the unit can’t reliably tell clean air from smoke, and you get intermittent nighttime faults.
- Shared Interconnect Traveler Interference: In hardwired setups, a high-voltage surge or loose connection on the traveler line (red/orange wire) can create phantom voltage spikes during the quiet hours, which sets off random chirping across all units.
Common Mistakes
- Swapping out the battery without holding down the test button. Popping in a new 9V battery by itself doesn’t reset modern smoke alarms. The microprocessor can hang onto residual charge in its capacitors for up to 30 seconds; if you don’t press and hold the test button with all power removed, the alarm may start chirping again the next night.
- Using rechargeable NiMH or bargain-bin zinc-carbon batteries. Rechargeable cells run at 1.2V per cell instead of 1.5V (or 7.2V to 8.4V for a 9V block) and drop off fast. Zinc-carbon batteries lose voltage quickly once temperatures dip below 65°F. Stick with industrial or name-brand alkaline or lithium 9V batteries.
- Assuming the battery is bad when the 10-year sensor is expired. Homeowners often go through three batteries in two weeks thinking they got a bad batch. Check the date stamped on the plastic backplate: if it says 2014 or earlier, the internal sensor is at end-of-life (EOL), and the unit will chirp until you replace it.
- Ignoring the ceiling junction box attic draft. You can swap batteries and alarms all day long, but if unconditioned 40°F attic air is pouring through the wire knockouts into the back of the detector, the new unit’s going to fail every winter night. Block that draft hole.
- Spraying cleaning liquids or aerosols into the sensor chamber. Never use Windex, Lysol, or furniture polish on a smoke alarm. The chemicals and propellants coat the optical sensor lenses, cloud the optics, and basically force an immediate replacement. Use only dry canned air or vacuum suction.
Cost & Time Breakdown
| Task | DIY Cost | Pro Cost | Time |
|---|---|---|---|
| Battery Replacement & Capacitor Reset | $5–$15 | $90–$150 | 15–20 minutes |
| Chamber Cleaning & Junction Box Sealing | $10–$20 | $120–$180 | 25–35 minutes |
| Single Hardwired Unit Replacement | $25–$65 | $150–$250 | 20–30 minutes |
| Full House Hardwired Upgrade (5–7 Units) | $150–$350 | $600–$1,100 | 2–3 hours |
| Traveler Line Electrical Troubleshooting | $0–$15 | $180–$300 | 1–2 hours |
Tips & Prevention
- Mark daylight saving time on your calendar for proactive battery changes. Don’t wait for the detector to beep at 3:00 AM. Replace every standard 9V or AA smoke alarm battery once a year in the fall when clocks "fall back" before the winter heating season starts.
- Vacuum alarm exteriors every six months. Every time you clean out your HVAC return filters, run the vacuum dusting brush across the perimeter slots of every ceiling detector to keep pet dander and dust from building up.
- Write the install date on the front edge with a Sharpie. The factory sticker hides on the backplate. Writing the expiration year (10 years from install date) inside the battery door or on the outer rim saves you from climbing a ladder at midnight just to check the age of the unit.
- Use high-temperature, sealed lithium detectors if replacing. If your jurisdiction allows it, install hardwired alarms with 10-year sealed lithium backup cells. They eliminate standard 9V battery swaps and hold voltage better through big temperature swings.
- Check the color of the initiator LED before touching anything. Keep a small flashlight on your nightstand. When the midnight alarm goes off, look for the single unit flashing red fast before you hit any hush buttons; finding the culprit takes five seconds in the dark and saves a lot of daytime guessing.
When to Call a Professional
Most midnight chirps come from dead batteries, dust, or old age, but there are times you need to stop the DIY routine and call a licensed electrician. If you smell burning plastic or that fishy electrical odor coming right out of the ceiling junction box, kill the breaker immediately—that usually means an arcing wire nut or melted insulation inside your branch circuit.
Call an electrician if testing shows erratic line voltage below 105V AC or above 125V AC on the hot and neutral conductors, or if the red/orange interconnect wire has stray voltage when all units are disconnected. Same goes for older aluminum branch wiring, which is common in late 1960s to mid-1970s houses, especially when it’s tied to modern copper pigtails without proper Copalum or AlumiConn connectors. Messing with those brittle ceiling wires yourself is asking for trouble. And if the chirping keeps coming back across multiple brand-new units on the same circuit even after you’ve installed the batteries right and cleaned everything, you’ve likely got a damaged, shorted, or nail-pierced traveler wire buried in the drywall.
Related Articles
Keep troubleshooting with these hand-picked guides from FixlyGuide:
- The Real Reason Your Smoke Alarm Chirps Every 30 Seconds (It's Not Always the Battery) — Don't just swap batteries; a smoke detector chirping every 30 seconds can signal various issues, from dust to improper installation, demand…
- Why Your Smoke Alarm Won't Stop Blaring (When There's No Fire!) — False alarms from your smoke detector are more than just annoying; they can make you ignore real emergencies. Learn why they happen and how…
- Why Your Smoke Detector Just Dies After 5 Years (And What to Do) — Think your smoke alarm should last forever? Think again. Here's why your detectors fail silently after a few years and what you absolutely…
- New Smoke Detector Won't Stop Chirping? Why It Happens and How to Fix It Fast — Just installed a new smoke detector and it's already chirping every 30-60 seconds? Here's why that brand-new alarm is making noise and the…
- The 30-Second Chirp: Why Most Homeowners Misdiagnose Their Smoke Detector (And The Real Fix) — A smoke detector chirping every 30 seconds almost always means a dying battery, but it can also signal an expired unit or a buildup of dust.
- Why Your Paint Just Won't Cover (and How to Stop the Struggle) — Struggling with paint that just won't cover the old color, even after multiple coats? I'll show you why it happens and how to fix it for go…
Should you do this yourself?
Answer five quick questions before you start. Safety outranks savings every time.
Your experience with work like this
How high do you have to work?
Does the job involve any of these?
Will it need a permit?
Specialty tools
Free and instant. Educational guidance only — not a quote, inspection, or professional diagnosis.
What should this project cost?
Enter your project details for a realistic cost range before you call anyone.
Outlet and switch work usually $150–$400; panel upgrades commonly $1,800–$4,200.
- Regional adjustment
- National average
- Labor share (typical)
- ~$709
- Quotes to collect
- 3 written estimates
Educational estimate based on national averages — not a binding quote. Always confirm with written local estimates.
Before you start
Check the difficulty, permits, and safety risk — then decide whether to call a pro.
- Estimate this projectGet a cost range for your scope and ZIP before you call anyone.Open
- Get local estimatesSend one request and compare written estimates from vetted pros.Open
Free, no signup required. Estimates are educational guidance, not a quote or an inspection.
Get the print-ready PDF of this guide
A clean, ad-free, printable version you can keep on your phone or pin to the workshop wall. Free with a FixlyGuide account.
- Print-optimized layout
- Tools, materials & every step included
- Saved to your account
Frequently asked questions
Why does my smoke detector only chirp in the middle of the night?+
Alkaline batteries rely on a chemical reaction to produce electricity. When your home temperature drops in the early morning hours, that reaction slows down, causing battery voltage to sag. If the battery was already running close to the alarm's low-voltage threshold (around 7.5 to 8.0 volts), that slight nighttime temperature dip is enough to cross the line and trigger a warning beep.
If my smoke alarm is hardwired to house power, why does it need a battery at all?+
No. Hardwired smoke detectors use 120V household electricity for primary operation, but they rely on an internal backup battery (usually a 9V or AA pack) in case the power goes out. The internal circuit board continuously tests this backup battery; if its voltage drops or the battery terminal contacts corrode, the alarm will chirp even while 120V power is running normally.
Why does my smoke alarm keep chirping even after I put in a brand-new battery?+
Modern smoke detectors contain capacitors that store electrical charge to smooth out power fluctuations. When you swap in a fresh battery without performing a reset, the microprocessor holds onto the low-battery error state stored in that residual energy. Unplug the unit, take out the battery, hold the test button for 15 seconds to drain the capacitors, and then install the new battery.
Why are all the hardwired smoke detectors in my house beeping at the same time?+
If the alarms are hardwired and interconnected with a yellow or red traveler wire, one single detector experiencing a low battery, dust fault, or sensor failure sends a signal to sound an alert on every interconnected alarm in the house. You need to find the initiating unit—the one flashing a rapid red light—to fix the source of the issue.
Do hardwired smoke detectors wear out and expire?+
Yes, all smoke detectors have a strict 10-year lifespan from their date of manufacture, regardless of whether they are hardwired or battery-only (combination smoke/CO detectors typically last 7 to 10 years). Over a decade, the optical sensors get coated in microscopic debris and the electronic components degrade. When they hit this limit, they chirp an end-of-life code that no battery change will silence.
What is the difference between a smoke alarm chirping and a full alarm?+
A single sharp chirp every 30 to 60 seconds indicates a maintenance issue: a low backup battery, a dirty sensor chamber, an end-of-life sensor, or a power interruption. A full continuous blast (three loud pulses, pause, three pulses) indicates the sensor has actively detected particles resembling smoke or fire.
Do I have to turn off the power at the breaker to change a hardwired smoke alarm?+
While you can safely disconnect the quick-connect wiring harness without killing the power, turning off the breaker is always recommended. Exposed brass pins or bare traveler wires inside the ceiling box carry lethal 120-volt current. Shutting off the circuit breaker ensures you don't accidentally shock yourself while working on the mounting plate.
How do I clean dust out of a smoke alarm sensor without breaking it?+
Use a can of compressed air (electronics duster) or a vacuum hose with a soft brush attachment. Spray canned air directly into the side perimeter slots and horn opening to blast away dead bugs and dust blankets. Never spray chemical household cleaners, water, or aerosol disinfectants inside the unit, as this permanently damages the optical sensors.
Discussion
Loading comments…