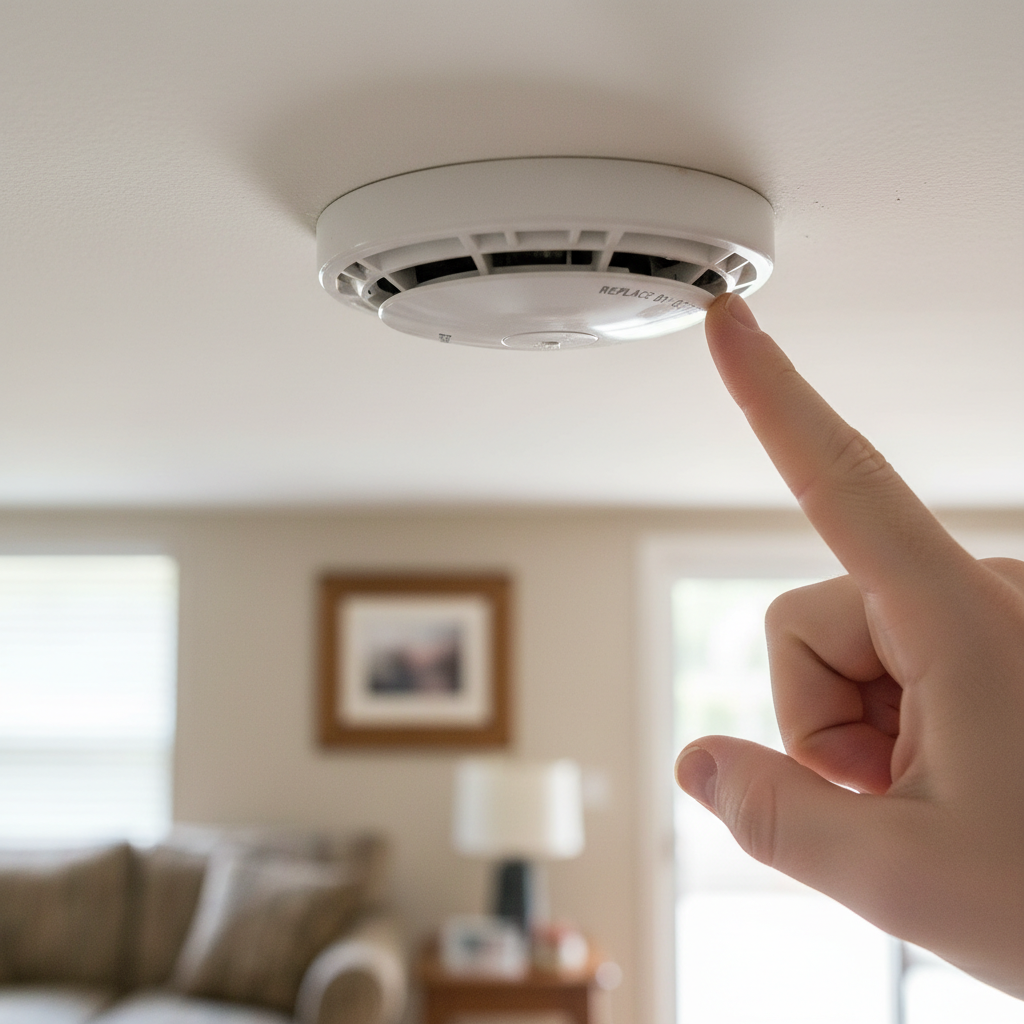
- Connect the Wiring Harness — Color-match and click.
- Interconnect Wires: That red/orange wire is what makes all your detectors go off if one catches smoke. Don’t skip it!
- If in doubt: If wiring makes your palms sweat, this is the point to call a pro. Seriously, don’t mess around with mains voltage.
Electrical · Panel or service upgrade
| Project category | Electrical |
|---|---|
| Problem type | Panel or service upgrade |
| Trade required | Electrical |
| Urgency | Planned project |
| Safety risk | High safety risk |
| DIY suitability | Licensed pro only |
| Cost category | High cost |
| Typical timeline | Permit plus utility scheduling, commonly 2–6 weeks |
| Contractor type | Licensed electrician |
Repair option
Add a subpanel when the main service is adequate.
Replacement option
Full service upgrade with utility coordination and permits.
Common causes
- Obsolete or recalled panel brands
- Service capacity too small for added loads
- No room for required AFCI/GFCI breakers
Relevant tools:project cost estimatorcompare quotes
Published September 10, 2026Last updated September 10, 2026
Tools & materials you'll need
Affiliate linksAs an Amazon Associate FixlyGuide earns from qualifying purchases — at no extra cost to you. Prices and availability are accurate as of publication and subject to change.
Quick Answer
Your smoke and carbon monoxide detectors aren't meant to live forever. Most smoke alarms have a 10-year lifespan, and CO alarms usually tap out after 5-7 years. After that, the sensors wear down and they get less trustworthy, even if they look fine sitting there on the ceiling. You’ve gotta replace ’em, plain and simple. Forget the batteries for a minute; if the date on the back is expired, that thing's toast.
The Problem
I’ve seen this a hundred times. Homeowners swap batteries like clockwork, maybe hit the test button once in a while, and figure they’re covered. Then ten years rolls by and the detector just… quits. No chirp. No warning. Nothing. Or worse, it fails quietly, and nobody knows until there’s a real emergency. Usually it’s not the wiring or the power feed. It’s the sensor wearing out. These aren’t just little beepers; they’re safety gear, and like anything with delicate parts, they age out. It’s not a question of if. It’s when. And trust me, you don’t want to learn the hard way that your first line of defense against fire or invisible killer gas checked out on you.
How It Works
Alright, let’s crack it open and look at what’s going on inside these little guardians. Most homes have a mix of smoke detectors—ionization and photoelectric—and then the carbon monoxide (CO) detectors. They all work a little differently, but they all have one thing in common: age gets ’em.
Ionization smoke detectors are the old-school style, and they’re usually the cheaper ones. They’ve got two electrically charged plates with a tiny bit of radioactive material, Americium-241, between them. That makes a small, steady electric current. When smoke gets into the chamber, it messes with that current and trips the alarm. Problem is, that radioactive source, tiny as it is, doesn’t stay sharp forever, and the sensitivity drops off over time. After about a decade, it just isn’t as responsive.
Photoelectric smoke detectors work a different way. They’ve got a chamber with a light source (an LED) and a light sensor. Under normal conditions, the beam misses the sensor. When smoke enters, it scatters the light and bounces some of it onto the sensor, which sets off the alarm. These are usually better on slow, smoldering fires. Over the years, dust builds up on the light source and sensor, and that cuts into how well they work. The electronics age too. Pretty soon, they can’t tell the difference between a harmless dust mote and a real smoke plume. That’s why cleaning helps, sure—but it doesn’t stop Father Time.
Carbon monoxide detectors are the quiet heroes. They don’t look for smoke; they sniff out CO, that odorless, colorless, deadly gas. They use an electrochemical sensor. Inside that sensor, electrodes and an electrolyte react with CO molecules and produce a small electrical current. The alarm circuit watches that current; if it climbs too high, it screams danger. The catch is the chemicals inside that electrochemical sensor dry out or break down over 5-7 years. Once that happens, it can’t react to CO the way it should. It’s like a battery that’s just flat. You can’t revive it. You swap it out. Thinking a CO detector from 2010 is still doing the job is like expecting a flip phone from 2000 to give you 5G coverage—ain’t happening.
All three types depend on precise calibration and healthy internal parts. Heat, humidity, dust, and plain old wear slowly chew away at them. You can’t always see it. You can’t hear it. But the clock’s ticking all the same.
Step-by-Step Fix
Alright, here’s how you get it handled. The “fix” for an expired detector isn’t a repair; it’s a replacement. Don’t get cute and jury-rig these things—your life could depend on them.
-
Locate the Expiration Date — Check the back or side. Every smoke and CO detector has a manufacture date and/or an expiration date printed right on it. You might need a flashlight or you may need to pop it off the mounting plate to read it. The manufacturer’s recommended replacement date is usually 7 or 10 years from the manufacture date for smoke detectors, and often 5-7 years for CO detectors. Circle it, highlight it, tattoo it on your arm if you have to—this date is gospel. If you can’t find a date, assume it’s too old and replace it.
-
Gather Your New Detectors — Match 'em up. Figure out how many you need. I always tell folks: minimum one per floor, one in each sleeping area, and one outside each sleeping area. If you’ve got hardwired detectors, try to buy new ones from the same brand. Most brands use standardized wiring harnesses, but mixing and matching can turn into a headache fast. If you’re going battery-only, then any reputable brand works. Combination smoke/CO units can save you a few install points too.
-
Shut Down the Power — Safety first, always. Before you touch any hardwired detector, head to your electrical panel. Find the breaker for the circuit that powers your detectors. It’s often labeled 'Smoke Detectors,' 'Lighting,' or something similar. Flip that sucker OFF. Don’t assume. If you’re not 100% sure, shut off the main if you have to, or check with a non-contact voltage tester. Your fingers will thank you.
- Tool Tip: A non-contact voltage tester is cheap, easy to use, and a must-have for any DIYer messing with electrical. Just hold it near the wires, and if it lights up and/or beeps, there’s juice.
-
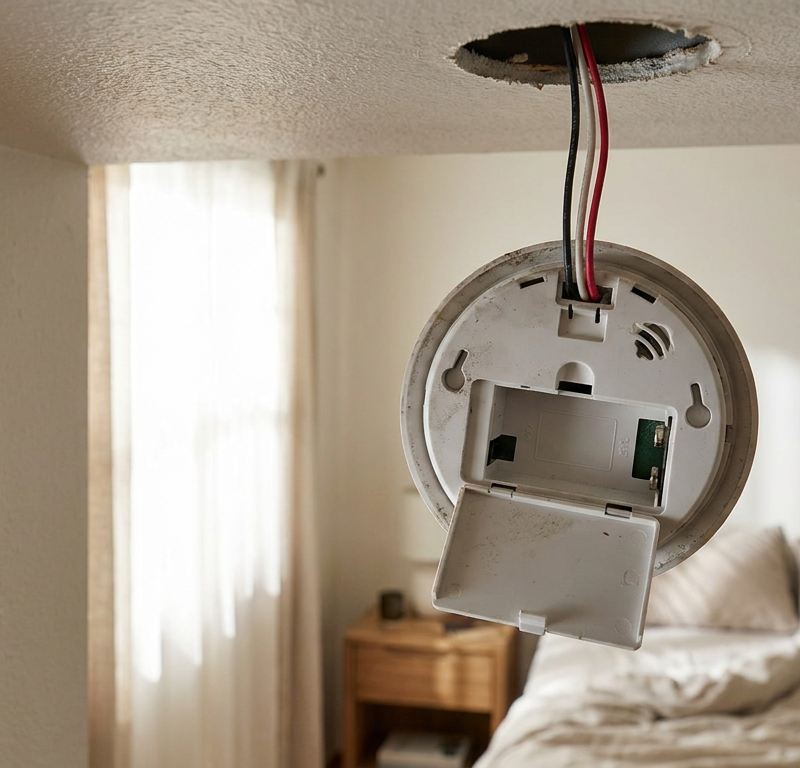
Remove the Old Detector — Unclip and unplug. Twist the old unit counter-clockwise to pull it off its mounting bracket. If it’s hardwired, you’ll see a wiring harness plugged into the back. Squeeze the tab on the connector and pull it free. If it’s battery-only, pop out the old battery and toss the unit.
-
Install the New Mounting Bracket (if needed) — Sometimes they change. If your new detector comes with a new mounting bracket, remove the old one. Usually that means backing out two small screws from the junction box in the ceiling or wall. Line up the new bracket and screw it in. Most brackets have a few screw holes for flexibility. Don’t crank down on it; just snug.
-
Connect the Wiring Harness — Color-match and click. If your new detector’s harness matches the old one, plug it in and call it a day. If it’s a different brand or doesn’t match, you’ll need to use the new harness that comes with it. Cut the wires from the old harness—after confirming the power is OFF—strip about 1/2 inch of insulation from each wire, and use wire nuts to connect the new harness wires to your home’s wiring: black to black (hot), white to white (neutral), and red or orange to red or orange (interconnect). Give each wire nut a gentle tug to make sure it’s tight.
- Interconnect Wires: That red/orange wire is what makes all your detectors go off if one catches smoke. Don’t skip it!
- If in doubt: If wiring makes your palms sweat, this is the point to call a pro. Seriously, don’t mess around with mains voltage.
-
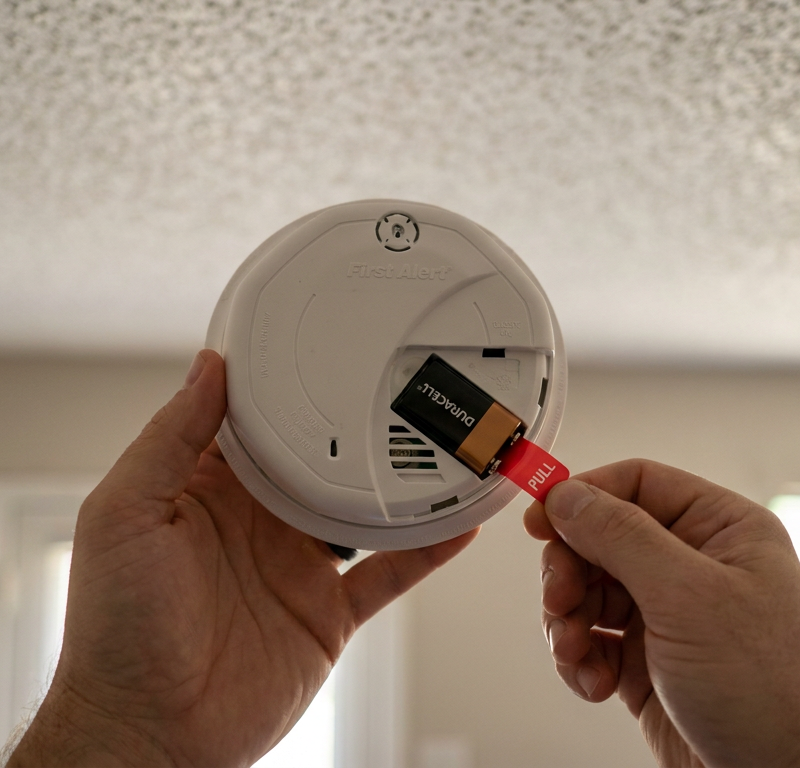
Install Batteries and Mount the New Detector — Power up and twist. Put the fresh batteries into the new detector. A lot of modern units use sealed 10-year lithium batteries, so you may not even have to think about them for a decade. Line up the new detector with the mounting bracket and twist it clockwise until it clicks into place.
-
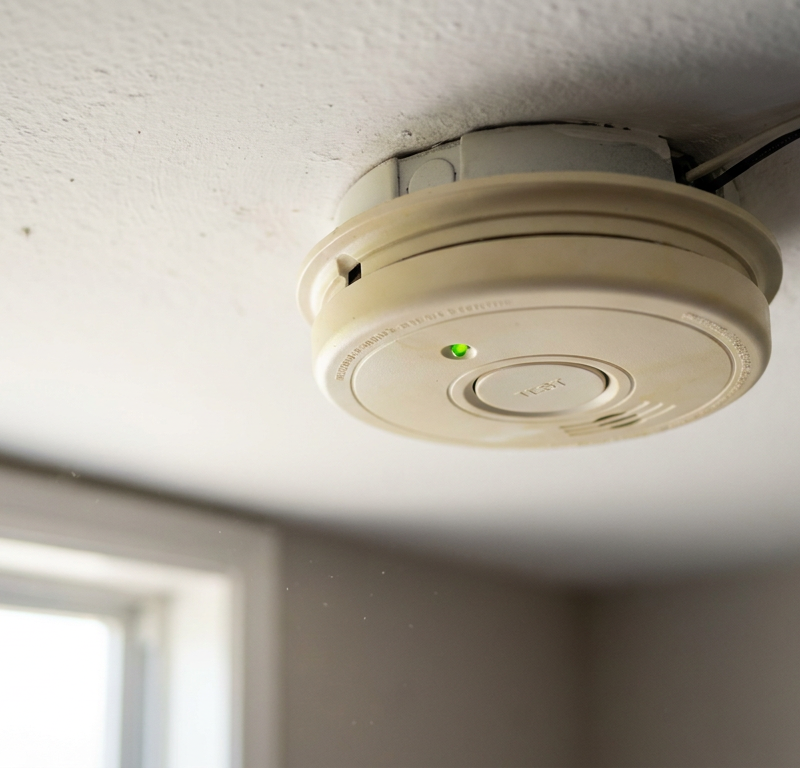
Restore Power and Test — The moment of truth. Go back to the electrical panel and flip the breaker ON. Give it a minute or two to power up. Then press and hold the 'Test' button on each new detector. It should blast out a loud, piercing alarm. If it’s an interconnected system, all the connected alarms should sound. If not, check your wiring or follow the manufacturer’s troubleshooting steps.
- What to listen for: A loud, continuous alarm. Not just a weak beep.
-
Mark Your Calendar — Don't forget the future. Use a permanent marker to write the installation date and the future replacement date on the back of each new detector. You can also set a reminder on your phone or stick a note on your calendar. Small move, big payoff. It saves you headaches later and keeps your family safer. I usually tell folks to just replace the whole set every 8 years on principle, especially here in Phoenix where the heat can be brutal on electronics.
Common Causes
It ain’t rocket science; most smoke and CO detector failures come down to one thing: time.
- Sensor Degradation: This is the big one. Like I said, the internal parts—radioactive material, optical chambers, electrochemical gels—just break down, dry out, or lose sensitivity with age. There’s no real repair for that; it’s built-in obsolescence for safety.
- Dust and Debris Buildup: While not the main cause of expiration, a heavy layer of dust inside the sensor chamber (especially on photoelectric units) can hurt performance over time. You’ll get nuisance alarms, or the unit just won’t respond like it should. A light cleaning helps, but it doesn’t stop the clock.
- Environmental Factors: Extreme temperatures and humidity can speed up the breakdown of internal components. If you’ve got detectors in an unconditioned garage or a damp basement, they might not even make it to their full rated lifespan. I pulled a water heater in Frisco last month that had exactly this kind of issue nearby—the CO detector above it was cooked by heat every day and died early.
- Power Surges/Outages: Not the usual cause of expiration, but repeated power swings or a bad surge can stress the electronics in hardwired units and shorten their useful life.
- Physical Damage: A knock, a paint splatter, or even pests can wreck a detector and make it useless way before the date on the back.
Common Mistakes
Don’t fall into these traps; I’ve seen ’em all, and they’re easy to avoid.
- Ignoring the Expiration Date: This is the big one. Folks think if the test button works, the unit’s fine. Nope. That test button only tells you the battery and horn work, not whether the sensor can actually catch smoke or CO. Always check the date.
- Only Replacing Batteries: A fresh battery keeps the light on, but it won’t fix a worn-out sensor. That’s like putting premium gas in a car with a blown engine—it’s not gonna save it.
- Cleaning with Harsh Chemicals: Never spray cleaning products directly onto or into your detectors. A light dusting with a cloth or a quick vacuum around the vents is all you need. Chemicals can ruin the sensors.
- Painting Over Detectors: I’ve walked into houses where the detectors were painted right over. That paint can clog the openings for smoke or CO and make the unit useless. If you’re painting, remove the detector and reinstall it afterward, or tape it off carefully.
- Placing Them Wrong: Putting a smoke detector too close to a bathroom (steam sets it off) or a kitchen (cooking fumes) cuts into its useful life and makes folks pull the battery out. Follow the manufacturer’s placement guidelines.
- Not Testing Regularly: Even brand-new detectors need a monthly test. It’s a fast check to make sure the battery and alarm horn still work. Takes literally 5 seconds per unit.
Cost & Time Breakdown
This isn’t a huge project, but it matters. Here’s what you’re looking at:
| Task | DIY Cost | Pro Cost | Time |
|---|---|---|---|
| Purchase New Detectors | $20-$50 per unit | $20-$50 per unit | 15-30 min online/store |
| Replace Battery-Only | $0-$1 (already own) | N/A | 5-10 min per unit |
| Replace Hardwired (DIY) | $0 (already own) | $75-$150 per unit | 15-30 min per unit |
| Full Home Replacement | $150-$400 (for 6-8 units) | $500-$1000+ (for 6-8 units) | 1-2 hours (DIY) / 2-4 hours (Pro) |
| Annual Testing | $0 | N/A | 1 minute per unit |
Tips & Prevention
Keeping your detectors in good shape is pretty straightforward if you stay on top of it.
- Check the Date: Make it a yearly habit to check the manufacture/expiration date on every single detector in your house. Write it down. Put it in your phone. Most brands print it pretty clearly.
- Dust 'Em Off: Once a month, wipe the detectors with a dry cloth or vacuum gently around the vents. That keeps nuisance alarms down and helps the sensors stay clear.
- Test Monthly: Hit that test button once a month. It’s a quick functional check. If it doesn’t sound, change the battery (if it uses one) and try again. If it still won’t go, it’s replacement time.
- Battery Plan: For detectors with replaceable batteries, swap them out at least once a year. A solid rule is to do it when you change your clocks for Daylight Saving Time. Easy to remember, hard to forget.
- Strategic Placement: Make sure detectors are installed where they should be—on every level, inside and outside sleeping areas, and at least 10 feet from cooking appliances and bathrooms.
- Know Your Types: Know whether you’ve got ionization, photoelectric, or combination units. Ionization is better for flaming fires, photoelectric for smoldering. A mix is usually the smartest setup.
When to Call a Professional
Look, I’m all for DIY, but some stuff just isn’t worth the risk. If you’re dealing with hardwired detectors and you’re not comfortable around electrical work, call a licensed electrician. If you’re swapping multiple units and the wiring harnesses don’t match, or if you find damaged wiring in the junction box, that’s a pro job. Don’t try to splice new harnesses into old wiring if you’re unsure; bad wiring can keep alarms from working or create a fire hazard. And if your detectors tie into a bigger smart home system that’s giving you fits, an electrician or low-voltage specialist can sort it out. When in doubt—especially with something that literally saves lives—don’t try to be a hero. Get a pro.
Related Articles
Keep troubleshooting with these hand-picked guides from FixlyGuide:
- The Real Reason Your Smoke Alarm Chirps Every 30 Seconds (It's Not Always the Battery) — Don't just swap batteries; a smoke detector chirping every 30 seconds can signal various issues, from dust to improper installation, demand…
- Why Your Smoke Alarm Won't Stop Blaring (When There's No Fire!) — False alarms from your smoke detector are more than just annoying; they can make you ignore real emergencies. Learn why they happen and how…
- The Annoying Chirp: 3 Hidden Reasons Your Smoke Detector Won't Shut Up — That persistent smoke detector chirp isn't always a low battery; several lesser-known issues can cause it.
- The Sneaky Reason Your Extension Cord Keeps Tripping the Breaker — Don't just reset that breaker again! Discover why your extension cord keeps tripping your circuit and how to fix it right.
- The Surprising Reason Your Ceiling Fan Wobbles (It’s Not Always What You Think) — A wobbling ceiling fan isn't just annoying; it can be a safety concern. Learn the real culprits behind the shake and how to fix them.
- The Mystery Smell: Why Your Fridge Stinks (Even After Cleaning It) — That persistent, foul odor in your refrigerator isn't just gross; it's often a sign of hidden issues. Learn the real culprits behind linger…
What should this project cost?
Enter your project details for a realistic cost range before you call anyone.
Outlet and switch work usually $150–$400; panel upgrades commonly $1,800–$4,200.
- Regional adjustment
- National average
- Labor share (typical)
- ~$709
- Quotes to collect
- 3 written estimates
Educational estimate based on national averages — not a binding quote. Always confirm with written local estimates.
Get the print-ready PDF of this guide
A clean, ad-free, printable version you can keep on your phone or pin to the workshop wall. Free with a FixlyGuide account.
- Print-optimized layout
- Tools, materials & every step included
- Saved to your account
Frequently asked questions
How do I find the expiration date on my smoke detector?+
The expiration date or manufacture date is typically printed on the back or side of the smoke detector. You might need to twist the unit off its mounting bracket to see it clearly. If you only see a manufacture date, add 7-10 years to determine the replacement date.
Can I just change the battery instead of replacing the whole unit?+
No, changing the battery only powers the alarm horn and test function. The internal sensors that detect smoke or carbon monoxide degrade over time, making the unit unreliable even with fresh batteries. Always adhere to the expiration date.
What's the difference between ionization and photoelectric smoke detectors?+
Ionization alarms are generally better at detecting fast-flaming fires, while photoelectric alarms are more sensitive to slow, smoldering fires. Many modern homes use a combination of both types for comprehensive protection, or opt for dual-sensor units.
How often should I test my smoke and CO detectors?+
You should test all smoke and carbon monoxide detectors at least once a month by pressing and holding the 'Test' button. This ensures the battery and alarm horn are functional. If it's a hardwired, interconnected system, all alarms should sound.
Where should I install smoke and carbon monoxide detectors in my home?+
Install smoke detectors on every level of your home, inside each bedroom, and in the hallway outside each sleeping area. Carbon monoxide detectors should be installed on every level and in or near sleeping areas. Keep them away from high-humidity areas like bathrooms and cooking fumes from kitchens.
Why would a new smoke detector chirp after installation?+
A new smoke detector might chirp due to an improperly installed battery, a low battery (if it's a model with a non-sealed battery), or an internal fault. Ensure the battery is seated correctly, and if chirping persists, consult the manufacturer's troubleshooting guide or return the unit.
Are combination smoke/CO detectors as effective as separate units?+
Yes, combination smoke/CO detectors are generally very effective and can simplify installation and maintenance. Just ensure they are placed in locations where both smoke and CO detection are appropriate, following manufacturer and fire safety guidelines.
What does it mean if my hardwired smoke detector has a green light and a red light flashing?+
A green light typically indicates the unit is receiving AC power. A red light flashing intermittently usually signifies normal operation, but a rapid or continuous red flash could indicate a problem like a low battery (for models with a backup battery) or a fault. Check your manual for specifics.
Can dust really affect my smoke detector's performance?+
Absolutely. Dust and cobwebs can accumulate inside the sensing chamber, especially in photoelectric detectors, blocking the light source or scattering light, which can lead to nuisance alarms or reduced sensitivity to actual smoke. Regular light cleaning is important.
My smoke detector has a sealed 10-year battery. Does it still need replacement?+
Yes. The 10-year battery is designed to last the lifespan of the *sensor*. Once the 10 years are up, the sensor itself has degraded, and the entire unit needs to be replaced, battery and all. There's no replacing the sealed battery.
Discussion
Loading comments…