- Identify the Culprit — Before you do anything else
- Look for a small LED light blink; some units will blink a specific color or pattern when chirping due to a low battery.
- Safety First: Accessing the Detector — Get ready to safely reach the unit
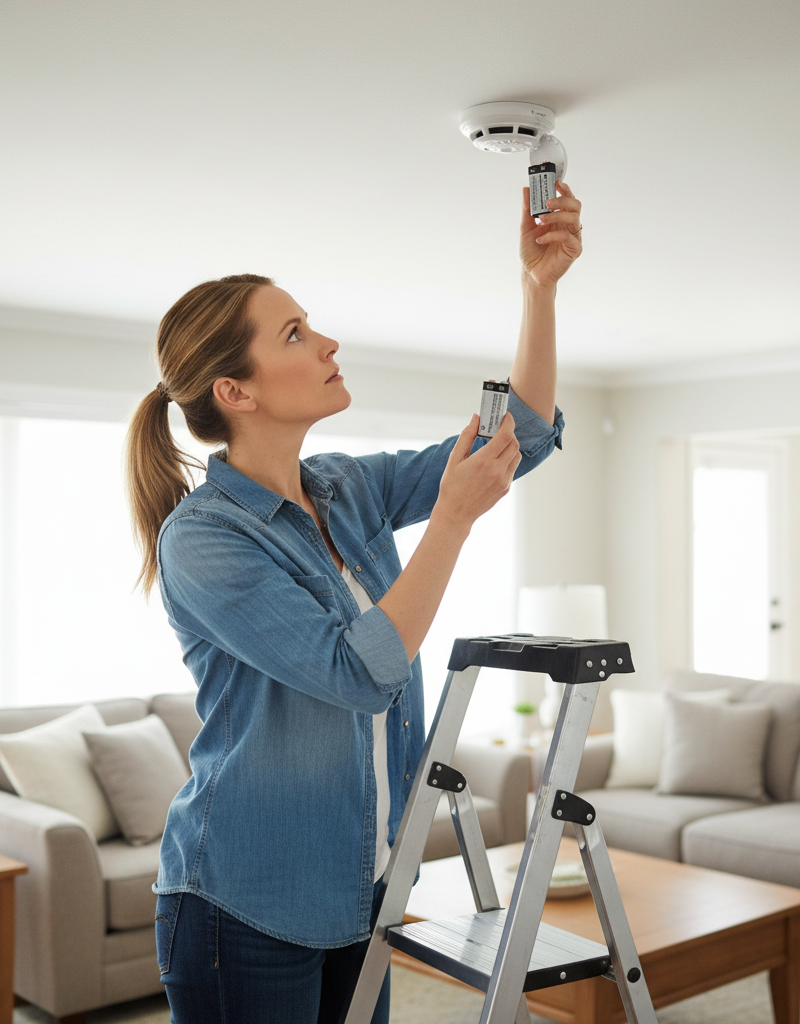
- Carefully climb up to the detector.
- Twist and Remove (or Slide) — Getting the unit open
Electrical · Panel or service upgrade
| Project category | Electrical |
|---|---|
| Problem type | Panel or service upgrade |
| Trade required | Electrical |
| Urgency | Planned project |
| Safety risk | High safety risk |
| DIY suitability | Licensed pro only |
| Cost category | High cost |
| Typical timeline | Permit plus utility scheduling, commonly 2–6 weeks |
| Contractor type | Licensed electrician |
Repair option
Add a subpanel when the main service is adequate.
Replacement option
Full service upgrade with utility coordination and permits.
Common causes
- Obsolete or recalled panel brands
- Service capacity too small for added loads
- No room for required AFCI/GFCI breakers
Relevant tools:project cost estimatorcompare quotes
Published July 22, 2026Last updated August 17, 2026
Tools & materials you'll need
Affiliate linksAs an Amazon Associate FixlyGuide earns from qualifying purchases — at no extra cost to you. Prices and availability are accurate as of publication and subject to change.
Quick Answer
That persistent, annoying chirp from your smoke detector every 30-60 seconds is almost always a low battery warning. While it seems straightforward, homeowners often encounter issues like chirping continuing after a battery change, or not knowing how to address hardwired units. The fix involves systematically checking and replacing batteries, resetting the unit, cleaning it, and understanding when the detector itself needs replacement due to age.
The Problem
You're trying to relax, sleep, or just enjoy a quiet moment when chirp... and then 30 to 60 seconds later, chirp again. Your smoke detector is demanding attention, and it's doing so in the most irritating way possible. This isn't a full alarm, which signals smoke or carbon monoxide; it's a subtle, yet persistent, plea for maintenance. For many homeowners, the immediate reaction is to swap out batteries, only to find the chirping continues, or to struggle with hardwired units. This seemingly simple issue can become a source of frustration, disrupting peace and quiet until the root cause is identified and addressed.
How It Works
Smoke detectors are critical safety devices designed to alert you to the presence of smoke, giving you precious time to escape a fire. There are two primary types of smoke detectors: ionization and photoelectric, though many modern units combine both technologies.
Ionization smoke detectors contain a small amount of radioactive material (Americium-241) that ionizes the air in a chamber, creating a small, constant electric current between two charged plates. When smoke enters the chamber, it disrupts this current, triggering the alarm. These are generally better at detecting fast-flaming fires.
Photoelectric smoke detectors work by shining a light source into a sensing chamber at an angle away from a sensor. When smoke enters the chamber, it scatters the light, directing some of it onto the sensor, which then triggers the alarm. These are typically more responsive to slow, smoldering fires.
Regardless of the sensing technology, all smoke detectors require power. Battery-powered units run entirely on disposable batteries (typically 9V, AA, or AAA). When the battery voltage drops below a certain threshold, the unit is designed to emit a regular "chirp" to alert you that it needs replacement. This low-battery warning is crucial because a dead battery means a non-functional detector.
Hardwired smoke detectors are connected directly to your home's electrical system, usually through a dedicated circuit. However, even hardwired units are required by code to have a backup battery (often 9V or AA/AAA) in case of a power outage. This backup battery ensures continuous protection. When this backup battery starts to run low, the hardwired unit will also chirp, signaling that it needs replacement, even though the main power supply is technically still active. This is a common point of confusion for homeowners, who might assume a hardwired unit doesn't need battery attention.
Beyond power, smoke detectors also have internal circuitry that monitors their own functionality. They perform self-tests and are designed to alert you if they are malfunctioning or reaching the end of their service life, which is typically 7-10 years. An expired unit might chirp to indicate it's time for replacement, not just a battery change. Dust and debris can also interfere with the sensing chambers, leading to false alarms or chirping, as the unit struggles to get a clear reading.
Step-by-Step Fix
Always address chirping smoke detectors promptly. Ensuring they are operational is a critical safety measure.
-
Identify the Culprit — Before you do anything else
- Listen carefully. That faint chirp can be hard to pinpoint. Go from room to room. Sometimes it helps to have someone else listen too. If you have multiple detectors, it's crucial to find the exact one chirping. It might not be the one you think.
- Look for a small LED light blink; some units will blink a specific color or pattern when chirping due to a low battery.
-
Safety First: Accessing the Detector — Get ready to safely reach the unit
- Safety Note: Never stand on unstable furniture. Use a sturdy step stool or a ladder that is rated for your weight and is placed on a flat, stable surface. Have someone spot you if possible. Avoid touching any exposed wires if it's a hardwired unit.
- Carefully climb up to the detector.
-
Twist and Remove (or Slide) — Getting the unit open
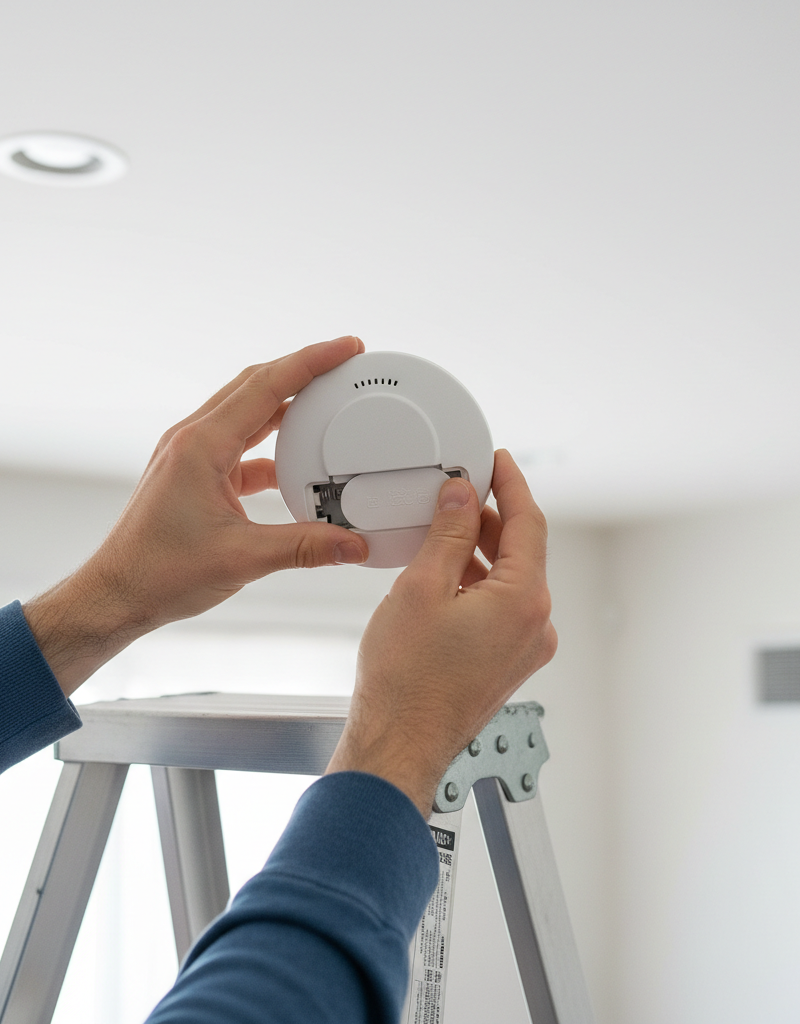
- Most smoke detectors are attached to a mounting bracket on the ceiling or wall by twisting counter-clockwise. A quarter-turn is usually enough. For some models, there might be a small latch or tab to press and then slide the unit off.
- If it's a hardwired unit, it will still be connected by wires. Do not yank the unit away; gently let it hang by the wires or have someone hold it while you disconnect the battery. If you are uncomfortable with the wiring, or if a circuit breaker needs to be turned off, consider calling a professional.
-
Remove the Old Battery — Say goodbye to the dead power source
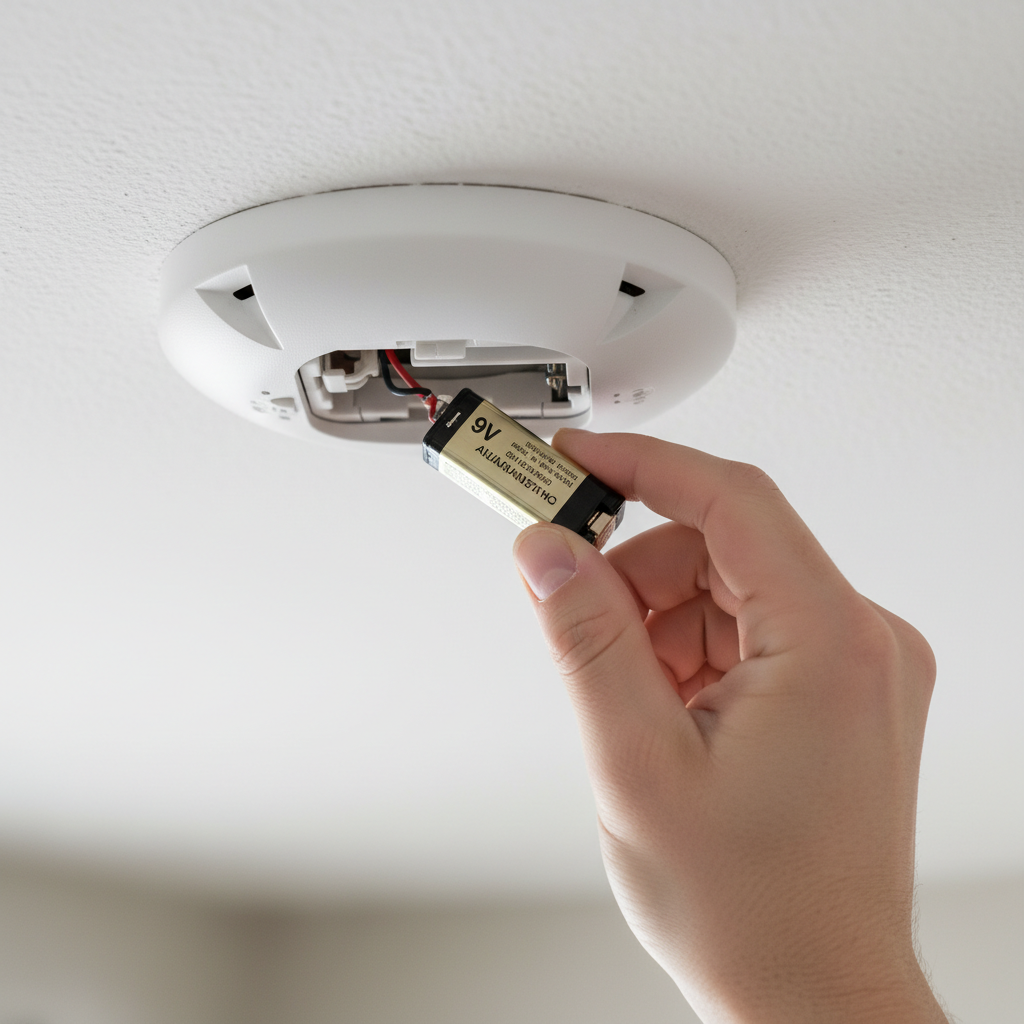
- Locate the battery compartment. This is usually on the back or side of the unit. Some models have a small door, others require the battery to be pushed or pulled out.
- Note the type and orientation (positive/negative terminals) of the old battery. Most commonly, it's a 9V battery, but some use AA or AAA.
- If hardwired: Gently disconnect the wiring harness for easier access if necessary, or have someone hold the unit steady. The clip for the 9V battery typically just pulls off the terminals.
-
Press and Hold (Discharge Residual Power) — Crucial step often missed
- After removing the old battery and before installing the new one, press and hold the "Test" button for 15-20 seconds. This drains any residual charge in the capacitor, which can prevent the unit from recognizing a new battery and stop the chirping.
- This step is very important, especially if the chirping continues after a battery swap without doing this.
-
Insert New Battery — Power it up
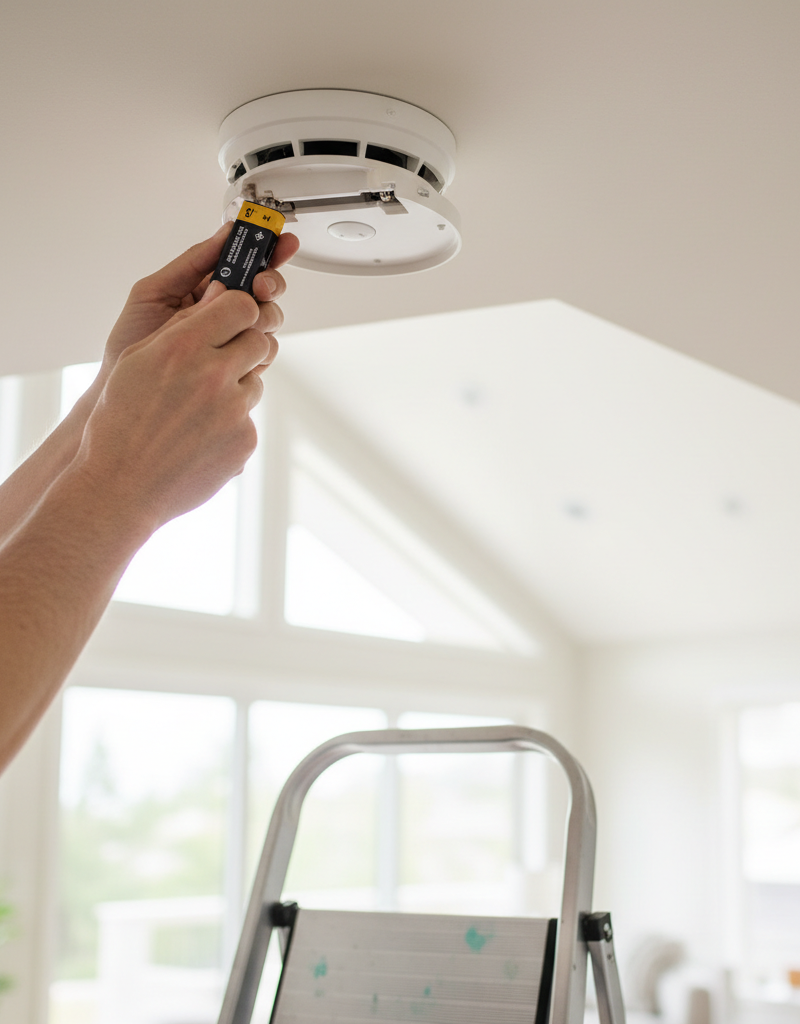
- Install a brand new, fresh battery of the correct type and size. Ensure the positive and negative terminals are correctly aligned. Double-check the expiration date on the new battery.
- Tip: Use a fresh battery from a recently purchased pack, not one that's been sitting in a drawer for years. Old batteries sometimes lose their charge even before use.
-
Test the Detector — Verify functionality
- Once the new battery is in, press and hold the "Test" button until the alarm sounds. This confirms the unit has power and its alarm is working. The alarm will be loud, so be prepared.
- Release the button. The alarm should stop, and the unit should return to normal operation.
-
Re-mount and Reset (if needed) — Put it all back together
- Carefully re-mount the detector by aligning it with the mounting bracket and twisting clockwise until it clicks into place. If it's a slide-on unit, ensure it's securely latched.
- For some interconnected systems, you may need to press the "Test" or "Hush" button briefly again after re-mounting to fully reset the network.
-
Monitor for Continued Chirping — Don't assume the fix worked immediately
- Listen for a few hours, or even overnight. Sometimes, it takes a little while for the unit's internal diagnostics to fully cycle and confirm the issue is resolved. If chirping continues, repeat the "Press and Hold" step (Step 5) with the new battery installed to ensure proper discharge.
-
Clean Your Detector (if chirping persists) — Dust can be a sneaky culprit
- If chirping continues after a battery change and reset, carefully remove the unit again. Use a can of compressed air to gently blow out any dust or cobwebs from the vents and sensing chamber. Do not use water or cleaning solutions.
- Safety Note: Be gentle; smoke detectors are sensitive instruments. Avoid aggressively poking inside the unit.
-
Check the Age of Your Detector (if all else fails) — It might be time for retirement
- Look on the back of the detector for a manufacturing date. Most smoke detectors have a lifespan of 7-10 years. If your detector is older than 10 years (or 7 years for CO/combination units), it needs to be replaced entirely, regardless of battery status.
- An expired unit will often chirp to indicate it needs replacement. This is a safety feature.
Common Causes
- Low Battery: The overwhelming majority of chirps are caused by a battery that is running low, regardless of whether the unit is battery-powered or hardwired with a backup.
- Old, Expired Unit: Smoke detectors have a finite lifespan, typically 7-10 years. After this period, their sensing capabilities diminish, and they are designed to chirp to signal that they need replacement.
- Residual Power/Improper Reset: Simply swapping a battery isn't always enough. Residual electrical charge in the unit's capacitors can prevent it from properly recognizing the new battery, leading to continued chirping until a hard reset (holding the test button) is performed.
- Dust or Debris: Accumulation of dust, insects, or cobwebs inside the sensing chamber can interfere with the detector's ability to "see" clearly, sometimes causing chirping or false alarms.
- Power Interruption (for hardwired units): Even a brief power flicker or outage can cause a hardwired unit to switch to its backup battery, and then once power is restored, it might chirp as it tries to re-integrate or if the backup battery was already low.
- Temperature or Humidity Fluctuations: Extreme or rapid changes in temperature or humidity can sometimes trigger a chirp, especially in older or malfunctioning units.
Common Mistakes
- Ignoring the Chirp: This is the most dangerous mistake. A chirping detector is a non-functional or soon-to-be non-functional detector. Never delay addressing it.
- Not Discharging Residual Power: Many homeowners swap batteries but skip pressing the "Test" button for 15-20 seconds after removing the old battery. This can leave residual charge in the unit, causing it to continue chirping despite a fresh battery.
- Using Old Batteries: Installing a battery that's been sitting in a drawer for years, or one with an unclear expiration date, can lead to the "fix" being temporary or ineffective. Always use a fresh battery from a new pack.
- Assuming Hardwired Units Don't Need Batteries: Even hardwired units have backup batteries that need to be replaced periodically (usually annually). Failing to replace these backup batteries will lead to chirping.
- Not Checking the Unit's Age: Smoke detectors don't last forever. Forgetting to check the manufacturing date and replacing units nearing or past their 7-10 year lifespan is a common oversight that compromises safety.
- Using the Wrong Battery Type: While most use 9V, some models use AA or AAA batteries. Always check the required battery type and orientation before inserting a new one.
Cost & Time Breakdown
| Task | DIY Cost | Pro Cost | Time |
|---|---|---|---|
| Battery Replacement (1 unit) | $5–$20 | $75–$150 | 5–10 minutes |
| Cleaning & Reset (1 unit) | $0 (compressed air $5–$10) | Included with service | 10–15 minutes |
| New Standard Smoke Detector | $15–$50 | $150–$250 | 10–20 minutes |
| New Smart/Combo Detector | $50–$150 | $200–$400 | 15–30 minutes |
| Full Home Detector Replacement | $150–$500+ (DIY) | $500–$1500+ | 1–4 hours (DIY) |
Tips & Prevention
- Annual Battery Replacement: Make it a habit to replace all smoke detector batteries at least once a year. A common practice is to do this when you change your clocks for Daylight Saving Time.
- Monthly Testing: Press the test button on each smoke detector monthly to ensure the alarm sounds. This verifies the battery and alarm are working.
- Know the Lifespan: Mark the installation date on the back of each unit with a permanent marker, and plan to replace alarms every 7-10 years. For combination smoke/CO detectors, the lifespan is often shorter (typically 7 years).
- Regular Cleaning: At least once a year, gently vacuum or use compressed air to clean around the vents of your smoke detectors to prevent dust buildup from causing issues.
- Strategic Placement: Ensure you have enough smoke detectors. Install them inside each bedroom, outside each sleeping area, and on every level of your home, including the basement. Avoid placement near bathrooms with showers (steam causes false alarms) or too close to kitchen stoves.
- Interconnected Systems: Consider interconnected smoke alarms. When one sounds, they all sound, providing maximum warning time, especially in larger homes.
When to Call a Professional
While most chirping smoke detector issues are easily resolved by a homeowner, there are specific situations where calling a licensed electrician is the safest and most effective course of action. If you have hardwired smoke detectors and are uncomfortable working with household electrical wiring, or if you suspect an issue beyond a simple battery replacement, a professional can diagnose the problem safely. Similarly, if multiple detectors are chirping erratically, or if the chirping continues despite fresh batteries, a proper reset, and cleaning, there might be a fault in the wiring, a widespread system issue, or a defect in the detector itself. Electricians can quickly identify wiring faults, ensure proper power supply, and replace faulty units. If you are dealing with interconnected systems that are not communicating correctly, leading to persistent chirping or false alarms, a professional has the tools and expertise to troubleshoot and re-establish proper communication. Lastly, if your detectors are past their recommended lifespan of 7-10 years and you need multiple units replaced, a professional can handle the installation efficiently and ensure all new units meet current safety codes and are properly interconnected.
Related Articles
Keep troubleshooting with these hand-picked guides from FixlyGuide:
- The 30-Second Chirp: Why Most Homeowners Misdiagnose Their Smoke Detector (And The Real Fix) — A smoke detector chirping every 30 seconds almost always means a dying battery, but it can also signal an expired unit or a buildup of dust.
- The Annoying Chirp: 3 Hidden Reasons Your Smoke Detector Won't Shut Up — A chirping smoke detector every 30-60 seconds usually means a low battery, but other hidden issues like dusty sensors or power interruption…
- The 3 Hidden Reasons Your Ceiling Fan Wobbles (And the Easy Fixes) — A wobbling ceiling fan isn't just annoying; it can be a sign of underlying issues that are simple to fix with the right approach.
- Why Does Only One Room Have Flickering Lights? The Real Culprit Isn't Always the Bulb — Flickering lights in a single room often point to a localized issue, ranging from a loose bulb to a faulty switch or wiring problem.
- The #1 Mistake Homeowners Make When a Gas Burner Won't Light (And the Easy Fix) — Before you call a technician, discover the most common, overlooked reason your gas stove burner isn't lighting and how to fix it yourself i…
- The 5-Minute Trick to Fixing a Door That Won't Latch (No New Hardware Needed) — A door that won't latch properly is a common household nuisance, but often requires a simple, quick fix without replacing any hardware.
What should this project cost?
Enter your project details for a realistic cost range before you call anyone.
Outlet and switch work usually $150–$400; panel upgrades commonly $1,800–$4,200.
- Regional adjustment
- National average
- Labor share (typical)
- ~$709
- Quotes to collect
- 3 written estimates
Educational estimate based on national averages — not a binding quote. Always confirm with written local estimates.
Get the print-ready PDF of this guide
A clean, ad-free, printable version you can keep on your phone or pin to the workshop wall. Free with a FixlyGuide account.
- Print-optimized layout
- Tools, materials & every step included
- Saved to your account
Frequently asked questions
Why is my smoke detector chirping every 30 seconds even with a new battery?+
Often, the detector retains a residual electrical charge after the old battery is removed. To fix this, remove the new battery, press and hold the 'Test' button for 15-20 seconds to drain the residual power, then reinsert the new battery. This hard reset allows the unit to recognize the fresh battery properly.
How do I stop a hardwired smoke detector from chirping?+
Hardwired smoke detectors always have a backup battery (usually 9V, AA, or AAA) that needs to be replaced annually. The chirping indicates this backup battery is low. Replace this battery, then press and hold the 'Test' button for 15-20 seconds to clear any residual charge and reset the unit.
How often should I replace smoke detector batteries?+
It's recommended to replace the batteries in all your smoke detectors at least once a year. A good reminder is to do it when you change your clocks for Daylight Saving Time. Monthly testing of the alarm is also advised.
My smoke detector is old. Could that be why it's chirping?+
Yes, smoke detectors have a limited lifespan, typically 7-10 years from the manufacturing date. After this period, their sensors can degrade, and they are designed to chirp to signal that the entire unit needs to be replaced, regardless of battery status.
Can dust make a smoke detector chirp?+
While less common than a low battery, dust, insects, or cobwebs accumulating inside the sensing chamber of a smoke detector can sometimes cause it to malfunction or chirp erratically. Gently clean the unit with compressed air to remove any debris.
Discussion
Loading comments…