- Check for an unbalanced cargo clump — Stop the machine, pop the lid or door, and look at how the laundry’s sitting. Big items like comforters, heavy bath sheets, or one soaked denim jacket can ball up on one side of the drum.
- Break up the tangled clothes and spread them evenly around the basket.
- Don’t wash a single heavy towel by itself; toss in two or three smaller towels so the drum stays balanced.
HVAC · High energy usage
| Project category | HVAC |
|---|---|
| Problem type | High energy usage |
| Trade required | HVAC |
| Urgency | Planned project |
| Safety risk | Low safety risk |
| DIY suitability | DIY for experienced homeowners |
| Cost category | High cost |
| Typical timeline | Assessment within weeks; replacement planned off-season |
| Contractor type | Licensed HVAC technician |
Repair option
Duct sealing, insulation, and a tune-up before touching the equipment.
Replacement option
High-efficiency replacement sized by a load calculation, not a rule of thumb.
Common causes
- Aging, low-efficiency equipment
- Leaking ducts losing conditioned air
- Insufficient attic insulation
- Oversized system short-cycling
Relevant tools:project cost estimatorrepair or replace
Published October 21, 2026Last updated October 21, 2026
Tools & materials you'll need
Affiliate links- AmazonReplacement suspension rod kit1 set · Model-specific set of 4 for top-loaders
- AmazonReplacement shock dampers2 to 4 · Model-specific for front-loaders
- AmazonDense rubber anti-vibration pads4 pads · Optional, for slippery tile floors
- AmazonWhite lithium damping grease1 tube · For suspension rod ball cups
As an Amazon Associate FixlyGuide earns from qualifying purchases — at no extra cost to you. Prices and availability are accurate as of publication and subject to change.
Quick Answer
If your washing machine is shaking like crazy, walking across the floor, or banging like a jackhammer during the spin cycle, the problem usually comes down to unadjusted leveling legs, worn-out suspension rods, or an unbalanced load. Leveling the machine with an adjustable wrench takes 10 minutes and costs zero dollars. If the tub keeps bouncing out of control when empty, your suspension springs or damper struts are shot and need replacement.
The Problem
There ain’t much that gets your attention faster than a washing machine rattling itself into the drywall at 1,200 RPM. You hear that steady thumping, then a nasty metallic shudder, and next thing you know the washer’s wandered six inches into the middle of the utility closet.
Besides scaring the dog half to death, that kind of vibration can chew up the machine from the inside out. Every smack between the inner tub and outer cabinet puts stress on the whole works: cracked plastic tubs, warped drive pulleys, stripped motor splines, busted drain pump fittings. If the laundry’s upstairs or you’ve got a pier-and-beam foundation—pretty common in older North Texas houses with that shifting clay soil—the shaking can even loosen copper water lines, crack the drywall below, or yank the drain hose out of the standpipe and flood the place in minutes. I pulled a washer in Frisco last month that had walked so hard it had actually pinched the drain hose behind it. Nasty mess. Leaving a bouncing washer alone isn’t the move.
How It Works
To fix the shaking, you’ve got to know what’s going on inside the cabinet. Modern washers throw around a pile of centrifugal force to pull gallons of water out of heavy stuff like denim and towels. In a top-load washer, the wash tub hangs inside the steel frame on four suspension rods with internal coil springs and plastic friction dampers. Those rods soak up side-to-side and up-and-down movement. Front-load washers work the other way: heavy cast-iron or concrete counterweights hold the outer tub in place, and hydraulic or friction damper struts mounted to the base frame keep it from bouncing around, while tension springs support it from above.
When the motor ramps the drum from a slow agitate speed of 50 RPM up to spin speeds of 800 to 1,400 RPM, any uneven load turns into a real beating. If the machine isn’t level, or the damping parts wear out and lose their resistance, the drum starts oscillating past what it was built to handle. The suspension bottoms out, the tub smacks the chassis—yeah, that’s tub strike—and the vibration sensor either shuts the machine down or lets the whole appliance shimmy across the floor like it’s trying to escape.
Step-by-Step Fix
Before you start pulling panels, knock out the easy stuff first, then move into the suspension parts.
-
Check for an unbalanced cargo clump — Stop the machine, pop the lid or door, and look at how the laundry’s sitting. Big items like comforters, heavy bath sheets, or one soaked denim jacket can ball up on one side of the drum.
- Break up the tangled clothes and spread them evenly around the basket.
- Don’t wash a single heavy towel by itself; toss in two or three smaller towels so the drum stays balanced.
-
Verify transit bolts were removed (Front-Loaders) — Look at the rear panel of your front-load washer and make sure the 3 to 4 factory shipping bolts and plastic spacers came out during installation.
- Tools needed: 10mm or 1/2-inch socket wrench.
- If those shipping bolts are still in there, the drum’s locked solid to the frame; run it like that and you’ll shake the house and tear up the internal brackets.
-
Perform the diagonal rock test — Put your hands on opposite diagonal corners of the washer’s top panel (front-left and rear-right, then front-right and rear-left) and push down firmly.
- If the cabinet rocks even 1/16 of an inch, at least one leveling leg isn’t on the floor right.
- The machine needs to sit dead solid on all four feet. No wobble. No dice.
-
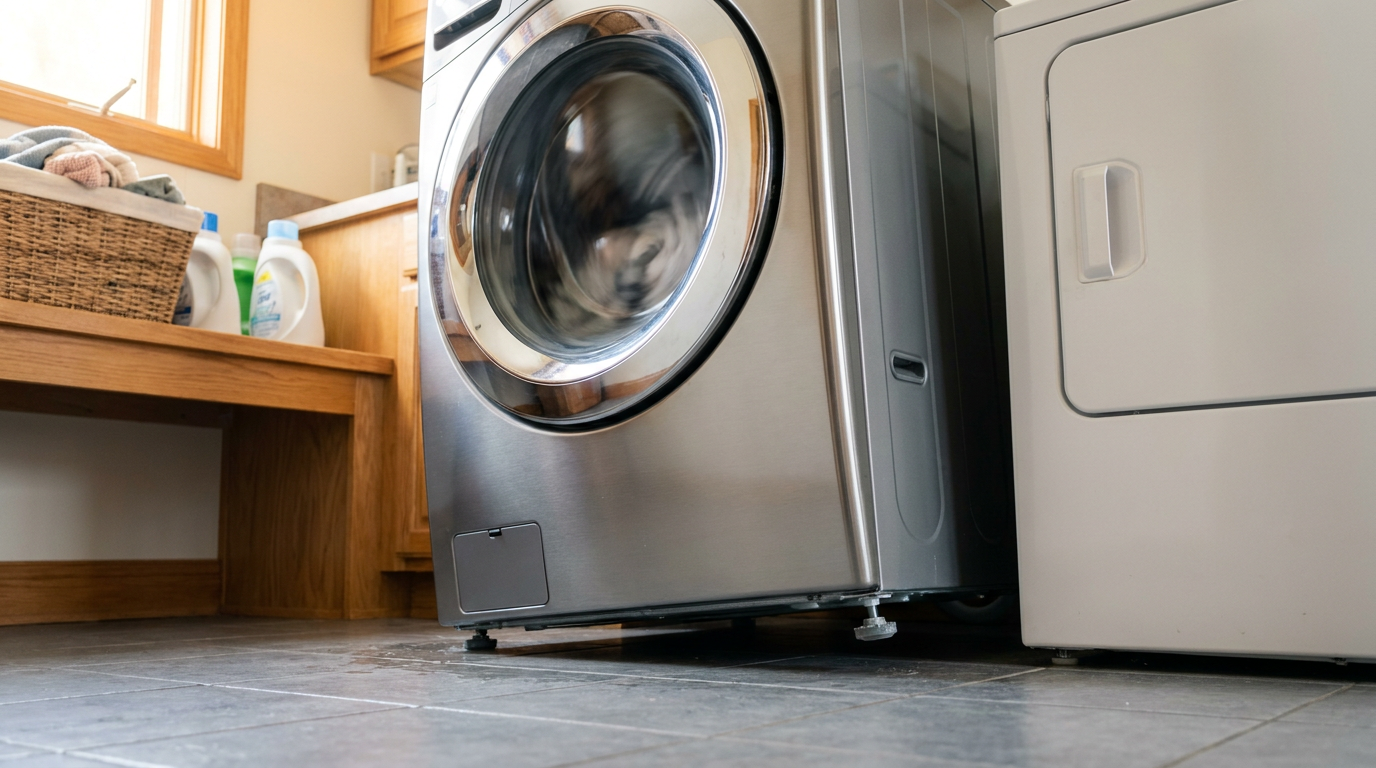
Adjust the front leveling feet — Set a 12-inch or 24-inch torpedo level across the top front rim of the washer cabinet, then along both side edges.
- Slip an adjustable wrench onto the flat notch of the threaded metal foot at the base.
- Turn clockwise to lower the foot, counterclockwise to raise it, until the bubble sits dead-center horizontally and front-to-back.
- Spin the locking jam nut tight against the machine’s steel frame with your wrench to lock the leg in place; if you skip that step, the foot’ll work itself loose in about two weeks.
-
Reset the rear self-leveling legs (Top-Loaders) — A lot of top-load models have spring-loaded self-adjusting rear feet that get sticky from soap residue or lint buildup.
- Grab the front cabinet frame and tip the whole washer forward 3 to 4 inches off the floor, letting it rest on the front two feet for a second.
- Ease the machine back down; that frees up the internal cam mechanism and lets the rear feet drop and match the floor automatically.
- If they stay stuck, tap the bottom of the rear feet lightly with a rubber mallet while the machine’s tipped.
-
Disconnect power and water supplies — If leveling doesn’t fix the bounce, you’ve got to check the internal suspension parts.
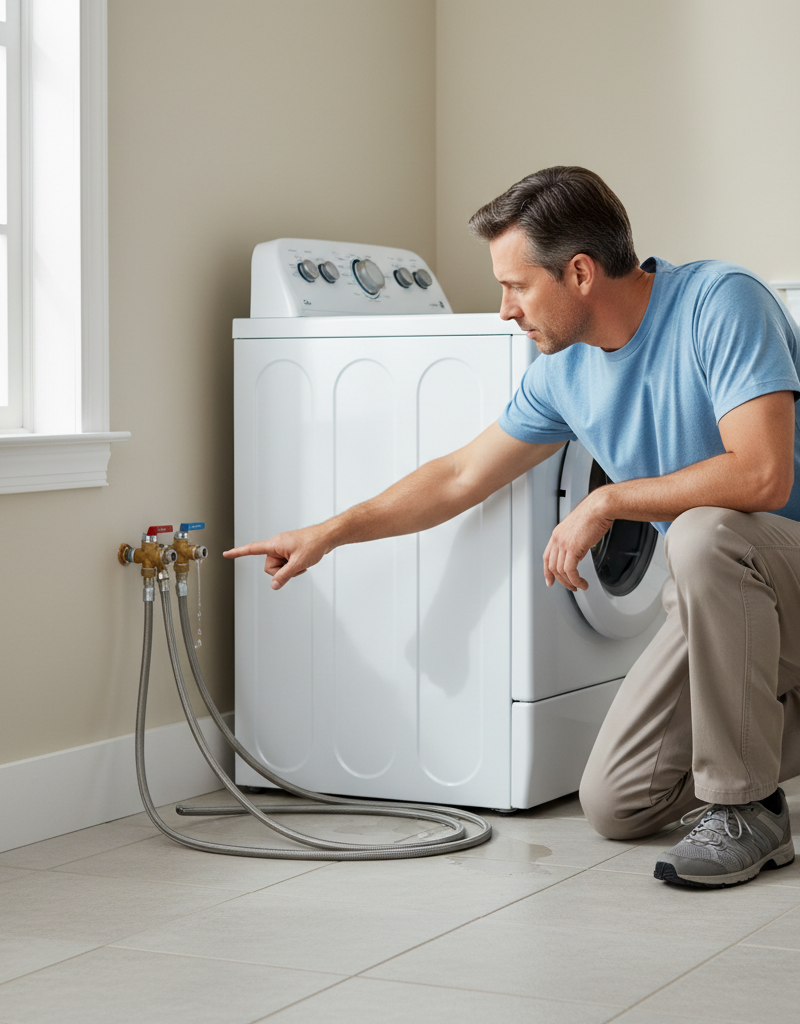
- Pull the washer away from the wall, unplug the 120V power cord from the outlet, and shut off both hot and cold water valves.
- Unscrew the inlet hoses by hand or with channel-lock pliers, and set a bucket under them to catch the leftover water.
-
Test top-load suspension rods with the "Bounce Test" — Open the washer lid and push down hard on the bottom of the inner wash drum with two hands, compressing it downward 3 to 4 inches, then let go fast.
- A healthy suspension springs back and settles on the first rebound.
- If the tub bounces up and down three, four, or five times like an old Cadillac with blown shocks, your suspension rod dampening cups are worn smooth, and all four rods need replacement.
-
Open the cabinet to access suspension — Get into the damping system.
- For top-loaders: Use a stiff putty knife to depress the two spring clips holding the main top panel down (located about 2 to 3 inches in from each front corner between the top and front panels), then hinge the top deck up and secure it with a bungee cord to the ceiling or wall.
- For front-loaders: Remove the rear service panel screws with a 1/4-inch nut driver or Phillips head screwdriver to expose the shock absorbers beneath the tub.
-
Replace top-loader suspension rods — Swap the suspension rods one corner at a time so the heavy tub assembly doesn’t drop to the floor.
- Reach in, lift the tub corner upward with one hand to take tension off the top rod cup, and slide the plastic ball head out of its cabinet slot.
- Lower the old rod out through the bottom tub bracket, insert the new rod assembly (pre-packed with fresh white lithium damping grease in the top cup), and lock the top ball back into the cabinet mount.
- Replace all four rods at the same time—mixing new, stiff springs with old, tired ones is asking for a lopsided wobble.
-
Replace front-loader damper shocks — Check the bottom hydraulic or friction shock absorbers connecting the base frame to the outer drum assembly.
- Look for oil leaks along the shock shafts, broken mounting eyes, or cracked plastic retainer pins.
- Pull the plastic mounting pins using a pin-release tool or tap them through with a punch and hammer while depressing the locking tab.
- Install the new shock dampers, making sure the resistance matches the factory specs (commonly rated between 80N and 120N of dampening force).
-
Run a test spin cycle empty — Close the cabinet, restore water and power, and run an empty "Rinse and Spin" cycle on the highest spin speed.
- Watch the tub through the spin-up transition between 300 and 600 RPM, which is the natural resonance frequency where vibrations peak.
- The drum ought to hum smooth with barely any cabinet movement and zero loud knocking.
Common Causes
- Uneven or Unlocked Leveling Legs: The biggest offender, plain and simple. Vibration will back threaded feet out over time if the locknuts aren’t torqued tight against the bottom frame.
- Worn-Out Suspension Rods (Top-Loaders): The plastic sleeves and internal dampening springs lose tension after 4 to 7 years, leaving the tub bouncing uncontrolled on bare coil springs.
- Blown Drum Shocks (Front-Loaders): Friction dampers wear down, or internal hydraulic fluid leaks past the seals, leaving the heavy outer drum basically unsupported during the spin cycle.
- Cracked or Broken Counterweight: Front-load washers use heavy concrete or cast blocks bolted to the tub. If a mounting bolt shears or the concrete cracks, the imbalance gets ugly fast.
- Failed Tub Bearing and Spider Arm: If you hear a roar like a jet engine taking off along with violent wobbling, the aluminum spider arm bracket supporting the rear drum has corroded, or the main bearing has gone out.
- Weak Flooring or Foundation Sag: In houses built on crawlspaces or second stories, subfloors with too much joist deflection (greater than L/360) bounce right along with the drum, making the whole problem worse.
Common Mistakes
- Replacing only one broken suspension rod — Putting in a single new rod creates an uneven rebound inside the tub housing. The new stiff rod will fight the three worn soft ones, and you’ll get nasty diagonal wobbling. Buy and install the full kit of four.
- Ignoring the locking jam nuts — Leveling the legs with a wrench but not tightening the top locknut against the metal base plate means the foot’ll back itself down within 10 wash loads.
- Stacking loose plywood or scrap rubber underneath — Shoving thin pieces of squishy foam, carpet remnants, or loose scrap plywood under the legs just makes the lateral motion worse. If you want anti-vibration pads, use commercial dense rubber pads made for appliances.
- Leaving shipping bolts installed on new front-loaders — Folks who install their own front-loader sometimes forget the 3 or 4 long steel bolts in the back. When spin hits, the unit can literally jump off the floor, break water lines, and crack the outer tub plastic.
- Misdiagnosing a failed spider bracket as a suspension issue — If the drum has too much up-and-down play relative to the plastic outer tub (more than 1/4 inch of play when you lift the front rim by hand), new shocks won’t save it. The internal three-pronged spider arm is broken.
Cost & Time Breakdown
| Task | DIY Cost | Pro Cost | Time |
|---|---|---|---|
| Leveling legs & tightening locknuts | $0 | $90–$150 (service call) | 10–15 minutes |
| Installing dense rubber anti-vibration pads | $15–$30 | $100–$160 | 15 minutes |
| Replacing top-load suspension rods (set of 4) | $35–$80 | $180–$280 | 45–60 minutes |
| Replacing front-load shock dampers (set of 2–4) | $40–$90 | $200–$320 | 60–90 minutes |
| Reinforcing subfloor under second-story laundry | $50–$120 | $400–$800 | 2–4 hours |
Tips & Prevention
- Distribute dense items evenly: Mix big stuff like bedsheets with medium towels instead of washing a pile of heavy bedspreads in one shot.
- Clean the leg threads once a year: Dust, detergent dribbles, and pet hair collect on threaded foot studs, corroding the steel and locking them in place. Wipe the threads with a wire brush and hit them with a drop of silicone spray.
- Check machine level every six months: Houses settle, locknuts loosen, and subfloors shift. Slap a torpedo level across your washer twice a year when you change smoke detector batteries.
- Avoid running oversized loads: Packing clothes right up to the top lip of the tub doesn’t leave enough room for them to spread out, so you get violent weight clumps during the drain-and-spin ramp-up.
- Use true anti-vibration pads on smooth floors: If your laundry room has polished glazed tile or smooth vinyl, high-spin torque can break the rubber grip of the feet. Heavy-duty molded rubber isolation pucks do a much better job anchoring the footprint.
When to Call a Professional
If you open the rear panel of your front-load machine and find chunks of broken concrete, your counterweight has fractured and needs specialty parts and a high-torque reassembly. Same deal if your drum makes a deafening metallic screech or rumbles like a freight train even when you turn it slowly by hand—the rear tub bearing and aluminum spider bracket have failed. Replacing a rear tub bearing means tearing the whole machine down to the bare chassis, splitting the outer drum clamshell, and pressing out pressed-in steel sleeves, and that’s more than most DIY hand tool setups can handle. Half the time, it costs more in labor than the washer’s worth. And if violent shaking has cracked your drain line standpipe inside the wall or bent internal electrical wiring harnesses, call a licensed appliance repair technician right away.
Related Articles
Keep troubleshooting with these hand-picked guides from FixlyGuide:
- The Grinding Racket: What Your Washing Machine Is Really Telling You — Don't ignore that grinding, thumping, or banging from your washing machine during the spin cycle—it's often a clear cry for help that you c…
- The Washer Whispers: Why Your Machine Won't Fill (and the $0 Fix) — Frustrated by a washing machine that just won't fill with water? It's a common headache, but often a simple, free fix could be hiding in pl…
- The Mystery Smell: Why Your Washer Stinks (and the 15-Minute Fix) — Is your washing machine leaving your clothes smelling worse than when they went in? Don't toss that machine just yet—often, a stinky washer…
- That Mildew Smell in Your Washer? Here’s the Real Reason — Is a musty odor taking over your laundry room? That mildew smell from your washing machine isn't just unpleasant—it's a sign of a deeper pr…
- That Mildew Smell in Your Washer? Here's the Real Fix. — Tired of 'clean' laundry smelling musty? The problem isn't your detergent; it's trapped bacteria and mold inside your washing machine. We'l…
- The Grimy Gunk Under Your Washer: Why Your Laundry Still Smells — If your laundry comes out smelling less than fresh, the culprit might be hidden gunk and mildew in your washing machine. I'll show you how…
Should you do this yourself?
Answer five quick questions before you start. Safety outranks savings every time.
Your experience with work like this
How high do you have to work?
Does the job involve any of these?
Will it need a permit?
Specialty tools
Free and instant. Educational guidance only — not a quote, inspection, or professional diagnosis.
Estimate your own project cost
National averages are a starting point. Enter your details for a range that fits your house.
Flooring cost estimator
- Material$498 – $1,095
- Installation labor$360 – $720
Tile installs and stairs increase labor cost. Get 2–3 quotes for jobs over 200 sq ft.
Educational estimate only — always confirm with written local bids.
What should this project cost?
Enter your project details for a realistic cost range before you call anyone.
Cost depends heavily on which system turns out to be the source.
- Regional adjustment
- National average
- Labor share (typical)
- ~$1,620
- Quotes to collect
- 3 written estimates
Educational estimate based on national averages — not a binding quote. Always confirm with written local estimates.
Before you start
Check the difficulty, permits, and safety risk — then decide whether to call a pro.
Free, no signup required. Estimates are educational guidance, not a quote or an inspection.
Get the print-ready PDF of this guide
A clean, ad-free, printable version you can keep on your phone or pin to the workshop wall. Free with a FixlyGuide account.
- Print-optimized layout
- Tools, materials & every step included
- Saved to your account
Frequently asked questions
Can violent shaking ruin my washing machine?},{answer:+
Yes, severe washer vibration can crack plastic drain pump housings, bend motor shafts, rupture supply hoses, and damage your drywall or subfloor over time.
Do anti-vibration rubber pads actually work?},{answer:+
They do for solid floors, but they are not a cure for mechanical failure. Anti-vibration pads dampen floor noise and stop walking on slippery tile, but they will not fix blown suspension rods or an unlevel cabinet.
Why do front-load washers shake so much when brand new?},{answer:+
Factory shipping bolts lock the suspended wash tub to the steel frame so it doesn't slam around during truck delivery. If left in, the drum cannot absorb rotational torque, sending intense vibrations through the chassis.
How long do washer suspension rods last?},{answer:+
Washing machine suspension rods typically last between 5 and 8 years under normal household use. Heavy daily loads of towels or dense bedding wear down the friction dampeners much faster.
What is the bounce test for a top-load washer?},{answer:+
Open the lid and push the inner basket straight down firmly, then let go. If it snaps back up and stops instantly, the suspension is healthy; if it oscillates and bounces like a pogo stick, the dampening rods are worn out.
Why does my washer shake violently even when it is empty?},{answer:+
First, check that all four feet are touching the floor firmly and that the locknuts are tight. Second, run the bounce test on the drum to verify your suspension springs haven't lost dampening resistance.
Why is washer vibration worse on an upper floor?},{answer:+
Second-floor framing naturally flexes under heavy loads. If your floor joists have too much deflection, the 1,200 RPM spin cycle matches the floor's natural vibration frequency, creating a trampoline effect that shakes the room.
What should I do if my washer smells like burning rubber while shaking?+
Turn off the cycle immediately and check for a broken rear spider bracket or a seized bearing. Grab the inner metal drum and push upward against the outer plastic tub; if there is noticeable clunking play between them, the internal support arm has snapped.

Discussion
Loading comments…