- Clean the Inlet Screens — The Hidden Gunk Traps
- Tools: Needle-nose pliers or tweezers, old toothbrush, towel.
- Safety: Make sure the water supply valves are OFF before you disconnect anything.
HVAC · High energy usage
| Project category | HVAC |
|---|---|
| Problem type | High energy usage |
| Trade required | HVAC |
| Urgency | Planned project |
| Safety risk | Low safety risk |
| DIY suitability | DIY for experienced homeowners |
| Cost category | High cost |
| Typical timeline | Assessment within weeks; replacement planned off-season |
| Contractor type | Licensed HVAC technician |
Repair option
Duct sealing, insulation, and a tune-up before touching the equipment.
Replacement option
High-efficiency replacement sized by a load calculation, not a rule of thumb.
Common causes
- Aging, low-efficiency equipment
- Leaking ducts losing conditioned air
- Insufficient attic insulation
- Oversized system short-cycling
Relevant tools:project cost estimatorrepair or replace
Published September 20, 2026Last updated September 20, 2026
Tools & materials you'll need
Affiliate linksAs an Amazon Associate FixlyGuide earns from qualifying purchases — at no extra cost to you. Prices and availability are accurate as of publication and subject to change.
Quick Answer
When your washing machine acts like it's on strike and won't fill with water, don't lose your cool and don't ring up a repairman right away. Most of the time, I've found it's something dead simple: a water valve got shut off, a hose got kinked tighter than a fist, or the little screens on the inlet valves are clogged up with junk. All of that you can usually handle yourself in under an hour, and a lot of the time it won't cost you a dime.
The Problem
You've tossed in the clothes, added detergent, hit "start," and... nothing. Or maybe just a weak trickle. Your washer's sitting there, stubborn as a mule, refusing to take in the water it needs to do the job. That's not just annoying; it means the laundry pile keeps growing and your whole day gets knocked sideways. I've been on jobs where folks were sure the machine was done for, only to find the water supply was off. Happens more than you'd think.
How It Works
Here's how your washer's supposed to fill. It ain't complicated, but knowing the basics makes troubleshooting a lot easier. You've got two water supply lines — one hot, one cold — coming from your home's plumbing to the back of the machine. Each one usually has a shut-off valve on the wall behind the washer. Right where those hoses connect to the machine, there are little filter screens. Think tiny strainers catching grit before it gets into the guts of the washer.
From there, the water goes to the water inlet valve, which is an electrically controlled part. When you pick a cycle, the control board sends power to that valve and tells it to open up and let water in. On most modern machines, there's also a lid switch or a door lock assembly on front-loaders that has to be engaged before it'll fill or agitate. That's a safety thing — nobody wants the lid popping open and somebody getting soaked, or worse. Then there's a pressure switch or water level sensor that tells the board how much water's in the tub so it knows when to shut the valve off. If any link in that chain goes sideways — clogged screen, closed valve, bad inlet valve, flaky lid switch — the washer won't fill. Simple as that.
Step-by-Step Fix
Alright, let's get your washer drinking again. Before you do anything else, unplug it. I've seen too many ugly little surprises where water and electricity got too cozy. No dice. Safety first.
-
Check the Water Supply Valves — The "Duh" Moment
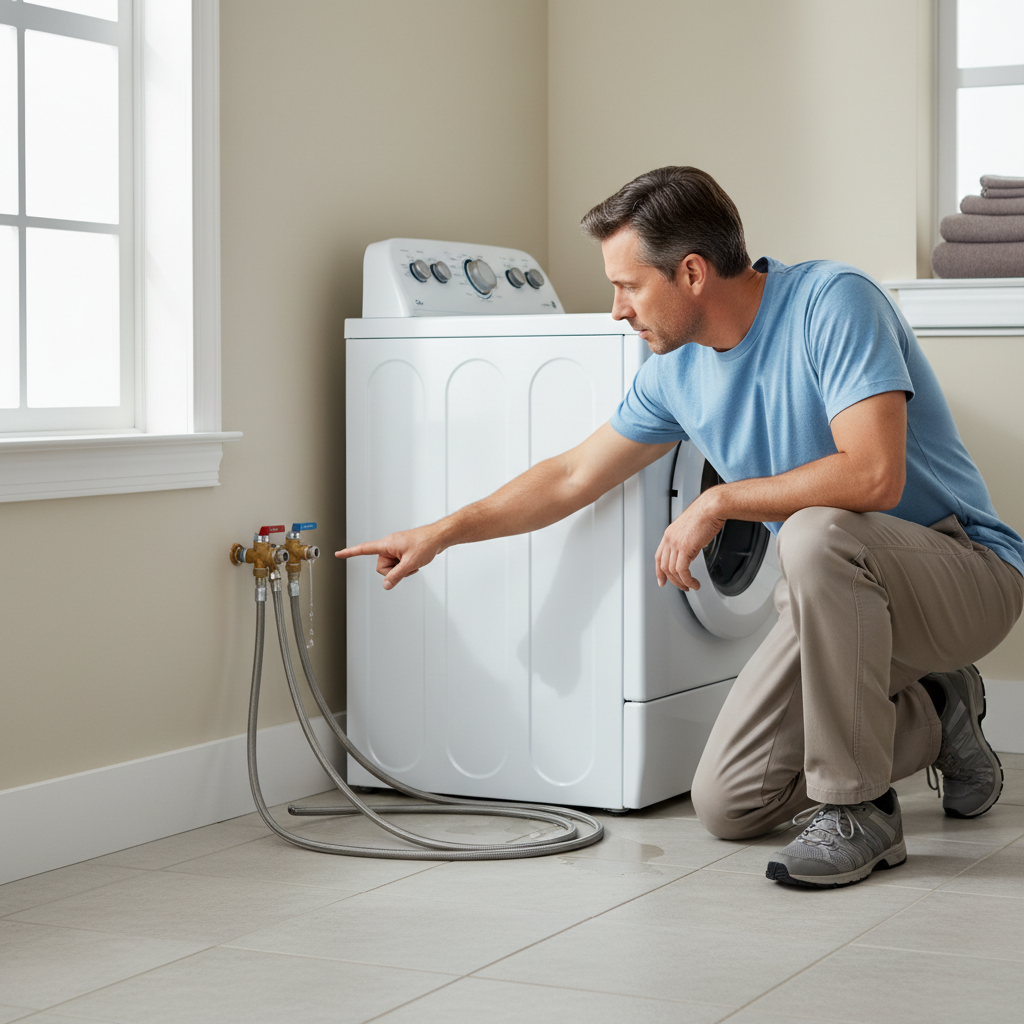
- Reach behind the washer and find the hot and cold supply hoses. Follow them back to the wall and you'll see two valves, usually with handles. Make sure both are all the way on. Sometimes they get bumped, or somebody shuts them off for another repair and never opens them back up. I had a call in Maplewood last year where the homeowner swore up and down he'd checked everything. Turns out his kid had been "helping" clean behind the washer and twisted one valve shut. One quick turn, and that thing was back in business.
- Tools: None. Just your hands.
-
Inspect the Water Supply Hoses — No Kinks in Your Style
- While you're back there, take a hard look at the hoses. Are they bent sharp or pinched? That's real common if the washer's shoved too close to the wall. A kink can choke off the water completely or cut it way down. Straighten out any bends you find. If the hoses look cracked, brittle, or rusty, don't mess around — swap them out. You do not want a burst hose turning your laundry room into a swamp.
- Tools: A flashlight helps, but you can get by without one.
-
Clean the Inlet Screens — The Hidden Gunk Traps
- Unscrew the hot and cold hoses from the back of the washer. Keep a towel handy; a little water's gonna spill out. Inside the inlet ports, you'll see small mesh screens. Those are there to catch sediment and debris from your supply lines. After a while, they can get plugged solid. Use needle-nose pliers or tweezers to pull them out carefully.
- Rinse the screens under the faucet and scrub them lightly with an old toothbrush if they need it until they're clear. Don't go stabbing at them with something sharp — you'll tear the mesh. Put them back, reconnect the hoses, and snug them up hand-tight, then give them a quarter turn more with pliers. Don't crank down on them; you'll strip the plastic threads.
- Tools: Needle-nose pliers or tweezers, old toothbrush, towel.
- Safety: Make sure the water supply valves are OFF before you disconnect anything.
-
Test the Lid Switch/Door Lock — The Safety Snitch
- For top-loaders: Your washer won't fill if it thinks the lid's open. Try starting a cycle and press down on the lid switch by hand — it's usually a little plastic plunger or tab near the front of the lid opening. You should hear a click. If it looks busted, or pressing it doesn't get a reaction, it may be bad. A lot of washers use a magnet too, so check that it didn't slip out of place.
- For front-loaders: The door's got to latch and lock all the way. Make sure nothing's in the way keeping it from closing tight. If the door won't lock, the machine won't start the fill cycle. The latch itself can get jammed or broken, plain and simple.
- If this doesn't work: A multimeter can test continuity on the lid switch, but replacing it is often easier if you already suspect it's the problem. It's usually a pretty straightforward DIY repair, often just a few screws and a plug-in connector.
-
Examine the Water Inlet Valve — The Electrical Gatekeeper
- Now we're getting a little deeper. The water inlet valve usually sits at the back of the machine where the hoses hook up. It's generally a plastic block with solenoids on it. If you've checked the easy stuff and you're still getting no water, this valve could be the troublemaker. It can fail electrically or get stuck mechanically.
- To get at it, you'll probably need to pull the back panel on a top-loader or the top panel on some front-loaders. Once it's exposed, check the wires going to the solenoids and make sure they aren't loose or corroded. You can test the solenoids with a multimeter for continuity and resistance, but that's getting into more advanced territory.
- If this doesn't work: If the solenoids aren't getting power or the resistance is off — check your washer's service manual for exact values, but typically around 500-1500 ohms — the valve's probably shot and needs replacement. This is a moderate DIY job. You'll have to disconnect hoses and wires carefully, pull the old valve, and put the new one in.
- Tools: Screwdriver set (Phillips, flathead, nut drivers), multimeter (optional), new water inlet valve (if replacing).
- Safety: UNPLUG the machine before you open any panels. Wear gloves too; sheet metal edges can bite.
-
Check the Pressure Switch/Water Level Sensor — The Unsung Hero
- This little part tells the washer how much water's in the tub. If it goes bad, it might think the tub's already full, or it might never call for water at all. On most top-loaders, it's under the main control panel and hooked to the tub with a small air hose.
- Check that hose for kinks, clogs, or a loose connection. You can try blowing gently into the disconnected hose — from the switch side, not the tub side — to see if you hear the switch click. If the switch is bad, it needs to be replaced. This one's usually an advanced DIY repair and sometimes takes special know-how or tools. I'd say leave it to a pro unless you're already comfortable with appliance diagnostics.
- Tools: Screwdrivers, possibly pliers.
- Safety: Unplug the machine. Don't damage that little air hose; it's delicate.
Common Causes
- Closed Shut-Off Valves: The most common fix by a mile. Somebody, usually without meaning to, turned them off.
- Kinked Water Hoses: The washer got shoved back too far, or the hoses just bent over time.
- Clogged Inlet Screens: Sediment and mineral buildup from your water supply slowly choke off the flow. I see this one a lot in older homes or anywhere with hard water.
- Faulty Lid Switch/Door Lock: The safety system isn't detecting that the lid or door is closed like it should.
- Bad Water Inlet Valve: The solenoids that open and close to let water in have given up.
- Pressure Switch Issues: The sensor that tells the washer water level is off, so it thinks the tub's full or won't allow fill at all.
Common Mistakes
- Ignoring the Obvious: Folks jump straight into fancy diagnostics without checking the valves or hoses first. Start with the simple stuff.
- Overtightening Hoses: Hand-tight, then just a quarter turn with pliers. Cranking them down hard can strip threads or wreck the rubber washers and cause leaks.
- Forgetting to Unplug: Water and electricity do not mix. I don't care how small the job looks — unplug it before you touch anything inside or even start pulling hoses.
- Damaging Inlet Screens: Sharp tools and brute force are a bad combo for those little screens. Clean them gently, or replace them if they're too far gone.
- Buying the Wrong Part: If you need a new inlet valve or lid switch, make sure it's the exact model number for your washer. There are a bunch of variations, even on parts that look the same.
- DIYing a Pressure Switch without Experience: That part can be tricky to diagnose and replace the right way. If you're not sure, that's usually your sign to call somebody.
Cost & Time Breakdown
| Task | DIY Cost | Pro Cost | Time |
|---|---|---|---|
| Check Valves/Hoses | $0 | $75–$150 (service call) | 5–10 minutes |
| Clean Inlet Screens | $0 | Included in service call | 15–30 minutes |
| Replace Water Hoses | $15–$40 | $100–$200 | 20–30 minutes |
| Replace Lid Switch/Door Lock | $25–$75 | $120–$250 | 30–60 minutes |
| Replace Water Inlet Valve | $40–$120 | $150–$300 | 45–90 minutes |
| Diagnose Pressure Switch | $0 (DIY) | $75–$150 (service call) | 30 minutes |
Tips & Prevention
- Regular Hose Checks: Every six months or so, pull the washer out and eyeball those hoses. Look for cracks, bulges, or leaks. Replace them every 3-5 years, especially if they're rubber. Braided stainless steel hoses hold up better and don't kink as easily.
- Clean Inlet Screens Annually: Make it a habit to disconnect the hoses and clean those inlet screens once a year. Keeps the crud from building up and keeps water moving like it should.
- Don't Overload: A stuffed-to-the-brim washer can put stress on parts, including the lid switch. Besides, your clothes won't come out clean anyway.
- Level Your Machine: A shaky washer can shift around and kink hoses or strain connections. Grab a level and adjust the feet until it's steady.
- Use the Right Detergent: Too many suds can mess with water level sensors sometimes, though modern machines handle that better than the old ones.
When to Call a Professional
Look, I'm all for DIY, but there comes a point where you need to throw in the towel and bring in the cavalry. If you've checked the valves, hoses, and inlet screens and the washer still won't fill, you're probably looking at a bad water inlet valve or, trickier yet, a faulty pressure switch or control board. Those repairs involve electrical parts and can get complicated fast. If you're not comfortable messing with wiring, or your multimeter readings aren't making much sense, it's time to call a licensed appliance tech. They've got the tools and the know-how to find the exact problem safely and without tearing up your machine — or your house.
Related Articles
Keep troubleshooting with these hand-picked guides from FixlyGuide:
- The Surprising Reason Your Washer Won't Drain (It's Not Always the Pump) — Discover the common culprits behind a washing machine that won't drain, from simple clogs to electrical glitches, and how to fix them yours…
- The Mystery of the Missing Water: Why Your Fridge Dispenser Just Quit — Ever go for a cold drink only to get air? Your refrigerator water dispenser might be on strike, but often it's a simple fix.
- That Mildew Smell in Your Washer? Here’s the Real Reason — Is a musty odor taking over your laundry room? That mildew smell from your washing machine isn't just unpleasant—it's a sign of a deeper pr…
- The Button Blocker: Why Your Microwave Panel Goes Dead (and the Easy Fix) — Don't rush to replace your microwave just because the buttons aren't responding; it's often a simple, DIY-friendly fix.
- The Real Reason Your Dishwasher Leaks (It’s Not Always the Hose) — A leaking dishwasher can be a homeowner's headache, but often the culprit isn't a failed hose, but rather a simple fix around the door or t…
- That Annoying Water Heater Popping Sound? It's Trying to Tell You This One Thing — A popping noise from your water heater is a common sign of sediment buildup, which can reduce efficiency and shorten its lifespan, but it's…
Should you do this yourself?
Answer five quick questions before you start. Safety outranks savings every time.
Your experience with work like this
How high do you have to work?
Does the job involve any of these?
Will it need a permit?
Specialty tools
Free and instant. Educational guidance only — not a quote, inspection, or professional diagnosis.
What should this project cost?
Enter your project details for a realistic cost range before you call anyone.
Cost depends heavily on which system turns out to be the source.
- Regional adjustment
- National average
- Labor share (typical)
- ~$1,620
- Quotes to collect
- 3 written estimates
Educational estimate based on national averages — not a binding quote. Always confirm with written local estimates.
Get the print-ready PDF of this guide
A clean, ad-free, printable version you can keep on your phone or pin to the workshop wall. Free with a FixlyGuide account.
- Print-optimized layout
- Tools, materials & every step included
- Saved to your account
Frequently asked questions
Why would my washing machine suddenly stop filling with water?+
Most commonly, it's a closed water supply valve, a kinked hose, or clogged inlet screens on the back of the washer. These are quick checks that often solve the problem without needing any new parts.
Can a clogged inlet screen really stop my washer from filling?+
Absolutely. Those small mesh screens are designed to catch debris. If they get too gunked up with sediment, they can severely restrict or completely block water flow, preventing your tub from filling.
How do I know if my lid switch is the problem?+
For top-loaders, try manually pressing the lid switch plunger down. If you don't hear a click or the washer still doesn't respond, the switch might be faulty. For front-loaders, ensure the door latches securely and isn't obstructed.
Is it safe to replace the water inlet valve myself?+
If you're comfortable working with basic tools and electrical connections and have unplugged the machine, replacing a water inlet valve is a moderate DIY job. Just make sure to get the correct part number for your model.
What's the difference between a water inlet valve and a pressure switch?+
The water inlet valve is the component that physically opens to let water into the tub, controlled by an electrical signal. The pressure switch (or water level sensor) is what tells the washer's control board how much water is in the tub, so it knows when to stop filling.
My washer fills slowly. Is that related to not filling at all?+
Yes, a slow fill often points to the same issues as a complete no-fill: partially closed valves, minor kinks in hoses, or partially clogged inlet screens. Address these, and your fill speed should improve.
How often should I replace my washing machine hoses?+
If you have standard rubber hoses, I recommend replacing them every 3-5 years to prevent leaks and bursts. Braided stainless steel hoses offer better durability and can last longer, but it's still smart to inspect them regularly.
Should I try to clean the water inlet valve if it's faulty?+
Generally, no. The water inlet valve is a sealed electrical component. If it's failed, it typically needs to be replaced, not cleaned or repaired internally. Attempting to clean it could cause further damage or leaks.

Discussion
Loading comments…