- Check the gas supply shutoff valve (gas dryers only) — If you’ve got a gas dryer, pull the machine out and make sure the inline manual gas valve handle lines up with the corrugated flex line.
- If the handle sits perpendicular (at a 90-degree angle) to the pipe, the gas supply’s shut off.
- Crack open the burner observation window (usually a little plastic plug near the bottom left or right corner of the lower front panel) while the cycle runs to see if the igniter glows cherry red.
HVAC · No heating
| Project category | HVAC |
|---|---|
| Problem type | No heating |
| Trade required | HVAC |
| Urgency | Emergency — act now |
| Safety risk | High safety risk |
| DIY suitability | Pro recommended |
| Cost category | Moderate cost |
| Typical timeline | Emergency in freezing weather; most repairs same day |
| Contractor type | Licensed HVAC technician |
Repair option
Igniter, sensor, or control replacement after a combustion safety check.
Replacement option
Immediate replacement when the heat exchanger is cracked.
Common causes
- Failed igniter or flame sensor
- Blocked flue or pressure switch fault
- Cracked heat exchanger — a carbon monoxide risk
- Thermostat or control board failure
Relevant tools:emergency checklistrepair or replace
Published October 26, 2026Last updated October 26, 2026
Tools & materials you'll need
Affiliate links- AmazonDigital multimeter1 · with continuity or resistance (Ohms) setting
- Amazon1/4-inch nut driver1 · for cabinet screws and thermostat brackets
- Amazon5/16-inch nut driver1 · common size for rear dryer access panels
- AmazonNeedle-nose pliers1 · to remove tight slip-on spade wire connectors
- AmazonRotary dryer vent cleaning brush kit1 kit · 12–18 ft flexible rod set for clearing ducts
- AmazonShop vacuum1 · to clear lint from cabinet and blower housing
As an Amazon Associate FixlyGuide earns from qualifying purchases — at no extra cost to you. Prices and availability are accurate as of publication and subject to change.
Quick Answer
A dryer that spins, hums, but gives you zero heat almost always has a blown thermal fuse, a busted heating element, or a tripped double-pole breaker. Electric dryers need 240 volts—if one 120-volt leg trips at the panel, the motor’ll keep right on running while the heater sits stone cold. Check the breaker box first, then kill the power and test the thermal fuse and element coils for continuity with a cheap digital multimeter.
The Problem
You toss a load of wet towels in the dryer, hit start, hear the drum rumbling along, and figure you’re good. Forty-five minutes later, you open the door expecting warm, fluffy laundry. Instead, it’s cold, damp, and smells a little like old detergent. The motor runs. The timer counts down. The drum turns like nothing’s wrong. But the inside of the drum feels like a fridge.
That “runs cold” problem throws people because we naturally assume an appliance either works or it doesn’t. Dryers don’t really play by that rule. The motor and interior light run on standard 120-volt current, while the heat source needs either a dedicated 240-volt circuit on electric units or a working ignition cycle with natural gas or propane on gas units. Once the heat path opens up, safety switches shut the heat down fast and let the drum keep tumbling so wet clothes don’t just sit there baking in leftover heat.
If you leave it alone, a cold dryer wastes power and beats up your clothes from extra tumbling friction. Worse, the root cause is often restricted airflow from lint buildup—a real fire hazard—and that’s exactly the kind of thing that pops a safety fuse meant to keep your place from going up.
How It Works
If you understand the heating circuit, you’re not just swapping parts and hoping. In an electric dryer, the wall receptacle feeds 240 volts AC across two separate 120-volt hot legs, a neutral, and a ground wire. The drive motor only needs 120 volts, so it pulls from one leg. The heating element—a heavy coiled wire made of nickel-chromium alloy (nichrome)—sits across both hot legs and pulls the full 240 volts, drawing between 18 to 22 amps to make heat in the 130°F to 160°F operating range.
Before power ever gets to that element, it has to pass through a chain of safety switches wired in series. First up is the thermal fuse, mounted right on the blower housing or exhaust duct. It watches exhaust air temperatures. If the exhaust gets to roughly 196°F—usually because lint jammed up the ductwork—the fuse’s internal link melts for good and cuts power before things get ugly.
Next is the operating thermostat, which cycles the element on and off to hold your selected dry temperature, and then a high-limit thermostat that kills power if the element chamber itself climbs above approximately 250°F. On a gas dryer, the setup changes a bit: the 120-volt circuit powers an igniter glow bar until a radiant sensor says it’s hot enough (above 1,100°F) to safely open the dual solenoid gas valves. If any one component in that chain fails, the loop opens and the heat shuts off completely. Simple enough. Annoying as hell, too.
Step-by-Step Fix
Here’s how I’d chase down the problem and fix a dryer that runs cold, starting with the no-tool checks and then moving into multimeter testing.
-
Reset both breaker legs at your main electrical panel — Walk to your home’s breaker panel and find the double-pole 30-amp breaker labeled "Dryer." Electric dryers run on two linked 120-volt breakers; one can trip internally while looking partially switched on, which lets the motor run on 120 volts while sending zero power to the 240-volt heating element.
- Flip the double breaker all the way to the complete "OFF" position, then snap it firmly back to "ON."
- If you’ve got an older fuse box, unscrew both cartridge or screw-in fuses and make sure neither one has a broken filament.
-
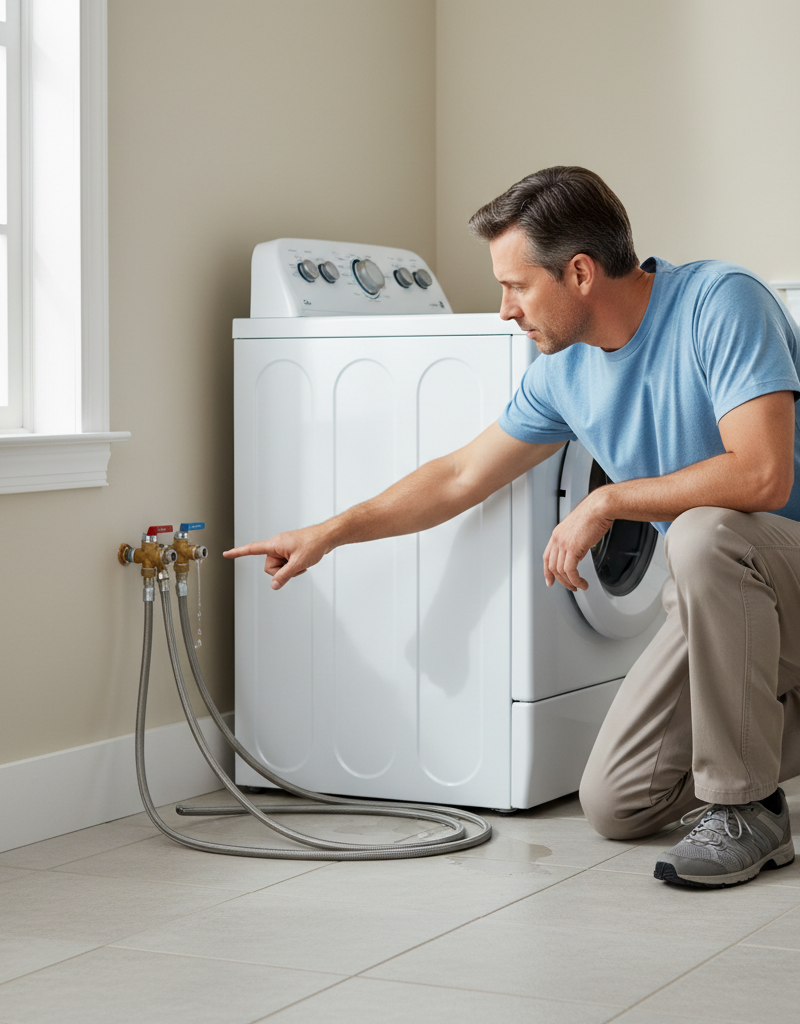
Check the gas supply shutoff valve (gas dryers only) — If you’ve got a gas dryer, pull the machine out and make sure the inline manual gas valve handle lines up with the corrugated flex line.
- If the handle sits perpendicular (at a 90-degree angle) to the pipe, the gas supply’s shut off.
- Crack open the burner observation window (usually a little plastic plug near the bottom left or right corner of the lower front panel) while the cycle runs to see if the igniter glows cherry red.
-
Disconnect power and pull the exhaust duct — Unplug the dryer cord all the way from the wall outlet; don’t ever work inside an appliance cabinet while it’s live. On gas units, turn the shutoff valve clockwise until it’s tight.
- Loosen the 4-inch worm-drive hose clamp on the exhaust vent with a 1/4-inch nut driver or flathead screwdriver.
- Pull the vent duct free and look for packed lint or crushed foil sections. If the duct’s stuffed solid, that restriction likely cooked your thermal switch.
-
Access the internal heater housing and safety switches — Depending on the dryer brand, you’ll get to the parts through the rear sheet-metal panel or the lower front kick panel.
- On most Whirlpool, Kenmore, Maytag, and Amana units, remove the 8 to 10 hex-head screws (usually 5/16-inch or 1/4-inch) holding the rear metal panel.
- On Samsung and LG models, you’ll usually remove the top panel screws, pop the control console forward, and unfasten the front bulkhead screws to reach the heater duct mounted low on the front-right side.
-
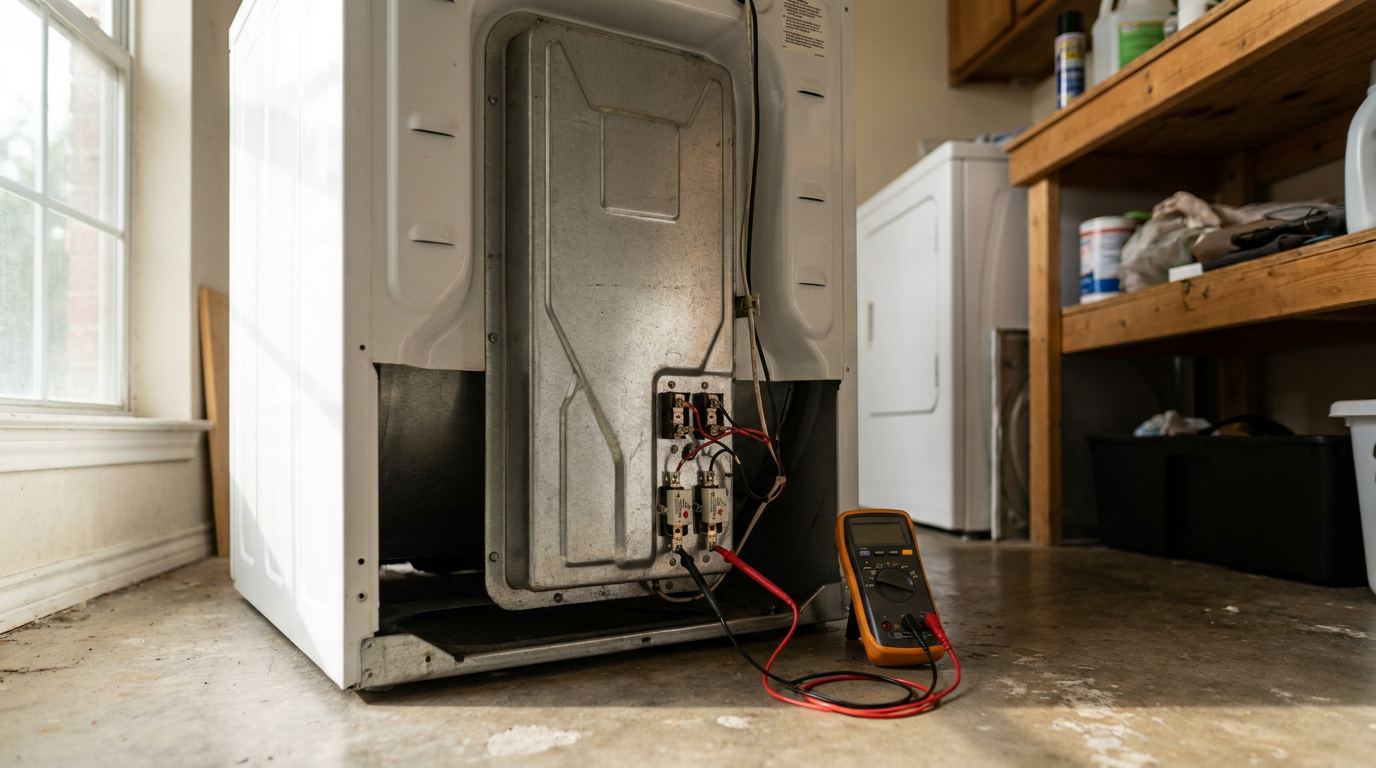
Locate and test the thermal fuse for continuity — Find the small white plastic or oval metal part mounted directly on the exhaust blower chute. It’ll have two heavy wires attached with spade connectors.
- Pull at least one wire off the terminal with needle-nose pliers so you’re not reading back through the rest of the harness.
- Set your digital multimeter to the lowest Ohms (Ω) setting or Continuity mode (the beeper icon).
- Touch one probe to each terminal; you want near-zero resistance (under 1.0 ohm) or a loud, steady beep. If the screen says "O.L." (open loop) or shows infinite resistance, the fuse is blown and needs replacement.
-
Test the high-limit and operating thermostats — Right next to the heating tube or blower duct, look for the round thermostats held in with 1/4-inch hex screws.
- Label or snap a photo of the wire positions, pull the leads off, and put your meter probes across the primary terminals.
- Room-temperature thermostats should show continuity (closed circuit, 0 ohms). If one reads open at 70°F, its internal bi-metal disc is stuck open.
-
Inspect and test the heating element assembly (electric) — Pull the wires off the two main terminals on the metal heating chamber cylinder.
- Put a meter probe on each terminal: a healthy 240-volt element should read between 7.8 and 12.5 ohms of resistance. An "O.L." reading means the coil wire’s broken.
- Then do a ground short test: touch one probe to a terminal and the other to the bare metal heater casing; if the meter beeps or shows any numeric resistance, the element has sagged and shorted against the housing, and that’s a safety issue.
- Shine an inspection light through the perforated tube and look for blackened breaks or melted, drooping coils.
-
Test the igniter and thermal cut-off (gas models) — Gas dryers use a carborundum or silicon nitride flat/spiral igniter mounted right in front of the burner orifice.
- Unplug the white plastic connector going to the igniter and touch your multimeter probes to the harness pins.
- A good igniter should read between 30 and 400 ohms; if it reads completely open, the brittle element’s cracked.
- Check the radiant flame sensor clipped to the side of the burner barrel; it should show dead continuity (0 ohms) when cool.
-
Install replacement components and torque fasteners — Back out the bad part with your 1/4-inch or 5/16-inch nut driver.
- Set the replacement part squarely into the factory screw holes, and seat the thermal gaskets evenly where they’re used.
- Snug the fasteners until they’re tight; don’t overdo it on thin sheet metal, because stripped holes are a pain.
- Push the spade wire connectors back onto the terminal blades until they bottom out completely. Loose spade connections build heat spots that’ll cook a wiring harness in weeks.
-
Clear the entire exhaust line before reassembly — Don’t fire up a repaired dryer unless you’ve vacuumed the housing and the wall duct first.
- Run an 18-foot rotary duct cleaning brush through the vent pipe from the laundry wall to your exterior exterior wall or roof cap.
- Vacuum up any lint rugs clinging to the bottom of the dryer cabinet around the drive motor. I pulled a dryer in Frisco last month that had a felt-like mat packed around the blower wheel, and that thing was toast until we cleared it out.
-
Button up the cabinet and run a live test cycle — Reattach the access panels and make sure the alignment tabs seat into the frame before you drive in the perimeter screws.
- Slip the 4-inch exhaust vent back over the dryer collar and clamp it down tight.
- Plug the power cord back into the 240-volt outlet (or open the gas cock).
- Turn the timer or digital dial to "Timed Dry - High Heat" for 5 minutes; open the door after two minutes and feel the back of the metal drum. It ought to be noticeably warm to the touch.
Common Causes
- Blown thermal fuse: This is the most common one I see. It sacrifices itself when airflow temps spike because the duct’s blocked with lint. Once it blows, it never resets; you replace it.
- Burned-out heating element coil: Years of heating and cooling beat up the nichrome resistance wire. Eventually the metal thins, gets hot at a weak spot, and snaps, breaking the circuit.
- Half-tripped 240V circuit breaker: Electric dryers use a tied double-pole breaker. Surges or startup load can trip the 120V heat leg while the 120V motor leg stays on.
- Defective cycling or high-limit thermostat: Thermostats use internal bi-metal discs that click open and closed. Over time, electrical arcing can weld the contacts open and block power to the heat source.
- Faulty gas valve solenoid coils (gas dryers): Solenoid coils (people call them "coils" or "M-series valves") open the gas valves when the igniter gets up to temp. Weak coils may work for the first 3 minutes of a load, then quit once they warm up, leaving the clothes cold for the remaining 40 minutes.
- Burnt centrifugal motor switch: The drive motor has an internal centrifugal switch that snaps shut only when the motor reaches full running speed (around 1,725 RPM). That keeps the element from firing if the belt breaks or the drum stalls. If the contacts burn or get packed with lint, the switch never sends power downstream to the heater.
Common Mistakes
- Swapping parts without cleaning the vent duct: Installing a brand-new $25 thermal fuse without clearing the lint plug in your 4-inch exhaust pipe is just burning money. That new fuse’ll blow within two cycles because the high-heat condition’s still there. Clean the pipe all the way to the outside damper.
- Bypassing the thermal fuse with a jumper wire: Desperate homeowners sometimes jumper across the spade terminals "just to finish laundry." Don’t do it. The thermal fuse is an emergency fire-prevention switch; bypassing it turns your dryer into a lint-fed furnace that can light your house on fire.
- Buying cheap, unbranded heating elements online: Cheap knock-off element coils sold on discount marketplaces often use junk gauge nichrome wire that stretches, sags, and shorts out within three to six months. Buy OEM parts or known aftermarket brands like Supco.
- Misreading multimeter scales: Leaving your digital multimeter set to mega-ohms (MΩ) or not zeroing the test leads leads to bad calls. Always check that your meter leads read 0.0 to 0.2 ohms when touched together before you test a component.
- Neglecting the terminal block condition: When people test electric dryers, they forget the 240V power cord junction box on the back of the machine. Loose strain-relief screws cause vibration, sparking, and melted terminal lugs that drop incoming voltage long before it reaches the thermostats.
Cost & Time Breakdown
| Task | DIY Cost | Pro Cost | Time |
|---|---|---|---|
| Reset Breakers & Clean Vent Duct | $0–$30 (brush kit) | $120–$190 | 45 minutes |
| Thermal Fuse Replacement | $10–$25 (OEM part) | $150–$225 | 30–45 minutes |
| Heating Element Assembly Swap | $35–$90 | $220–$350 | 45–60 minutes |
| High-Limit / Cycling Thermostat Kit | $15–$35 | $160–$240 | 30 minutes |
| Gas Valve Solenoid Set Replacement | $20–$45 | $180–$270 | 45 minutes |
Tips & Prevention
- Replace flexible vinyl or foil ducts immediately: Toss out semi-rigid ribbed foil or thin white plastic accordion ducts. They crimp easy behind the appliance, catch lint in the ribs, and they’re straight-up fire hazards. Swap them for rigid or semi-rigid aluminum ducting that meets UL 2158A standards.
- Keep vent runs under 35 equivalent feet: Every 90-degree elbow in your 4-inch exhaust system adds roughly 5 feet of airflow resistance. Keep the run as straight and short as you can manage so exhaust velocity stays up and internal temps stay down.
- Perform the outdoor flapper check monthly: Step outside while the dryer’s running with clothes in it. The outdoor exhaust flapper should get pushed wide open by strong, warm exhaust air. If it’s barely fluttering or hanging limp, lint’s choking the pipe upstream.
- Wipe dryer sheets residue off lint screens: Fabric softeners and dryer sheets leave an invisible waxy film on the fine wire mesh of your lint screen that hurts airflow without looking dirty. Pop the screen out every six months, wash it in the sink with warm water and blue Dawn dish soap, scrub it with an old toothbrush, and let it dry all the way.
- Inspect the rear drum seal: If you see little dark streaks on clothes or heat bleeding inside the cabinet, the felt drum seals may be worn out. Bad seals pull cool room air straight into the exhaust blower, throw the thermostats off, and drive element run times way up.
When to Call a Professional
Most thermal fuse and heating element swaps only take basic hand tools, but you’ve gotta know when to call it a day. If your electrical outlet shows visible scorching, bubbling plastic, or smells like fish or burning rubber, back away right now. That points to failing 6-gauge or 8-gauge copper wire in the wall or an oxidized receptacle pulling dangerous arcs; you need a licensed electrician.
On gas dryers, call an appliance repair technician if you smell raw gas in the laundry room or think there’s a leaking pipe union. Gas leaks are not DIY work. And if you test every single switch, fuse, and element—and each one shows perfect continuity—your problem probably lives on the electronic control board (a burnt heater relay) or the motor’s internal centrifugal switch. Replacing complex control boards or rewiring drive motors often gets close to the point where hiring a seasoned tech or replacing an aging machine makes more sense.
Related Articles
Keep troubleshooting with these hand-picked guides from FixlyGuide:
- The Silent Fire Hazard Lurking In Your Laundry Room — Don't let a clogged dryer vent become a silent fire starter. Learn why this common oversight is so dangerous, the clear warning signs to lo…
- The Annoying Drip: Why Your Refrigerator's Leaking Water (and the 10-Minute Fix) — Don't let a leaky refrigerator ruin your floor! Discover the common culprits behind water leaks and how you can fix most of them in just 10…
- The Annoying Hum: The Real Reason Your Fridge Vibrates (And How to Silence It) — Is your refrigerator buzzing or vibrating loudly? Don't ignore that annoying hum. This guide uncovers the common culprits behind fridge vib…
- The Mystery of the Cold Oven: Is It Your Power or a $15 Part? — Don't rush to replace your oven when it won't turn on; many common power issues or a simple, inexpensive thermal fuse might be the real cul…
- Dishwasher Won't Fill With Water? 5 Causes and the Step-by-Step Fix — Dishwasher running dry? Learn how to diagnose a stuck float switch, unclog a water inlet valve, and test solenoid continuity with step-by-s…
- The $5 Part That Stops Your Dryer From Heating (And How to Replace It in 30 Minutes) — A dryer that tumbles but doesn't heat often points to a blown thermal fuse, a simple and inexpensive fix most homeowners can do themselves.
Should you do this yourself?
Answer five quick questions before you start. Safety outranks savings every time.
Your experience with work like this
How high do you have to work?
Does the job involve any of these?
Will it need a permit?
Specialty tools
Free and instant. Educational guidance only — not a quote, inspection, or professional diagnosis.
Questions to ask before you sign
Ask every contractor the same questions and the cheapest bid stops looking cheapest. Check them off as you go — your progress is saved on this device.
Free, no signup. Bring this to every walkthrough so you compare bids on the same terms.
What should this project cost?
Enter your project details for a realistic cost range before you call anyone.
Cost depends heavily on which system turns out to be the source.
- Regional adjustment
- National average
- Labor share (typical)
- ~$1,620
- Quotes to collect
- 3 written estimates
Educational estimate based on national averages — not a binding quote. Always confirm with written local estimates.
Fixly Project Decision Box
- DIY difficulty
- Advanced
- Estimated time
- Homeowner checks 20–30 minutes
- Cost level
- Moderate
Main tools / materials
- Clean air filter
- Garden hose for condenser coils
- Shop vac for the condensate line
When to stop and call a pro
- Burning smell, smoke, or a tripping breaker
- Refrigerant lines iced over or hissing
- Any work inside the sealed refrigerant circuit (EPA-licensed only)
- Gas smell near a furnace — leave and call the utility
Need professional help?
Find an HVAC Pro Near YouHandle this before it gets worse
First steps that limit damage, then a way to reach a qualified pro.
- Emergency repair checklistThe first steps that limit damage before a pro arrives.Open
- Get local estimatesSend one request and compare written estimates from vetted pros.Open
- Estimate this projectGet a cost range for your scope and ZIP before you call anyone.Open
Free, no signup required. Estimates are educational guidance, not a quote or an inspection.
Get the print-ready PDF of this guide
A clean, ad-free, printable version you can keep on your phone or pin to the workshop wall. Free with a FixlyGuide account.
- Print-optimized layout
- Tools, materials & every step included
- Saved to your account
Frequently asked questions
Why does my electric dryer still turn on and spin if the breaker is tripped?+
Electric dryers require 240 volts of electricity to operate the heater, split across two separate 120-volt legs. The motor and drum run on just one 120-volt leg, while the heating element requires both legs combined. If one breaker pole trips, the dryer still tumbles and lights up normally, but the heating element receives no usable voltage.
Can I reset a blown dryer thermal fuse, or do I have to replace it?+
Thermal fuses are one-time sacrificial safety devices made with a low-melting-point internal alloy link. Once internal exhaust temperatures hit their safety threshold (typically between 196°F and 212°F), that link melts permanently to break the circuit. You cannot reset a standard thermal fuse; it must be discarded and replaced with a new part.
What causes a dryer thermal fuse to blow in the first place?+
The vast majority of thermal fuses blow because of restricted exhaust airflow. Heavy lint buildup in the 4-inch vent duct, a crushed flexible foil hose behind the dryer, or an exterior vent hood flapper jammed shut traps scorching exhaust air inside the cabinet until the safety fuse trips to prevent a structural fire.
How many ohms should a functional dryer heating element have?+
A healthy electric dryer heating element should show between 7.8 and 12.5 ohms of resistance across its terminals when tested with a digital multimeter at room temperature. If your meter reads "O.L." (open loop) or infinite resistance, the nichrome resistance coil is broken and the element must be replaced.
Why does my gas dryer heat up for five minutes and then blow cold air?+
The classic symptom of failing gas valve solenoid coils is a dryer that heats up for the first 3 to 5 minutes of a cycle, then blows room-temperature air for the rest of the time. As the solenoid coils heat up during normal operation, weak internal windings expand and break electrical continuity, preventing the gas valves from opening on subsequent heating passes.
Is it safe to bypass the thermal fuse just to finish one load of laundry?+
Never run a dryer with a bypassed thermal fuse. The fuse exists strictly to prevent dryer lint from catching fire and spreading flames into your walls. Jumping the fuse turns your dryer into a dangerous fire hazard. Replacing the fuse takes roughly 30 minutes and costs less than $20.
Should I replace just the element wire or the entire heating element housing?+
While you can technically replace just the broken nichrome coil wire using a restringing kit, it is rarely worth the hassle. Restrung coils fail much faster due to uneven manual spacing and tension loss. Installing a complete factory-assembled housing with fresh ceramic insulators and mounting brackets ensures long-term reliability for only $15 to $30 more.
What else could be broken if my thermal fuse and heating element both test good?+
If your thermal fuse, high-limit thermostat, cycling thermostat, and heating element all pass continuity testing with a multimeter, the issue points to either a failed centrifugal switch inside the motor or a bad heater relay on the main electronic control board. Check for burnt solder joints or blackened relay boxes on the circuit board.
Discussion
Loading comments…