- Dense Clay Soil: Clay particles are very small and tend to pack together tightly, leading to rapid compaction. This is a primary reason for poor drainage and shallow root growth.
- Heavy Foot Traffic: Play areas, pathways, and areas where pets frequently run will naturally become compacted over time. Even regular mowing contributes to surface compaction.
- Construction Activity: If your home is new or has undergone recent landscaping, heavy machinery can severely compact the soil, sometimes requiring deep aeration or even tilling.
Landscaping · Deck or fence project
| Project category | Landscaping |
|---|---|
| Problem type | Deck or fence project |
| Trade required | Landscaping |
| Urgency | Planned project |
| Safety risk | Moderate safety risk |
| DIY suitability | DIY for experienced homeowners |
| Cost category | High cost |
| Typical timeline | Most builds 3–10 days depending on size |
| Contractor type | Landscaping contractor |
Repair option
Replace failed boards, posts, and hardware; reseal the surface.
Replacement option
Rebuild when framing or the ledger connection is unsafe.
Common causes
- Rot at posts and ledger
- Storm damage
- Adding outdoor living space
Relevant tools:home improvement material pricesproject cost estimator
Published May 27, 2026Last updated August 17, 2026
Tools & materials you'll need
Affiliate linksAs an Amazon Associate FixlyGuide earns from qualifying purchases — at no extra cost to you. Prices and availability are accurate as of publication and subject to change.
Quick Answer
Aeration, the process of punching small holes in your lawn to allow air, water, and nutrients to penetrate the soil, is a vital practice for a healthy turf. The best time to aerate is when your grass is actively growing and can quickly recover from the stress of aeration. This means late summer or early fall for cool-season grasses, and late spring or early summer for warm-season grasses. Aerating at the wrong time can actually stress your lawn, making it more susceptible to weeds, diseases, and heat damage.
The Problem
Many homeowners understand the benefits of lawn aeration but often fall short on the most critical aspect: timing. Aerating at the wrong time of year is not just ineffective; it can actively harm your lawn. Imagine trying to recover from a minor surgery when your body is already fighting off a cold – it's an uphill battle. Similarly, aerating when your grass is dormant, stressed by extreme temperatures, or just emerging from dormancy can weaken it significantly. This leads to slow recovery, increased weed germination in the new holes, and a generally unhealthy, patchy lawn that ends up looking worse than before.
The core problem is often a lack of understanding regarding grass growth cycles. Cool-season grasses like fescue, bluegrass, and perennial ryegrass thrive in cooler temperatures, putting on most of their root and shoot growth in spring and fall. Warm-season grasses such as zoysia, Bermuda, and St. Augustine flourish in hot weather, doing their heavy growing in the late spring and summer. Attempting to aerate a cool-season lawn in the middle of a scorching July, or a warm-season lawn in a frosty November, will significantly hinder its ability to repair itself, leaving open wounds vulnerable to pests, diseases, and weed invasion. Without proper timing, the effort and expense of aeration are wasted, and your lawn's health is compromised.
How It Works
Lawn aeration is primarily about relieving soil compaction and improving the exchange of vital elements. Over time, foot traffic, heavy machinery, and even rainfall can compact soil, especially in clay-heavy areas. When soil is compacted, it becomes dense, reducing the pore space between soil particles. This makes it difficult for grass roots to penetrate deeply, limiting their access to water and nutrients. Compacted soil also impedes the flow of air, which is crucial for microbial activity and root respiration. Anaerobic (oxygen-deprived) conditions can lead to a buildup of harmful microorganisms and a decline in beneficial soil life.
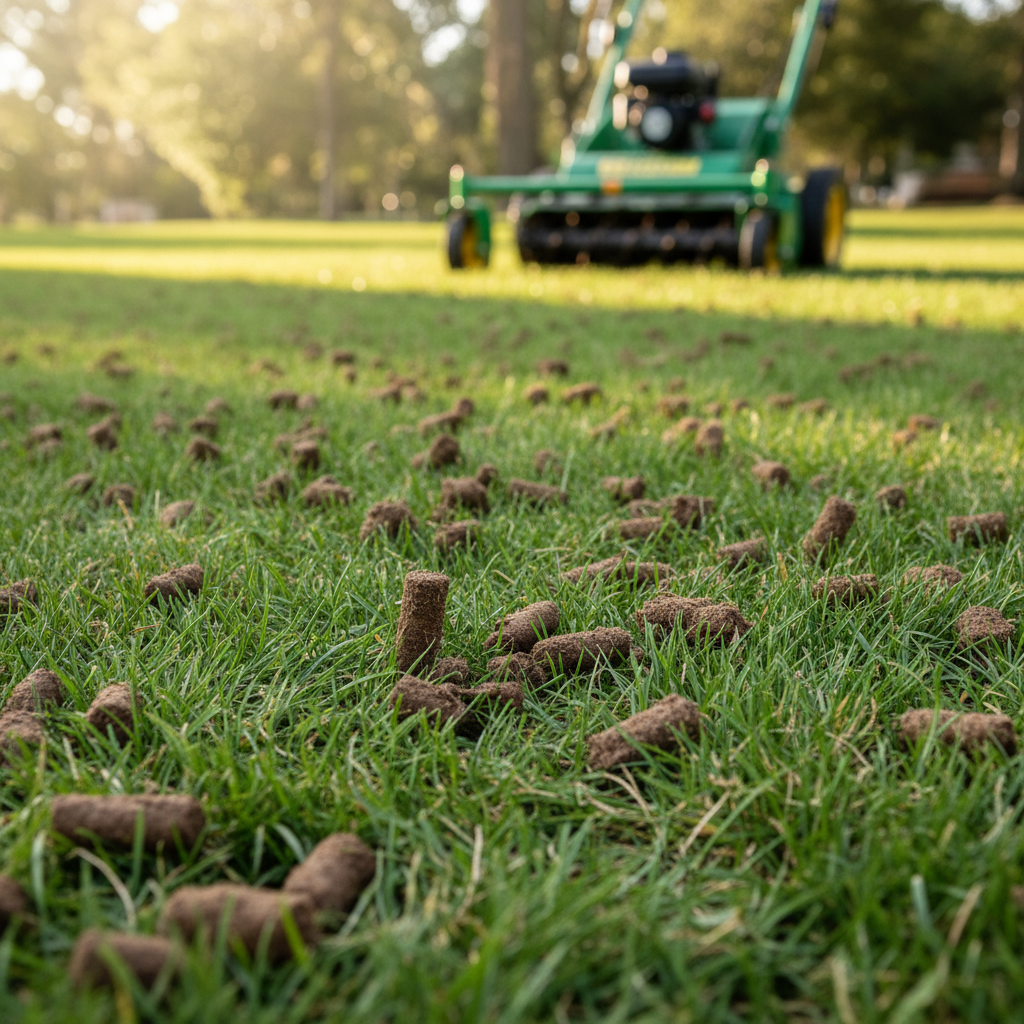
When you aerate, typically using a core aerator that removes small plugs of soil, you create channels that directly address this compaction. These holes serve multiple purposes: they allow air to circulate freely into the root zone, improving oxygen availability; they provide direct pathways for water to reach deeper roots, reducing runoff and improving drought resistance; and they allow fertilizers and soil amendments to penetrate effectively, rather than sitting on the surface. The removed soil plugs, often left on the lawn, decompose and return organic matter to the soil surface, further improving soil structure.
The timing is critical because the grass needs to be actively growing to fill in these newly created holes quickly. During active growth, the grass plants have sufficient energy reserves to produce new roots and shoots that colonize the aerated channels. This rapid recovery prevents weeds from establishing themselves in the bare soil openings and minimizes stress on the existing turf. Aerating when the grass is dormant or under environmental stress (like extreme heat or cold) means the plant cannot repair itself efficiently, leaving the lawn vulnerable for longer periods and potentially causing more damage than good. By understanding the growth cycle of your specific grass type, you can ensure that the aeration process is a benefit, not a burden, to your lawn's health.
Step-by-Step Fix
1. Identify Your Grass Type — Crucial first step for proper timing. Before you do anything, figure out if you have cool-season grass (fescue, bluegrass, rye) or warm-season grass (Bermuda, zoysia, St. Augustine, centipede). Cool-season grasses are typically found in northern climates and thrive in spring and fall. Warm-season grasses are common in southern regions and love the summer heat. If you're unsure, take a photo and ask a local nursery or extension office.
2. Determine the Optimal Aeration Window — Align with active growth cycles.
- Cool-Season Grasses: Early Fall (September to October is ideal). This allows the grass to heal before winter dormancy and gives roots time to establish. Early spring (March to early April) is a secondary option, but fall is generally preferred as it avoids competition with spring weed germination. Avoid aerating during summer heat.
- Warm-Season Grasses: Late Spring to Early Summer (April to June) is best. This coincides with their peak growth period, enabling quick recovery from the aeration process. Avoid aerating in late fall or winter when these grasses are dormant.
3. Prepare Your Lawn — A little prep makes a big difference. Mow your lawn to its regular height a day or two before aerating. Water the lawn thoroughly a day before you plan to aerate – the soil should be moist but not saturated. This makes it easier for the aerator tines to penetrate and pull plugs. Dry, hard soil will make aeration incredibly difficult and ineffective.
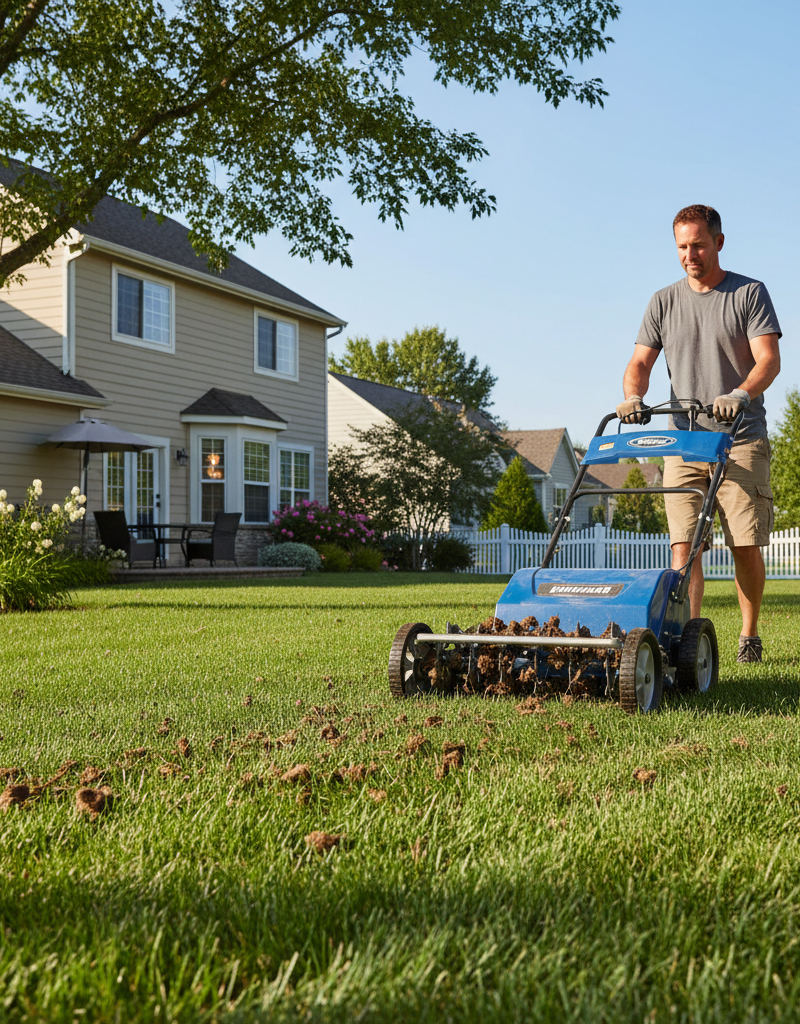
4. Select Your Aerator — Consider rental or purchase. For most homeowners, a core aerator (which extracts plugs of soil) is the most effective. These can be rented from home improvement stores or equipment rental centers. Spike aerators (which just push holes) are less effective as they can actually increase compaction around the holes. Ensure the machine is in good working order before you start.
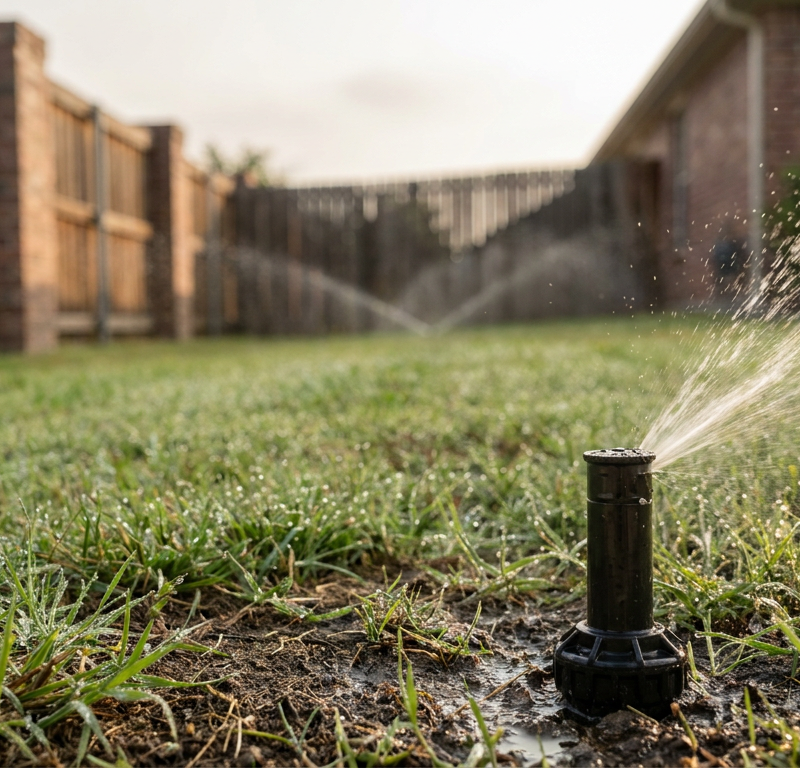
- Safety Note: Always read the aerator's operation manual thoroughly. Wear sturdy closed-toe shoes and eye protection. Clear the lawn of any debris, rocks, or sprinkler heads that could be damaged.
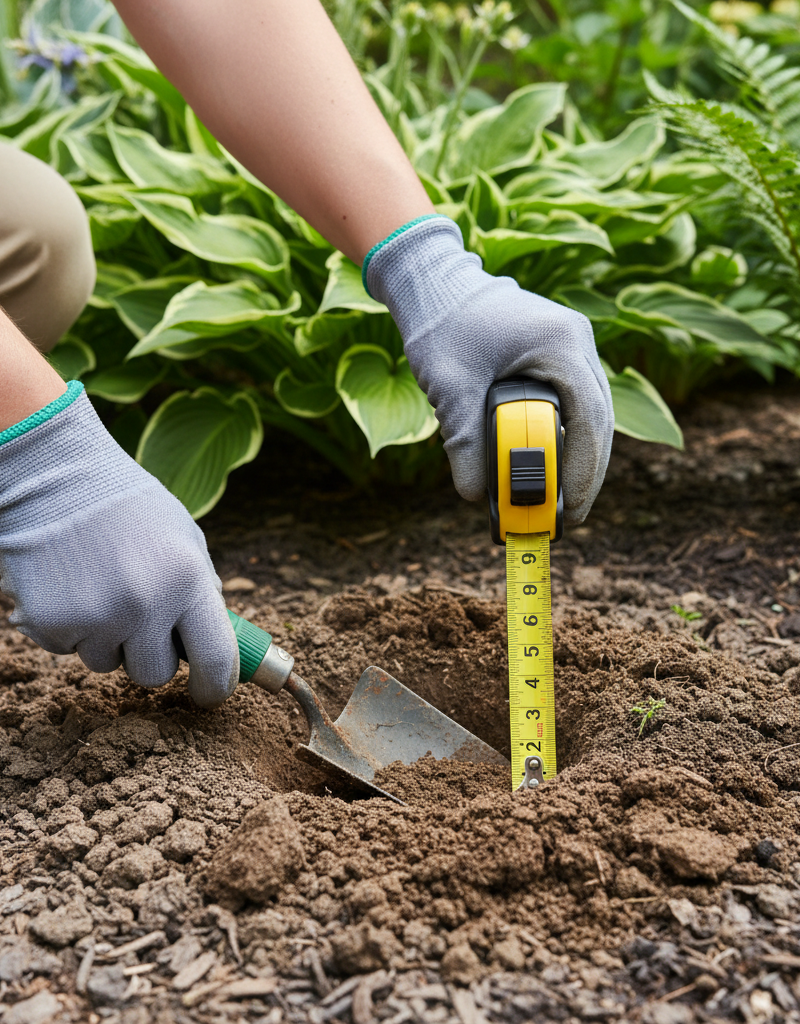
5. Make Multiple Passes — Maximize coverage for best results. For compacted areas, plan to make two passes over your lawn. The first pass should be in one direction (e.g., north-south), and the second pass perpendicular to the first (east-west). Aim for holes roughly 2-4 inches deep and 2-4 inches apart. This ensures good coverage and maximizes the benefits of aeration for your lawn.
6. Leave the Plugs — They're beneficial. Do not remove the soil plugs left on your lawn. They contain beneficial microorganisms and will break down over a few weeks, returning nutrients and organic matter to the soil surface. You can speed up their decomposition by lightly raking them or running a mower over them (without the collection bag).
7. Fertilize and Overseed (Optional but Recommended) — Boost recovery and density. Immediately after aeration is an excellent time to fertilize and overseed your lawn. The holes provide direct pathways for grass seed and fertilizer to reach the soil, significantly improving germination rates and nutrient uptake. Choose a high-quality fertilizer appropriate for your grass type and a grass seed blend that matches your existing lawn or improves it.
- If this doesn't work: If after aeration, fertilizing, and overseeding, your lawn still struggles with thin patches or nutrient deficiencies, consider a soil test. A soil test will reveal specific nutrient imbalances or pH issues that might be hindering growth, allowing for targeted amendments.
8. Water Your Lawn — Aid seed germination and overall recovery. After overseeding and fertilizing, water your lawn thoroughly to help the new seed settle into the aeration holes and to activate the fertilizer. Continue to water regularly (lightly and frequently for new seed) to keep the top inch of soil moist, especially critical for new grass seed germination. Deep watering is generally beneficial for established grass roots.
Common Causes
- Dense Clay Soil: Clay particles are very small and tend to pack together tightly, leading to rapid compaction. This is a primary reason for poor drainage and shallow root growth.
- Heavy Foot Traffic: Play areas, pathways, and areas where pets frequently run will naturally become compacted over time. Even regular mowing contributes to surface compaction.
- Construction Activity: If your home is new or has undergone recent landscaping, heavy machinery can severely compact the soil, sometimes requiring deep aeration or even tilling.
- Thatch Buildup: A thick layer of thatch (dead grass material between the green blades and the soil surface) can prevent air, water, and nutrients from reaching the soil. While aeration doesn't remove thatch directly, it helps break it down and improves conditions for microbial decomposition. Thatch layers over 1/2 inch thick warrant dethatching in addition to aeration.
- Improper Watering & Fertilization: Consistent shallow watering can encourage shallow root systems, making the lawn more vulnerable to compaction. Over-fertilization can also contribute to thatch buildup and stress a lawn, making it more susceptible to compaction's negative effects.
Common Mistakes
- Aerating Dormant Grass: This is the #1 mistake. Whether it's cool-season grass in summer heat/winter cold or warm-season grass in late fall/winter, aerating dormant grass causes unnecessary stress, slow recovery, and makes it more prone to disease and weeds.
- Aerating Bone-Dry Soil: Attempting to aerate extremely dry, hard soil is not only difficult but also ineffective. The aerator tines won't penetrate deeply, resulting in shallow holes that don't relieve compaction where it matters most – in the root zone. It also puts undue strain on the aerator machine.
- Using a Spike Aerator Exclusively: While spike aerators are less expensive, they don't remove soil plugs. Instead, they push soil particles aside, which can actually increase compaction around the edges of the holes. For effective compaction relief, a core aerator is essential.
- Not Making Multiple Passes: A single pass over the lawn is often insufficient, especially in heavily compacted areas. For optimal results, go over the lawn twice in perpendicular directions to ensure thorough coverage and maximum hole density.
- Ignoring Post-Aeration Steps: Aeration creates an ideal environment for seed and fertilizer. Failing to overseed or fertilize immediately after aeration misses a prime opportunity to thicken the lawn, improve its health, and outcompete weeds.
- Not Clearing the Lawn First: Leaving sprinkler heads, hidden rocks, or unmarked utility lines can result in costly damage to your equipment or property, and even personal injury. Always mark obstacles before starting.
Cost & Time Breakdown
| Task | DIY Cost | Pro Cost | Time |
|---|---|---|---|
| Aerator Rental (4-8 hours) | $70–$150 | N/A | 1–4 hours |
| Fertilizer (bag) | $40–$80 | Included | 15–30 min |
| Grass Seed (bag) | $30–$70 | Included | 15–30 min |
| Pro Aeration Service | N/A | $150–$350 | 1–2 hours |
| Total DIY Estimate | $140–$300 | N/A | 2–5 hours |
Tips & Prevention
- Regular Soil Testing: Get a soil test every 2-3 years. It provides invaluable information on pH and nutrient levels, guiding your fertilization and amendment strategies. This can prevent over-application and ensure your lawn gets exactly what it needs.
- Mow at the Right Height: Taller grass blades encourage deeper root growth and shade the soil, reducing water evaporation and weed growth. For most cool-season grasses, aim for 3-4 inches; for warm-season grasses, 2-3 inches.
- Deep, Infrequent Watering: Water deeply and less frequently to encourage roots to grow down into the soil, making them more resilient to compaction and drought. Aim for 1 inch of water per week, including rainfall.
- Topdressing with Compost: Periodically applying a thin layer (1/4–1/2 inch) of organic compost can significantly improve soil structure, add beneficial microbes, and reduce the need for frequent aeration.
- Vary Traffic Patterns: If possible, avoid creating consistent pathways across your lawn. Encourage foot traffic to spread out to minimize localized compaction.
- Consider Mulching Mower: Leave grass clippings on the lawn. They return valuable nutrients and organic matter to the soil, contributing to its health and structure. Ensure clippings are fine and don't clump.
When to Call a Professional
While aerating your lawn is a manageable DIY project for many homeowners, there are specific situations where calling a professional lawn care service or landscaper is advisable. If your lawn is extremely large (over an acre), renting and operating a heavy-duty aerator can be physically demanding and time-consuming; professionals have larger, more efficient equipment. If your soil is severely compacted, perhaps due to recent construction or heavy clay content, a professional might have access to more powerful or specialized aeration equipment that can achieve deeper penetration. Additionally, if you're unsure about your grass type, proper timing, or diagnosing underlying lawn health issues, a local pro can offer expert advice, perform the service correctly, and recommend further treatments to ensure your lawn thrives. Never hesitate to call a professional if you feel uncomfortable or if the scope of work exceeds your capabilities, especially with heavy machinery. Their expertise can save you time, effort, and potential damage to your lawn or property. professionals can also integrate aeration into a broader lawn health program, ensuring long-term success.
Related Articles
Keep troubleshooting with these hand-picked guides from FixlyGuide:
- The #1 Lawn Aeration Mistake Most Homeowners Make (And How to Time It Right) — Timing your lawn aeration correctly is crucial for maximizing its benefits and ensuring a healthier, more resilient lawn.
- The #1 Lawn Aeration Mistake Most Homeowners Make (And How to Fix It) — Timing is everything when it comes to lawn aeration, and doing it at the wrong time can do more harm than good for your grass.
- The #1 Lawn Aeration Mistake Most Homeowners Make (And How to Time It Right) — Timing your lawn aeration correctly is crucial for maximizing its benefits and ensuring a healthy, thriving lawn. Learn the secrets.
- The #1 Lawn Aeration Mistake Most Homeowners Make (And When to REALLY Do It) — Discover the crucial mistake many homeowners make with lawn aeration and learn the optimal timing for a thriving, healthy lawn.
- The #1 Lawn Aeration Mistake Most Homeowners Make (And When to REALLY Do It) — Discover the crucial mistake homeowners make with lawn aeration and learn the optimal timing to ensure a healthy, thriving lawn.
- The #1 HVAC Mistake Costing You Hundreds (And How Often to Really Change Your Filter) — Discover the crucial mistake most homeowners make with HVAC filters, leading to higher energy bills, poor air quality, and system damage. L…
Should you do this yourself?
Answer five quick questions before you start. Safety outranks savings every time.
Your experience with work like this
How high do you have to work?
Does the job involve any of these?
Will it need a permit?
Specialty tools
Free and instant. Educational guidance only — not a quote, inspection, or professional diagnosis.
What should this project cost?
Enter your project details for a realistic cost range before you call anyone.
Cost depends heavily on which system turns out to be the source.
- Regional adjustment
- National average
- Labor share (typical)
- ~$1,620
- Quotes to collect
- 3 written estimates
Educational estimate based on national averages — not a binding quote. Always confirm with written local estimates.
Frequently asked questions
Can I aerate my lawn any time?+
No, aerating your lawn at the wrong time, especially when your grass is dormant or stressed, can cause significant damage. Always aerate during the active growing season for your specific grass type (early fall/spring for cool-season; late spring/early summer for warm-season) to allow for quick recovery.
Should I remove the plugs after aeration?+
No, it's generally best to leave the soil plugs on your lawn. They contain beneficial microorganisms and will break down within a few weeks, returning organic matter and nutrients back into your soil. You can gently rake them to help them decompose faster.
How do I know if my lawn needs aeration?+
Common signs your lawn needs aeration include standing water after rain, a spongy feeling underfoot, thinning grass, excessive thatch (over 1/2 inch thick), or your lawn struggling in high-traffic areas. A simple screwdriver test can also indicate compaction: if you can't easily push a screwdriver deep into the soil, it's likely compacted.
How often should I aerate my lawn?+
Most lawns benefit from aeration every 1-3 years. Lawns with heavy clay soil, high traffic, or excessive thatch may benefit from annual aeration. Lawns with sandy soil or minimal compaction may only need it every 3-5 years.
What kind of aerator should I use?+
For the most effective results, use a core aerator that pulls out small plugs of soil. Spike aerators, which just push holes into the ground, can actually increase compaction around the holes and are generally less effective for relieving overall soil compaction.
Discussion
Loading comments…