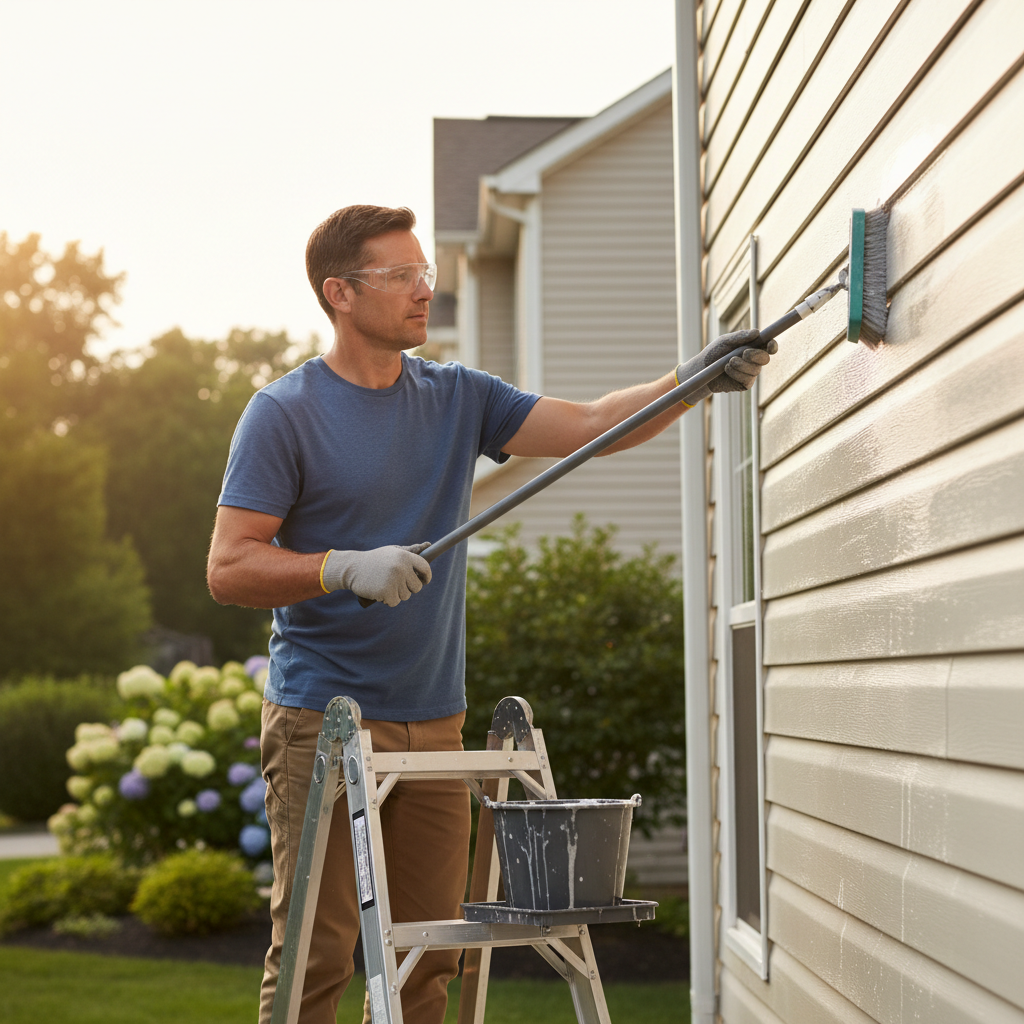
- Assess the Damage – Check the severity and material type.
- Vinyl/Aluminum: Usually clean and seal. If it’s badly faded, specialty vinyl paint can work, but that’s a bigger project.
- Wood/Fiber Cement (Painted): Clean it well, prime it, then repaint.
- Safety First: Wear eye protection and gloves when you’re using cleaning solutions, especially bleach or stronger detergents. If you’re on ladders, make sure they’re planted solid on level ground.
Roofing · Aging roof
| Project category | Roofing |
|---|---|
| Problem type | Aging roof |
| Trade required | Roofing |
| Urgency | Planned project |
| Safety risk | Low safety risk |
| DIY suitability | Pro recommended |
| Cost category | High cost |
| Typical timeline | Plan 4–12 weeks ahead for scheduling and material lead time |
| Contractor type | Licensed roofing contractor |
Repair option
Maintenance repairs to buy a season or two while you budget.
Replacement option
Planned replacement, which is almost always cheaper than a leak-driven emergency.
Common causes
- Normal weathering past the shingle service life
- Poor attic ventilation cooking the shingles from below
- Repeated repairs on the same slopes
Relevant tools:repair or replace roofproject cost estimatorhome improvement material prices
Published September 23, 2026Last updated September 23, 2026
Tools & materials you'll need
Affiliate linksAs an Amazon Associate FixlyGuide earns from qualifying purchases — at no extra cost to you. Prices and availability are accurate as of publication and subject to change.
Quick Answer
You know that dull, powdery film on your siding? That’s chalking, plain and simple. Most of the time, it’s the paint or vinyl finish breaking down under the sun and shedding pigment as it goes. The good news: it usually isn’t a structural disaster. Bad news? It means the protective layer’s getting thin. A solid wash and a fresh protective coat, or a repaint if the surface can take it, will usually knock it out.
The Problem
Walk around your house and swipe your hand across the siding. If you get a powdery residue on your palm that matches the siding color, yep—you’ve got chalking. It’s one of those sneaky problems that creeps in slow. One day the siding looks crisp, and the next it’s faded, flat, and worn out. Not pretty. It’s not just an eyesore, either; that chalky layer tells you the finish is breaking down, whether that’s paint on wood or a factory coating on vinyl. It’s a lot like a clear coat on a truck fading after years in the sun—looks bad, and it leaves the material underneath more exposed.
I’ve seen hundreds of homes with chalky siding. Folks call me thinking it’s mold, mildew, or hidden rot. Most of the time, it’s just UV doing what UV does. South- and west-facing walls get hammered hardest because they take the full brunt of the afternoon sun. When I was just getting my feet under me, sweating my tail off on houses in Plano and Frisco, I learned fast that prep makes or breaks the whole job. I pulled a water heater in Frisco last month that had exactly this kind of half-done prep around the exterior trim—same story, same mess. If you don’t clean chalk off properly, any new paint or coating just sits on top of the dust, and then it peels off before the warranty paper’s even warm.
How It Works
Alright, here’s what’s actually going on when siding starts to chalk. It’s not magic. It’s chemistry and weather beating on the finish day after day. Most paints and vinyl finishes get their color and UV resistance from pigments, especially titanium dioxide. That stuff does good work—it reflects UV light and helps keep the siding from breaking down too fast while giving it that clean color. But it’s not bulletproof.
Over time, those ultraviolet rays from the sun break down the resin or binder holding the pigment together. Think microscopic demolition. The sun keeps pounding on the finish, the binder weakens, and eventually it can’t hang onto the pigment particles anymore. So what happens? Those particles, especially the titanium dioxide, loosen up and work their way to the surface. That powder on your hand? That’s what’s left after the binder gives up.
A few things speed that process along. Strong sunlight is the main one, no surprise there. Better paints and vinyl usually have stronger binders and UV inhibitors, so they hold up longer. Cheaper stuff can start chalking in just a few years. Premium material might go a decade or more before it really starts showing it. Color matters too. Darker siding soaks up more heat and UV, which can push the binder harder, though the chalk itself may be less obvious. Wind and rain help wear away the loosened particles, but UV is the big dog here. And while chalking starts out cosmetic, heavy buildup can mean the protective layer’s gone soft, which leaves the siding more vulnerable to moisture, mold, and general breakdown. It’s the siding’s way of saying, “Hey, fix me.”
Step-by-Step Fix
Fixing chalky siding isn’t rocket science, but it does take patience and the right sequence. I’ve seen people try to paint right over it or hit it with a pressure washer like they’re stripping a driveway—no dice. Prep it right, or you’ll be doing it again. Here’s how I handle it:
-
Assess the Damage – Check the severity and material type. Before you grab a brush or sprayer, figure out what siding you’ve got and how bad the chalking really is. Light chalking might only need a good scrub and a protective sealer. Heavy chalking, especially on paintable surfaces, usually means a full repaint after cleaning. Check whether it’s vinyl, aluminum, wood, or fiber cement—each one needs a slightly different touch.
- Vinyl/Aluminum: Usually clean and seal. If it’s badly faded, specialty vinyl paint can work, but that’s a bigger project.
- Wood/Fiber Cement (Painted): Clean it well, prime it, then repaint.
- Safety First: Wear eye protection and gloves when you’re using cleaning solutions, especially bleach or stronger detergents. If you’re on ladders, make sure they’re planted solid on level ground.
-
Protect Your Surroundings – Cover plants, windows, and fixtures. You don’t want cleaner splashing on your petunias or etching the windows. Throw down tarps or plastic sheeting over landscaping, outlets, light fixtures, and anything else you don’t want soaked with water or chemicals. Mask windows and doors if overspray’s a concern. It takes a few extra minutes and saves a pile of cleanup later.
-
Mix Your Cleaning Solution – Get the right blend for effective cleaning. For most chalking, I use a mix of household bleach and a good exterior cleaner. A common ratio is about one part household bleach (5.25% sodium hypochlorite) to three parts water, plus a squirt of dish soap so it hangs on better. There are also commercial siding cleaners made specifically for chalking and oxidation. Follow the label on those. Don’t get carried away with the bleach, especially on colored vinyl, because it can lighten the finish.
- For stubborn areas: You might need a little stronger mix, but test a hidden spot first.
- Eco-friendly options: Oxygen bleach cleaners (like OxiClean) are a decent alternative if you’re worried about plants or harsh chemicals, though they’ll usually need more scrubbing.
-
Apply the Cleaner – Let it soak, but don't let it dry. Spray or brush the solution onto a manageable section, starting at the bottom and working up. That helps cut down on streaks. Use a garden sprayer for larger runs, or a soft-bristle brush for smaller trouble spots. Let it sit for about 10-15 minutes so it can loosen that chalky film. Keep it wet. Don’t let it dry on the siding, especially if the sun’s beating on it.
-
Scrub (If Necessary) – Sometimes elbow grease is required. Heavier chalking calls for a little muscle. A soft-bristle brush, like a car wash brush on an extension pole, works great. Scrub gently and work in small sections so you’re not just smearing residue around. You’ll see the chalk start coming off as you go.
-
Rinse Thoroughly – Crucial step to remove all residue. This is where a pressure washer can save you a lot of time, but don’t get reckless with it. Use a wide-angle tip, like a 25-degree or 40-degree fan tip, and keep the nozzle at least 12-18 inches away from the siding. Spray downward only. You don’t want to force water up behind the panels and start a moisture problem inside the wall. No pressure washer? A garden hose with a strong nozzle works too, but it’ll take longer and probably take more scrubbing. Rinse from top to bottom so the chalk and cleaner wash away clean. Keep going until the rinse water runs clear and your hand comes away clean.
-
Test for Cleanliness – The ultimate chalk test. Once a section’s rinsed and starts drying, run your hand over it. If you still get a decent amount of powder, the chalk’s still there. Go back to step 4 and clean it again. This part matters, especially if you’re painting. Anything left behind can wreck adhesion for new paint or sealant.
-
Allow to Dry Completely – Don't rush the next step. Give it time to dry all the way. Depending on humidity, temperature, and sunlight, that can take anywhere from 24 to 48 hours. Painting or sealing damp siding is asking for peeling and blistering. I know, waiting’s a pain. Still cheaper than doing it twice.
-
Apply Sealer or Primer/Paint – Protect your investment.
- For Vinyl/Aluminum: Once it’s dry and chalk-free, roll or spray on a clear acrylic sealant made for siding. It’ll bring back some sheen and add a protective layer. I like products with good UV inhibitors. One solid coat is usually enough.
- For Painted Surfaces (Wood/Fiber Cement): If you’re repainting, start with a high-quality exterior primer rated for chalky surfaces—even after cleaning, I like that extra insurance. Then put on two coats of premium exterior paint. Acrylic latex is my go-to because it flexes well and holds up. Look for paint with built-in mildewcides.
-
Clean Up – Don't leave a mess. Gather your tarps and rinse out your brushes and sprayers. Dispose of leftover chemicals according to local rules. Step back and take a look. The siding should look a whole lot better, and you’ve just bought yourself some extra years.
Common Causes
- UV Radiation: This is the main culprit. Sunlight breaks down the binders in paint and vinyl, and the pigment ends up on the surface. South- and west-facing walls always take the worst beating.
- Low-Quality Materials: Cheaper paint and siding usually have weaker resins and fewer UV inhibitors. They just won’t hold up as long as the good stuff.
- Age: Even top-shelf material wears out eventually. Years of weather exposure will lead to chalking sooner or later.
- Improper Application: If paint went on dirty or without proper primer, it’ll fail faster. Same goes for factory finishes that didn’t cure right.
- Environmental Pollutants: Less common than UV, sure, but airborne pollutants can still chew on siding finishes, especially in industrial areas. Usually it’s a side issue, not the main one.
Common Mistakes
- Painting Over Chalk: Classic DIY mistake. If you paint right over that powder without cleaning it off, the new coating won’t bond worth a darn. It’ll stick to the loose chalk, and before long you’ll be staring at peeling paint. Then you’re back on the ladder and mad at everybody.
- Using Too Much Pressure Washing: Hammering siding with a super-strong stream can damage the surface, especially vinyl. It can also shove water behind the panels and set you up for mold or rot in the wall cavity. Use a wide fan tip and keep your distance—a 2,000 PSI machine at 12 inches is overkill; a 1,500 PSI machine with a 25-degree tip from 18 inches away is usually plenty.
- Not Rinsing Enough: If you leave cleaner or dissolved chalk behind, it’ll cause problems later. New paint may not stick right, and you can end up with streaks or residue. Rinse it until the water runs clear.
- Ignoring the Forecast: Trying to paint or seal in damp, rainy, or humid weather is trouble waiting to happen. Moisture trapped under the finish leads to bubbling, peeling, and a lousy result. Check the forecast and give yourself at least 24-48 hours of dry weather.
- Using the Wrong Cleaner: A basic household cleaner might not touch bad chalking. On the flip side, a too-strong industrial cleaner can damage siding, especially some colored vinyl. Pick a cleaner made for exterior siding.
- Skipping the Test Swipe: I know, it feels too simple, but that hand swipe after cleaning is gold. It’s the fastest way to tell whether you’ve actually removed the chalk or just pushed it around. Don’t skip it.
Cost & Time Breakdown
| Task | DIY Cost | Pro Cost (Estimates) | Time (DIY) |
|---|---|---|---|
| Siding Cleaning | $30–$75 | $300–$800 | 2–4 hours |
| Pressure Washer Rental | $40–$60 (day) | Included | 0 hours |
| Sealant/Paint Prep | $20–$50 | Included | 1–2 hours |
| Sealing/Painting | $100–$400 | $1,000–$3,000+ | 3–8 hours |
| Total (Cleaning/Sealing) | $150–$500 | $1,300–$3,800+ | 6–14 hours |
(Costs are estimates for a typical 1,500-2,000 sq ft single-story home. Pro costs vary wildly by region and project complexity. Painting costs can be significantly higher for multi-story homes or extensive prep.)
Tips & Prevention
- Regular Cleaning: Don’t wait until the chalking gets heavy. A yearly wash with mild soap and water can clear off surface grime and slow the whole process down. Kind of like washing your truck—it keeps the finish looking better longer.
- Quality Matters: If you’re replacing siding or choosing paint, spend the money on good product. Better UV inhibitors, stronger binders, longer life. It costs more upfront, but you’re buying durability.
- Strategic Planting: Trees and shrubs can shade siding, especially on south- and west-facing walls. Just don’t crowd the house; you still need airflow so moisture doesn’t get trapped.
- Annual Inspection: Walk the house once a year. Look for chalking, fading, or any other wear. Catching it early keeps the fix simpler and cheaper.
- Consider Color: Lighter colors usually show chalking less and absorb less heat, which can help the finish last longer. Dark colors can look sharp, but they sometimes speed up finish breakdown.
- Professional Coatings: If vinyl keeps chalking up on you, there are specialized coatings or “restorers” pros can apply. They’re not cheap, but they can stretch the life and improve the look of siding that’s not quite ready for replacement.
When to Call a Professional
Look, I’m all for DIY, but sometimes you’ve got to bring in a pro. If the chalking covers the whole house, especially on a multi-story place, that’s a big lift. You’re hauling ladders, working around pressure washers, and dealing with unstable footing—it gets sketchy fast. And if you’ve got other issues like stubborn mold, mildew, or visible damage to the siding panels, a pro can sort out what’s really going on. They’ve got the right gear, they know how to handle tricky heights, and they’ll usually spot the stuff homeowners miss, like bad sheathing or flashing. Don’t gamble with a fall or a half-baked repair when the house is on the line.
Related Articles
Keep troubleshooting with these hand-picked guides from FixlyGuide:
- The Urgent Truth About Missing Roof Shingles (And Your 3-Step Fix) — High winds can rip shingles off your roof, exposing your home to immediate water damage – here’s how to assess, temporary patch, and plan p…
- The Invisible Hail Damage Mistake Most Homeowners Make (And How to Spot It) — Discover how to accurately assess hail damage on your home's siding, understand its hidden impacts, and perform essential repairs to protec…
- The Mystery of the Loose Siding Panel: Why It Flaps and How to Fix It Right — Loose siding panels aren't just an eyesore; they can lead to serious water damage if not addressed quickly. Learn why your siding is flappi…
- The 3 Hidden Reasons Your Deck Boards Warp (and the Easy Fixes) — Deck board warping can ruin your outdoor space, but understanding the root causes and applying simple fixes can restore your deck's beauty.
- Missing Shingles? The Real Trouble Is Under Your Roof — After a storm, missing shingles seem like a simple fix. But the high winds that tore them off likely broke the seals on surrounding shingle…
- The Secret to Banishing Old Pet Odors (Even When You Can't Find the Stain) — Don't let hidden pet accidents ruin your home's fresh scent; this guide reveals how to find and eliminate old pet odors and their invisible…
Should you do this yourself?
Answer five quick questions before you start. Safety outranks savings every time.
Your experience with work like this
How high do you have to work?
Does the job involve any of these?
Will it need a permit?
Specialty tools
Free and instant. Educational guidance only — not a quote, inspection, or professional diagnosis.
Estimate your own project cost
National averages are a starting point. Enter your details for a range that fits your house.
Interior paint estimator
- Paint$96
- Supplies (tape, rollers, drop cloth)$35
- Estimated total (DIY)$131
Hiring a pro? Add roughly $1.50–$4.00/sq ft for labor depending on prep work and trim detail.
Educational estimate only — always confirm with written local bids.
What should this project cost?
Enter your project details for a realistic cost range before you call anyone.
Spot repairs commonly run $400–$1,800; full replacement typically $9,000–$18,000 for an average home.
- Regional adjustment
- National average
- Labor share (typical)
- ~$2,948
- Quotes to collect
- 3 written estimates
Educational estimate based on national averages — not a binding quote. Always confirm with written local estimates.
Decide what your roof needs
Two minutes of questions turns "something is wrong up there" into a clear next step.
- Repair or replace your roof?Answer 10 questions about age, leaks, and damage to get a clear next step.Open
- Compare contractor quotesScore up to four bids on price, warranty, licensing, and timeline.Open
- Get local estimatesSend one request and compare written estimates from vetted pros.Open
Free, no signup required. Estimates are educational guidance, not a quote or an inspection.
Get the print-ready PDF of this guide
A clean, ad-free, printable version you can keep on your phone or pin to the workshop wall. Free with a FixlyGuide account.
- Print-optimized layout
- Tools, materials & every step included
- Saved to your account
Frequently asked questions
What exactly is chalking on siding?+
Chalking is that powdery residue you find on your siding, often matching its color. It happens when the sun's UV rays break down the binder in the paint or vinyl finish, releasing pigment particles like titanium dioxide to the surface. It's a sign of material degradation.
Is chalking on siding harmful to my home?+
While primarily a cosmetic issue, significant chalking indicates the protective layer of your siding is degrading. This can leave the underlying material more vulnerable to moisture, mold, and further damage over time. It's best to address it to maintain your home's integrity.
Can I just paint over chalky siding?+
Absolutely not. Painting directly over chalky siding is a common mistake. The new paint won't adhere to the loose chalk, leading to premature peeling and flaking. You must thoroughly clean and remove all chalking first for proper adhesion.
How often should I clean my siding to prevent chalking?+
A good annual cleaning with mild soap and water can go a long way. This removes surface grime and slows down the chalking process by preventing buildup. It's a simple preventative measure that can extend your siding's life.
What's the best cleaning solution for chalky siding?+
A mix of one part household bleach (5.25%) to three parts water, plus a squirt of dish soap, often works well. Commercial siding cleaners are also effective. Always test in an inconspicuous area and follow product instructions carefully.
Will pressure washing remove chalking?+
Yes, but use caution. A pressure washer can effectively remove chalk, but you need a wide-angle tip (25-40 degrees) and must keep it 12-18 inches from the surface. Spray downwards to avoid forcing water behind the panels, which can cause serious moisture issues.
How long does the fix typically last?+
If cleaned and sealed/painted properly with quality materials, a good fix can last anywhere from 5 to 10 years, sometimes more. Regular maintenance and using UV-resistant products will extend its longevity.
When should I consider replacing siding instead of fixing chalking?+
If your siding is heavily chalked, severely faded, cracked, warped, or shows signs of widespread structural damage, a fix might only be a temporary band-aid. At that point, the cost of extensive repairs might outweigh the benefits, and replacement could be the more economical long-term solution.
Can color choice impact chalking?+
Yes, it can. Lighter siding colors tend to absorb less UV radiation and often show chalking less visibly than darker colors. While not a complete prevention, choosing a lighter shade can contribute to a longer-lasting appearance.
What's the difference between cleaning and sealing chalked vinyl siding?+
Cleaning removes the chalky residue from the surface. Sealing, which you do *after* cleaning, applies a new protective, often clear, coating over the now-clean vinyl. This sealant helps restore some sheen and provides a fresh barrier against UV degradation, essentially rejuvenating the finish.
Discussion
Loading comments…