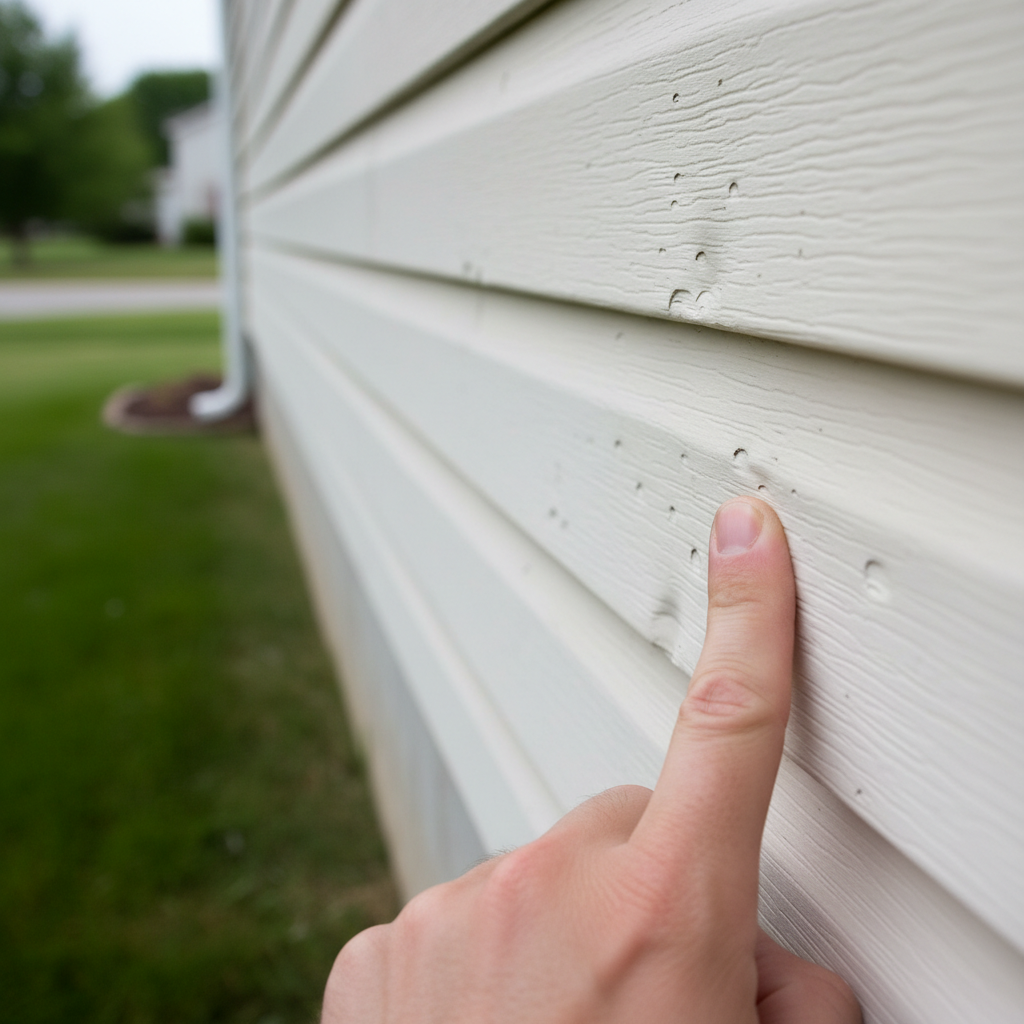
- Start with the ground: Check for displaced siding fragments, paint chips, or unusually large amounts of granular material if you have asphalt shingles (a sign of potential roof damage that might correlate with siding impact).
- Examine all sides: Hail often comes at an angle, so one side of your house might show more damage than others. Pay close attention to corners, trim, and areas around windows and doors.
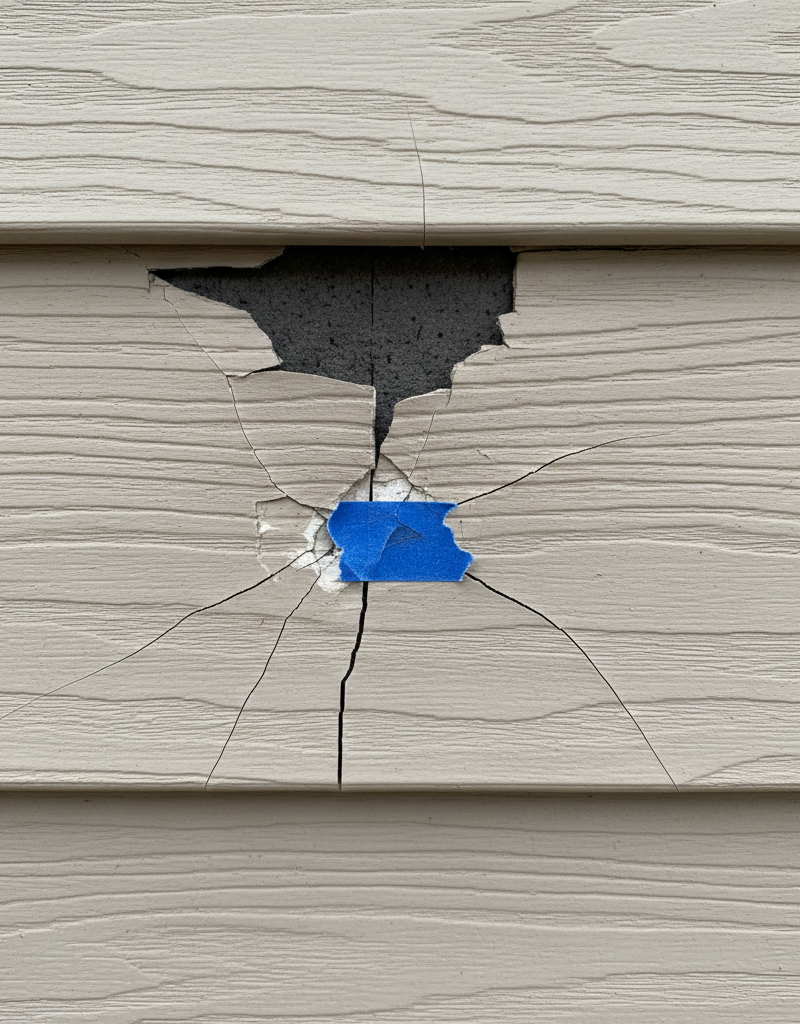
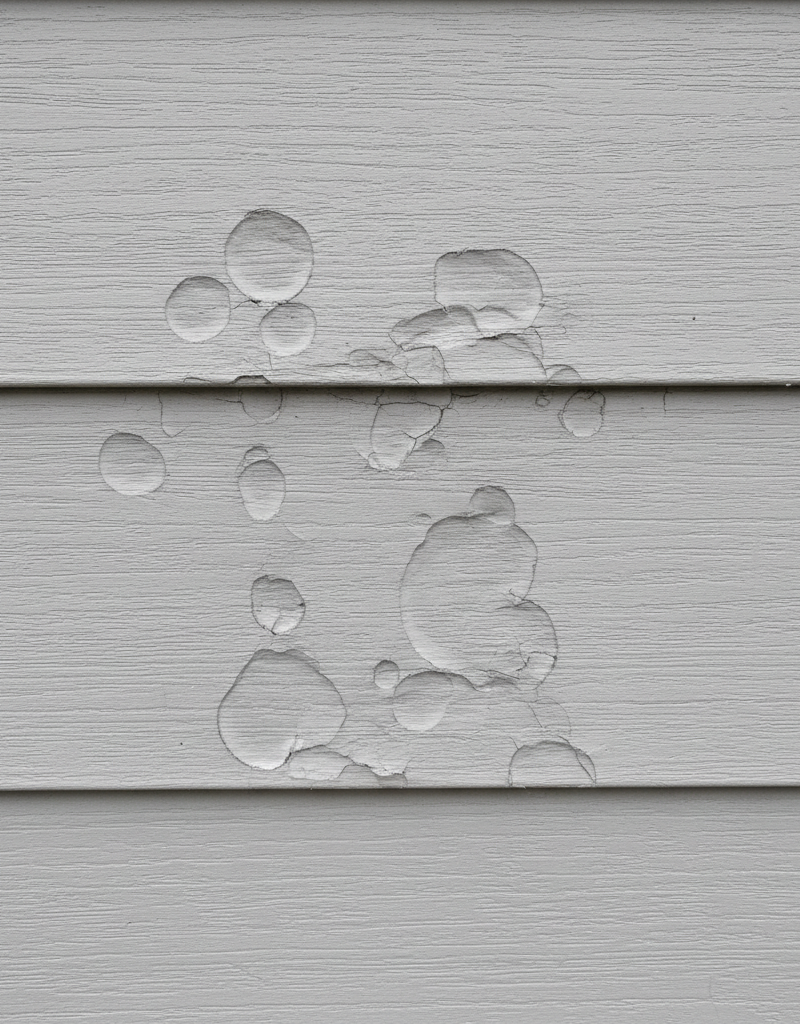
- Look for: Visible cracks, holes, chips, dings, dents, and split sections of siding. Photograph and video everything you see, no matter how small.
Roofing · Hail damage
| Project category | Roofing |
|---|---|
| Problem type | Hail damage |
| Trade required | Roofing |
| Urgency | Urgent — within days |
| Safety risk | Moderate safety risk |
| DIY suitability | Licensed pro only |
| Cost category | High cost |
| Typical timeline | Inspection within days; claim and build often several weeks |
| Contractor type | Licensed roofing contractor |
Repair option
Spot repair for isolated slopes with limited impact marks.
Replacement option
Insurance-scope replacement when impacts exceed the carrier threshold per square.
Common causes
- Impact bruising that knocked granules loose
- Cracked mat under the surface, not visible from the ground
- Damaged soft metals: vents, gutters, flashing
Relevant tools:repair or replace roofcompare quotes
Published July 20, 2026Last updated August 18, 2026
Tools & materials you'll need
Affiliate linksAs an Amazon Associate FixlyGuide earns from qualifying purchases — at no extra cost to you. Prices and availability are accurate as of publication and subject to change.
Quick Answer
After a hail storm, the most common mistake homeowners make is not acting quickly enough or not documenting damage properly. Immediately assess your siding for visible dents, cracks, or fractured panels, then thoroughly document everything with photos and videos. Contact your insurance provider promptly to understand your policy and file an official claim, ensuring all timelines are met to avoid denial.
The Problem
Hailstorms can wreak havoc on your home's exterior, and siding is often a primary target. While some damage, like large cracks or gaping holes, is immediately obvious, much of the harm can be subtle – small dents, fractured sections, or granular loss on vinyl siding that's easy to overlook. The true problem isn't just the damage itself, but the homeowner's response to it. Many homeowners either underestimate the extent of the damage, delay inspection, or fail to follow proper insurance procedures. This can lead to unaddressed vulnerabilities that worsen over time, causing water infiltration, mold, and rot in the underlying structure, ultimately resulting in much more expensive repairs down the line. Furthermore, delays in reporting can jeopardize your insurance claim, leaving you to shoulder the full repair cost.
How It Works
When hail strikes siding, the impact transfers kinetic energy to the material. The extent and type of damage depend on several factors: the size, density, and velocity of the hailstones; the type and age of your siding material; and the angle of impact.
Vinyl siding, for example, is made from PVC plastic. Hail impact can cause brittle vinyl to crack, particularly in colder weather when the material is less flexible. Even without a visible crack, a strong impact can weaken its structural integrity, making it more prone to future damage or thermal expansion issues. You might see small, crescent-shaped fractures or chips at the impact point. Over time, these small fractures can expand with temperature changes, allowing water to penetrate.
Aluminum siding is softer and more likely to dent. Hail will leave circular indentations or pockmarks on the surface. While these might seem cosmetic, serious dents can compromise the siding's protective coating, leading to oxidation and corrosion. Larger, sharper hailstones can even puncture aluminum, creating direct entry points for water.
Fiber cement siding, a blend of cement, sand, and cellulose fibers, is quite durable but not impervious. Severe hail can chip the painted surface, exposing the core material, or cause spiderweb-like cracks. If moisture gets into these cracks, it can lead to delamination and deterioration of the fiber cement boards.
Wood siding, whether clapboard or shingles, can suffer dings, splintering, or even deep gouges from hail. These open wounds in the wood make it highly susceptible to rot, insect infestation, and paint failure.
In all cases, the primary concern beyond cosmetic issues is compromised weatherproofing. Siding's main job is to protect your home's sheathing and interior from moisture. Even a seemingly minor crack or dent can allow water to seep behind the siding, where it can be absorbed by the wood sheathing, studs, and insulation. This hidden moisture can lead to mold growth, wood rot, reduced insulation efficiency, and even structural damage over months or years. Understanding how hail interacts with your specific siding material helps you identify damage and appreciate the urgency of proper assessment and repair.
Step-by-Step Fix
1. Prioritize Safety – Before any inspection, ensure the storm has fully passed and it's safe to go outside.
- Look for downed power lines, standing water near electrical outlets, or structural instability. If any of these are present, do not proceed and contact emergency services.
- Wear sturdy shoes with good grip, especially if using a ladder. Consider a hard hat and safety glasses if there's any risk of falling debris.
2. Perform a Ground-Level Visual Inspection – Walk around your entire home, looking for obvious signs of damage.
- Start with the ground: Check for displaced siding fragments, paint chips, or unusually large amounts of granular material if you have asphalt shingles (a sign of potential roof damage that might correlate with siding impact).
- Examine all sides: Hail often comes at an angle, so one side of your house might show more damage than others. Pay close attention to corners, trim, and areas around windows and doors.
- Look for: Visible cracks, holes, chips, dings, dents, and split sections of siding. Photograph and video everything you see, no matter how small.
3. Conduct a Close-Up Siding Examination – Use a ladder cautiously to get closer to higher sections, but always prioritize safety.
- Safety Note: If you are uncomfortable or unstable on a ladder, hire a professional inspector. Never overreach or place a ladder on uneven ground. Have a spotter if possible.
- Feel for subtle damage: Run your hand along vinyl siding – you might feel small indentations or rough spots that aren't immediately visible. On aluminum, look for minor dimpling.
- Check joints and seams: These areas are often weaker and more susceptible to splitting or fracturing from impacts.
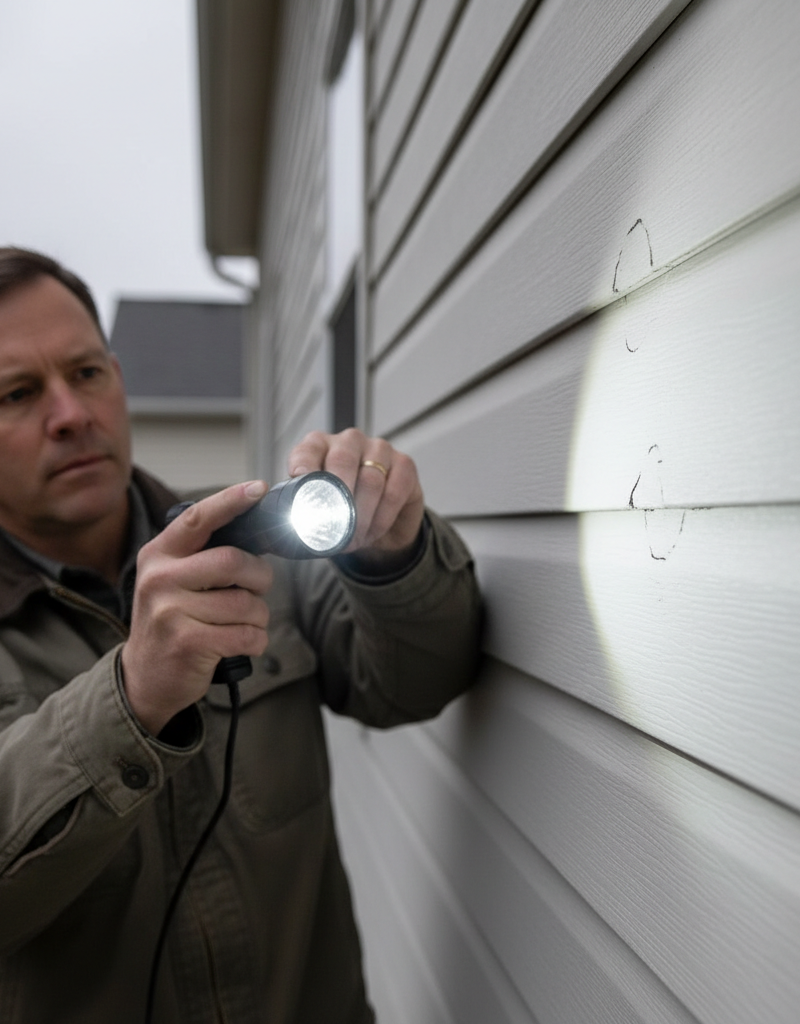
- Document EVERYTHING: Take high-resolution photos and videos from multiple angles. Include close-ups with a ruler for scale if possible. Note the date and time. This documentation is crucial for your insurance claim.
4. Assess Interior for Secondary Damage – Check inside your home for any signs that water has penetrated.
- Look for: Water stains on ceilings, walls, or near windows and doors. Feel for dampness or soft spots.
- Check attic: If accessible, use a flashlight to look for leaks, wet insulation, or water marks on the roof decking directly underneath damaged siding areas.
- Record: Document any interior damage with photos and videos as well, noting the location and severity.
5. Temporarily Protect Exposed Areas – If you have significant holes or detached siding, take immediate steps to prevent further water intrusion.
- Safety Note: Do not attempt roof repairs yourself if you are not experienced or if the roof is steep/wet. This step primarily applies to easily accessible siding sections.
- Cut and secure tarps: Use heavy-duty tarps or plastic sheeting to cover large damaged areas. Secure them with duct tape or wood strips and screws/nails if possible, ensuring the top edge is under uncompromised siding to create a shingle effect and shed water away.
- Caulk small cracks: For minor cracks, a temporary bead of exterior-grade silicone caulk can provide immediate protection until permanent repairs are made. This is a temporary measure only.
6. Contact Your Insurance Company – Initiate the claims process as soon as possible.
- Review your policy: Understand your deductible, coverage limits, and what types of storm damage are covered. Some policies have specific timelines for reporting hail damage, often within 30 days.
- File the claim: Provide your documented evidence (photos, videos, notes) to your adjuster. Be honest and thorough in your description of the damage.
- Schedule an inspection: Your insurance company will likely send an adjuster to assess the damage. Be present during the inspection and point out all the areas you've identified.
7. Obtain Repair Estimates – Get at least two to three detailed estimates from reputable, licensed contractors.
- Choose pros wisely: Look for contractors experienced in hail damage repair and who are familiar with the insurance claims process. Verify their licenses, insurance, and references.
- Compare estimates: Ensure they are detailed and specify the materials, scope of work, and timeline. Don't automatically go with the cheapest bid; consider reputation and thoroughness.
8. Proceed with Repairs – Once your claim is approved and you've selected a contractor, schedule the repairs.
- Monitor progress: Stay in communication with your contractor throughout the repair process. Take photos of the repairs in progress if you want to.
- Final inspection: Before making the final payment, perform a thorough inspection of the completed work to ensure it meets your expectations and the agreed-upon scope.
Common Causes
- Hail Impact: The most obvious cause, resulting in dents, cracks, and punctures. Large, dense hailstones traveling at high velocities cause the most severe damage.
- Wind-Driven Debris: Strong winds accompanying hailstorms can pick up branches, lawn furniture, or other objects and propel them into your siding, causing impact damage that might be confused with direct hail damage.
- Pre-Existing Weaknesses: Older siding, siding exposed to prolonged UV radiation, or poorly installed siding is more brittle or less securely fastened, making it more susceptible to hail damage than new, properly installed materials.
- Cold Weather Brittleness: Vinyl siding becomes more brittle in cold temperatures. Hailstorms occurring in colder seasons (late fall, winter, early spring) can cause vinyl to crack more easily upon impact.
- Improper Siding Material for Climate: In areas prone to frequent severe hailstorms, certain siding materials (like very thin vinyl) may be inadequate for long-term durability, leading to more frequent damage.
Common Mistakes
- Delaying Inspection: Waiting too long to inspect your siding means minor damage can worsen, and your insurance claim might be denied due to delayed reporting or the inability to prove the damage was from a specific event.
- Underestimating Damage: Dismissing small dents or cracks as merely cosmetic. These can be entry points for water, leading to hidden rot and mold that are far more costly to fix.
- Poor Documentation: Not taking enough detailed photos and videos from various angles and distances. Weak documentation can make it harder to justify your claim to the insurance company.
- Ignoring Other Exterior Elements: Focusing only on siding and forgetting to check gutters, windows, window screens, and nearby outdoor HVAC units or light fixtures for hail damage.
- Cleaning Before Inspection: Tempting as it might be, cleaning the siding before your insurance adjuster sees it can remove evidence or make subtle damage less apparent.
- Hiring the First Contractor: Rushing to hire the first contractor who knocks on your door after a storm. Always get multiple estimates and thoroughly vet contractors for licenses, insurance, and references.
- Attempting Complex DIY Repairs: Tackling extensive siding replacement or high-up repairs without proper experience or safety equipment. This can lead to injury, further damage, or voided warranties.
Cost & Time Breakdown
| Task | DIY cost | Pro cost | Time |
|---|---|---|---|
| Initial Inspection | $0 | $0–$250 | 1–3 hours |
| Temporary Tarp/Seal | $20–$50 | N/A | 1–2 hours |
| Insurance Claim Process | $0 | N/A | 1–3 weeks |
| Patch/Replace 1-2 Siding Panels | $30–$100 | $200–$500 | 2–4 hours |
| Extensive Siding Repair (per sf) | $2–$6 per sq ft | $5–$15 per sq ft | Days to weeks |
| Full Siding Replacement | N/A | $10,000–$30,000+ | 1–3 weeks |
Tips & Prevention
- Regular Inspections: Periodically inspect your siding, especially after severe weather, for any signs of wear, cracks, or loose panels, which can exacerbate hail damage.
- Keep Gutters Clean: Clogged gutters can cause water to overflow and seep behind siding, weakening its resistance to impacts over time.
- Maintain Landscaping: Trim trees and shrubs that are close to your house to prevent branches from becoming projectiles during high winds and hailstorms.
- Consider Impact-Resistant Siding: If you live in a hail-prone area, consider upgrading to impact-resistant siding materials (e.g., thicker vinyl or specialized fiber cement) when it's time for replacement.
- Review Insurance Annually: Understand your homeowner's insurance policy, coverage limits, and deductible before a storm hits. Knowledge is power when filing a claim.
- Post-Storm Quick Check: After any significant hailstorm, do a quick walk-around your property to identify immediate, obvious damage so you can act quickly.
When to Call a Professional
There are several critical situations where calling a licensed professional is not just recommended, but essential. If you observe any significant structural damage to your siding, such as large holes that expose the underlying sheathing, or if multiple panels are detached and flapping, a professional contractor should be called immediately. Similarly, if your ladder inspection reveals extensive, widespread damage that goes beyond a few isolated dents or cracks, attempting DIY repair can be overwhelming and lead to further issues. Professionals have the necessary safety equipment, experience with various siding materials, and expertise in navigating insurance claims. You should also call a pro if you suspect water has penetrated the siding and caused interior damage like ceiling stains or mold, as this indicates a more complex repair involving moisture mitigation and potential structural fixes. Finally, if the damage is on a second story or higher, or requires specialized tools you don't possess, save yourself the risk and call in the experts. They can ensure the job is done safely and correctly, protecting your home's integrity and your investment.
Related Articles
Keep troubleshooting with these hand-picked guides from FixlyGuide:
- Is That Hail Damage on Your Siding? 5 Hidden Signs Most Homeowners Miss — Discover how to inspect your siding for hidden hail damage, understand the different types, and navigate the repair or replacement process.
- The #1 Mistake Homeowners Make After Finding Missing Shingles (And How to Fix It Right) — Discover the crucial steps to take after a storm rips shingles from your roof, ensuring a proper, lasting repair and preventing costly futu…
- The #1 Gutter Mistake You're Making (And 3 Hidden Causes of Overflow) — Overflowing gutters in heavy rain are often a sign of a deeper issue than just debris, leading to potential foundation damage and costly re…
- The 3 Hidden Reasons Your Gutters Fail in Heavy Rain (It’s Not Just Leaves) — Overflowing gutters during heavy rain often stem from a few common, yet overlooked, issues beyond simple leaf clogs, leading to potential s…
- Is Your Gutter Sagging After Every Storm? The Hidden Flaw Most Homeowners Miss — Discover the overlooked reason your gutters sag after every storm and learn the lasting fix that most homeowners miss.
- The 4 Hidden Reasons Your Chimney Leaks in Rain (And the Smart Fixes) — A leaky chimney during rain can hint at several underlying issues, from a faulty chimney cap to damaged flashing, all of which require prom…
Should you do this yourself?
Answer five quick questions before you start. Safety outranks savings every time.
Your experience with work like this
How high do you have to work?
Does the job involve any of these?
Will it need a permit?
Specialty tools
Free and instant. Educational guidance only — not a quote, inspection, or professional diagnosis.
Questions to ask before you sign
Ask every contractor the same questions and the cheapest bid stops looking cheapest. Check them off as you go — your progress is saved on this device.
Free, no signup. Bring this to every walkthrough so you compare bids on the same terms.
What should this project cost?
Enter your project details for a realistic cost range before you call anyone.
Spot repairs commonly run $400–$1,800; full replacement typically $9,000–$18,000 for an average home.
- Regional adjustment
- National average
- Labor share (typical)
- ~$2,948
- Quotes to collect
- 3 written estimates
Educational estimate based on national averages — not a binding quote. Always confirm with written local estimates.
Fixly Project Decision Box
- DIY difficulty
- Professional Recommended
- Estimated time
- Inspection 1–2 hours · repairs 1–3 days
- Cost level
- High
Main tools / materials
- Binoculars for a ground-level look
- Flashlight for attic checks
- Moisture meter
- Roofing cement (temporary patch only)
When to stop and call a pro
- Active leak near lights, fans, or any wiring
- Sagging, bulging, or water-filled ceiling
- Steep, wet, or two-story roof — do not climb it
- Storm or hail damage you plan to claim on insurance
Need professional help?
Free roof assessment first — no phone calls until you ask for them.
Get Local Roofing HelpGet help with your roof now
Stay off the roof. These free tools help you protect the house and reach the right professional fast.
- Emergency repair checklistThe first steps that limit damage before a pro arrives.Open
- Repair or replace your roof?Answer 10 questions about age, leaks, and damage to get a clear next step.Open
- Get local estimatesSend one request and compare written estimates from vetted pros.Open
Free, no signup required. Estimates are educational guidance, not a quote or an inspection.
Frequently asked questions
How do I know if hail damaged my siding?+
Look for visible signs like cracks, chips, holes, or dents on the siding panels themselves. On vinyl, you might see crescent-shaped fractures. On aluminum, look for pockmarks or indentations. Also, check for granules from your roof in your gutters or on the ground, which can indicate impacts.
Should I file an insurance claim for hail damage?+
Yes, if you suspect significant damage. Even seemingly minor damage can lead to costly water intrusion over time. Document everything thoroughly with photos and videos, then contact your insurance provider as soon as possible to understand your policy and initiate a claim.
What if only one side of my house has hail damage?+
It's very common for hail damage to be concentrated on one side of the house, usually the side facing the direction the storm came from. This doesn't lessen the validity of your claim, but ensure you inspect all sides as a precaution.
Can I repair hail-damaged siding myself?+
Minor repairs, like replacing a single damaged vinyl panel or patching a small crack in older siding, might be possible for a skilled DIYer. However, extensive damage, damage on upper stories, or any compromise to your home's weather barrier should be handled by a licensed professional to ensure proper repair and prevent future issues.
Discussion
Loading comments…