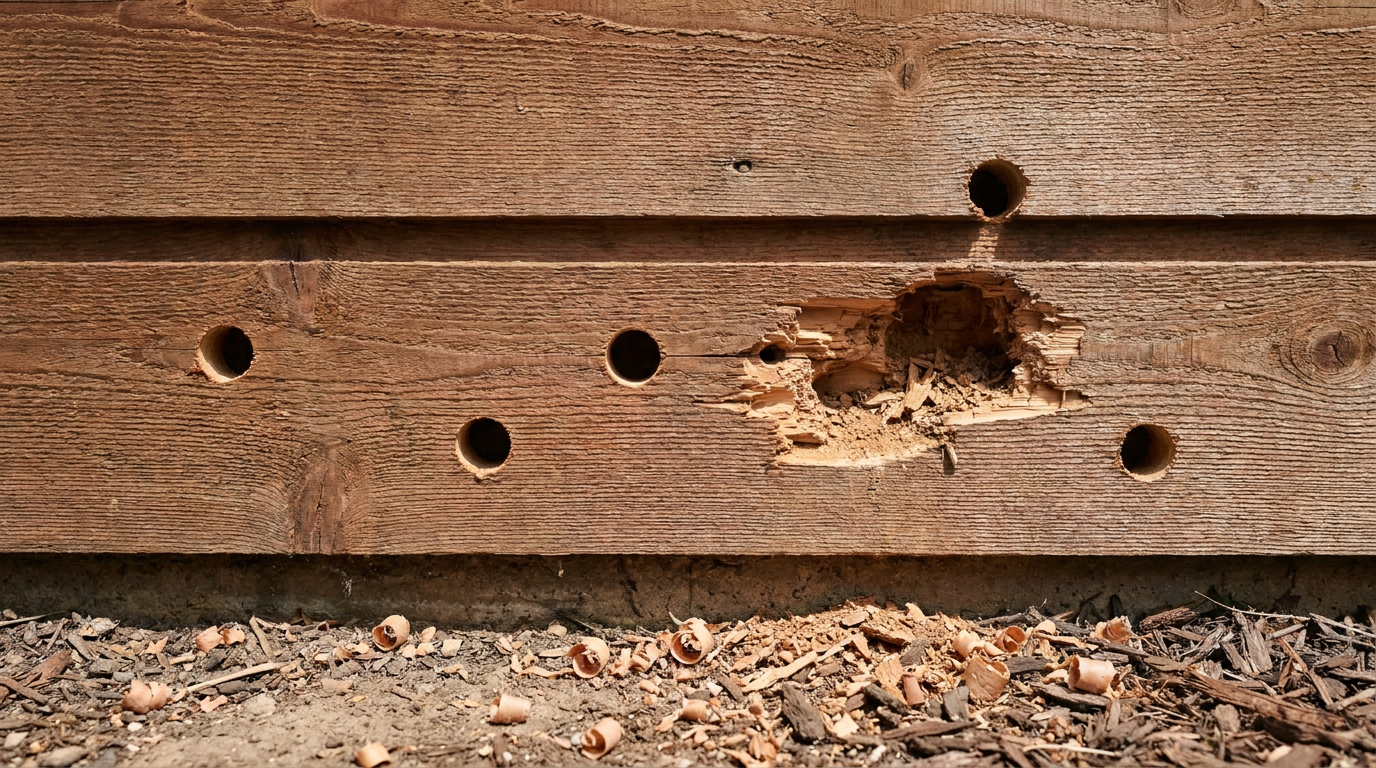
- Insect Infestations: Carpenter bees are a big one. They drill neat 1/2-inch holes to nest, and woodpeckers make bigger, rougher holes to get to the larvae. Termites and carpenter ants inside the wall can bring them around too.
- Soft Wood Siding: Cedar, redwood, and pine look great, but they’re soft. To a woodpecker, that can look like an easy dead tree to excavate, especially on homes near wooded areas.
- Resonant Surfaces: That metal chimney cap or aluminum gutter corner makes a heck of a drum. If the tapping is extra loud and metallic, the bird’s just trying to claim territory.
- New Construction: In new developments, the natural trees woodpeckers used for feeding and nesting are gone, so they adapt and start working on the houses instead.
Roofing · Aging roof
| Project category | Roofing |
|---|---|
| Problem type | Aging roof |
| Trade required | Roofing |
| Urgency | Planned project |
| Safety risk | Low safety risk |
| DIY suitability | Pro recommended |
| Cost category | High cost |
| Typical timeline | Plan 4–12 weeks ahead for scheduling and material lead time |
| Contractor type | Licensed roofing contractor |
Repair option
Maintenance repairs to buy a season or two while you budget.
Replacement option
Planned replacement, which is almost always cheaper than a leak-driven emergency.
Common causes
- Normal weathering past the shingle service life
- Poor attic ventilation cooking the shingles from below
- Repeated repairs on the same slopes
Relevant tools:repair or replace roofproject cost estimatorhome improvement material prices
Published October 5, 2026Last updated October 5, 2026
Tools & materials you'll need
Affiliate linksAs an Amazon Associate FixlyGuide earns from qualifying purchases — at no extra cost to you. Prices and availability are accurate as of publication and subject to change.
Quick Answer
Woodpeckers usually drill into siding for one of four reasons: they’re hunting insects living in your walls, they’re trying to make a nesting cavity, they’re stashing food, or they’re drumming to mark territory. The trick is figuring out which one you’re dealing with, fixing the damage the right way with epoxy or a siding patch, and then getting ahead of it with deterrents like reflective tape, fake owls, or professional bird netting before they settle in and make a habit of it.
The Problem
You hear it before you see it. That fast, rhythmic, surprisingly loud tapping on the side of your house, usually just after sunrise. Then you spot the damage: a clean, dime-sized hole—or sometimes a nasty fist-sized crater—in your wood or fiber cement siding. Other times it’s just a bunch of smaller pockmarks where the bird was testing the waters.
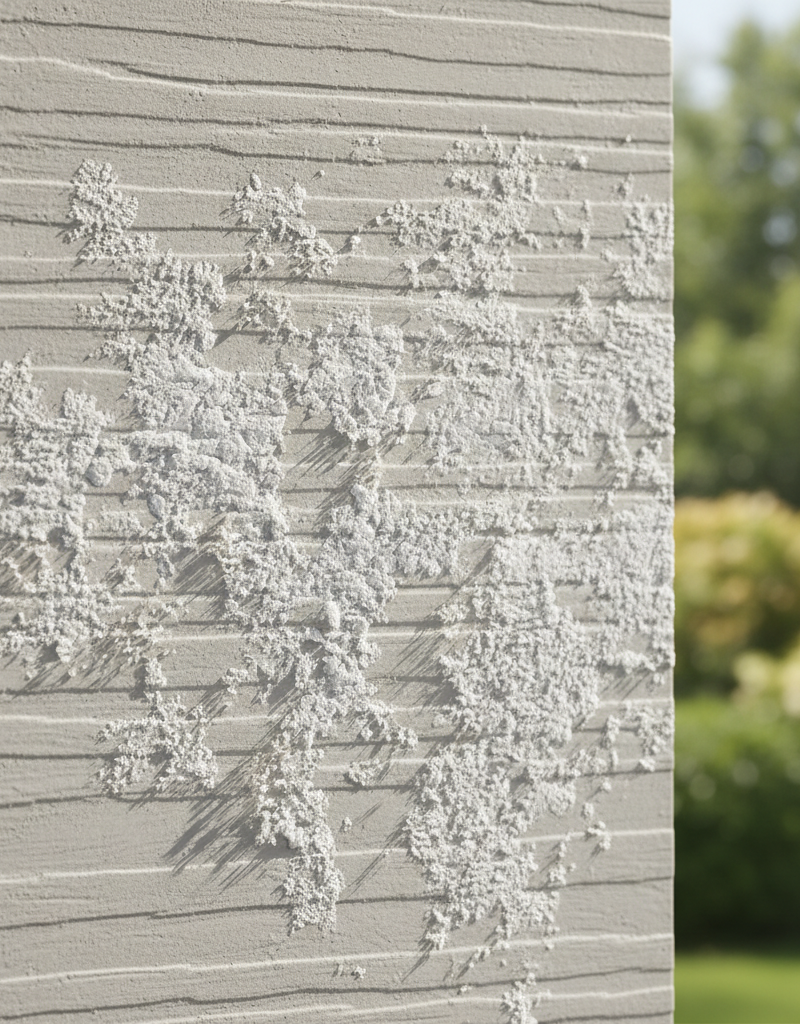
This isn’t just a looks issue. One woodpecker can rack up thousands of dollars in damage. Those holes open the door for water, insects, and cold air to get into the wall assembly, and that’s how you end up with wood rot, mold, and energy bills that’ll make you grit your teeth. EIFS (stucco-like) siding can get hit hard too, and those birds can absolutely shred the foam backing. And since woodpeckers are protected under the Migratory Bird Treaty Act, you can’t trap, hurt, or kill them—you’ve got to scare them off.
How Woodpeckers Think (And Why They Target Your House)
You’ve got to think like the bird here. Woodpeckers don’t go after houses because they’re mad at you; they’re following instinct. If you want them gone, you need to know what they’re after in the first place.
There are four main reasons a woodpecker takes an interest in your place:
- It's a Buffet: This is the one I see most, and it’s the one that should get your attention. Your walls may be holding an insect colony. Carpenter bees, ants, or termites tucked inside the wall cavity are a protein-packed meal for a woodpecker. The bird hears them moving around and starts drilling to get at the food. If you see this, the holes are just the symptom—you’ve got a bigger pest issue on your hands, and you need to deal with it right away.
- It's a Nursery: In spring, woodpeckers are looking for a safe place to carve out a nesting cavity. Soft siding like cedar or redwood can look to them like a dead tree—what folks call a snag. Nesting holes are usually bigger and more worked over than feeding holes.
- It's a Pantry: Some species, like the Acorn Woodpecker, drill hundreds or even thousands of small, snug holes called "granaries" to store acorns and nuts for winter. They’re turning your siding into their own little storage unit.
- It's a Drum: Woodpeckers don’t sing; they drum. They hammer on resonant surfaces—your siding, gutters, or chimney cap—to stake out territory and attract a mate. It’s quick, loud, and usually hits the same spot every morning. Not much surface damage, but man, it’ll wear you out.
Knowing the difference matters. Drumming is mostly a noise nuisance; feeding usually points to an insect infestation. Nesting is a bigger structural deal. Before you start patching, watch the bird for a few days. What time does it show up? Is it pulling anything out? Is that hole getting deeper day by day?
Step-by-Step Fix
Alright, let’s fix it. You’re looking at three jobs here: scare the bird off, repair the hole, and keep it from coming back. Don’t patch anything until you’ve pushed the woodpecker on to the next place—otherwise you’re just giving it a fresh target.
Step 1: Investigate for Insects
- Tools: Flashlight, screwdriver or awl.
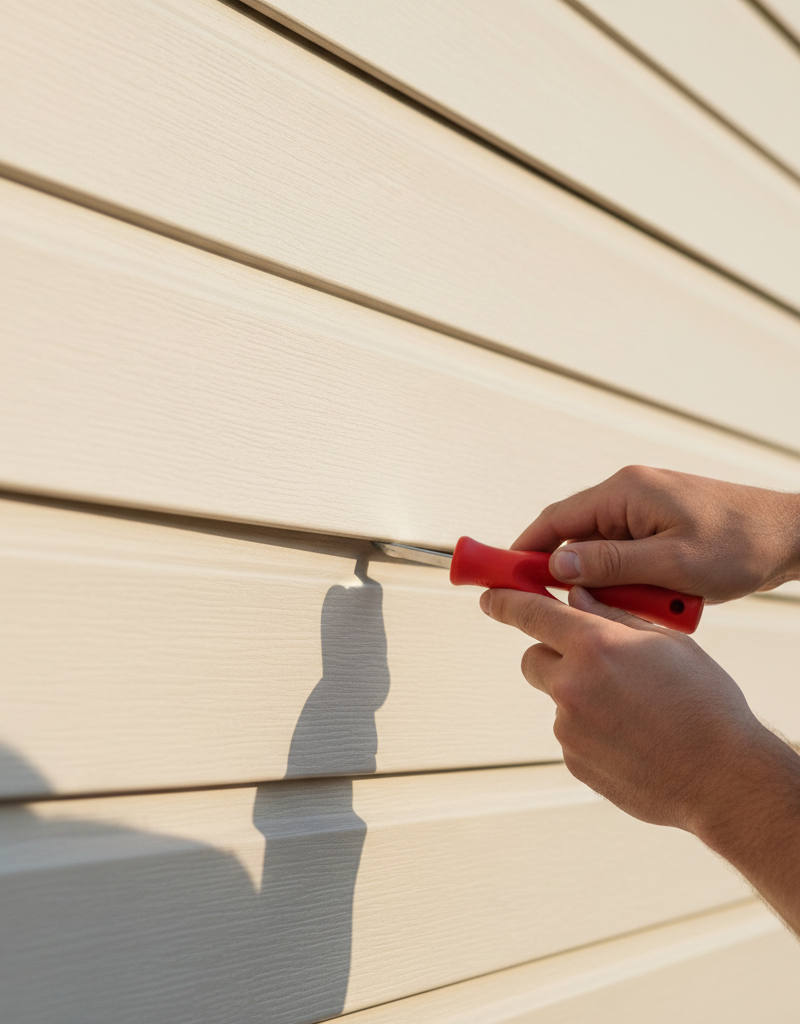
- Before you fill a single hole, you have to figure out whether the bird was feeding. Gently probe the edges of the woodpecker hole with a screwdriver. Look for sawdust-like frass (insect droppings), live bugs, or tunneling in the wood sheathing behind the siding. If you see signs of carpenter bees, termites, or ants, stop right there. Call pest control. If you patch it now, you’ll just trap the bugs inside and let them keep chewing.
Step 2: Deploy Deterrents (Immediately)
- Tools: Ladder, reflective tape, zip ties, fake owl/hawk decoy.
- The minute you see activity, get deterrents up. The whole point is to make your house feel like a bad place to hang around before that bird gets comfortable. Hang strips of holographic "scare tape" about 2-3 feet long near the damage. The flashing and rattling can spook them pretty fast. A big fake owl or hawk can help too, but only if you move it every 2-3 days—leave it sitting there and the bird will catch on. They’re not dumb.
Step 3: Clean and Prep the Hole
- Tools: Utility knife, wire brush, shop vacuum.
- Once you’re confident the birds and bugs are gone, then you can repair it. Use a utility knife to trim away loose, splintered siding around the hole. You want clean, solid edges for the patch to bite into. Then hit the inside of the hole with a wire brush to rough it up a little so the filler grabs better. Vacuum out the dust and debris. Don’t leave junk behind.
Step 4: Fill Small Holes (Under 1/2-inch)
- Tools: Exterior-grade wood filler or two-part epoxy, putty knife.
- For small, round holes, a good paintable wood filler works fine. If you want a tougher, more waterproof repair, I lean toward a two-part epoxy putty. Mix it per the instructions and pack it firmly into the hole with a putty knife. Overfill it just a bit since most fillers shrink a touch while curing.
Step 5: Scrape and Smooth the Filler
- Tools: Putty knife.
- While the filler still has some give, scrape off the extra and feather the edges flush with the siding. If you’ve got wood grain texture, you can fake it a little by dragging the edge of the knife or a small wire brush across the wet filler. Let it cure all the way—could be 1 hour to 24 hours depending on the product and the humidity. I pulled a water heater in Frisco last month that had exactly this kind of half-finished siding patch beside it, and you could tell somebody got impatient and painted too early. It looked rough.
Step 6: Sand the Patch
- Tools: 120-grit sanding sponge.
- After the filler gets rock-hard, lightly sand it smooth. Don’t get aggressive and chew up the surrounding siding—you’ll mess with the finish and texture. You’re just aiming for a clean blend, not a sculpture.
Step 7: Patching Large Holes (The "Dutchman" Patch)
- Tools: Oscillating multi-tool or circular saw, siding material, tape measure, construction adhesive.
- For a big shredded hole, filler won’t do the trick. You need a "Dutchman" patch. Measure carefully and cut a square or rectangle around the damaged area. An oscillating multi-tool gives you better control. Then cut a new piece of siding to fit that opening exactly. Run a bead of high-quality construction adhesive on the back of the patch, press it into place, and secure it with a few stainless steel siding nails. Caulk the seams with a paintable, exterior-grade sealant.
Step 8: Prime and Paint
- Tools: Exterior primer, color-matched exterior paint, small paintbrush.
- Last step: make it disappear. Prime the patched area. Don’t skip primer—it seals the patch and gives the topcoat something to stick to. After that dries, put on two coats of high-quality exterior paint matched to your siding. Dab the paint on instead of brushing it hard; that helps mimic the surrounding texture. If you get the color right, the repair’ll disappear from a few feet away.
Common Causes
- Insect Infestations: Carpenter bees are a big one. They drill neat 1/2-inch holes to nest, and woodpeckers make bigger, rougher holes to get to the larvae. Termites and carpenter ants inside the wall can bring them around too.
- Soft Wood Siding: Cedar, redwood, and pine look great, but they’re soft. To a woodpecker, that can look like an easy dead tree to excavate, especially on homes near wooded areas.
- Dark-Colored Stains: Some ornithologists think dark brown or dark red stains can make a house look more like a dead tree, which may pull in woodpeckers looking for nesting or drumming spots. Light-colored siding and natural finishes seem to get hit less often.
- Resonant Surfaces: That metal chimney cap or aluminum gutter corner makes a heck of a drum. If the tapping is extra loud and metallic, the bird’s just trying to claim territory.
- New Construction: In new developments, the natural trees woodpeckers used for feeding and nesting are gone, so they adapt and start working on the houses instead.
Common Mistakes
- Patching an active bug problem. This is the big one. If you fill a hole without killing the carpenter bees inside, they’ll just chew a new exit—and the woodpecker will be back. Always confirm and treat the infestation first.
- Using the wrong filler. Don’t grab that tub of drywall spackle from the garage. You need a quality exterior-grade filler or epoxy that can flex with the siding and stand up to rain and UV.
- Skipping the deterrents. Fixing the hole without chasing the bird off first is a waste of time. You’ve got to make the area unpleasant, or they’ll just attack the fresh repair.
- Not moving the decoys. A fake owl gets ignored fast—about 48 hours and it’s just yard décor. If you don’t move it every few days, the woodpeckers will figure it out.
- Painting without priming. Paint straight over filler or epoxy and it’ll peel, sometimes in just a few months. Primer is what gives you the bond you need.
Cost & Time Breakdown
Fixing woodpecker damage is usually a pretty cheap DIY job, as long as you don’t uncover a bigger structural or pest issue hiding behind the siding.
| Task | DIY Cost | Pro Cost (Handyman) | Time |
|---|---|---|---|
| Inspect & Deploy Deterrents | $15–$30 (for tape/decoy) | $75–$150 (trip charge) | 30 minutes |
| Repair a Few Small Holes | $20–$40 (epoxy/filler, paint) | $150–$300 | 1–2 hours |
| Replace One Damaged Siding Board | $50–$100 (siding, sealant, paint) | $250–$500 | 2–4 hours |
| Pest Control (Carpenter Bees) | $50–$100 (for DIY kits) | $300–$600 | N/A |
| Install Professional Netting | N/A | $500–$2,000+ | 1 day |
Tips & Prevention
- Act Fast: The biggest thing you can do is respond the first time you see a woodpecker on your house. The longer they’re allowed to drum or feed, the more territorial they get, and the tougher they are to move along.
- Reflective Power: Those mylar scare tape strips are a solid first defense. You can also hang old CDs or small mirrors on fishing line—anything that flashes in the sun and keeps changing.
- Check Siding in Spring/Fall: Walk the house twice a year. Look for the tell-tale half-inch round holes from carpenter bees. Catching that early can save you from a woodpecker problem down the road.
- Consider Lighter Siding Colors: If you’re repainting anyway, think about going lighter. There’s decent evidence it makes your house less appealing to nesting woodpeckers.
- Netting for Persistent Problems: If you’ve got one spot that keeps getting hammered—like a cedar-sided dormer—the only 100% effective fix is professional bird netting. It gets mounted on a frame 3-6 inches off the siding, so the birds physically can’t reach it.
When to Call a Professional
This is a solid DIY project, but you still need to know when to tag in a pro. If you find signs of a widespread insect infestation like termites or carpenter ants, call a licensed pest control operator right away—don’t mess around with that yourself. For EIFS (synthetic stucco) repairs, a specialized contractor is usually the safer bet, because a bad patch can trap moisture and cause major rot. And if the damage covers a lot of siding boards or it’s way up on a second or third story, calling a siding contractor or a qualified handyman is the smarter, safer move.
Related Articles
Keep troubleshooting with these hand-picked guides from FixlyGuide:
- The 3 Hidden Reasons Your Gutters Fail in Heavy Rain (It’s Not Just Leaves) — Overflowing gutters during heavy rain often stem from a few common, yet overlooked, issues beyond simple leaf clogs, leading to potential s…
- Is Your Gutter Sagging After Every Storm? The Hidden Flaw Most Homeowners Miss — Discover the overlooked reason your gutters sag after every storm and learn the lasting fix that most homeowners miss.
- The 3 Hidden Mistakes That Make Your Deck Sealer Fail (And How to Fix Them) — Resealing your wood deck protects it from weather and extends its life. Learn how to avoid common mistakes for a long-lasting finish and vi…
- The #1 Deck Sealing Mistake Most Homeowners Make (And How to Fix It) — Discover the most common deck sealing error and a step-by-step guide to resealing your wood deck for lasting protection against the element…
- The Mystery of the Loose Siding Panel: Why It Flaps and How to Fix It Right — Loose siding panels aren't just an eyesore; they can lead to serious water damage if not addressed quickly. Learn why your siding is flappi…
- The #1 Mistake Homeowners Make When Spotting Soffit Damage — Ignoring early signs of soffit and fascia damage can lead to costly structural issues. Learn to identify and fix common problems the right…
Should you do this yourself?
Answer five quick questions before you start. Safety outranks savings every time.
Your experience with work like this
How high do you have to work?
Does the job involve any of these?
Will it need a permit?
Specialty tools
Free and instant. Educational guidance only — not a quote, inspection, or professional diagnosis.
What should this project cost?
Enter your project details for a realistic cost range before you call anyone.
Spot repairs commonly run $400–$1,800; full replacement typically $9,000–$18,000 for an average home.
- Regional adjustment
- National average
- Labor share (typical)
- ~$2,948
- Quotes to collect
- 3 written estimates
Educational estimate based on national averages — not a binding quote. Always confirm with written local estimates.
Decide what your roof needs
Two minutes of questions turns "something is wrong up there" into a clear next step.
- Repair or replace your roof?Answer 10 questions about age, leaks, and damage to get a clear next step.Open
- Compare contractor quotesScore up to four bids on price, warranty, licensing, and timeline.Open
- Get local estimatesSend one request and compare written estimates from vetted pros.Open
Free, no signup required. Estimates are educational guidance, not a quote or an inspection.
Frequently asked questions
Will insurance cover woodpecker damage to my siding?+
It's unlikely, but possible. Most standard homeowner's policies exclude damage from birds, rodents, or insects. However, if you can prove the woodpecker was drilling to get at an insect infestation that was part of a covered peril, you might have a case. Always read your policy and talk to your agent.
What time of year do woodpeckers cause the most damage?+
You'll see two main peaks of activity. In the spring (March-May), they are drumming for mates and excavating nests. In the fall and winter, they are often drilling to find insect larvae that are overwintering in your walls.
Is it illegal to harm a woodpecker?+
Yes, absolutely. All species of woodpeckers are protected by the federal Migratory Bird Treaty Act. It is illegal to injure, capture, or kill them, or to disturb their nests, without a specific permit. Your only legal option is to deter them.
Why did a woodpecker suddenly start drilling on my house?+
There's almost always a trigger. It could be a new swarm of carpenter bees that just moved in, a new rival woodpecker in the area prompting territorial drumming, or simply that your house was the most convenient 'drum' or 'pantry' when the bird needed one.
Do fake owls really work to scare off woodpeckers?+
They can, but with a major catch: you have to move the owl every 2-3 days. Woodpeckers are smart enough to realize that a predator that hasn't moved in a week isn't a threat. Constant relocation is the key to making decoys effective.
Can I just shoot a woodpecker with a BB gun?+
No, do not do this. It is a federal crime that can come with hefty fines and even jail time. Use non-lethal deterrents like scare tape, netting, or owl decoys instead.
What kind of siding is woodpecker-proof?+
No siding is 100% 'proof,' but some are highly resistant. Fiber cement, brick, stone, and vinyl siding are generally safe from drilling. Woodpeckers can't penetrate them, although they might still drum on vinyl or metal trim for the sound.
My woodpecker is drilling on my metal gutter. What should I do?+
This is a classic case of drumming, not feeding. The bird just likes the loud noise. The best solution is to deaden the sound by attaching scare tape or wrapping the area in a small piece of cloth or foam. Once it's not fun to bang on, they'll go somewhere else.
Discussion
Loading comments…