- Lawn equipment and airborne debris: High-velocity gravel kicked up by a string trimmer or lawnmower blade causes roughly 70% of lower-course punctures. The strike dumps a lot of energy into a tiny, unsupported hollow profile.
- Thermal embrittlement: Ultraviolet (UV) radiation breaks down the chemical plasticizers that give PVC its flexibility. After 10 to 15 years in the sun, those panels lose impact resistance and get brittle as dried pasta.
- Cold-weather strikes: Vinyl’s impact tolerance drops hard below 32°F. Bumping a ladder against a frozen wall or tossing a heavy snow shovel against the foundation skirt will shatter panels that’d shrug it off in July.
Roofing · Aging roof
| Project category | Roofing |
|---|---|
| Problem type | Aging roof |
| Trade required | Roofing |
| Urgency | Planned project |
| Safety risk | Low safety risk |
| DIY suitability | Pro recommended |
| Cost category | High cost |
| Typical timeline | Plan 4–12 weeks ahead for scheduling and material lead time |
| Contractor type | Licensed roofing contractor |
Repair option
Maintenance repairs to buy a season or two while you budget.
Replacement option
Planned replacement, which is almost always cheaper than a leak-driven emergency.
Common causes
- Normal weathering past the shingle service life
- Poor attic ventilation cooking the shingles from below
- Repeated repairs on the same slopes
Relevant tools:repair or replace roofproject cost estimatorhome improvement material prices
Published November 17, 2026Last updated November 17, 2026
Tools & materials you'll need
Affiliate links- AmazonExterior copolymer sealant or PVC repair adhesive1 tube · UV-resistant, color-matched or clear
- Amazon1-1/2 inch galvanized roofing nails1 small box · Smooth shank, wide head
- AmazonReplacement vinyl siding panel1 panel · Matching profile and exposure
- AmazonButyl self-adhering flashing tape1 roll · 4-inch width for backing repairs
As an Amazon Associate FixlyGuide earns from qualifying purchases — at no extra cost to you. Prices and availability are accurate as of publication and subject to change.
Quick Answer
Cracked vinyl siding panels let wind-driven rain sneak right behind your weather barrier, and that’s how you end up with rotten sheathing and mold hiding where you can’t see it. Small cracks under 4 inches? You can usually fix those in 20 minutes with color-matched exterior PVC siding adhesive or clear exterior copolymer sealant. Bigger cracks, or splits running across the profile, are a different animal. Pop the damaged piece loose with a $7 zip tool, pull the roofing nails, and hang a fresh panel with enough wiggle room to slide side to side.
The Problem
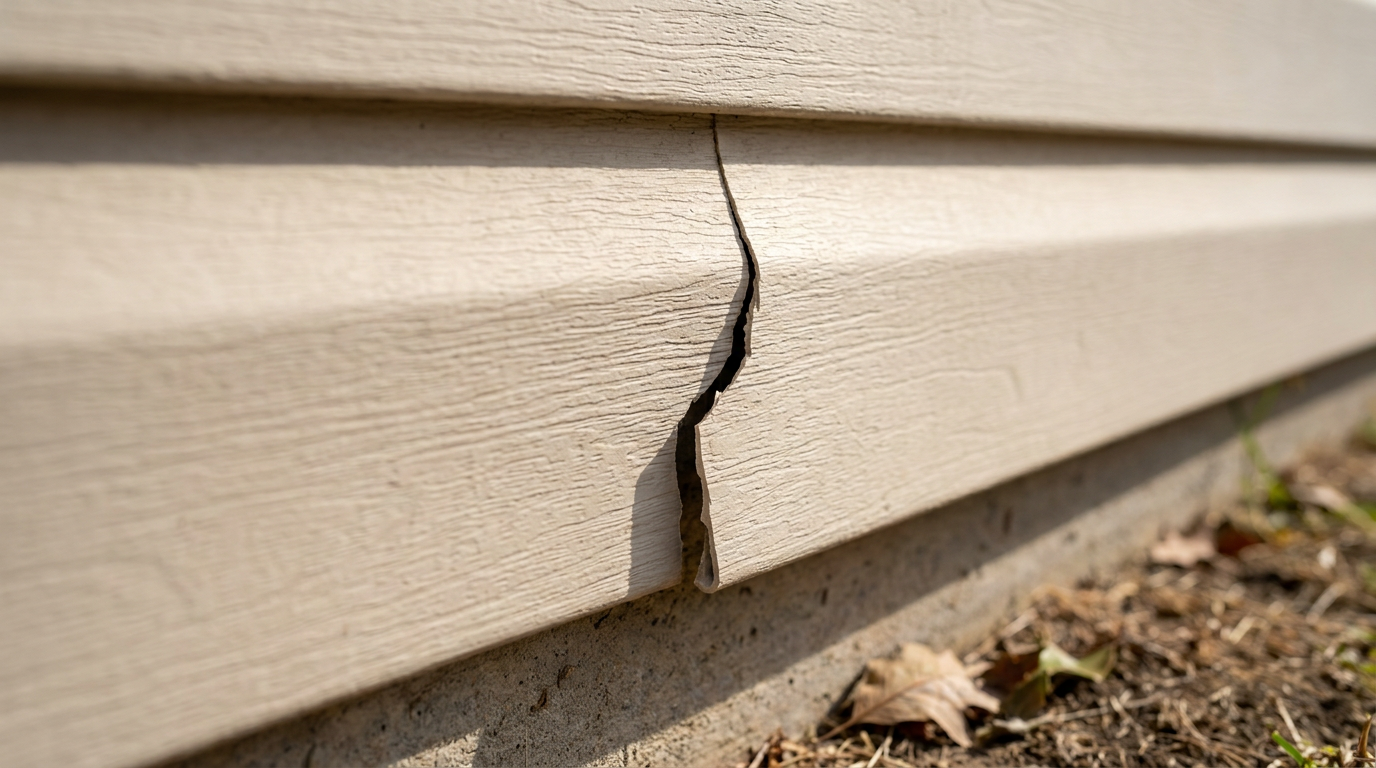
A flying rock from the lawnmower. A rogue baseball. A plastic panel that’s gotten brittle after ten brutal North Texas summers and then gets slapped with a 15°F winter freeze. One second it looks fine. Next second you’ve got a jagged starburst crack sitting right at eye level on your exterior wall.
A lot of homeowners think vinyl siding is a waterproof shield. It isn’t. It’s a rainscreen—the first layer meant to shed most of the water, while the weather-resistant barrier underneath, like Tyvek or 15-lb felt paper, handles whatever sneaks through. Once a panel cracks, rainwater can get driven straight through that split. If that water gets trapped against your oriented strand board (OSB) sheathing without any airflow, rot starts. The wood swells, nail-holding strength goes to zero, and carpenter ants show up like they got invited. I pulled a water heater in Frisco last month and the homeowner had the same attitude about a little siding crack—by the time we opened the wall, the sheathing was soft enough to poke with a screwdriver. Leave it through one wet season and a $15 patch job can turn into a $2,500 sheathing tear-out. No joke.
+-------------------------------------------------------------+
| OUTSIDE AIR                                                 |
|                                                             |
|   [Vinyl Panel] ---> (Cracked: Lets bulk rain blow inside)  |
|         |                                                   |
|   [1/8" Air Space]                                          |
|         |                                                   |
|   [Housewrap / Felt] ---> (Repels incidental dampness)      |
|         |                                                   |
|   [7/16" OSB Sheathing] ---> (Rot risk if wet continuously) |
|         |                                                   |
|   [2x4 or 2x6 Framing & Fiberglass Batt Insulation]         |
|         |                                                   |
|   [Interior Drywall]                                        |
+-------------------------------------------------------------+
How It Works
Vinyl siding is extruded polyvinyl chloride (PVC), and it usually runs between 0.040 and 0.046 inches thick. The reason it survives wild temperature swings is simple: it floats on the wall instead of being locked down tight.
A 12-foot vinyl siding panel can expand and contract up to 5/8 of an inch between summer highs of 105°F and winter lows of 20°F. To handle that movement, the top edge of every panel has slotted nailing hems. The bottom edge has a curved return leg that snaps into the top lock of the panel below it.
When you drive a nail into that hem, you’ve got to leave a 1/32-inch to 1/16-inch gap—about the thickness of a dime—between the nail head and the vinyl. That little bit of room lets the siding slide on the nail shanks as the temperature changes. If you glue or caulk a big crack solid across two panels, or drive a nail straight through the face to pin a split shut, you’re binding the siding up. Then the next cold front rolls in, the vinyl tries to shrink, can’t move, and it fractures right where the stress is trapped. That floating movement matters. More than folks realize.
Step-by-Step Fix
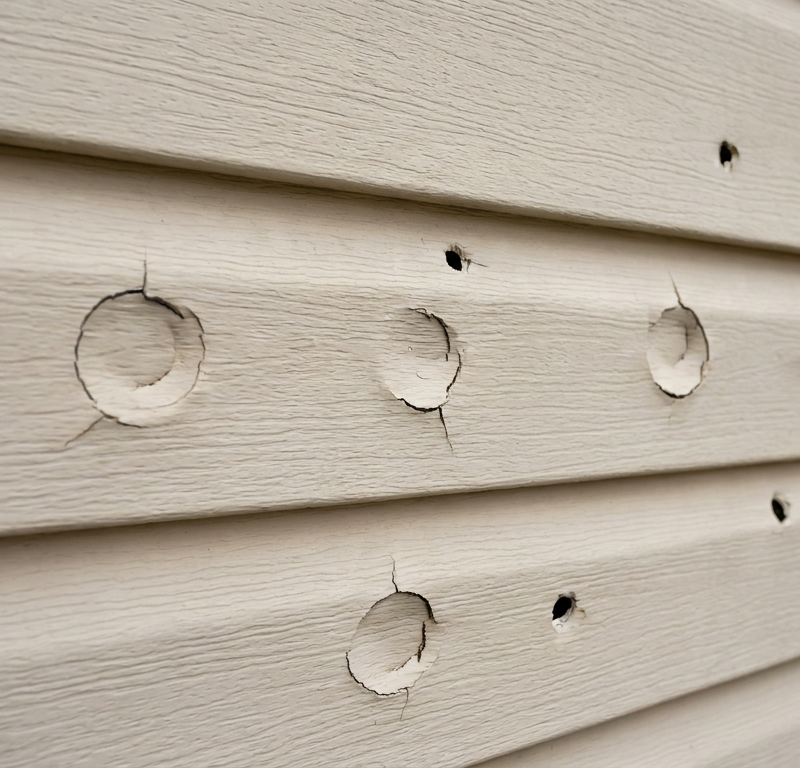
Before you start, decide whether this is a seal job or a replacement. Small hairline punctures or horizontal cracks under 4 inches that fit back together cleanly can usually be sealed with specialized PVC adhesive. Jagged blowouts, missing chunks, or vertical splits across the butt edge need a full panel replacement.
-
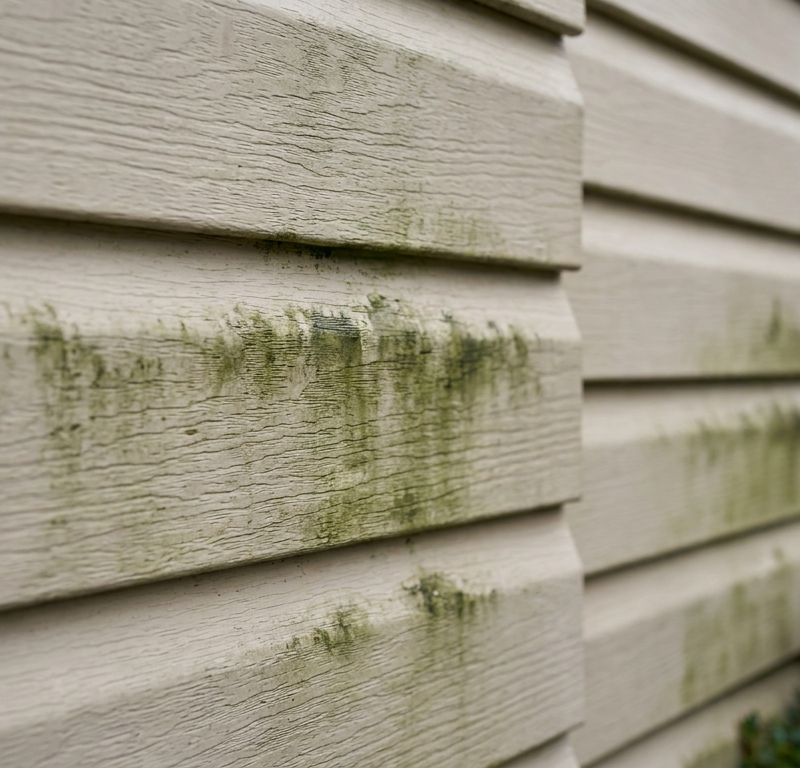
Clean the fracture zone thoroughly — Wash the cracked section and 6 inches around it with warm water and a few drops of grease-cutting liquid dish soap. Wipe off road grime, mildew, and chalking with a non-scratch microfiber cloth, then let the vinyl dry all the way. If you try sealing over oxidized vinyl powder or trapped dampness, the repair’ll fail fast.
- Tools: Bucket, microfiber towel, mild dish soap.
- Safety: Don’t hit it with a pressure washer. That high-pressure spray will blast right through the split and soak your wall sheathing.
-
Stop the crack from spreading (drill relief holes) — Find the exact ends of the crack under bright light. Use a 1/8-inch drill bit and gently drill a single hole through the siding at each dead end of the crack. That relief hole spreads the stress around a curve instead of letting it keep running from a sharp point.
- Tools: Cordless drill, 1/8-inch twist drill bit.
- Caution: Go easy. If you shove the bit through too hard, you can puncture the housewrap behind the siding.
-
Back the crack with waterproof flashing tape (for patches) — If you’re patching a small hole or clean split, slide the thin hooked blade of a siding zip tool under the panel above the damage to unlock it. Gently pry the cracked panel away from the wall 1 inch, and slide a 4x4-inch square of butyl flashing tape or PVC coil stock behind the crack against the wall. That gives the adhesive something solid to grab, and it keeps wind-driven rain off the sheathing if the bond ever ages out.
- Tools: Siding removal zip tool, butyl flashing tape.
- If this doesn't work: If the panel’s too brittle to flex outward without snapping, quit fighting it and move to a full panel swap.
-
Apply exterior PVC cement to small splits — Press the split edges back flush. Lay a controlled bead of clear exterior copolymer sealant or specialized PVC bonding adhesive right over the seam. Work it in with a plastic putty knife and feather the edges flat so you don’t leave a big ridge that’ll catch shadows on the wall.
- Tools: Plastic putty knife, color-matched PVC siding repair adhesive or clear copolymer sealant.
- Drying time: Allow at least 2 hours of cure time above 50°F before touching the panel.
-
Unlock the damaged piece for full replacement — If the panel needs replacing, stand at one end of the panel above the damaged piece. Slip the curved blade of your zip tool under the bottom lip of the upper panel until you feel it catch the locking leg. Pull downward and slide the tool across the whole strip to unzip the panels.
- Tools: Siding zip tool.
- Technique: Don’t yank straight out away from the wall. Pull down toward the ground while sliding sideways.
-
Expose and extract the existing nails — Lift the unlocked upper panel carefully with one hand to expose the nailing hem of the damaged panel below it. Slide a thin flat pry bar behind the heads of the 1-1/2-inch galvanized roofing nails holding the cracked piece. Pop out every nail that’s tying that panel to the studs.
- Tools: 10-inch flat pry bar or wonder bar.
- Watch out: Keep a finger on the nail as it comes free so it doesn’t drop behind the lower panels and punch your housewrap.
-
Disengage the bottom lock and remove the broken panel — Once all the fasteners are out, slide your zip tool under the bottom edge of the cracked panel where it hooks into the course below. Pull down to release the bottom hook from the lower panel’s top lock, then slide the damaged piece clear of the wall. Take a good look at the exposed housewrap for black mold, water stains, or torn seams before you put the new panel on.
- Pro check: Patch any housewrap tears immediately using official acrylic sheathing tape, never standard duct tape.
-
Cut the replacement piece to exact dimensions — Measure the old panel from butt to butt and transfer those numbers to your new vinyl stock. Cut the piece using aviation snips or a 12-inch miter saw equipped with a fine-tooth plywood blade installed backwards (that cuts cleanly without shattering brittle PVC). Leave a 1/4-inch expansion clearance at both ends inside the receiving J-channels or corner posts (bump that up to 3/8-inch if you’re working below 40°F).
- Tools: Aviation snips (offset left/right) or circular saw with inverted blade, tape measure.
- Tip: Snip the top nailing hem a little shorter than the visible face so it doesn’t bind against the neighboring hems inside the overlap.
-
Lock the new panel into the lower course — Set the bottom hook of your new panel into the top receiving lock of the panel below it. Push upward firmly until you feel and hear the continuous lock click tight all the way across. The panel should hang on its own without dropping.
- Check: Double-check that both ends sit centered with equal 1/4-inch expansion gaps inside the vertical trim channels.
-
Hang the replacement with proper fastener depth — Drive 1-1/2-inch galvanized roofing nails through the exact center of the factory nail slots into the wall studs, spaced every 16 inches. Center each nail shank squarely in its slot. Stop driving when the nail head is roughly 1/16 of an inch shy of touching the vinyl—the panel needs to hang loose from the nail, not get clamped down hard.
- Tools: 16-ounce smooth-face claw hammer, 1-1/2-inch galvanized roofing nails.
- The Slide Test: Grab the panel with your bare hand and shove it left and right. It should glide smoothly by an inch in either direction. If it won’t move, you’ve driven one too deep—back it out right then.
-
Re-lock the upper panel using your zip tool — Push down on the panel above your repair while pulling the bottom locking lip downward with your zip tool. Slide the tool along the track while pressing with your other hand to re-engage the original interlock. Walk the wall from one side to the other, slapping the seam gently with the flat of your palm to make sure the lock clicked tight the whole way.
Common Causes
Vinyl fractures don’t happen by accident. Usually one of these is behind it:
- Lawn equipment and airborne debris: High-velocity gravel kicked up by a string trimmer or lawnmower blade causes roughly 70% of lower-course punctures. The strike dumps a lot of energy into a tiny, unsupported hollow profile.
- Thermal embrittlement: Ultraviolet (UV) radiation breaks down the chemical plasticizers that give PVC its flexibility. After 10 to 15 years in the sun, those panels lose impact resistance and get brittle as dried pasta.
- Cold-weather strikes: Vinyl’s impact tolerance drops hard below 32°F. Bumping a ladder against a frozen wall or tossing a heavy snow shovel against the foundation skirt will shatter panels that’d shrug it off in July.
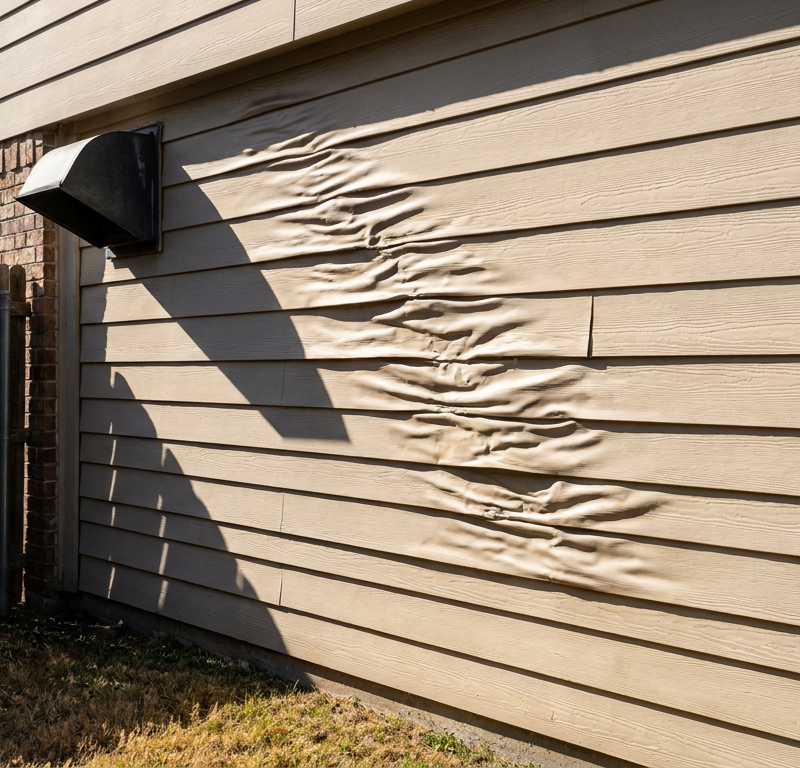
- Face-nailing and locked expansion: If an installer nailed through the face of the board or drove the nails tight against the hem, the panel can’t expand in summer heat. That trapped pressure forces the vinyl to buckle, then it cracks along those stressed spots.
Common Mistakes
- Face-nailing the cracked area: Homeowners like to drive a nail right through the overlapping face of the split piece to hold it flat. Don’t. Pinning the panel straight to the wall kills the expansion cycle and sets you up for a big tear the next time the temperature drops.
- Using standard silicone bath caulk: White interior silicone or cheap latex painter’s caulk peels off exterior vinyl within 6 months. It doesn’t bond chemically to PVC and it dries out fast under UV. Use only exterior copolymer or specialized structural PVC adhesives.
- Nailing replacement panels too tight: If you drive the nail heads flush, you’ve locked the vinyl in place. The siding will wave up the first hot afternoon, then crack around the nail shanks. Leave a 1/16-inch gap under the nail head.
- Forgetting the relief holes on small repairs: Smearing glue over a crack without drilling small 1/8-inch relief holes at the ends doesn’t do much. Thermal expansion keeps flexing the panel, and that crack will keep walking right past your glue patch.
- Failing to maintain expansion gaps at vertical trim: Cutting a replacement panel tight between J-channels or corner posts will make the ends jam into the trim on hot days and push the panel into a bulge. Keep at least 1/4 inch of play at both ends.
Cost & Time Breakdown
| Task | DIY Cost | Pro Cost | Time |
|---|---|---|---|
| Minor crack patch (adhesive + tape) | $15–$30 | $150–$250 | 20–30 mins |
| Single panel replacement (matching stock on hand) | $10–$25 | $200–$350 | 45–60 mins |
| Multi-panel replacement (3–5 boards) | $45–$120 | $400–$750 | 2–3 hours |
| Color-matched siding search & order (distributor) | $20–$50 | $100–$150 | 1–2 hours |
| Sub-wall moisture/sheathing repair (small area) | $40–$80 | $500–$1,200 | 3–5 hours |
Tips & Prevention
- Save two extra panels during any exterior renovation: If you’re siding a house or building an addition, buy two extra 12-foot panels and stash them flat in the garage or crawl space. Manufacturers change color dye lots and panel profiles every 3 to 5 years, so a dead-on match gets tough later.
- Harvest a match from an inconspicuous spot: If you can’t get an exact color match for an eye-level street-facing crack, pull a weathered panel from behind your outdoor AC condenser or shed wall. Put the faded original piece on the front of the house and move the slightly mismatched new piece where nobody looks.
- Edge with care around the foundation: Keep string trimmers at least 6 inches away from the bottom course of your siding. Put in a 12-inch gravel or mulch drip-line strip along the foundation so you’re not running heavy power equipment right up against the vinyl skirt.
- Do your exterior repairs when it’s warm: Work on vinyl siding when ambient temperatures are above 60°F. Warm vinyl is forgiving; cold vinyl shatters when you try to unzip it.
- Check your weep holes twice a year: Look under the bottom folded hem of your siding panels. Those little factory-punched slots let condensation drain. Make sure they stay clear of dirt, mud dauber nests, and paint.
When to Call a Professional
A crack that stays in one panel is usually fair DIY territory. But if you unzip a damaged piece and find black, rotted sheathing that crumbles under your thumb, or if the nails pull straight out of the framing with zero resistance, you’re dealing with serious structural rot. Call a licensed siding and framing contractor right away.
Same deal if you’re working with insulated siding, meaning panels backed with molded, laminated EPS foam, or if the repair is high on a two- or three-story wall and you need ladder jacks and staging. Don’t gamble with your neck. And if the siding has shattered across several courses along an entire gable, that usually points to bigger wall movement or foundation settling—not just a bad panel.
Frequently Asked Questions
Can I fix a cracked vinyl siding panel without taking it off the wall?
Yes. For cracks under 4 inches, you can make a solid repair right on the wall. Drill 1/8-inch relief holes at both ends of the split, gently slide a thin piece of flashing tape or aluminum coil behind the split using a zip tool, and seal the front face using clear exterior copolymer sealant or specialized PVC siding adhesive.
What is the best glue or adhesive for cracked vinyl siding?
Don’t use standard silicone or hot glue. Use an exterior-rated copolymer adhesive or a solvent-weld PVC cement made specifically for exterior plastics. Those chemical adhesives fuse the molecular chains of the PVC together instead of just sticking to the surface.
How do I match the color of old, faded vinyl siding?
Exact matches are tough because UV rays bleach siding unevenly over time. Cut a small 2-inch chip from the broken section and take it to a specialized exterior building products distributor, not a big-box store. You can also take that sample to a paint store for an exterior acrylic latex color match, or harvest a matching weathered panel from the back of your house.
Why did my vinyl siding crack so easily?
Age and cold temperatures are the main culprits. Sunlight breaks down the plasticizers in PVC over 10 to 15 years, which leaves the panels rigid and brittle. If something hits the siding when the temperature is below freezing, the cold vinyl shatters instead of flexing.
How loose should vinyl siding be when I nail it?
Never nail it tight. Leave a gap of 1/32 to 1/16 of an inch—about the thickness of a dime—between the head of the roofing nail and the vinyl nailing hem. The panel needs to slide back and forth easily by hand so it can handle thermal expansion.
What tool do I need to remove a siding panel?
You need a siding removal tool, usually called a "zip tool." It’s a thin, angled steel bar with a curved hook on the tip that costs about $7. It slips between overlapping panels to release and re-engage the vinyl locking tabs without wrecking the plastic.
Can cracked vinyl siding cause a leak inside my house?
Not right away, but it will over time. Siding is an exterior rainscreen, not a waterproof membrane. Wind-driven rain pushes straight through cracks and soaks the housewrap and wood sheathing underneath. Left alone, that trapped moisture rots the wall framing, compromises fiberglass insulation, and grows toxic black mold inside exterior walls.
Is it better to patch cracked siding or replace the whole panel?
Replacing the panel is the better permanent fix every time. Patches stop water, but they stay visible up close and can fail after a few seasons of hard thermal movement. If you’ve got spare matching panels or can source one from a distributor, replace the whole board.
What kind of nails should I use for vinyl siding repair?
Use 1-1/2-inch to 2-inch galvanized steel or aluminum roofing nails with a broad head (at least 5/16-inch diameter) and a smooth shank. Don’t use standard drywall screws, finish nails, or staples—they’ll rust and pinch the vinyl tight against the wall studs.
Related Articles
Keep troubleshooting with these hand-picked guides from FixlyGuide:
- Deck Screws Pulling Out? 5 Causes and the Step-by-Step Fix — Stop tripping on loose deck screws. Here is why fasteners pop out of deck boards, how to test for joist rot, and the step-by-step fix to an…
- Standing Water in Gutters? How to Fix Improper Slope in 11 Steps — Standing water in your gutters after a storm means an improper slope. Here is how to measure, realign, and re-pitch your gutters so they dr…
- How to Reseal a Wood Deck: 11 Steps to Restore and Protect It — Learn how to reseal a wood deck step by step. Protect your boards from rot, peeling, and UV graying with practical pro advice on prepping,…
- Is Your Gutter Sagging After Every Storm? The Hidden Flaw Most Homeowners Miss — Discover the overlooked reason your gutters sag after every storm and learn the lasting fix that most homeowners miss.
- Melted Vinyl Siding? 5 Heat Sources and the Complete Step-by-Step Fix — Learn why vinyl siding melts from window reflections or heat, how to replace distorted planks using a zip tool, and ways to stop the glare…
- Bouncy Floating Floors? 5 Causes and How to Fix Hollow Spots — Eliminate hollow sounds and bounce in floating vinyl or laminate floors by relieving pinched wall gaps or injecting subfloor voids with spe…
Repair or replace this system?
Plug in four numbers and see which choice holds up financially.
Free and instant. Educational guidance only — not a quote, inspection, or professional diagnosis.
Questions to ask before you sign
Ask every contractor the same questions and the cheapest bid stops looking cheapest. Check them off as you go — your progress is saved on this device.
Free, no signup. Bring this to every walkthrough so you compare bids on the same terms.
What should this project cost?
Enter your project details for a realistic cost range before you call anyone.
Spot repairs commonly run $400–$1,800; full replacement typically $9,000–$18,000 for an average home.
- Regional adjustment
- National average
- Labor share (typical)
- ~$2,948
- Quotes to collect
- 3 written estimates
Educational estimate based on national averages — not a binding quote. Always confirm with written local estimates.
Fixly Project Decision Box
- DIY difficulty
- Professional Recommended
- Estimated time
- Diagnosis 1–2 hours
- Cost level
- Moderate
Main tools / materials
- Non-contact voltage tester
- Outlet tester
- Flashlight
When to stop and call a pro
- Burning smell, scorch marks, or a warm outlet or switch plate
- A breaker that trips again right after being reset
- Any work inside the service panel
- Aluminum wiring or cloth-insulated wiring
Need professional help?
Talk to a Licensed ElectricianDecide what your roof needs
Two minutes of questions turns "something is wrong up there" into a clear next step.
- Repair or replace your roof?Answer 10 questions about age, leaks, and damage to get a clear next step.Open
- Get local estimatesSend one request and compare written estimates from vetted pros.Open
Free, no signup required. Estimates are educational guidance, not a quote or an inspection.
Get the print-ready PDF of this guide
A clean, ad-free, printable version you can keep on your phone or pin to the workshop wall. Free with a FixlyGuide account.
- Print-optimized layout
- Tools, materials & every step included
- Saved to your account
Frequently asked questions
Can I fix a cracked vinyl siding panel without taking it off the wall?+
Yes, for cracks under 4 inches you can make a durable repair right on the wall. Drill 1/8-inch relief holes at both ends of the split, gently slide a thin piece of flashing tape or aluminum coil behind the split using a zip tool, and seal the front face using clear exterior copolymer sealant or specialized PVC siding adhesive.
What is the best glue or adhesive for cracked vinyl siding?+
Never use standard silicone or hot glue. Use an exterior-rated copolymer adhesive or a solvent-weld PVC cement designed specifically for exterior plastics. These chemical adhesives fuse the molecular chains of the PVC together rather than merely sticking to the surface.
How do I match the color of old, faded vinyl siding?+
Exact matches are tough because UV rays bleach siding unevenly over time. Cut a small 2-inch chip from the broken section and take it to a specialized exterior building products distributor, not a big-box store. Alternatively, take that sample to a paint store for an exterior acrylic latex color match, or harvest a matching weathered panel from the back of your house.
Why did my vinyl siding crack so easily?+
Age and cold temperatures are the primary culprits. Sunlight degrades the plasticizers in PVC over 10 to 15 years, leaving panels rigid and brittle. If an object strikes the siding when outside temperatures drop below freezing, the cold vinyl shatters on impact instead of flexing.
How loose should vinyl siding be when I nail it?+
Your siding should never be nailed tight. Leave a gap of 1/32 to 1/16 of an inch—about the thickness of a dime—between the head of the roofing nail and the vinyl nailing hem. The panel must be able to slide back and forth easily by hand to handle thermal expansion.
What tool do I need to remove a siding panel?+
You need a siding removal tool, commonly called a "zip tool." It is a thin, angled steel bar with a curved hook at the tip that costs about $7. It slips between overlapping panels to release and re-engage the vinyl locking tabs without damaging the plastic.
Can cracked vinyl siding cause a leak inside my house?+
Not immediately, but it will over time. Siding is an exterior rainscreen, not a waterproof membrane. Wind-driven rain drives straight through cracks and saturates the housewrap and wood sheathing underneath. Left unaddressed, this trapped moisture rots the wooden wall framing, compromises fiberglass insulation, and grows toxic black mold inside exterior walls.
Is it better to patch cracked siding or replace the whole panel?+
Replacing the panel is always the superior, permanent fix. Patches stop water penetration, but they remain visible up close and can fail after several seasons of extreme thermal movement. If you have spare matching panels or can source one from a distributor, replace the entire board.
What kind of nails should I use for vinyl siding repair?+
Use 1-1/2-inch to 2-inch galvanized steel or aluminum roofing nails with a broad head (at least 5/16-inch diameter) and a smooth shank. Never use standard drywall screws, finish nails, or staples, which will rust and pinch the vinyl tight against the wall studs.
Discussion
Loading comments…