- Look for an AFCI or standard 15-amp or 20-amp single-pole breaker handle sitting halfway in the tripped spot or fully switched to "OFF".
- Push it all the way to "OFF" until it clicks, then snap it firmly back to "ON".
- If it pops again right away, you’ve got a dead short between hot and ground; leave it off and call an electrician.
Plumbing · Water heater problem
| Project category | Plumbing |
|---|---|
| Problem type | Water heater problem |
| Trade required | Plumbing |
| Urgency | Urgent — within days |
| Safety risk | Moderate safety risk |
| DIY suitability | Pro recommended |
| Cost category | Moderate cost |
| Typical timeline | Diagnosis same day; replacement typically a half-day install |
| Contractor type | Licensed plumber |
Repair option
Element, thermostat, or thermocouple replacement on a tank still in good condition.
Replacement option
Full replacement once the tank leaks or passes roughly a decade of service.
Common causes
- Failed heating element or thermocouple
- Sediment buildup reducing capacity
- Tank corrosion at end of service life
Relevant tools:repair or replaceproject cost estimator
Published October 29, 2026Last updated October 29, 2026
Tools & materials you'll need
Affiliate linksAs an Amazon Associate FixlyGuide earns from qualifying purchases — at no extra cost to you. Prices and availability are accurate as of publication and subject to change.
Quick Answer
If your hardwired smoke detector’s got no power—maybe the LED’s dark, the test button gives you nothing, or the unit’s still dead after you swapped in a fresh battery—the problem’s usually one of three things: a tripped 15-amp or 20-amp arc-fault circuit interrupter (AFCI) breaker, a loose wire nut inside the junction box, or a fried internal transformer pin. Get it back by resetting the breaker panel, checking the 120-volt quick-connect wiring harness for tight connections, and using a non-contact voltage tester to make sure you’ve actually got house current before you replace the mounting base or the whole alarm.
The Problem
You look up and notice the steady green pilot light on your smoke detector is out. You jab the "Test/Hush" button with a broom handle, expecting that 85-decibel horn to rip off the ceiling. Nothing. Not a peep.
A hardwired smoke alarm with no line power is limping along on emergency battery juice—or, if the backup 9V cell or sealed lithium pack’s dead, it’s flat-out useless. A standalone battery alarm usually chirps at you when power gets weak. A hardwired detector that loses 120-volt AC power often goes dark without warning. That means you lose your early warning system. And if that unit’s supposed to interconnect with the rest of the house, that network dies too—so if a fire starts in a kid’s room, it won’t send the 9V signal down the red traveler wire to wake you in the master suite.
Figuring out why a hardwired smoke detector’s dead means doing more than swapping batteries. You’ve gotta trace the whole path from the 120V service panel through the ceiling junction boxes to the three-wire quick-connect harness snapped into the plastic backplate.
How It Works
Hardwired smoke alarms aren’t just battery units with a cord on them. They’ve got a small power supply and a communication hub built right into the housing.
House current—120 volts alternating current (AC)—comes into the ceiling junction box through Romex cable (usually 14/2 with ground for standalone units, or 14/3 with an extra red traveler wire for whole-house interconnected systems). A factory-molded wiring harness plugs into the back of the alarm. Inside, an internal step-down transformer and bridge rectifier knock that 120V AC down to roughly 9V direct current (DC) to run the sensing chamber, microcontroller, and charging circuit.
[120V AC Panel] ---> [Black Wire (120V Line)] -----\
                ---> [White Wire (Neutral)]    -----> [3-Pin Harness] ---> [Internal Transformer / Rectifier (9V DC)]
                ---> [Red Wire (Interconnect)] -----/                             |
                                                                          [Microcontroller & Sensor Chamber]
                                                                                  ^
                                                                                  |
                                                                        [9V Battery Backup Circuit]
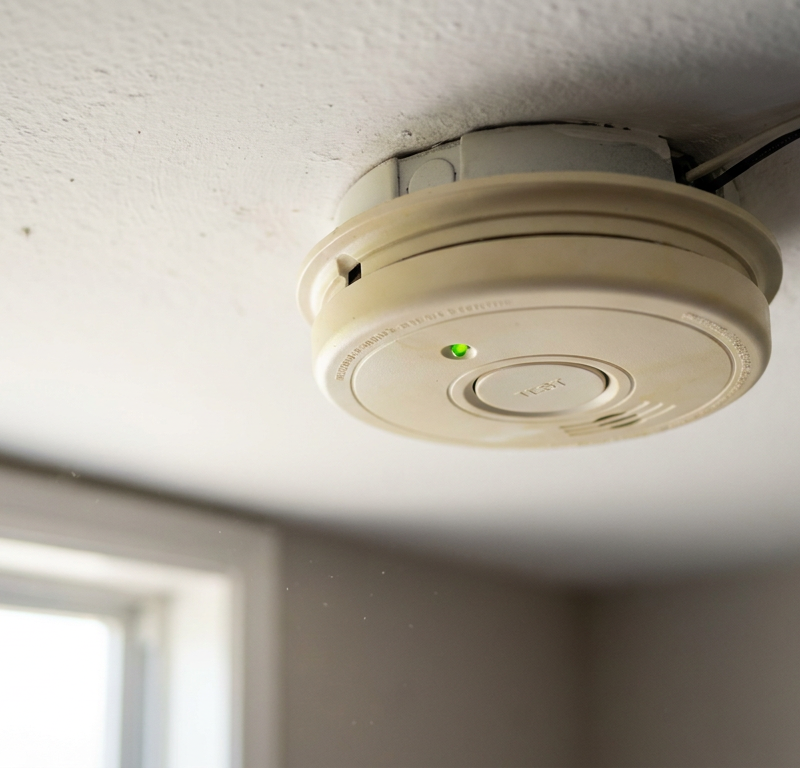
When AC power’s flowing like it should, an external light-emitting diode (LED)—usually solid green, though some models use amber or blue—stays lit 24/7. That pilot light tells you the unit’s running on utility power while the internal 9-volt alkaline or sealed 10-year lithium-ion battery stays on standby.
If line power drops out, a mechanical relay or solid-state switching circuit flips over to battery power right away. If that battery’s missing, dead, or stuck behind a factory pull-tab, the unit goes completely inert. And yeah, the red interconnect wire matters too. It carries an active 9V DC signaling pulse any time one detector trips. If the connections are loose or line power is gone, that whole network gets scrambled.
Step-by-Step Fix
Follow this order and you’ll find the break in the circuit without guessing.
-
Verify the Breaker State at the Main Panel — Head to the electrical panel and find the smoke detector circuit. Most code setups want smoke alarms on a dedicated circuit or a general lighting branch that gets used every day, so you’ll notice if it trips.
- Look for an AFCI or standard 15-amp or 20-amp single-pole breaker handle sitting halfway in the tripped spot or fully switched to "OFF".
- Push it all the way to "OFF" until it clicks, then snap it firmly back to "ON".
- If it pops again right away, you’ve got a dead short between hot and ground; leave it off and call an electrician.
-
Check for an Upstream Tripped GFCI Outlet — Walk the house and check ground-fault circuit interrupter (GFCI) receptacles in nearby hallways, bathrooms, and garages. I’ve seen more than one older place where a smoke circuit got tied into the downstream side of a GFCI during a sloppy retrofit.
- Hit the "Reset" button on any tripped GFCI outlet nearby.
- If one won’t reset or trips again instantly, unplug everything on that branch before you try once more.
-
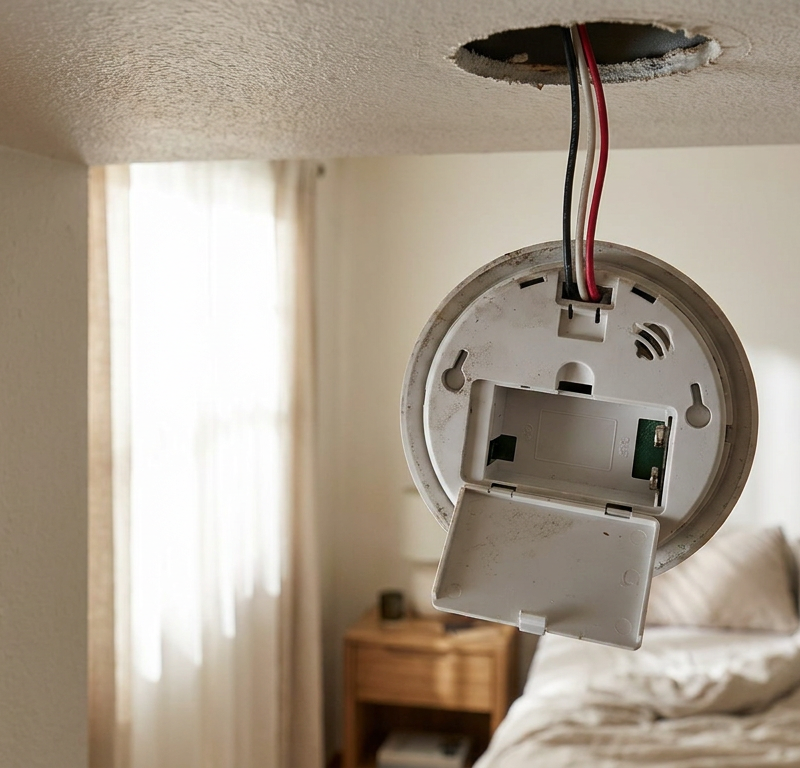
Safely Remove the Alarm from the Mounting Bracket — Set a step ladder on solid, level floor under the detector. Grip the alarm body with both hands and twist it counterclockwise about 1/2 inch to release the locking tabs from the ceiling base.
- Lower it gently. Don’t yank it, or you can pull wire nuts loose inside the metal or plastic octagonal junction box.
- Let the unit hang from its three-wire factory harness.
-
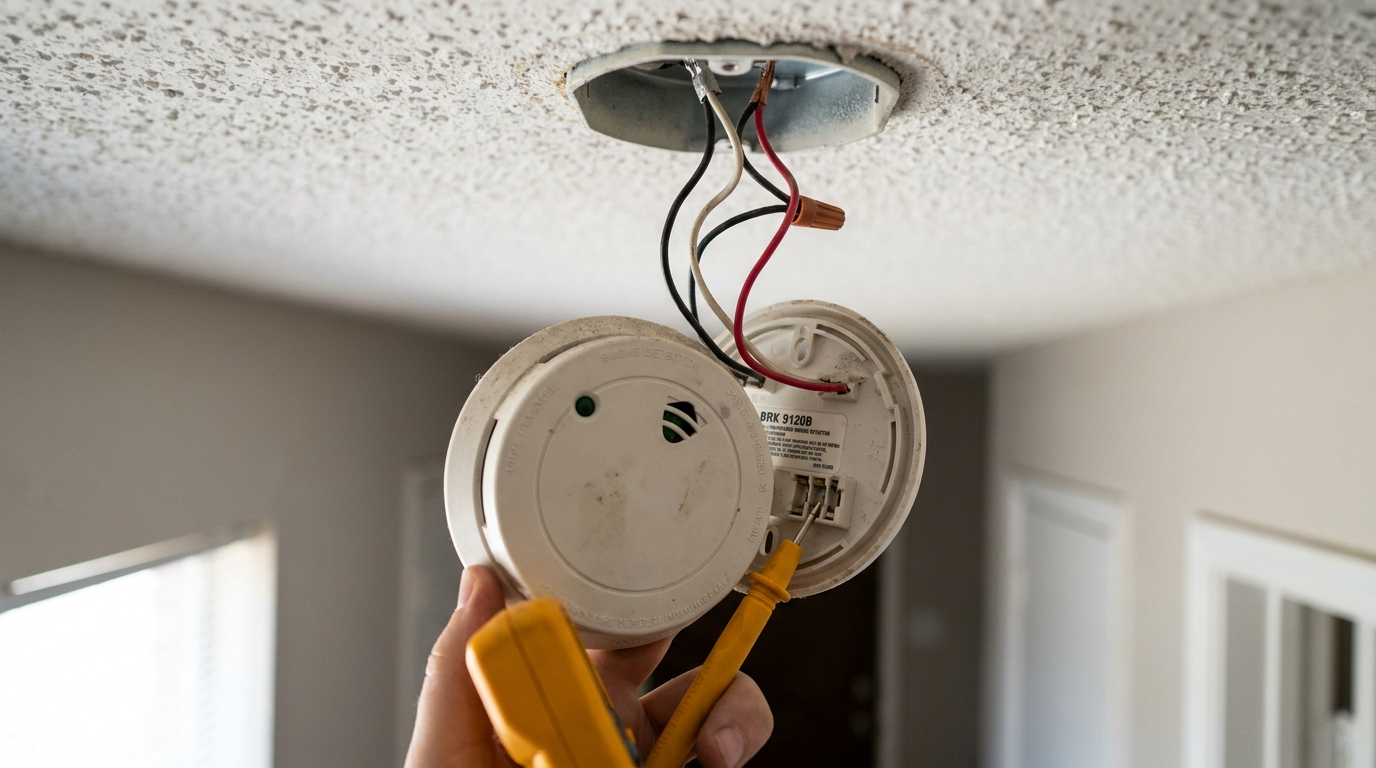
Inspect and Disconnect the Wiring Harness Plug — Look at the plastic multi-pin connector snapped into the back of the detector. Squeeze the flexible retaining clips on the sides of the harness plug and pull it straight out of the alarm housing.
- Check the male pins inside the detector socket. Black scorch marks, green corrosion, or bent copper contacts are bad news.
- Set the smoke detector housing aside on a table.
-
Test for Live 120V AC with a Non-Contact Voltage Tester — Hold a working non-contact voltage tester (NCVT) near the black insulated wire coming out of the ceiling harness.
- Keep the breaker on for this quick test.
- The tester should beep steadily and glow bright red when it touches the black wire.
- If it stays quiet on the black lead, the problem’s upstream in the house wiring, not the alarm.
-
Shut Off the Circuit Breaker for Safe Work — Go back to the panel and switch the smoke alarm breaker completely to "OFF".
- Test the black wire at the ceiling harness again with your NCVT to make sure the voltage’s dropped to absolute zero.
- Don’t mess with wire nuts or exposed copper on a live 120V circuit. No dice.
-
Inspect the Ceiling Wire Connections — Loosen the two screws holding the plastic mounting ring to the junction box and pull the wires out 3 to 4 inches so you can see the splices.
- Check the black (hot) wires: the house wire and the harness lead should be twisted together clockwise under a tight wire nut, with no bare copper sticking out past the plastic skirt.
- Check the white (neutral) wires: a loose neutral will kill power completely even if the black wire seems hot on a basic tester.
- Check the red/orange (interconnect) wire: make sure the wire nut’s snug and not touching bare copper or ground wires.
- If a wire pulls out with a light tug, strip 1/2 inch of clean copper, line the ends up flush, and put on a fresh wire nut rated for two #14 conductors.
-
Perform a Resistance and Neutral Continuity Test with a Multimeter — If the voltage tester showed power earlier but the unit still won’t wake up, check line-to-neutral voltage with a digital multimeter set to AC Volts (750V range).
- Turn the breaker back on carefully.
- Put the black multimeter probe into the neutral harness pin (white wire) and the red probe into the hot harness pin (black wire).
- You should see between 110V and 125V AC.
- If you get 0V or a jumpy floating voltage (like 24V to 40V), you’ve got an open neutral splice somewhere on that branch circuit. Turn the breaker back off before you start digging.
-
Clear Internal Parasitic Charge (Hard Reset) — If the harness is giving you verified 120V AC, the smoke alarm’s microchip may just be locked in a fault state.
- Disconnect the harness and pull the backup battery out of the compartment.
- Hold the faceplate "Test/Hush" button down for 20 to 30 seconds.
- That drains the leftover energy from the internal capacitors and resets the processor memory.
-
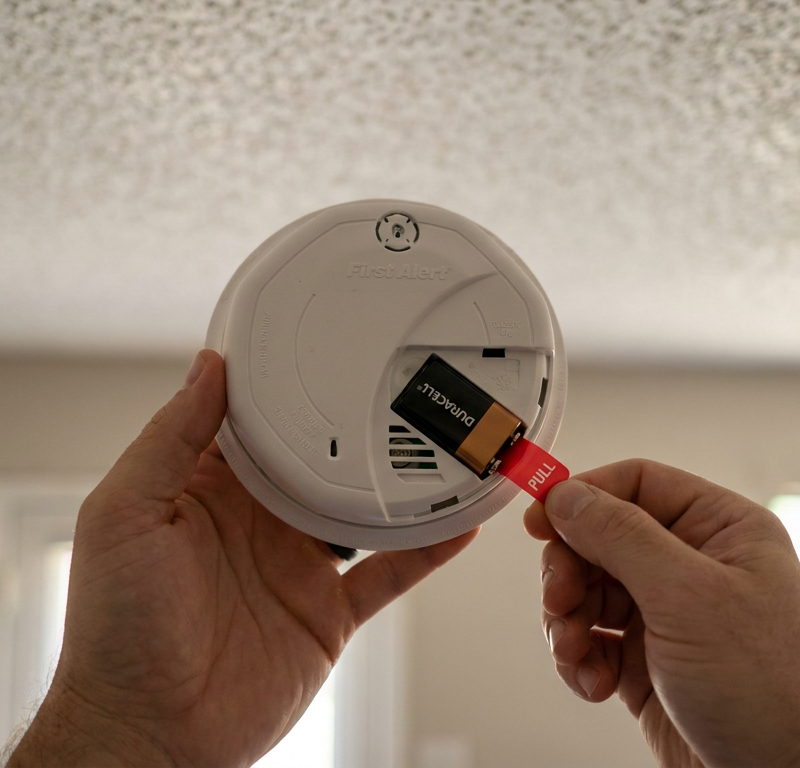
Install a Fresh 9V Backup Battery or Check the Pull-Tab — Slide open the battery compartment door and look at the terminals.
- If it’s a brand-new unit, make sure the clear plastic factory pull-tab has been pulled all the way out of the contact slot; leftover film can block battery contact.
- Snap in a fresh, brand-name 9-volt alkaline battery (measuring at least 9.3V DC on a meter), and line up the polarity marks.
- Close the battery door firmly; a lot of newer models have a mechanical lockout peg that keeps the harness from plugging in unless that door’s shut.
-
Reconnect the Harness and Remount the Detector — Push the plastic wiring harness firmly into the alarm port until the side latches click.
- Check the faceplate LED: the solid green AC line power indicator should come on right away.
- Tuck the ceiling wiring neatly back into the junction box, line up the detector slots with the mounting plate pins, and turn clockwise until it snaps locked.
-
Run the Horn and Interconnect Functional Test — Step back and hold the "Test" button down for 5 seconds until the horn goes off.
- You should hear three loud, distinct beeps (Temporal 3 fire pattern: beep-beep-beep, pause, beep-beep-beep) measuring 85 dB at 10 feet.
- If the system’s interconnected, the other alarms in the house should trigger within 3 to 6 seconds.
Common Causes
- Nuisance Tripped AFCI Breakers: Arc-fault circuit interrupter breakers are looking for tiny electrical micro-arcs. Older AFCI breakers from 2005 to 2015 are famous for nuisance-tripping because of RF interference, small motor loads (like vacuum cleaners), or loose neutral screws on the smoke circuit.
- Open Neutral Wire Splice: A disconnected white neutral wire inside the ceiling junction box kills current flow completely. A standard pen-style voltage tester may still beep on the black wire, which makes you think power’s there when the circuit can’t actually carry current.
- Corroded or Loose Quick-Connect Pins: Smoke detectors use molded plastic wire harness clips. If the brass female sleeves inside that connector loosen, spread open, or corrode from attic condensation dripping through the junction box, they won’t feed current to the unit’s male board pins.
- Dead Internal Step-Down Power Supply: The internal transformer or bridge rectifier that changes 120V AC to low-voltage DC can burn out from lightning surges or grid swings. When that part dies, the alarm acts dead on AC power even though it’s still hooked to a live harness.
- Mechanical Battery Lockout Engaged: Manufacturers build smoke alarms so you can’t mount them without an active battery. If the 9V battery’s missing, backward, or the battery tray door isn’t closed flush, an internal mechanical interlock blocks the AC connector from seating.
- Expired 10-Year Operational Lifespan: Smoke alarms have a programmed end-of-life microchip. After 10 years (120 months) from the factory manufacture date stamped on the back chassis, the internal firmware shuts down normal operation and line-power functionality.
Common Mistakes
- Trusting a Non-Contact Voltage Pen as Proof of Power: A pen tester detects magnetic fields around hot wires, but it can’t measure electrical load or find a broken neutral. Always verify true 120V potential between hot and neutral with a digital multimeter before you decide the alarm’s bad.
- Tucking Interconnect (Red) Wires into Hot (Black) Wire Nuts: Folks new to this stuff often bundle every wire color together. If you twist the red traveler wire into the black 120V line wire nut, you send full line voltage straight into the delicate 9V signaling processor and fry the motherboard in every connected alarm on that circuit.
- Forgetting Upstream Junction Boxes: On hardwired runs, power loops through multiple ceiling boxes down the hallway. If the master bedroom detector’s dead, the loose wire nut is often two rooms away at the first smoke detector in the series.
- Replacing Batteries Without Performing a Hard Reset: Dropping in a fresh battery while the unit’s still plugged into house power often won’t clear microprocessor lockout codes. You’ve got to unplug the harness and hold the test button for 20 seconds to drain internal capacitance.
- Ignoring the Manufacture Date Code: Buying replacement alarms from liquidation sales or pulling old units out of a hot attic can leave you with expired hardware. Check the factory stamp: if it’s over 10 years old, it belongs in the trash, not on your ceiling.
Cost & Time Breakdown
| Task | DIY Cost | Pro Cost | Time |
|---|---|---|---|
| Reset AFCI Breaker & Reseat Harness | $0 | $120–$180 | 10–15 mins |
| Replace 9V Alkaline / Lithium Battery | $4–$9 | $95–$130 | 5–10 mins |
| Replace Ceiling Wiring Harness & Splices | $5–$12 | $150–$225 | 20–30 mins |
| Replace Hardwired Smoke/CO Detector Unit | $35–$75 | $175–$260 | 15–25 mins |
| Trace & Repair Broken Open Neutral Wire | $10–$25 | $220–$380 | 1–3 hours |
Tips & Prevention
- Vacuum the Sensor Vents Every 6 Months: Dust, drywall powder, and spider webs inside the ionization or photoelectric chambers can chew through battery life and block the cooling vents. Vacuum the perimeter slots with an upholstery brush attachment whenever you change daylight saving time.
- Seal Junction Box Attic Penetrations: In rough climates like North Texas summers, 140°F attic air sneaks through ceiling electrical boxes and down into the alarm body. That leads to condensation in humid weather and corrodes the wire harness pins. Seal wire entry points in the attic box with fire-rated expanding foam or electrical putty.
- Label the Dedicated Breaker Accurately: Take five minutes and figure out the exact breaker feeding the smoke detectors. Mark it clearly with red electrical tape inside your panel door so family members don’t kill a life-safety circuit by accident when they’re resetting other breakers.
- Standardize Brands Across the Entire Interconnect Loop: Don’t mix different brands—like Kidde, First Alert, and BRK—on the same three-wire hardwired loop. Even if the harness pins fit, the signaling voltages on the red interconnect traveler wire vary between 5V and 9V DC, and that causes communication errors and weird power faults.
- Replace the Whole Unit Every 10 Years: Hardwired smoke alarms are disposable safety gear. Even if the unit still seems fine, the internal radioactive sensing elements (Americium-241) or photoelectric optical diodes wear out after a decade. Check the back panel date and put in brand-new units before year 10 runs out.
When to Call a Professional
Working in ceiling junction boxes is fine for a careful homeowner, but some warning signs mean it’s time to bring in a licensed electrical contractor. If your circuit breaker trips instantly with an audible pop or flash the second you reset it, you’re dealing with a direct short circuit or a ground fault hidden behind the drywall.
Call an electrician right away if you pull down an unpowered alarm and find melted insulation, charred wire nuts, or scorch marks inside the junction box—those usually point to long-term overheating or the wrong wire gauge, like 14 AWG wire shoved onto a 20-amp breaker circuit.
And if your multimeter shows an erratic open neutral (reading 0V to neutral but 120V to bare ground), finding the broken connection behind finished walls takes specialized circuit-tracing gear. That’s not a rip-into-the-ceiling kind of job unless you want to make a bigger mess than you started with.
Related Articles
Keep troubleshooting with these hand-picked guides from FixlyGuide:
- Smoke Detector Light Stays Green but Won't Test? 5 Reasons & What to Check First — Your smoke detector's green light means it has power, but if it fails the test, the sensor or another key part might be failing—here's how…
- Smoke Detector Chirps at Night? 6 Reasons It Wakes You Up and How to Fix It — Stop the infuriating 3:00 AM smoke alarm chirp. Learn why hardwired detectors beep in the cold night hours, how to reset the capacitor, and…
- The Real Reason Your Smoke Alarm Chirps Every 30 Seconds (It's Not Always the Battery) — Don't just swap batteries; a smoke detector chirping every 30 seconds can signal various issues, from dust to improper installation, demand…
- Why Your Smoke Alarm Won't Stop Blaring (When There's No Fire!) — False alarms from your smoke detector are more than just annoying; they can make you ignore real emergencies. Learn why they happen and how…
- New Smoke Detector Won't Stop Chirping? Why It Happens and How to Fix It Fast — Just installed a new smoke detector and it's already chirping every 30-60 seconds? Here's why that brand-new alarm is making noise and the…
- No Hot Water From Your Water Heater? 9 Causes and the Fix for Each — If you have no hot water, it's a cold shower for you and a major headache. We'll show you how to diagnose the cause, from a tripped breaker…
Should you do this yourself?
Answer five quick questions before you start. Safety outranks savings every time.
Your experience with work like this
How high do you have to work?
Does the job involve any of these?
Will it need a permit?
Specialty tools
Free and instant. Educational guidance only — not a quote, inspection, or professional diagnosis.
What should this project cost?
Enter your project details for a realistic cost range before you call anyone.
Outlet and switch work usually $150–$400; panel upgrades commonly $1,800–$4,200.
- Regional adjustment
- National average
- Labor share (typical)
- ~$709
- Quotes to collect
- 3 written estimates
Educational estimate based on national averages — not a binding quote. Always confirm with written local estimates.
Fixly Project Decision Box
- DIY difficulty
- Professional Recommended
- Estimated time
- Diagnosis 1–2 hours
- Cost level
- Moderate
Main tools / materials
- Non-contact voltage tester
- Outlet tester
- Flashlight
When to stop and call a pro
- Burning smell, scorch marks, or a warm outlet or switch plate
- A breaker that trips again right after being reset
- Any work inside the service panel
- Aluminum wiring or cloth-insulated wiring
Need professional help?
Talk to a Licensed ElectricianBefore you start
Check the difficulty, permits, and safety risk — then decide whether to call a pro.
- Estimate this projectGet a cost range for your scope and ZIP before you call anyone.Open
- Get local estimatesSend one request and compare written estimates from vetted pros.Open
Free, no signup required. Estimates are educational guidance, not a quote or an inspection.
Get the print-ready PDF of this guide
A clean, ad-free, printable version you can keep on your phone or pin to the workshop wall. Free with a FixlyGuide account.
- Print-optimized layout
- Tools, materials & every step included
- Saved to your account
Frequently asked questions
Does a hardwired smoke alarm still protect my family if it has no AC power?+
Yes. Hardwired smoke detectors contain internal 9V alkaline or sealed lithium backup batteries specifically designed to power the sensing chamber and horn during utility power failures. However, while running purely on battery power, the solid green AC line light remains unlit, and whole-house interconnectivity to other alarms may be disabled depending on the model.
What does the green light on a hardwired smoke detector mean?+
The green LED indicates that your alarm is receiving continuous 120-volt AC power from your home's breaker panel. If the light goes dark, the unit has lost line power and is operating solely on its backup battery (or is completely dead if the battery is depleted).
Can I replace a hardwired smoke detector with a battery-operated one?+
No. National Electrical Code (NEC) mandates hardwired interconnectivity in modern homes so that an alarm sounding in a basement alerts occupants in upstairs bedrooms. Replacing a hardwired unit with a standalone battery model breaks the signaling loop to all other detectors in the house, leaving your system non-compliant.
Why did all my hardwired smoke detectors lose power at the same time?+
If the red interconnect wire receives an accidental surge or is wired incorrectly into a 120V line, it can fry the circuit boards of all alarms on the loop simultaneously. Alternatively, a single tripped circuit breaker feeding the entire dedicated smoke detector branch will shut off line power to every detector in the house at once.
Are hardwired smoke detector wiring harnesses interchangeable between brands?+
No. Wiring harnesses use brand-specific pin layouts, spacing, and locking clips. While a First Alert connector might look similar to a Kidde connector, the pin configurations and signaling voltages differ. Always use the harness adapter supplied with your new detector and rewire the box if switching brands.
Will a smoke detector chirp if it has no power at all?+
If you hear a steady chirp every 30 to 60 seconds while the green AC light is out, the alarm is warning you that both house power is missing and the backup battery is critically low. If the unit has no power and the battery is completely exhausted, it will not chirp at all—it will be completely silent and inactive.
How do I fix a loose connection on the wiring harness plug?+
Inspect the plastic connector socket on the back of the smoke detector. Look for small internal metallic release tabs next to the pins. If a pin is pushed inward or bent sideways, use a pair of needle-nose pliers or a jeweler's screwdriver with the breaker off to gently straighten it; otherwise, replace the wiring harness assembly.
Can a hardwired smoke detector be on the same circuit as a wall switch?+
While common building code allows smoke alarms to share an un-switched general lighting circuit (so homeowners notice when a breaker trips), they should never be wired downstream of an in-room wall switch. If someone flips the wall switch off, line power to your detectors is cut, leaving them running on emergency battery reserves.
Discussion
Loading comments…