- Overheating: Long exposure to high outdoor temps, especially in brutal summer sun, can cook the internal parts and shorten its life. Units sitting in direct sun all day usually burn through them faster.
- Power Surges: Lightning strikes or utility voltage spikes can smack the capacitor hard enough to damage it. Even a short surge can be enough.
- Motor Issues: Sometimes a weak fan or compressor motor — tight bearings, low refrigerant, that sort of thing — puts extra strain on the capacitor while it’s trying to get the motor started.
- Manufacturing Defects: Rare, sure, but every so often you get a bad capacitor right out of the box. It just gives up way before it should.
HVAC · High energy usage
| Project category | HVAC |
|---|---|
| Problem type | High energy usage |
| Trade required | HVAC |
| Urgency | Planned project |
| Safety risk | Low safety risk |
| DIY suitability | DIY for experienced homeowners |
| Cost category | High cost |
| Typical timeline | Assessment within weeks; replacement planned off-season |
| Contractor type | Licensed HVAC technician |
Repair option
Duct sealing, insulation, and a tune-up before touching the equipment.
Replacement option
High-efficiency replacement sized by a load calculation, not a rule of thumb.
Common causes
- Aging, low-efficiency equipment
- Leaking ducts losing conditioned air
- Insufficient attic insulation
- Oversized system short-cycling
Relevant tools:project cost estimatorrepair or replace
Published September 26, 2026Last updated September 26, 2026
Tools & materials you'll need
Affiliate linksAs an Amazon Associate FixlyGuide earns from qualifying purchases — at no extra cost to you. Prices and availability are accurate as of publication and subject to change.
Quick Answer
Ever walk past your outdoor HVAC unit and catch that hard, ugly humming noise, but nothing’s actually spinning? The fan’s dead still, the compressor ain’t coming on, and inside your house it’s either roasting or turning into an icebox. Nine times out of ten, you’re looking at a failed capacitor. It’s a small, cheap electrical part that gives the motor that first shove it needs to get moving. I see it a lot, especially when the weather flips and the system gets asked to work hard after sitting around for months. The good news? If you’re handy and you respect the power, it’s usually a pretty simple, pretty affordable fix.
The Problem
Alright, let’s talk about that hum. You’ve set the thermostat to “cool” or “heat,” but the air coming out of the vents isn’t changing a bit. You step outside, and the condenser unit — that big box sitting there — sounds like a mad bumblebee, but the fan blades aren’t budging. Sometimes there’s even that faint burnt-electrical smell. That hum means the motor wants to start. It’s getting power. It just can’t get over the hump and actually turn. Kind of like pushing a car uphill with one flat tire — the engine may be trying, but you’ve got no traction.
This isn’t just an annoying noise; it means the system isn’t running and your house isn’t getting conditioned air. Classic seasonal startup problem. I run into it all the time, especially on older units that’ve been sitting idle and then get slapped with a hot spell or a cold snap.
How It Works
Think of your HVAC fan motor and compressor like heavy flywheels. They need a solid burst of electricity just to get moving. That’s where capacitors come in — they’re basically temporary power storage, sort of like a tiny, lightning-fast battery. When the thermostat calls for cooling or heating, power goes to the capacitor. It charges up and dumps that energy in a quick burst to the motor windings. That initial jolt is what beats the motor’s inertia and gets it spinning.
Once the motor’s running, another capacitor — the “run capacitor” — may help keep things efficient. A lot of residential outdoor units use a “dual-run” capacitor that handles both the compressor and the fan motor, usually with separate terminals for each. If that capacitor fails, swells up, leaks, or just gets weak and can’t hold a charge, that kickstart never shows up. The motor sits there trying to pull power straight from the line, which is what gives you that steady humming and zero movement. It’s trying, bless it, but no dice. That louder-and-louder hum? That’s the motor straining and getting nowhere.
Step-by-Step Fix
Safety First! Before you even think about sticking your hands inside that HVAC unit, you’ve got to kill the power. This part isn’t optional. We’re dealing with high voltage here, enough to hurt you bad or kill you. Go to your main electrical panel and shut off the breaker for the outdoor unit. It’s usually a double-pole breaker, and it’ll often be labeled “AC” or “Furnace” or “HVAC.” Then head to the disconnect box right next to the outdoor unit — small gray box, usually. Pull the plug out or flip the lever to “OFF.” Don’t skip that. I’ve seen too many close calls to count.
-
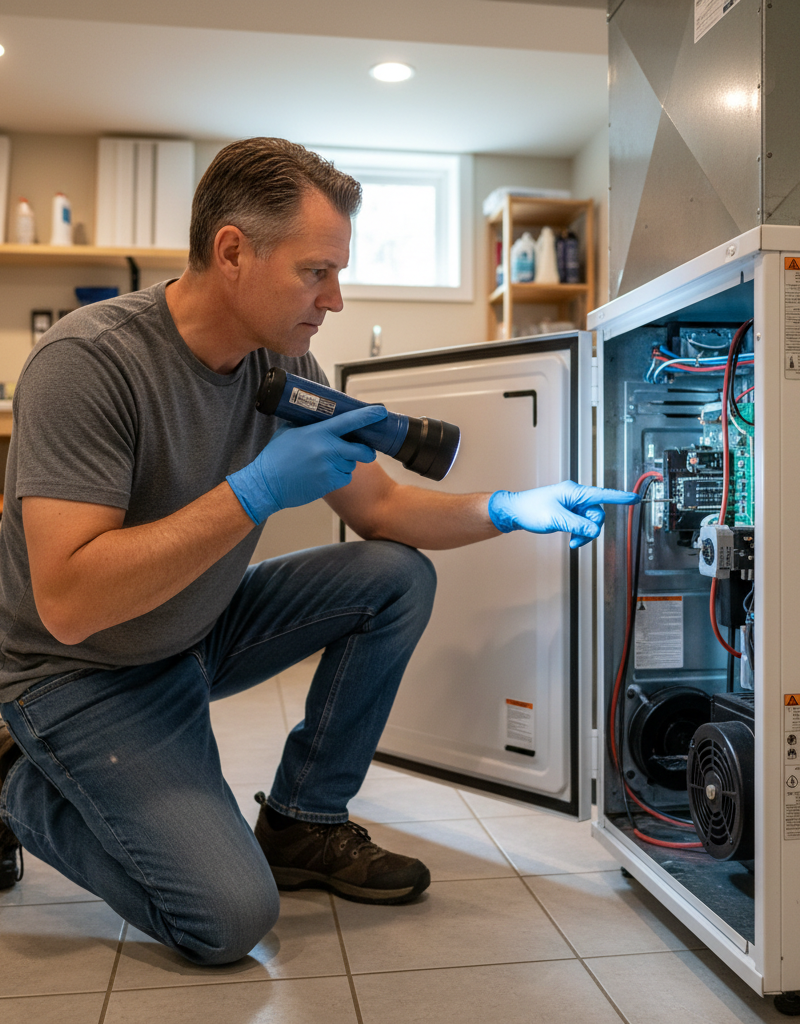
Expose the Capacitor – Carefully remove the access panel
- Usually it’s held on with a few screws, often 1/4-inch or 5/16-inch hex-head. Keep track of them — they disappear faster than a dropped washer in gravel. You’re looking for the electrical compartment, usually on one corner of the unit. Crack it open gently and pay attention to any wires or insulation you move out of the way. A magnetic screwdriver helps a bunch, trust me. I lost a screw in a messy yard in Lynnfield once and spent twenty minutes on my hands and knees looking for it. Never again.
-
Locate the Capacitor – Identify the component
- It’s a cylindrical part, usually black, gray, or silver, about the size of a soda can or a small beer can. You’ll see terminals on top, and there are usually three: “HERM” for the compressor, “FAN” for the fan motor, and “C” for common. Sometimes there’s a separate smaller capacitor for just the fan if it isn’t a dual-run unit. Take a clear picture of the wiring before you touch anything — seriously, that photo is your road map back.
-
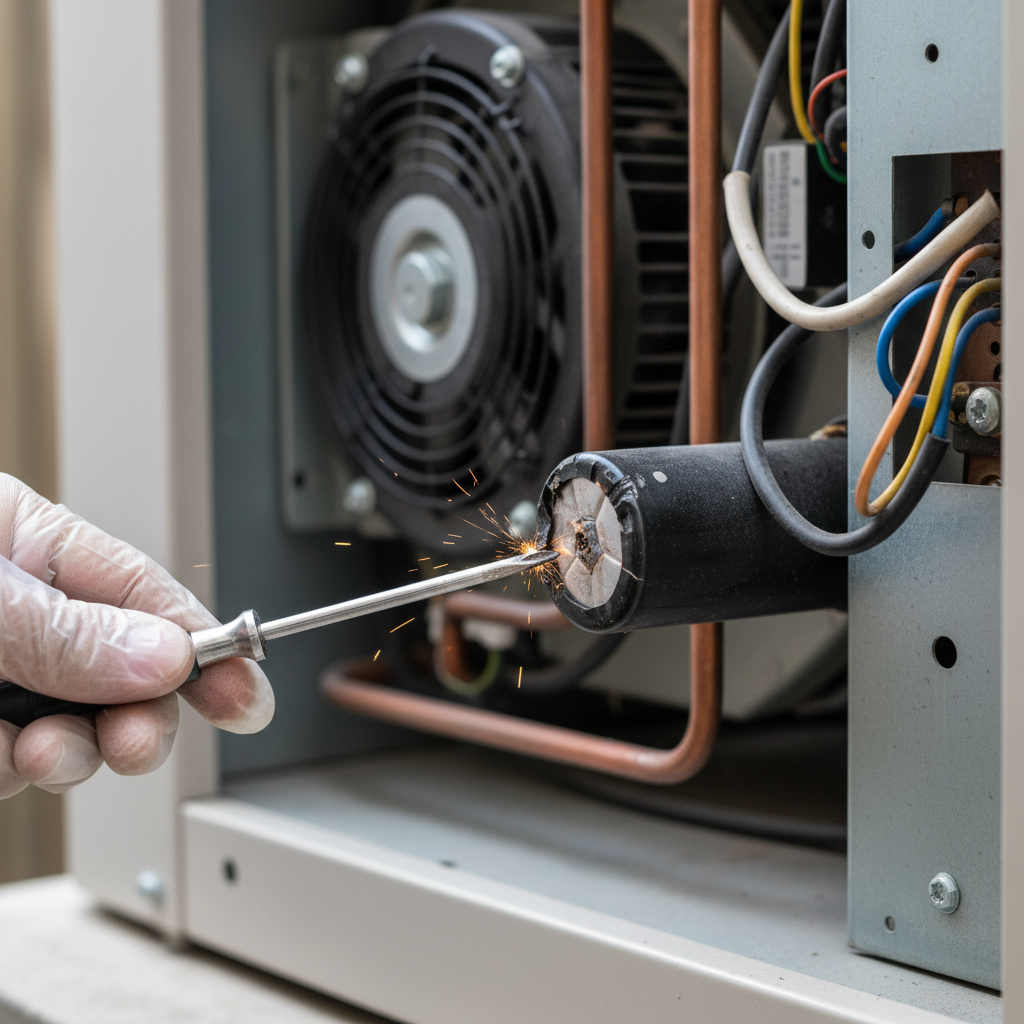
Discharge the Capacitor – Crucial safety step
- Even with the power off, a capacitor can still hold a charge, and it can give you a nasty shock. Use a screwdriver with an insulated handle. Touch the metal shaft across the “HERM” and “C” terminals, then “FAN” and “C”, and finally “HERM” and “FAN”. You might hear a pop or see a little spark — that’s the charge dumping out. If it’s already dead, you won’t. Always treat it like it’s charged until you’ve discharged it yourself.
-
Disconnect Wires – Note and remove wires
- Using your photo as a guide, pull the spade connectors off the terminals carefully. They can be stubborn, so needle-nose pliers can help, but don’t yank on the wires themselves. If you’re nervous about mixing them up, label them with tape. The colors are usually pretty consistent anyway — brown for fan, yellow/purple for herm, red/blue for common.
-
Remove Old Capacitor – Take out the faulty part
- The capacitor is usually held in with a clamp or a screw. Loosen it up and lift the old one out. Sometimes it’s just wedged in there tight. Take a good look at the old capacitor: if the top is swollen or domed, or you see any leakage or rust, that thing’s toast.
-
Match Specifications – Get the right replacement
- On the side of the old capacitor, you’ll find its electrical ratings. You need to match the Microfarad (µF) rating (like 40/5 µF or 40+5 µF) and the Voltage (VAC) rating (like 370 VAC or 440 VAC). The µF rating has to be exact — within 5% — but you can go with a higher VAC rating if needed (so a 440 VAC can replace a 370 VAC, but not the other way around). Don’t guess here. Don’t eyeball it. A wrong capacitor can hurt your motors. Write the numbers down or snap a picture of the label.
-
Install New Capacitor – Reverse the removal process
- Set the new capacitor into the bracket. Hook the wires back to the right terminals using your photo as a guide. “HERM” — usually the smaller terminal, but check the markings — goes to the compressor wire, “FAN” goes to the fan wire, and “C” goes to the common wires. Make sure the spade connectors are seated snug.
-
Replace Access Panel – Button everything up
- Put the access panel back on and tighten all the screws. Check that no wires are pinched or left exposed.
-
Restore Power & Test – Cross your fingers
- Go back to the outdoor disconnect and reinsert the plug or flip the lever back to “ON.” Then go to your main panel and turn the breaker back on. Set your thermostat low for cooling or high for heating so the system keeps running. Walk outside and listen. You should hear the fan kick on and the compressor hum into action almost right away. If it works, you just saved yourself a few hundred bucks and earned some solid DIY bragging rights.
Common Causes
- Age and Wear: Capacitors wear out over time, especially with constant cycling and high heat. Most are good for 10-15 years, but I’ve seen ’em quit in five. That’s just the nature of the beast. Like a car battery — sooner or later, it’s done.
- Overheating: Long exposure to high outdoor temps, especially in brutal summer sun, can cook the internal parts and shorten its life. Units sitting in direct sun all day usually burn through them faster.
- Power Surges: Lightning strikes or utility voltage spikes can smack the capacitor hard enough to damage it. Even a short surge can be enough.
- Motor Issues: Sometimes a weak fan or compressor motor — tight bearings, low refrigerant, that sort of thing — puts extra strain on the capacitor while it’s trying to get the motor started.
- Manufacturing Defects: Rare, sure, but every so often you get a bad capacitor right out of the box. It just gives up way before it should.
Common Mistakes
- Forgetting to Kill the Power: This isn’t just a mistake; it’s dangerous. Always, always, always shut off the breaker and the outdoor disconnect before you touch anything inside the unit. You can’t be too careful with 240 volts.
- Not Discharging the Capacitor: Even with the power off, these things can hold enough charge to knock you flat. Use an insulated screwdriver and discharge it properly. Don’t skip this one.
- Guessing on Ratings: Put in the wrong microfarad (µF) rating and you can damage the fan motor or compressor. The µF has to match exactly. Don’t try to make a 35/5 work for a 40/5.
- Mixing Up Wires: Taking a picture before you disconnect anything is huge. The wires usually line up with “HERM,” “FAN,” and “C” (common), and if you hook them up wrong, you can fry the new capacitor or the motor. That’s an expensive oops.
- Using the Wrong Voltage Rating: A higher VAC rating is fine, but a lower VAC rating than specified will fail fast — sometimes loud and ugly — and can damage other parts.
- Ignoring Other Symptoms: If the capacitor keeps failing, or the unit is humming and you’ve got other trouble like refrigerant leaks or a seized motor, swapping the capacitor alone might just be a band-aid. You’ve got to look at the whole system.
Cost & Time Breakdown
I’ve done this repair a thousand times, and here’s what homeowners usually run into:
| Task | DIY Cost | Pro Cost | Time |
|---|---|---|---|
| New Capacitor | $15–$50 | Included in service | 5 minutes |
| Tools (Screwdriver, Pliers) | $0 (if owned) | Included | 0 |
| Troubleshooting | 10–20 minutes | Included | 10–15 minutes |
| Replacement Labor | 20–45 minutes | $150–$300 (trip + labor) | 20–45 minutes |
| Total Estimated Cost | $15–$50 | $150–$350 | 30–60 minutes |
Tips & Prevention
- Regular Inspections: During your spring AC tune-up or fall furnace check, have the tech eyeball the capacitor. They can usually spot swelling or corrosion before it turns into a dead unit. A good tech’ll test capacitance with a multimeter too.
- Keep Unit Clean: Keep the area around your outdoor unit clear of leaves, weeds, junk, and anything that blocks airflow. Better airflow keeps the unit cooler, and that helps every part in there, capacitor included.
- Surge Protection: A whole-home surge protector on the main panel is worth thinking about. It won’t stop every capacitor failure, but it can cut down the risk from power spikes a lot.
- Know Your Ratings: Before you ever need a replacement, write down the µF and VAC ratings from the existing capacitor. Stick it near the unit or stash it in your homeowner’s manual. Saves a pile of time later.
- Consider a Spare: If you’re in a place with brutal summers or winters and the unit’s getting up there in age, having a spare capacitor with the right ratings isn’t a bad move. Cheap part. Big comfort.
- Listen to Your Unit: If you hear weird noises — especially a steady hum or buzz that wasn’t there before — pay attention. Catching it early can save you from a much bigger, much pricier breakdown. That unit’s talking to you if you listen.
When to Call a Professional
Look, I’m all for DIY, but there are times you’ve gotta know when to bring in the cavalry. If you’ve killed the power and discharged the capacitor but you’re still not comfortable working around electrical parts, that’s your sign. If you replace the capacitor and the unit still hums without starting, or if the new capacitor swells up or smokes right away — kill the power immediately and call a pro. That usually means there’s a deeper problem, like a seized compressor or fan motor, and that’s past a simple capacitor swap.
Any sign of burnt wires, melted insulation, or a strong electrical smell that doesn’t go away is a red flag too. If you’re dealing with a heat pump in heating mode and the compressor isn’t running but the indoor fan is, you could be looking at a bad reversing valve or a refrigerant issue, and that calls for special tools and EPA certification. Don’t mess with refrigerant; it’s not just risky for you, it’s rough on the environment if it gets released. When you’re not sure, a licensed HVAC tech can track down the real cause safely and get it handled right. Your safety and your expensive equipment are worth the service call.
Related Articles
Keep troubleshooting with these hand-picked guides from FixlyGuide:
- The Furnace That Won't Start: 3 Hidden Reasons Your Heat Quit — When your furnace won't kick on, it's often more than just the thermostat. Discover the overlooked culprits that stop your heat dead in its…
- The #1 Reason Your AC Blows Warm Air (And It's Not What You Think) — Discover the most common and often overlooked reason your AC might be blowing warm air, and how a simple capacitor fix can restore cool air.
- The Hidden Reason Your Furnace Short Cycles (and the $15 Fix) — Furnace short cycling can drive up energy bills and wear out your system prematurely; often, a simple fix like a dirty filter or miscalibra…
- The Mystery of the Vanishing Air: Why Your HVAC Stops Blowing After 10 Minutes — Discover the hidden culprits behind your HVAC system stopping short after just 10 minutes of operation and learn how to fix them yourself.
- The Secret Reason Your Thermostat Lies (and How to Make It Tell the Truth) — Discover why your thermostat isn't reaching its set temperature and how to diagnose and fix common culprits with simple DIY steps.
- The Surprising Reason Your Dishwasher Won't Start (It's Not Always the Door) — Don't rush to call a repairman when your dishwasher refuses to start; often, the culprit is a simple, overlooked issue you can fix yourself…
What should this project cost?
Enter your project details for a realistic cost range before you call anyone.
Service calls and common repairs run $150–$900; full system replacement typically $6,000–$12,000.
- Regional adjustment
- National average
- Labor share (typical)
- ~$1,935
- Quotes to collect
- 3 written estimates
Educational estimate based on national averages — not a binding quote. Always confirm with written local estimates.
Fixly Project Decision Box
- DIY difficulty
- Advanced
- Estimated time
- Homeowner checks 20–30 minutes
- Cost level
- Moderate
Main tools / materials
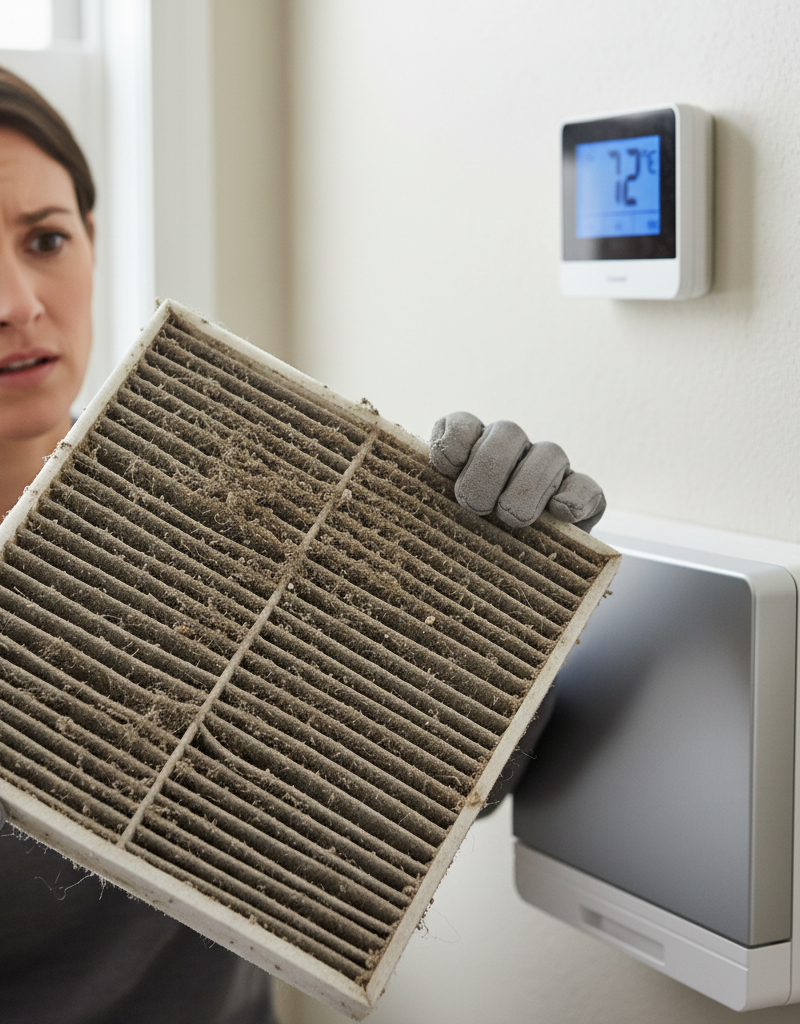
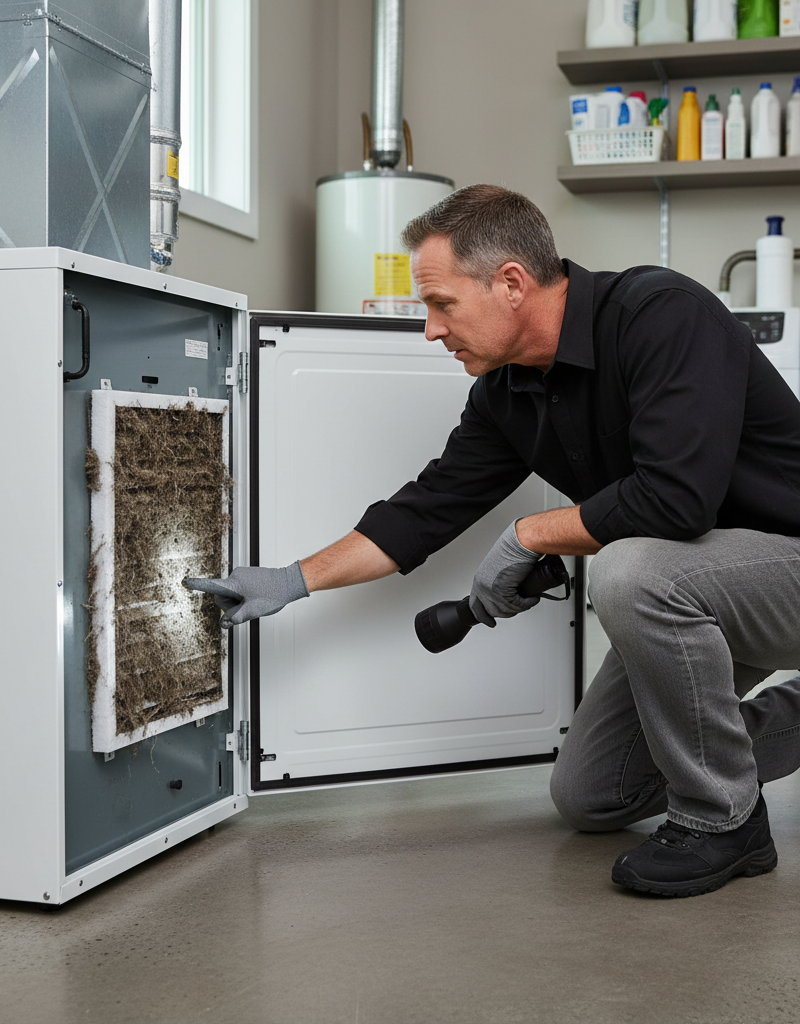
- Clean air filter
- Garden hose for condenser coils
- Shop vac for the condensate line
When to stop and call a pro
- Burning smell, smoke, or a tripping breaker
- Refrigerant lines iced over or hissing
- Any work inside the sealed refrigerant circuit (EPA-licensed only)
- Gas smell near a furnace — leave and call the utility
Need professional help?
Find an HVAC Pro Near YouGet the print-ready PDF of this guide
A clean, ad-free, printable version you can keep on your phone or pin to the workshop wall. Free with a FixlyGuide account.
- Print-optimized layout
- Tools, materials & every step included
- Saved to your account
Frequently asked questions
What is an HVAC capacitor and what does it do?+
An HVAC capacitor is an electrical component that stores and releases an electrical charge to provide the initial boost needed to start the fan motor and compressor. Without it, these motors struggle to get spinning, leading to a loud humming sound and no operation.
How can I tell if my HVAC capacitor is bad?+
Common signs of a bad capacitor include a loud humming noise from the outdoor unit without the fan or compressor running. Visually, a bad capacitor might appear swollen or domed on top, or show signs of leakage or rust. A professional can test its capacitance with a multimeter.
Is it safe to replace an HVAC capacitor myself?+
It can be safe if you follow strict safety protocols. Always turn off power at both the main breaker and the outdoor disconnect, and crucially, discharge the capacitor using an insulated screwdriver before touching any terminals. Capacitors can hold a lethal charge even after power is off.
What tools do I need to replace an HVAC capacitor?+
You'll typically need a screwdriver (often 1/4-inch or 5/16-inch hex head), needle-nose pliers, and an insulated-handle screwdriver for discharging. A camera on your phone to photograph wiring is also invaluable.
What numbers do I need to match when buying a new capacitor?+
You must match the Microfarad (µF) rating exactly (e.g., 40/5 µF) and the Voltage (VAC) rating (e.g., 370 VAC or 440 VAC). You can use a higher VAC rating, but never a lower one, or the new capacitor will fail prematurely.
Why did my HVAC capacitor fail in the first place?+
Capacitors can fail due to age, exposure to high temperatures, power surges, or stress from a struggling motor. They're a common wear-and-tear item, much like a car battery.
What if my HVAC unit still won't start after replacing the capacitor?+
If the unit still hums or doesn't start, or if the new capacitor shows immediate signs of failure, cut power immediately and call a professional. This indicates a deeper problem, possibly with the fan motor or compressor itself, requiring specialized diagnosis.
How long do HVAC capacitors typically last?+
While it varies, most HVAC capacitors have a lifespan of 10 to 15 years. However, factors like extreme heat, frequent cycling, and power fluctuations can shorten their life, sometimes to as little as five years.
Can I temporarily jump-start my HVAC fan if the capacitor is bad?+
I've heard stories, but frankly, it's a terrible idea. Trying to manually spin the fan or compressor motor with power still connected is extremely dangerous due to the high voltage and rotating blades. It can also damage the motor windings, turning a cheap capacitor fix into a very expensive motor replacement. Don't do it.
How much does a new HVAC capacitor cost?+
A new capacitor typically costs between $15 and $50, depending on its specific ratings and where you buy it. It's one of the cheaper parts in your HVAC system.
Discussion
Loading comments…