- Safety First: Shut off the breakers for the outdoor unit AND pull the disconnect switch (that little box with a handle or fuse block) mounted near the unit. You're dealing with high voltage out there.
- Tools: Screwdriver/nut driver.
- If this doesn't work: You're drifting into pro territory. Don't go poking around with a multimeter unless you really know what you're doing. A new control board can run $200-$600.
HVAC · High energy usage
| Project category | HVAC |
|---|---|
| Problem type | High energy usage |
| Trade required | HVAC |
| Urgency | Planned project |
| Safety risk | Low safety risk |
| DIY suitability | DIY for experienced homeowners |
| Cost category | High cost |
| Typical timeline | Assessment within weeks; replacement planned off-season |
| Contractor type | Licensed HVAC technician |
Repair option
Duct sealing, insulation, and a tune-up before touching the equipment.
Replacement option
High-efficiency replacement sized by a load calculation, not a rule of thumb.
Common causes
- Aging, low-efficiency equipment
- Leaking ducts losing conditioned air
- Insufficient attic insulation
- Oversized system short-cycling
Relevant tools:project cost estimatorrepair or replace
Published October 11, 2026Last updated October 11, 2026
Tools & materials you'll need
Affiliate links- AmazonNew Air FilterMake sure to get the correct size for your system
As an Amazon Associate FixlyGuide earns from qualifying purchases — at no extra cost to you. Prices and availability are accurate as of publication and subject to change.
Quick Answer
If your heat pump won't switch to AC, the usual suspect is the thermostat's 'cool down' delay, and that can run up to 15 minutes. So first, just wait. If that thing still won't cooperate, I'd check the thermostat settings, the air filter, and the breaker for the outdoor unit. Make sure it's on COOL, not HEAT or EM HEAT. A bad reversing valve solenoid or a stuck valve is a deeper issue, and that's pro territory.
The Problem
You walk up to the thermostat on that first warm spring day in North Texas, looking for a little relief. You flip it from HEAT to COOL, drop the setpoint to a brisk 72°F, and stand there waiting. And waiting. But instead of that nice blast of cold air, you get... nothing. Or worse, it starts pushing lukewarm air, maybe even a little warm. Your heat pump, the same workhorse that got you through winter, is flat refusing to switch over to its summer job.
I see this all the time. The system runs, the fan blows, but the air coming out of the vents just isn't cold. Before you start sweating and planning for a pricey repair, know this: a lot of the time, it's something you can spot, and sometimes fix, yourself in under an hour. Simple thermostat settings. A clogged filter. A part that's stuck solid. We'll go through it step by step.
How It Works
First thing, a heat pump doesn't make heat. It moves it. In winter, it pulls heat from the cold outdoor air and brings it inside. In summer, it flips the script, grabbing heat from inside your house and dumping it outdoors. That's the whole trick. One unit, two jobs.
The part that makes that switch happen is the reversing valve. Think of it like a four-way traffic cop for refrigerant, the fluid that carries heat around the system. When you move the thermostat from HEAT to COOL, it sends a 24-volt signal to a small electromagnet called a solenoid on the reversing valve. That solenoid activates a pilot valve, which uses refrigerant pressure to slide a metal tube inside the main valve body and reroute the flow. That change is what swaps the indoor and outdoor coils. The coil that was dumping heat outside now starts absorbing it, and the other one takes over as the condenser. Pretty slick—when it works.
When it doesn't, you're stuck in limbo. The thermostat is asking for cool, but the reversing valve never got the message. Maybe it's stuck in heating mode. Maybe the signal never made it. Either way, the system might think it's cooling, while the guts of it are still set up for heat. That's why you'll get warm air even though the AC is supposedly on.
Step-by-Step Fix
Let's start with the easy stuff and work our way up. Don't jump ahead.
1. Wait 15 Minutes
- Action: Seriously, don't touch anything for at least 15 minutes.
- Why: Most modern thermostats build in a delay to protect the compressor. When you switch modes, they wait 5-15 minutes before kicking the compressor on so it doesn't short cycle itself to death. That's called a 'compressor lockout' or 'short cycle protection.' You might be chasing a problem that hasn't even started yet.
2. Check the Thermostat Settings
- Action: Look at the thermostat and make sure it's set to COOL. Not HEAT. Not OFF. Not EM HEAT (Emergency Heat). And make sure the setpoint is at least 3-5 degrees below the room temperature. If it's set to 75°F and the room is sitting at 74°F, it won't call for cooling.
- Tools: Your eyes.
- Safety: Nothing to worry about here.
3. Power Cycle Everything
- Action: Flip the thermostat to OFF. Then head to the main panel and find the HVAC breakers. Usually there are two: one for the indoor 'Air Handler' and one for the outdoor 'Condenser' or 'Heat Pump'. Shut both off all the way. Wait 5 minutes. Then turn them both back on. Go back to the thermostat, set it to COOL, and lower the temperature. After that, give it another 15 minutes for the compressor delay.
- Why: This is the old IT trick for a reason. It resets the logic boards in the thermostat and the unit, and sometimes that's all it takes to clear a glitch.
4. Replace the Air Filter
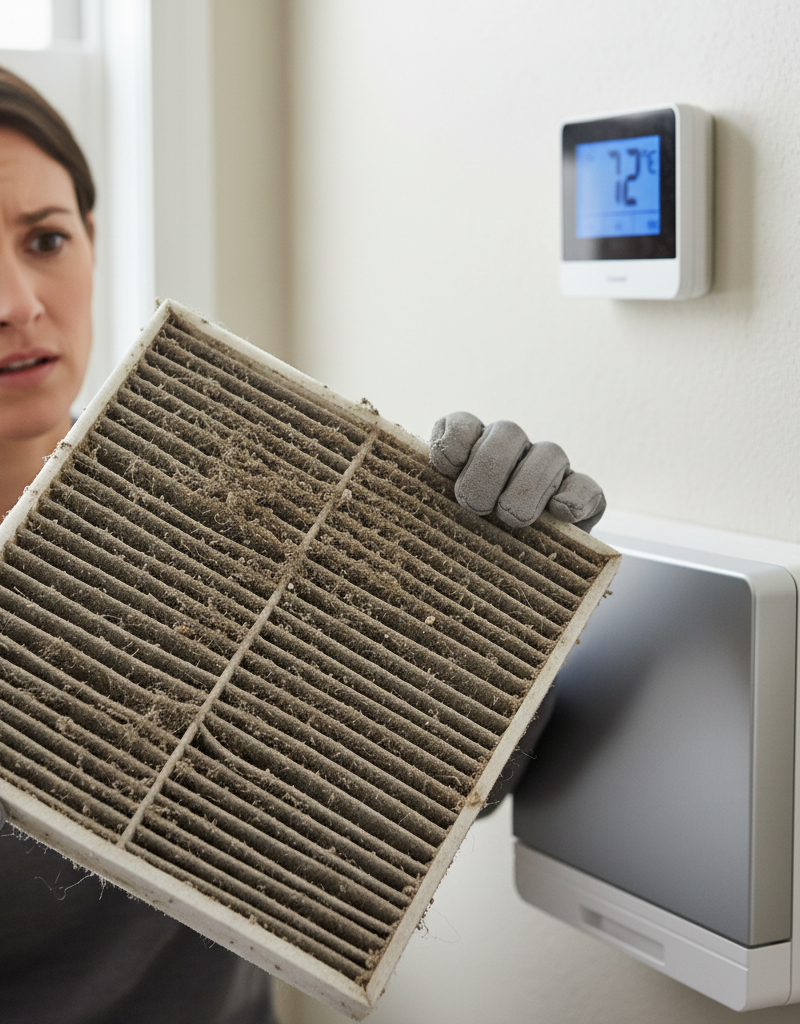
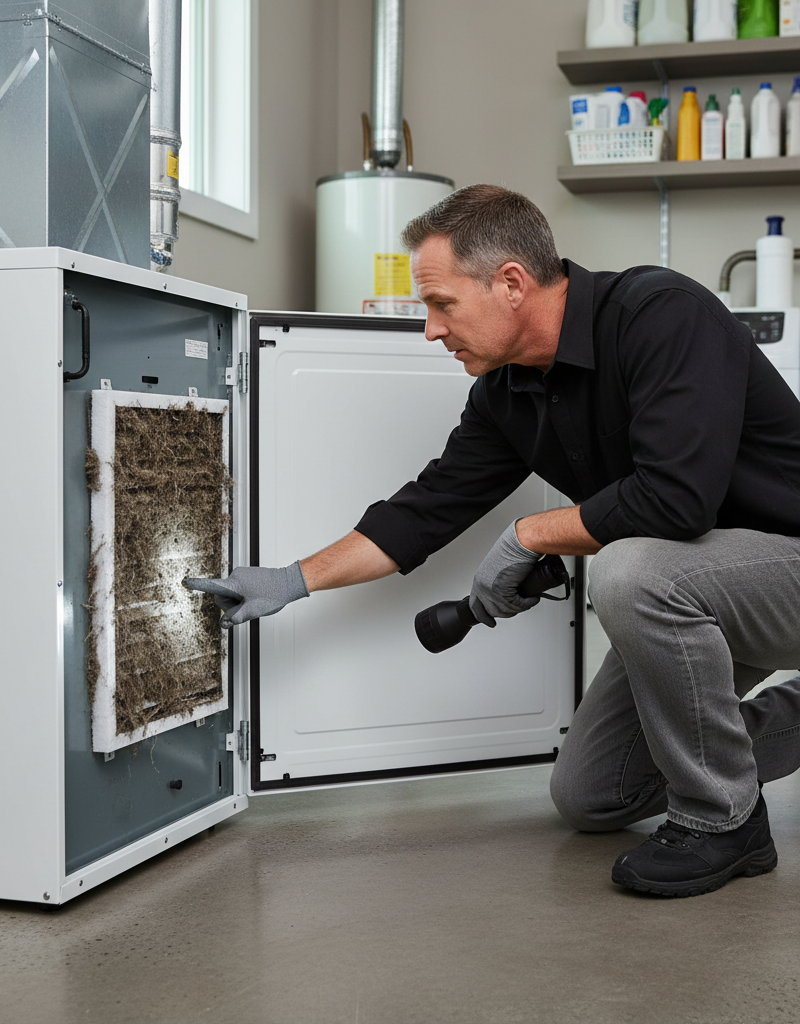
- Action: Find the indoor air filter. It's usually in a slot beside the air handler or in a big return vent in the wall or ceiling. Pull the old one out and look at it. If it's packed with gray dust and junk, it's choking the system. Replace it with a new one, and make sure the arrows on the frame point the way the air is moving, toward the furnace/air handler.
- Tools: New air filter (check the size printed on the old one).
- Why: A nasty clogged filter can cut airflow enough to trip pressure switches and keep the compressor from running like it should. It may not be the main reason your system won't switch modes, but it's maintenance you ought to stay on top of anyway.
5. Listen for the 'Whoosh'
- Action: You'll need somebody else for this. Have them stand by the outdoor unit while you're at the thermostat. With the system off, switch it to COOL and lower the temperature. You should hear a clean click and then a soft whoosh or hiss from the outdoor unit as the reversing valve solenoid energizes and the valve shifts. If you hear the click but no whoosh, the solenoid's getting power, but the valve itself may be stuck. If you don't hear either one, you're probably looking at an electrical problem.
- Anecdote: I pulled a water heater in Frisco last month that had exactly this kind of dead-silent control issue—looked simple on the surface, but the signal never made it where it needed to go.
6. Inspect the Outdoor Unit's Control Board
- Safety First: Shut off the breakers for the outdoor unit AND pull the disconnect switch (that little box with a handle or fuse block) mounted near the unit. You're dealing with high voltage out there.
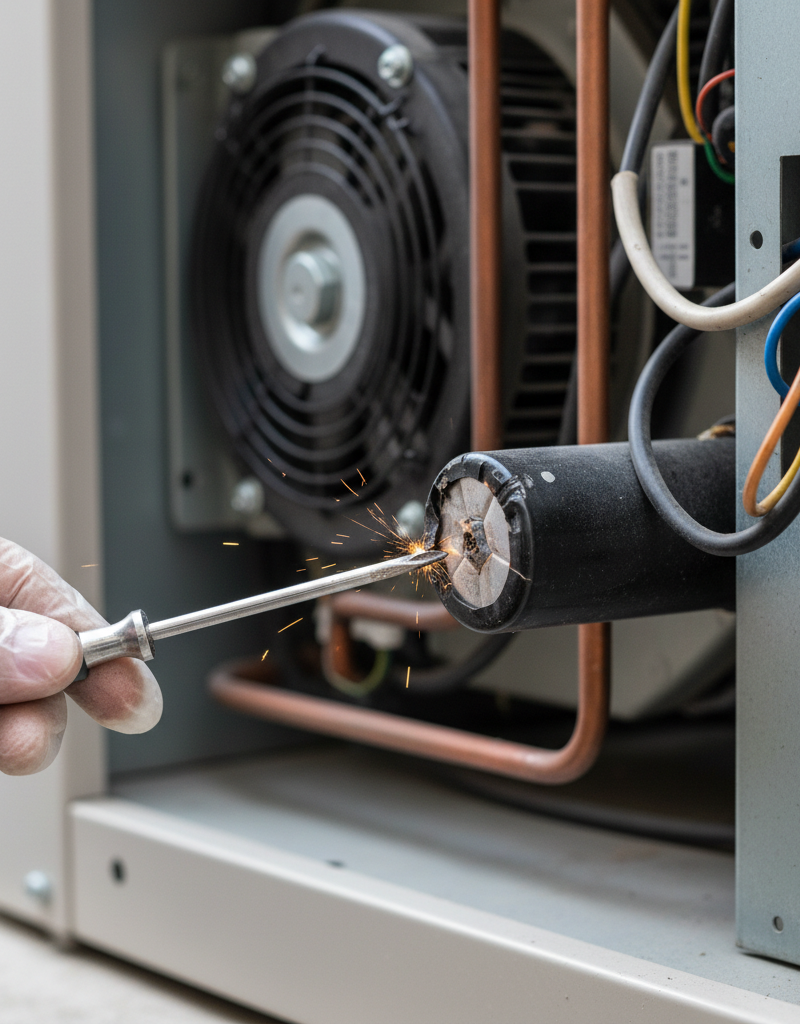
- Action: Take off the access panel on the outdoor unit, usually just a few screws. Look for a small circuit board. Check for anything obvious: burn marks, melted parts, or a tiny fuse that's blown. Some boards have a diagnostic LED that flashes an error code; the inside of the panel door should tell you what the flashes mean.
- Tools: Screwdriver/nut driver.
- If this doesn't work: You're drifting into pro territory. Don't go poking around with a multimeter unless you really know what you're doing. A new control board can run $200-$600.
7. Check the Reversing Valve Solenoid
- Safety: Power has to be OFF at the breaker and disconnect.
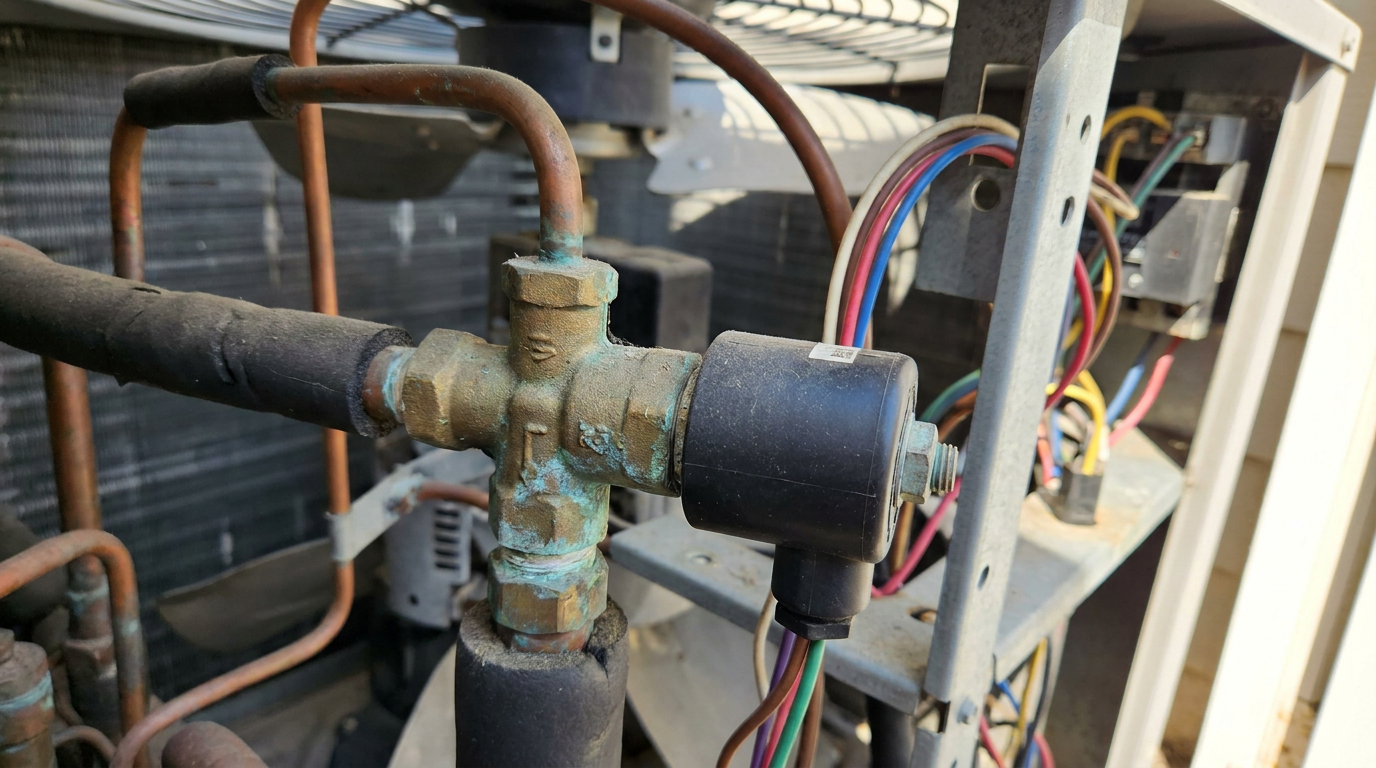
- Action: Find the reversing valve. It's a brass-looking cluster of tubes with one big tube and three smaller ones. On it, you'll see a small cylinder, usually with two wires coming out of it—that's the solenoid. Make sure those wires are tight. Check the plastic housing for cracks or signs of melting. If you're comfortable using a multimeter, you can test for continuity across the solenoid terminals with the power off, or for 24 volts AC when the system is trying to cool, with the power on and extreme caution. No continuity means a bad solenoid. No voltage means you've got a wiring issue or a bad control board.
Common Causes
If the steps above didn't fix it, these are the usual suspects, from simple to ugly.
- Thermostat Delay: Like I said, this is the most common "problem." The thermostat is doing its job and protecting the compressor. Give it time.
- Wrong Thermostat Wiring: If you put in a new thermostat recently, you may have wired it like a standard AC instead of a heat pump. The 'O' (Orange) and 'B' (Blue) wires run the reversing valve. An 'O' wire energizes the valve for cooling (most common), while a 'B' wire energizes it for heating. Get that backward and you'll get heat when you want cool, and the other way around too.
- Faulty Reversing Valve Solenoid: This little electromagnet is the part that quits the most. It can burn out and leave the valve with nowhere to go. Cheap part, usually $20-$50, but getting to it can be a pain.
- Stuck Reversing Valve: The valve itself can hang up from dirt, debris, or just plain wear. Sometimes a tech can free it by giving the valve body a gentle tap, but a lot of times the whole assembly has to come out. That's a major job, with refrigerant recovery and brazing involved.
- Low Refrigerant: Low refrigerant usually shows up as freezing or weak cooling, but it can also mess with the pressure needed to shift the reversing valve. The valve uses high-pressure refrigerant to move, and if the charge is low, it may not have enough oomph.
- Bad Control Board: The defrost board or main control board in the outdoor unit is the brain of the system. If it goes bad, it can't send the 24-volt signal to the solenoid, and the switch from heat to cool just never happens.
Common Mistakes
I've watched homeowners make these mistakes over and over. Don't be that guy.
- Not Waiting Long Enough: Patience gets lost first. Before you grab a tool, wait a full 15 minutes after switching to COOL.
- Setting the Thermostat to 'On' Instead of 'Auto': If the fan's set to 'On', it'll run nonstop, even when the compressor isn't cooling. That makes you think the AC quit, when really it's just blowing room-temperature air between cooling cycles. Leave it on 'Auto'.
- Ignoring the Breakers: A breaker can look on and still be tripped. You've got to push it firmly all the way to OFF before flipping it back to ON if you want a proper reset.
- Tapping the Valve Too Hard: If you think the valve is stuck and you're tempted to try the old tap trick, use the plastic handle of a screwdriver, not a hammer. A gentle tap-tap-tap is enough. Whacking it can break internal parts or the brazed joints and turn a small headache into a real mess.
- Trying to Add Refrigerant: Don't do it. Those DIY cans from the auto parts store are illegal, dangerous, and they'll probably wreck your system. Refrigerant charge isn't a guessing game.
Cost & Time Breakdown
Here's the rough damage to your wallet and your Saturday.
| Task | DIY Cost | Pro Cost | Time |
|---|---|---|---|
| Wait for Thermostat Delay | $0 | N/A | 15 minutes |
| Replace Air Filter | $5 - $30 | $75 - $150 (as part of a service call) | 5 minutes |
| Replace Thermostat | $50 - $250 | $200 - $500 | 1 hour |
| Replace Reversing Valve Solenoid | $20 - $50 | $150 - $350 | 1-2 hours (if accessible) |
| Replace Reversing Valve Assembly | N/A - Pro Only | $450 - $900+ | 3-5 hours |
| Replace Outdoor Unit Control Board | $200 - $600 (part only) | $500 - $1,200 | 2-3 hours |
Tips & Prevention
- Exercise the Valve: A few times in spring and fall, switch the system between HEAT and COOL by hand. Let it run 10-15 minutes in each mode. Like anything mechanical, the reversing valve can get stiff if it sits in one position for 6 months straight.
- Keep Filters Clean: I can't hammer this home enough. A clean filter is the cheapest insurance you'll buy for your HVAC system. Change it every 1-3 months, depending on pets, dust, and the rest of the house's bad habits.
- Protect the Outdoor Unit: Keep bushes and weeds trimmed at least 2 feet away from the outdoor unit so it can breathe. In the fall, hose it off gently, with the power off, to knock off cottonwood seeds, grass clippings, and other junk that clogs the coils.
- Schedule a Tune-Up: Have a pro check the system every spring before cooling season starts. They'll check refrigerant levels, test capacitors, and clean components—all of which help the reversing valve do its job.
When to Call a Professional
This is a DIY-friendly issue up to a point. But you've got to know when to put the tools down and pick up the phone. Call a licensed HVAC technician if:
- You've gone through the basic power-cycling and filter checks, and it's still acting dead.
- You hear a loud buzzing or grinding noise from the outdoor unit. Shut it off right away.
- You think the reversing valve itself is stuck, or the solenoid needs replacing, and you're not comfortable dealing with 240-volt power and delicate parts.
- You see ice building up on the refrigerant lines or the outdoor unit.
Replacing a reversing valve means recovering the system's refrigerant, cutting out the old valve, brazing in a new one, and recharging everything to exact specs. That's absolutely not a DIY job. It takes pricey specialized equipment and an EPA license. Don't mess with it.
Related Articles
Keep troubleshooting with these hand-picked guides from FixlyGuide:
- The Hidden Reason Your Furnace Short Cycles (and the $15 Fix) — Furnace short cycling can drive up energy bills and wear out your system prematurely; often, a simple fix like a dirty filter or miscalibra…
- Thermostat Won't Connect to Wi-Fi? 9 Reasons and What to Check First — A smart thermostat that can't connect to Wi-Fi is just a thermostat. Here are the 9 most common reasons yours keeps dropping offline and th…
- The #1 Mistake Homeowners Make When Their Heat Pump Stops Heating in Winter — Discover the most common reason your heat pump struggles in cold weather and how a simple homeowner fix can restore warmth to your home.
- The $5 Part That Stops Your Dryer From Heating (And How to Replace It) — A dryer that tumbles but doesn't heat often points to a blown thermal fuse, a cheap and simple fix any homeowner can do.
- The #1 Reason Your AC Freezes Solid (It's Not What You Think) — A frozen AC unit often points to poor airflow, which can be a simple fix if you know where to look.
- Why Your Garbage Disposal Just Died (And the One Thing You Should Check First) — Don't panic if your garbage disposal went silent. Often, it's a simple, overlooked electrical issue you can fix in minutes without a plumbe…
What should this project cost?
Enter your project details for a realistic cost range before you call anyone.
Service calls and common repairs run $150–$900; full system replacement typically $6,000–$12,000.
- Regional adjustment
- National average
- Labor share (typical)
- ~$1,935
- Quotes to collect
- 3 written estimates
Educational estimate based on national averages — not a binding quote. Always confirm with written local estimates.
Fixly Project Decision Box
- DIY difficulty
- Advanced
- Estimated time
- Homeowner checks 20–30 minutes
- Cost level
- Moderate
Main tools / materials
- Clean air filter
- Garden hose for condenser coils
- Shop vac for the condensate line
When to stop and call a pro
- Burning smell, smoke, or a tripping breaker
- Refrigerant lines iced over or hissing
- Any work inside the sealed refrigerant circuit (EPA-licensed only)
- Gas smell near a furnace — leave and call the utility
Need professional help?
Find an HVAC Pro Near YouFrequently asked questions
How do I know if my reversing valve is bad?+
Listen at the outdoor unit when the system tries to switch modes. You should hear a 'whoosh.' If you don't, or if you hear a continuous buzzing from the valve area, it's likely bad. Another key sign is getting hot air when calling for cool, or vice-versa.
Can I unstick a reversing valve myself?+
Sometimes. After turning the power off, you can try gently tapping the body of the valve (the brass part) with the plastic handle of a screwdriver. If it's just a minor jam, this can sometimes free it. Do not use a hammer or excessive force.
Why is my heat pump blowing hot air on the COOL setting?+
This is the classic symptom of a reversing valve stuck in the HEAT position. The thermostat is telling the system to cool, but the valve never shifted, so it's still operating in heating mode.
How long should a reversing valve last?+
A reversing valve can often last the entire 12-15 year lifespan of the heat pump. However, solenoids can fail sooner, and valves can get stuck at any time, especially if they aren't 'exercised' by switching between modes seasonally.
What does the 'O' wire on my thermostat do?+
The orange 'O' wire is the most common wire used to control the reversing valve. When your thermostat sends a 24-volt signal through the 'O' wire, it energizes the solenoid to switch the heat pump to cooling mode. If this wire is loose or disconnected, your AC won't work.
Is it expensive to replace a reversing valve?+
Yes, this is one of the more expensive repairs. Expect to pay between $450 and $900. The part itself isn't terribly expensive, but the labor is significant because it requires a technician to recover refrigerant, braze the new valve in, and then recharge the system.
Could a bad thermostat cause this problem?+
Absolutely. A faulty thermostat might not send the 24-volt signal to the reversing valve. If you've tried all the other simple fixes, testing or replacing the thermostat is a logical next step before assuming it's a major component failure.
My heat pump is old. Should I repair or replace it?+
If your heat pump is over 12 years old and needs a major repair like a reversing valve or compressor, it's often more cost-effective to replace the entire system. A new system will be much more energy-efficient and come with a new warranty, saving you money and future headaches.
Discussion
Loading comments…