Tools & materials you'll need
Affiliate linksAs an Amazon Associate FixlyGuide earns from qualifying purchases — at no extra cost to you. Prices and availability are accurate as of publication and subject to change.
Quick Answer
An oven that fails to reach its set temperature often indicates a malfunctioning temperature sensor. This component sends crucial resistance readings to the oven's control board. When it fails, the board receives inaccurate data, causing the heating elements to cycle incorrectly or not activate sufficiently, resulting in an oven that consistently runs too cool. Replacing this affordable part is a common and effective DIY fix.
The Problem
You've set your oven to 375°F for that perfect roast chicken, but an hour later, it's still lukewarm, and your digital thermometer confirms the oven is only hitting 250°F. This frustration is a common experience for many homeowners, leading to undercooked food, extended cooking times, and wasted energy. While there are several reasons an oven might not heat correctly, a significant, yet often overlooked, cause is a failing oven temperature sensor. This tiny, inexpensive part plays a colossal role in your oven's ability to maintain accurate heat, and when it malfunctions, your oven essentially "lies" about its internal temperature, causing it to constantly underperform. Before you consider replacing the entire appliance or calling an expensive technician, understanding and addressing a faulty temperature sensor can save you hundreds of dollars and bring your oven back to optimal performance.
How It Works
At the heart of your oven's temperature regulation is the oven temperature sensor, often called a RTD (Resistance Temperature Detector) sensor. This sensor is typically a thermistor, a type of resistor whose resistance changes significantly and predictably with temperature. It's usually a small, metal-cased probe located inside the oven cavity, often near the top rear or side. When you set your oven to a specific temperature, say 350°F, the oven's control board (the "brain" of the appliance) sends a small electrical current through this sensor. As the oven heats up, the resistance of the thermistor changes. This change in resistance is then measured by the control board, which correlates it to a specific temperature. The control board continuously monitors this resistance, comparing the actual temperature against your desired setting. If the actual temperature falls below the set point, the control board activates the heating elements (either the bake element at the bottom or the broil element at the top, or both) to increase the heat. Once the temperature reaches the set point, the control board deactivates the elements to prevent overheating. This cycle of monitoring and activating/deactivating the elements allows the oven to maintain a relatively stable temperature within a small operating range. A healthy sensor will provide a consistent, accurate resistance reading for a given temperature. However, if the sensor begins to fail, its resistance readings become erratic or consistently off, leading the control board to misinterpret the actual oven temperature. For instance, a failing sensor might report the oven is hotter than it actually is, causing the control board to prematurely shut off the heating elements, resulting in an underheated oven.
Step-by-Step Fix
1. Safety First — Always unplug your oven or shut off the circuit breaker before beginning any repair work. This prevents the risk of electrical shock.
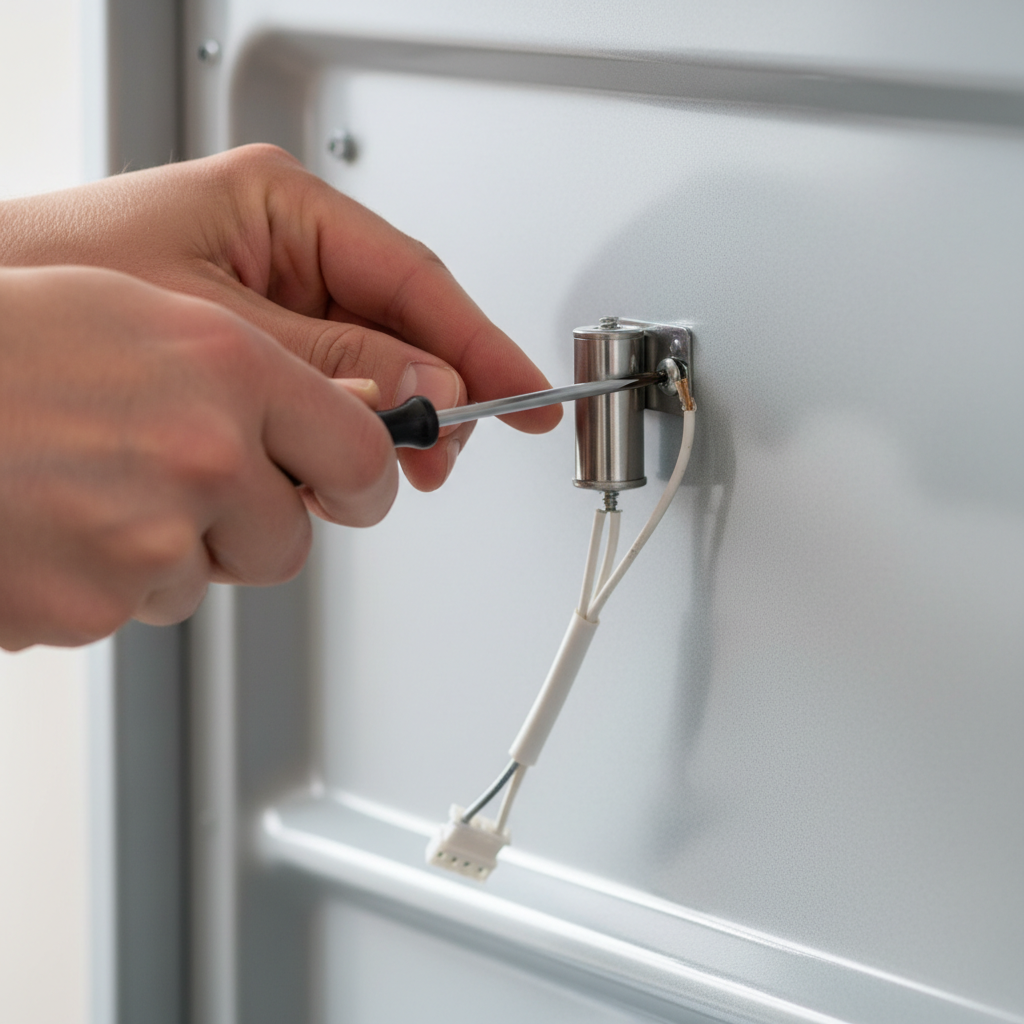
2. Locate the Temperature Sensor — The oven temperature sensor is typically a slender, metallic rod, about 2-3 inches long, protruding into the oven cavity. It's usually found in the upper-left or upper-right corner at the back of the oven, or sometimes along the side. It will be secured with one or two screws.
3. Prepare for Removal — Open the oven door fully. You'll likely need a Phillips-head screwdriver for the mounting screws. Place a towel or soft cloth on the oven floor to protect the door and provide a place for tools.
4. Disconnect the Sensor Wiring — Carefully unscrew the mounting screws holding the sensor in place. Gently pull the sensor body a few inches out of the oven wall. You should see a wire harness connected to the end of the sensor. There might be a clip or a simple push-and-pull connection. Disconnect the wire harness, noting its orientation if it's not symmetrical.
5. Test the Old Sensor (Optional but Recommended) — Use a multimeter set to the ohms (Ω) setting. At room temperature (around 70-75°F or 20-24°C), a healthy oven sensor should read between 1080 and 1100 ohms. Readings significantly outside this range (e.g., 900 ohms or 1300 ohms) indicate a faulty sensor. You can also place the sensor in a cup of ice water (32°F/0°C) and then in hot water (checking the manual for expected resistance at specific temperatures, or looking up a generalized resistance chart for oven sensors) to see if the resistance changes predictably. A sensor that shows no change or erratic readings across temperature changes is definitely bad.
6. Connect the New Sensor — Take your new oven temperature sensor and connect its wire harness to the oven's internal wiring. Ensure the connection is snug and secure. Make sure you have the correct replacement part; generic sensors may not have the correct resistance curve for your specific oven model.
7. Mount the New Sensor — Gently push the new sensor probe back into its opening in the oven wall until the mounting bracket is flush. Secure it with the original mounting screws. Be careful not to overtighten and strip the screws.
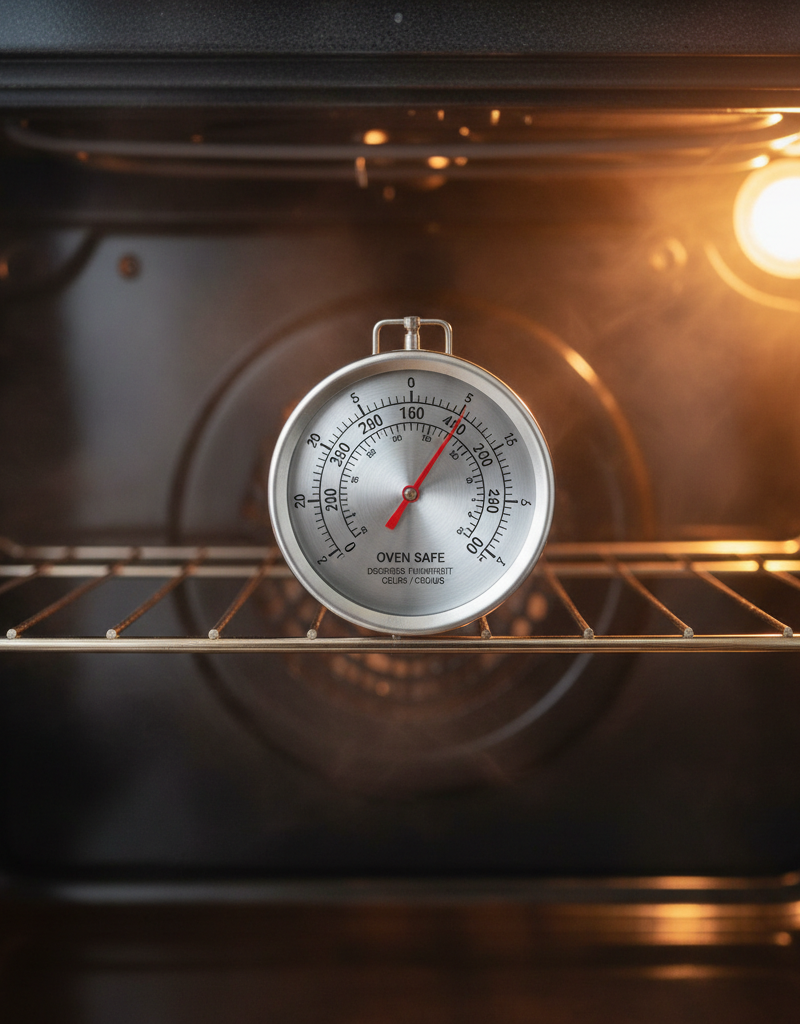
8. Reassemble and Test — Close the oven door. Plug the oven back in or restore power at the circuit breaker. Set the oven to a mid-range temperature, like 350°F (175°C), and monitor it with an accurate oven thermometer. It should now heat up to the set temperature and cycle correctly. You may notice the preheat time is faster and more accurate.
Common Causes
- Age and Wear: Like any electronic component, oven temperature sensors degrade over time due to repeated heating and cooling cycles. The internal components can become brittle or lose their precise calibration.
- Overheating: While designed for high temperatures, extreme or prolonged overheating (e.g., a self-cleaning cycle gone wrong, or a malfunction causing elements to run too hot) can damage the sensor's delicate internal wiring.
- Power Surges: Electrical surges can sometimes damage sensitive electronic components like the temperature sensor, scrambling its ability to provide accurate readings.
- Physical Damage: Though protected, accidental impact during cleaning or inserting/removing racks could potentially damage a sensor, especially if it's loosely mounted.
- Manufacturing Defects: Rare, but a sensor can sometimes leave the factory with an inherent flaw that leads to premature failure.
- Moisture or Grease Intrusion: While generally sealed, chronic exposure to excessive moisture or grease can sometimes degrade the sensor's exterior housing and eventually affect its internal workings.
Common Mistakes
- Ignoring the Safety Step: Many DIYers rush to open up the oven without unplugging it first. Always disconnect power to avoid serious electrical shock.
- Not Testing the Sensor: Rushing to replace the sensor without confirming it's the problem. A quick multimeter test can save you from buying an unnecessary part if the issue lies elsewhere (e.g., a bake element).
- Using the Wrong Part: Assuming all oven sensors are universal. Always look up your oven's make, model, and serial number to order the exact replacement part. The resistance curves vary between brands and models.
- Overtightening Screws: Stripping the mounting screws or cracking the oven's enamel can create a bigger problem than you started with.
- Not Checking Wiring: Sometimes, the wiring harness connecting the sensor can be loose or corroded. Inspect these connections before assuming the sensor itself is bad.
- Failing to Calibrate (if applicable): Some high-end ovens have a small temperature offset calibration setting in the control panel. While less common for a significantly underheating oven, it’s worth checking your oven's manual.
Cost & Time Breakdown
| Task | DIY cost | Pro cost | Time |
|---|---|---|---|
| New Oven Temp Sensor | $15–$50 | $15–$50 | 15–30 min |
| Multimeter (if needed) | $20–$30 | N/A | N/A |
| Professional Service Call | N/A | $150–$300+ | 1–2 hours |
| Total DIY (Parts Only) | $15–$50 | N/A | 20–30 minutes |
| Total Professional Repair | N/A | $165–$350+ | 1–2 hours |
Tips & Prevention
- Regular Cleaning (Gentle): Keep your oven relatively clean, but avoid harsh abrasive cleaners directly on the sensor. Wipe down any spills quickly.
- Avoid Physical Impact: Be mindful when placing or removing oven racks, especially heavy items, to avoid accidentally bumping the sensor.
- Self-Cleaning Cycle Caution: While convenient, the extreme temperatures of a self-cleaning cycle can stress components. Ensure good ventilation and only use it when necessary.
- Use an Oven Thermometer: A standalone oven thermometer is your best friend. Keep one in the oven at all times to regularly cross-check your oven's display against the actual internal temperature. This is the earliest warning sign of a problem.
- Check Wiring Annually: When you clean your oven, a quick visual inspection of the sensor's wiring connection for any signs of fraying or looseness can catch issues before they escalate.
- Document Oven Performance: If you suspect an issue, make a note of the set temperature versus the actual temperature over a few cooking cycles to identify patterns.
When to Call a Professional
While replacing an oven temperature sensor is a manageable DIY task for most homeowners, there are specific situations where calling a licensed appliance repair professional is the wiser choice. If, after replacing the sensor, your oven still fails to heat correctly or exhibits erratic temperature control, the issue might stem from the main control board. Diagnosing and replacing a control board is more complex, often requiring specialized knowledge to program or calibrate. Furthermore, if you encounter any electrical issues such as sparking, burning smells, or if the main heating elements are visibly damaged or not glowing red, shut off power immediately and call a professional. These could indicate more serious electrical faults that pose a fire hazard. If your oven is a dual-fuel model (gas and electric), any issues related to the gas supply or burner ignition should always be handled by a qualified gas appliance technician to ensure safety and compliance with local codes. Attempting complex electrical or gas component repairs without proper expertise can be dangerous and void your appliance's warranty.
Related Articles
Keep troubleshooting with these hand-picked guides from FixlyGuide:
- The #1 Reason Your AC Blows Warm Air (And It's Not What You Think) — A dirty air filter is often the overlooked culprit behind an air conditioner blowing warm air, hindering its ability to cool your home effi…
- The #1 Mistake When Your Oven Isn't Heating (and the $0 Fix) — Fix your oven not heating to the correct temperature by understanding a common overlooked issue and simple troubleshooting steps.
- The One Reason Your Refrigerator Fails (While the Freezer Doesn't) — If your freezer works but your refrigerator isn't cooling, the most common culprit is a blocked or malfunctioning defrost drain system.
- The #1 Reason Your AC Fan Won't Spin (And the 20-Minute Fix) — Diagnose and fix a non-spinning AC condenser fan with our step-by-step guide, saving you money and restoring your home's cool air.
- The #1 Mistake Homeowners Make Installing a Smart Thermostat (and How to Fix It) — Avoid the most common pitfall when installing a smart thermostat yourself and ensure a smooth, energy-efficient setup.
- The $5 Secret to Silencing That Annoying Dripping Faucet (Single-Handle Fix) — Stop a dripping single-handle faucet with a simple and inexpensive DIY fix by replacing a worn-out o-ring or washer.
Frequently asked questions
How do I know if my oven temperature sensor is bad?+
The most common sign is your oven consistently underheating or overheating, even when set to a specific temperature. You can confirm this with an accurate oven thermometer. For a definitive test, use a multimeter to check the sensor's resistance at room temperature; it should be around 1080-1100 ohms. Significant deviations or a complete lack of continuity indicate a bad sensor.
Can I replace an oven temperature sensor myself?+
Yes, for most electric ovens, replacing the temperature sensor is a straightforward DIY task that involves unplugging the oven, unscrewing the old sensor, disconnecting its wiring harness, and installing the new one. It typically takes less than 30 minutes.
What is the typical cost to replace an oven temperature sensor?+
The cost for a new oven temperature sensor typically ranges from $15 to $50, depending on your oven's brand and model. If you hire a professional, expect to pay an additional $100-$200 or more for labor.
Where is the oven temperature sensor located?+
The oven temperature sensor is usually a slender metallic probe located inside the oven cavity, often found in the upper-left or upper-right corner at the back of the oven. It will be secured with one or two screws.
What if replacing the sensor doesn't fix the oven temperature?+
If a new sensor doesn't resolve the issue, the problem might be with the oven's main control board, the heating elements (bake or broil), or the oven's wiring. At this point, it's often best to consult a licensed appliance repair professional for further diagnosis and repair.

Discussion
Loading comments…