- Weather Exposure: High winds, hail, heavy rain, snow, and ice are the leading causes of roof wear and damage. UV radiation from the sun also degrades materials over time.
- Age and Material Degradation: All roofing materials have a lifespan. As they age, materials become brittle, sealants fail, and the protective properties diminish. Granule loss, cracking, and curling are common age-related issues.
- Poor Installation or Repairs: Improperly installed shingles, flashing, or ventilation can lead to premature failure and leaks. Patchy, DIY repairs can sometimes exacerbate underlying problems.
- Clogged Gutters and Downspouts: Accumulated leaves and debris prevent proper water drainage, causing water to back up under shingles, rot fascia boards, and lead to ice dams in colder climates.
- Animal Activity: Squirrels, raccoons, birds, and other pests can chew through wood, damage vents, and displace shingles to gain entry into an attic.
Plumbing · Leak
| Project category | Plumbing |
|---|---|
| Problem type | Leak |
| Trade required | Plumbing |
| Urgency | Emergency — act now |
| Safety risk | High safety risk |
| DIY suitability | DIY for experienced homeowners |
| Cost category | Low cost |
| Typical timeline | Shut water off now; repair usually same or next day |
| Contractor type | Licensed plumber |
Repair option
Isolate at the shutoff, replace the failed component, and dry the cavity fully.
Replacement option
Repipe the run or the branch when corrosion is widespread.
Common causes
- Failed supply line or shutoff valve
- Worn washers, cartridges, or P-trap connections
- Pinhole corrosion in older copper
Relevant tools:emergency checklistdiy or hire a pro
Published July 19, 2026Last updated August 17, 2026
Tools & materials you'll need
Affiliate links- AmazonBinoculars7x-10x magnification
- AmazonNotepad and pen
- AmazonSmartphone or digital camera
- AmazonLong-handled pole with mirror (optional)For seeing undersides of gutters
- AmazonGutter scoopFor easily reachable debris.
- AmazonLadderOnly for safe, low-level inspection of gutters; do not climb onto the roof.
- AmazonWork gloves1 pair · If you are clearing easily reachable debris.
As an Amazon Associate FixlyGuide earns from qualifying purchases — at no extra cost to you. Prices and availability are accurate as of publication and subject to change.
Quick Answer
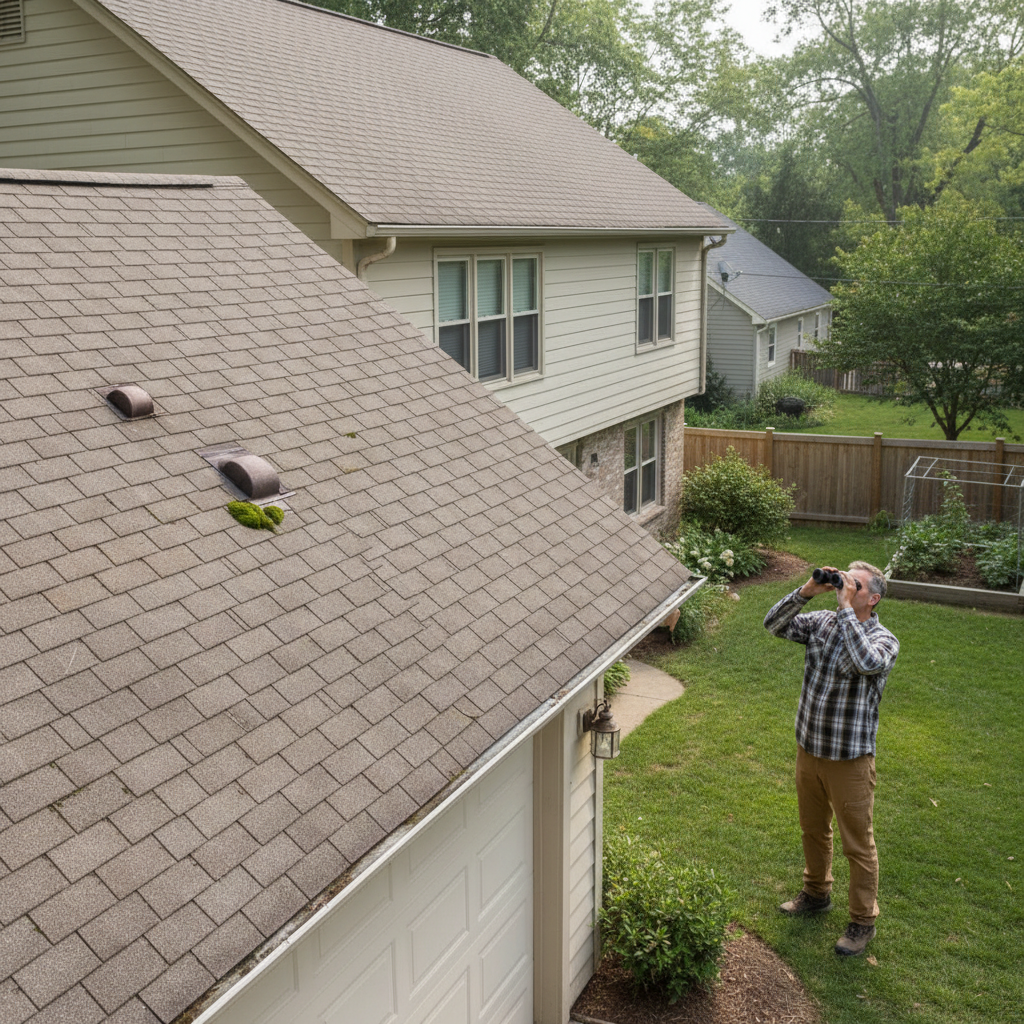
A ground-level roof inspection involves systematically scanning the roof's various components using binoculars, looking for visual cues of damage, wear, or potential failure points. This proactive check helps homeowners identify issues like cracked shingles, displaced flashing, sagging gutters, or moss growth before they escalate into major leaks and expensive repairs, saving thousands in potential damage and remediation costs.
The Problem
Many homeowners assume they need to climb onto their roof to identify problems, a task that can be dangerous and is often unnecessary for early detection. The reality is, a significant percentage of roof issues — from missing shingles to damaged flashing and blocked gutters — are visible from the ground with the right approach and tools. Ignoring these early warning signs can lead to severe consequences: water intrusion into your attic, damaged ceilings, compromised insulation, potential mold growth, and even structural deterioration. A small, unaddressed defect can quickly compound into a multi-thousand-dollar repair or even require a full roof replacement prematurely. The challenge for most homeowners is knowing what to look for and how to effectively spot these subtle but critical indicators from a safe vantage point.
How It Works
A roof's primary job is to shed water and protect the home's structure. It achieves this through a carefully layered system. The outermost layer, typically shingles (asphalt, metal, tile, etc.), deflects the vast majority of rainfall. Beneath the shingles, an underlayment (felt or synthetic) provides a secondary barrier against water, and flashing — thin pieces of metal (aluminum, steel, copper) – are installed around penetrations like chimneys, vents, and valleys to direct water away from vulnerable areas. Gutters and downspouts then collect and channel water safely away from the foundation. Even a small disruption in this system can allow water to penetrate. For example, a single cracked shingle acts like a tiny funnel, directing water to the underlayment. If the underlayment is compromised or if the water finds an unsealed nail hole, it can begin to wick into the attic space. Similarly, displaced flashing creates an open seam where water can easily enter. Granule loss on asphalt shingles, often visible as dark patches or granules accumulating in gutters, indicates the shingle's UV protection and waterproofing are deteriorating, making it more brittle and prone to cracking. Moss or algae growth, while sometimes aesthetic, can retain moisture and accelerate shingle degradation, especially in shaded, damp areas. By understanding these components and their common failure points, you can effectively "read" your roof's health from the ground up, identifying anomalies that signal potential hidden water pathways.
Step-by-Step Fix
1. Gather Your Tools & Choose Your Time – For the most effective inspection, pick a clear, bright day with minimal wind. * Tools: A good pair of binoculars (7x to 10x magnification is ideal), a notepad and pen, a smartphone or digital camera for photos, and a measuring tape if you plan to assess certain features from the ground (e.g., gutter sag). * Best Practice: Perform this inspection at least twice a year – once in the spring after winter storms and once in the fall before winter hits. Also, inspect your roof immediately after any significant weather event like a hailstorm or strong winds.
2. Walk the Perimeter and Look for Debris – Begin your inspection by walking slowly around your entire house. * Focus: Look for any large debris (branches, leaves, toys) sitting on the roof or in the gutters. Pay close attention to areas beneath trees. Debris can trap moisture, lead to mold and rot, and weigh down roof components. Note any visible large piles of leaves or branches. * If you see large debris: If it's safely reachable from the ground with a leaf blower or a long-handled brush, carefully remove it. For anything out of reach or potentially dangerous, make a note to call a professional.
3. Inspect Shingles for Damage – Using your binoculars, zoom in on different sections of your roof, area by area. * Look for: Missing, cracked, curled, buckled, or blistered shingles. Pay special attention to the edges, hips, and ridges of the roof, as these areas are more exposed to wind. Also, look for dark streaks or patches, which can indicate algae or mold, and shiny, exposed areas where granules have worn off. * Granule Assessment: Check your gutters and downspout splash blocks for an accumulation of shingle granules. A significant amount often signals accelerated shingle wear. * Color Discrepancy: Note any areas with a noticeably different color, which could mean a patch repair was done, possibly indicating prior damage.
4. Scrutinize Flashing Around Penetrations – Flashing is crucial for preventing leaks around chimneys, vents, skylights, and valleys. * Focus: Use your binoculars to inspect all flashing. Look for any signs of rust, bending, lifting, or missing caulk/sealant. Pay close attention to the base of the chimney, vent pipes (where rubber boots can crack), and edges of skylights. * Common Issue: The rubber or plastic collar around plumbing vent pipes degrades over time, cracking and leaving openings for water. Look for visible cracks or tears in these collars.
5. Evaluate Gutters and Downspouts – Effective water drainage is paramount for roof and foundation health. * Look for: Sagging gutters, detached sections, obvious blockages (leaves, nests), rust spots, or overflowing gutters during rain. Ensure downspouts are securely attached and directing water away from the foundation (ideally 5-10 feet away). * Hidden Clogs: If you observe rust streaking down the side of the house from a downspout, it often indicates a persistent clog within the downspout itself, causing water to back up and rust the metal.
6. Check Soffit and Fascia Boards – These components protect your eaves and provide ventilation. * Focus: Look for any peeling paint, water stains, soft spots (indicating rot), or signs of animal entry (chew marks, nests) along the soffit (the underside of the eaves) and fascia (the board along the roof edge). * Ventilation Issues: If you notice excessive mildew or dampness on the soffit, it might point to attic ventilation problems combining with moisture from inside the house.
7. Examine Chimney and Vent Caps – These elements can often show early signs of masonry or component failure. * Look for: Cracked or crumbling mortar joints on chimneys, missing chimney caps, rust on metal vent caps, or deterioration of the chimney crown (the concrete slab on top). Loose or missing caps can allow rain and critters to enter. * Moisture Stains: Dark stains running down the side of the chimney can indicate water penetration directly behind the masonry or a compromised cap/flashing.
8. Scan for Sagging and Ponding – A subtle sag can be a major structural indicator. * Method: Step back from your home and view the roofline from different angles. Look for any areas that appear to dip, sag, or are uneven. While slight undulations can be normal for older homes, a pronounced dip can indicate structural issues, water damage to the decking, or overloaded areas. * Ponding: After a rain, if you can see standing water (ponding) in certain areas of a flat or low-slope roof, this is a serious issue that needs immediate professional attention. For pitched roofs, standing water is extremely rare unless there's a significant structural problem.
9. Document Your Findings – A visual record helps track issues and communicate with professionals. * Action: Take clear photos or videos of any identified issues. Note the date, location on the roof (e.g., "front-left corner near chimney"), and a brief description of the problem. This documentation is invaluable for monitoring changes, showing to insurance adjusters, or providing to a roofing contractor for a repair estimate.
Common Causes
- Weather Exposure: High winds, hail, heavy rain, snow, and ice are the leading causes of roof wear and damage. UV radiation from the sun also degrades materials over time.
- Age and Material Degradation: All roofing materials have a lifespan. As they age, materials become brittle, sealants fail, and the protective properties diminish. Granule loss, cracking, and curling are common age-related issues.
- Poor Installation or Repairs: Improperly installed shingles, flashing, or ventilation can lead to premature failure and leaks. Patchy, DIY repairs can sometimes exacerbate underlying problems.
- Clogged Gutters and Downspouts: Accumulated leaves and debris prevent proper water drainage, causing water to back up under shingles, rot fascia boards, and lead to ice dams in colder climates.
- Vegetation Overgrowth: Overhanging tree branches can scrape and damage shingles, leading to granule loss or punctures. Falling leaves and needles contribute to gutter clogs. Moss and algae growth on shaded roofs retain moisture and accelerate decay.
- Animal Activity: Squirrels, raccoons, birds, and other pests can chew through wood, damage vents, and displace shingles to gain entry into an attic.
Common Mistakes
- Ignoring Granule Accumulation: Many homeowners see granules in their gutters and dismiss it as normal. Significant granule loss indicates the protective layer of asphalt shingles is wearing away, exposing the underlayment to UV rays and accelerating roof deterioration. Don't ignore it; it's a prime indicator for future leaks.
- Neglecting Gutter Maintenance: Clogged gutters are a primary cause of fascia rot, foundation issues, and ice dams. Assuming gutters only need cleaning when they
Related Articles
Keep troubleshooting with these hand-picked guides from FixlyGuide:
- The $20 Trick That Melts Ice Dams (and Saves Your Roof) — Discover a surprisingly simple, budget-friendly method to safely remove ice dams and prevent costly roof damage to your home.
- The 7 Overlooked Home Inspection Items That Cost Homeowners Thousands Annually — Discover the seven most commonly missed home inspection items that lead to costly repairs for homeowners every year and learn how to perfor…
- The 7 Critical Spring Home Maintenance Tasks Most Homeowners Forget — Prepare your home for warmer weather and prevent costly repairs with a comprehensive spring maintenance checklist that goes beyond surface-…
- The #1 Washing Machine Killer (and 5 Ways to Stop It) — Extend your washing machine's life and prevent costly breakdowns with these essential maintenance tips, focusing on the most common cause o…
- The 7 Critical Home Inspection Mistakes Most Homeowners Make (and How to Spot Them) — Discover the crucial home inspection mistakes homeowners commonly overlook and learn how to identify potential problems before they become…
- The Secret Culprit Behind Your Leaky Refrigerator (It's Not What You Think) — Discover the often-overlooked reason your refrigerator is leaking water and how a simple, inexpensive fix can prevent costly damage.
What should this project cost?
Enter your project details for a realistic cost range before you call anyone.
Spot repairs commonly run $400–$1,800; full replacement typically $9,000–$18,000 for an average home.
- Regional adjustment
- National average
- Labor share (typical)
- ~$2,948
- Quotes to collect
- 3 written estimates
Educational estimate based on national averages — not a binding quote. Always confirm with written local estimates.
Fixly Project Decision Box
- DIY difficulty
- Professional Recommended
- Estimated time
- Inspection 1–2 hours · repairs 1–3 days
- Cost level
- High
Main tools / materials
- Binoculars for a ground-level look
- Flashlight for attic checks
- Moisture meter
- Roofing cement (temporary patch only)
When to stop and call a pro
- Active leak near lights, fans, or any wiring
- Sagging, bulging, or water-filled ceiling
- Steep, wet, or two-story roof — do not climb it
- Storm or hail damage you plan to claim on insurance
Need professional help?
Free roof assessment first — no phone calls until you ask for them.
Get Local Roofing HelpDecide what your roof needs
Two minutes of questions turns "something is wrong up there" into a clear next step.
- Repair or replace your roof?Answer 10 questions about age, leaks, and damage to get a clear next step.Open
- Compare contractor quotesScore up to four bids on price, warranty, licensing, and timeline.Open
- Get local estimatesSend one request and compare written estimates from vetted pros.Open
Free, no signup required. Estimates are educational guidance, not a quote or an inspection.
Recommended for DIYers & woodworkers
Sponsored
The Top 20 Tools for Workshops of Any Budget
No stationary machines or power tools required — plus 3 fundamental tools that can't be bought at any price.
Get the free guide
Ted's Woodworking — The #1 Woodworking Resource
Detailed instructions, dimensioned drawings, materials & cutting lists, and 3D schematics for every skill level.
See the plansSponsored: links above are affiliate links. FixlyGuide may earn a commission on qualifying purchases — at no extra cost to you.
Frequently asked questions
How often should I inspect my roof from the ground?+
You should inspect your roof from the ground at least twice a year – once in the spring after winter and once in the fall before winter. Also, perform an inspection immediately after any severe weather event like strong winds or hail.
What are the most critical things to look for during a ground-level roof inspection?+
Focus on missing, cracked, or curled shingles, damaged or displaced flashing around chimneys and vents, clogged gutters, and any signs of sagging in the roofline. Granule loss from asphalt shingles is also a key indicator of wear.
Can I really spot major roof problems without getting on the roof?+
Yes, many significant roof issues, such as missing shingles, damaged flashing, blocked gutters, and even some types of structural sagging, are often visible from the ground with the aid of good binoculars. This allows for early detection and safer inspection.
What if I see moss or algae on my roof?+
Moss and algae can retain moisture and accelerate the degradation of roofing materials. While not always an immediate emergency, significant growth warrants further investigation and generally indicates a need for cleaning or professional assessment, especially if it's causing shingles to lift or deteriorate.
When should I call a professional roofer after a ground inspection?+
Call a professional if you spot widespread shingle damage, significantly displaced flashing, severe sagging in the roofline, extensive moss growth that appears to be lifting shingles, or any evidence of active leaks inside your home.



Discussion
Loading comments…