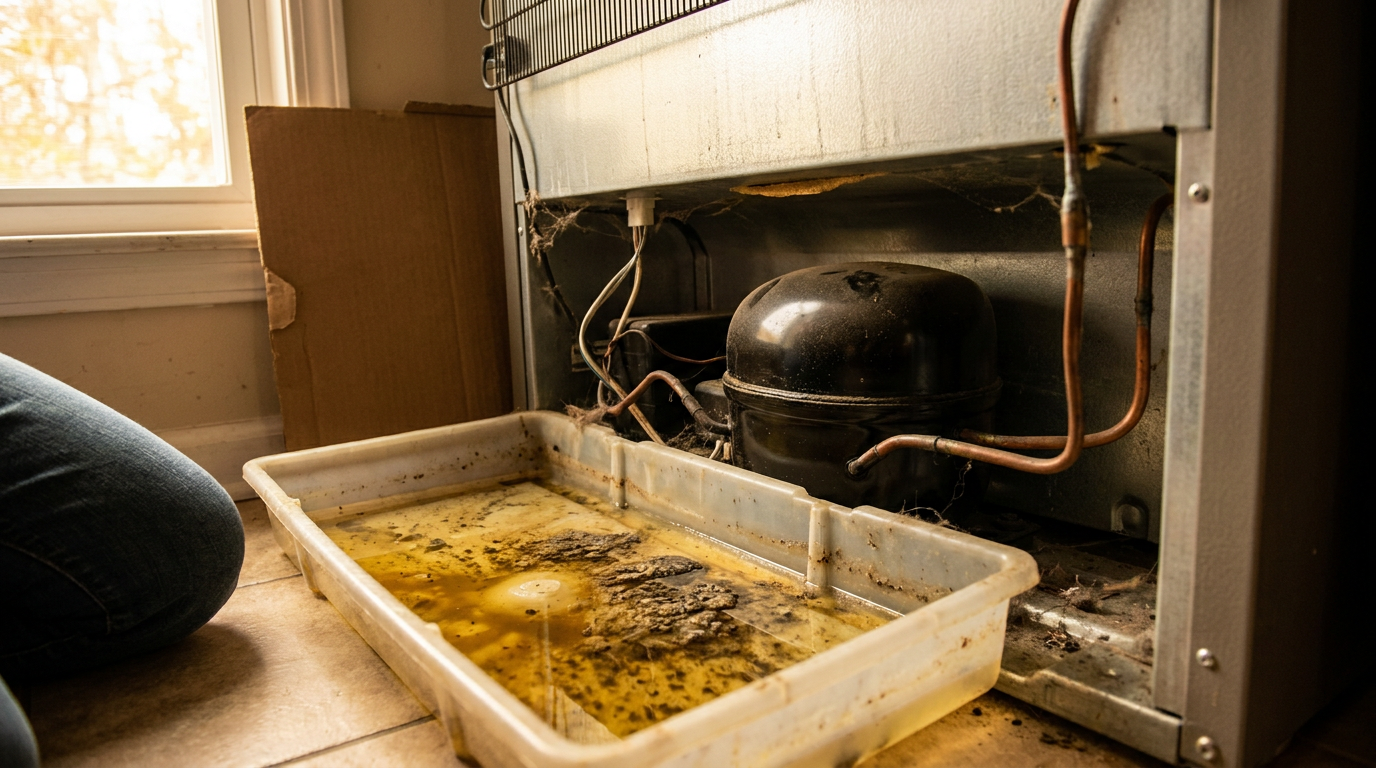
- The defrost drain pan underneath the unit
- The rubber J-trap drain line behind the back cardboard cover
- Saturated styrofoam insulation inside the air plenum
- Mold spores tucked deep inside the accordion folds of the door gaskets
- A spent carbon filter that’s basically off-gassing old odors right back into the air stream
Plumbing · Clog
| Project category | Plumbing |
|---|---|
| Problem type | Clog |
| Trade required | Plumbing |
| Urgency | Soon — within weeks |
| Safety risk | Low safety risk |
| DIY suitability | DIY friendly |
| Cost category | Low cost |
| Typical timeline | Same-day DIY attempt; pro visit within a day or two |
| Contractor type | Licensed plumber |
Repair option
Plunger, hand auger, or trap cleanout before chemicals.
Replacement option
Line replacement when clogs return in the same spot repeatedly.
Common causes
- Hair and soap buildup in the trap
- Grease cooling in the branch line
- Flushed wipes or foreign objects
Relevant tools:diy difficultydiy or hire a pro
Published November 15, 2026Last updated November 15, 2026
Tools & materials you'll need
Affiliate linksAs an Amazon Associate FixlyGuide earns from qualifying purchases — at no extra cost to you. Prices and availability are accurate as of publication and subject to change.
Quick Answer
If your refrigerator smells bad even after you’ve scrubbed every shelf, chances are decaying organic gunk is sitting in the defrost drain pan under the cabinet or bacterial biofilm has taken over your drip tube. Pull the fridge forward, crack open the rear access panel, and scrub that plastic condensate tray with hot water, dish soap, and vinegar. If the foul air’s blowing from the vents, swap out the internal activated-carbon air filter and clean the folds of the door gasket with a 50/50 water-and-vinegar mix.
The Problem
You dumped the spoiled milk, tossed the slimy bag of spinach, and wiped every tempered glass shelf with lemon cleaner. Two hours later, you swing open the French doors and that sour, sickly stink hits you right in the face.
It’s maddening.
Most folks figure a refrigerator odor lives on the plastic walls or in some forgotten Tupperware shoved to the back of the bottom shelf. Sure, that covers everyday food funk, but when the smell hangs around for days or weeks after a deep clean, the mess isn’t actually inside the food compartment.
It’s hiding in the fridge’s guts:
- The defrost drain pan underneath the unit
- The rubber J-trap drain line behind the back cardboard cover
- Saturated styrofoam insulation inside the air plenum
- Mold spores tucked deep inside the accordion folds of the door gaskets
- A spent carbon filter that’s basically off-gassing old odors right back into the air stream
Until you get into those hidden mechanical spaces, baking soda and surface sprays won’t do much. No dice.
How It Works
Your modern refrigerator doesn’t just sit there making cold air; it’s moving an enclosed air loop and shedding moisture the whole time.
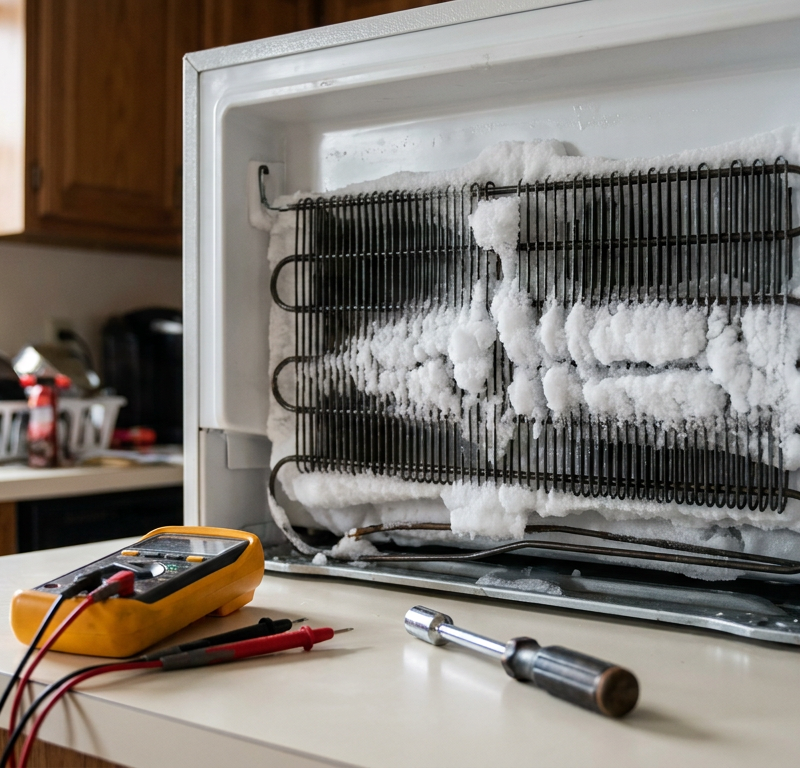
Every 8 to 12 hours, a control board or old-school defrost timer shuts off the compressor and kicks on an electric defrost heating element wrapped around the evaporator coils behind the freezer wall. That heater brings the coils up to roughly 45°F to 50°F so the frost melts off. The water drops into an evaporator trough, then runs through a 1/2-inch plastic or rubber drain tube down into a shallow drain pan sitting in the warm, dusty machine compartment at the base of the fridge.
+-----------------------------------------------------------+
| FRESH FOOD COMPARTMENT                                    |
| [Air Return / Damper] <==== [Circulating Blower Fan]      |
+-----------------------------------------------------------+
| FREEZER COMPARTMENT                                       |
| [Evaporator Coils + Defrost Heater (45°F-50°F melt cycle)]|
|                          |                                |
|                   [Trough Drain]                          |
|                          |                                |
|                 [1/2" Drain Tube / Duckbill]              |
+--------------------------|--------------------------------+
| MACHINE COMPARTMENT      v                                |
| [Compressor Heat] ---> [Condensate Drain Pan] <--- [Fan]  |
|                        (Stagnant residue / odor source)   |
+-----------------------------------------------------------+
Once that runoff lands in the pan, heat from the compressor — usually running between 110°F and 140°F — and airflow from the condenser fan evaporate the standing water right back into your kitchen. Under normal conditions, it’s a closed little self-evaporating loop.
The trouble starts when food crumbs, sticky meat juice, or sugary spills from the upper shelves drip down the air return vents and wash into that dark, warm tray. Now you’ve got moisture, heat, and raw organic junk sitting right in front of a high-speed condenser fan. That fan pulls air across the rotten pan and pushes the stink through the lower vents, while cabinet pressure differences drag odors right back into the fresh food cavity. That thing’s toast.
Step-by-Step Fix
Before you tear into the fridge, cut the power. You’ll be working inches from the compressor, start relay, and condenser fan motor, and those parts carry standard 120-volt current.
-
Cut the power and pull the unit forward — Unplug the cord from the wall outlet or flip the dedicated 15-amp breaker at your main panel. Ease the refrigerator out from the wall, and don’t gouge your hardwood or vinyl while you’re at it.
- Safety note: If you’ve got a copper water line for the ice maker, pull straight and slow; kink that tube and it’ll split at the compression fitting and flood the subfloor.
- Tool: Appliance glide sliders or a clean piece of corrugated cardboard under the front leveling feet.
-
Strip out all food, crisper bins, and shelves — Move everything from the fresh food compartment into coolers packed with ice packs. Pull every crisper drawer, glass shelf, and door caddy so you can see the bare ABS plastic liner.
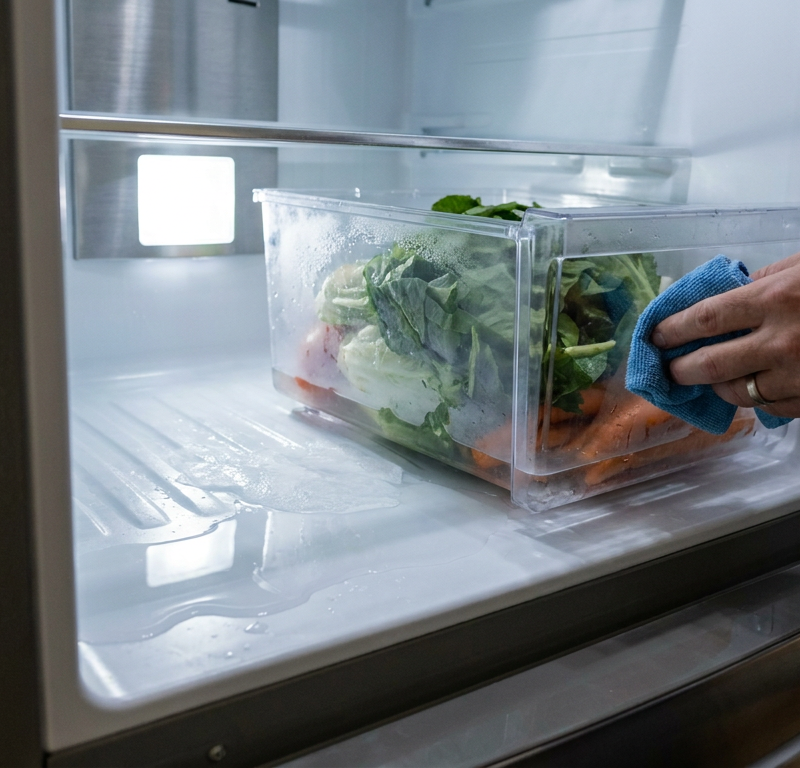
- Check the bottom floor right under the deli drawers for sticky, caramelized liquid that ran under the plastic seam.
- If liquid pooled under the bottom drawer runners, scrape it up with a plastic putty knife wrapped in a damp microfiber rag.
-
Scrub the interior with a pH-neutralizing wash — Don’t go blasting the liner with straight bleach; it chews up polystyrene and leaves behind a nasty plastic smell. Mix 2 tablespoons of baking soda and 1 quart of hot tap water (approx. 110°F) in a bucket instead.
- Wipe every interior wall, shelf bracket, and shelf ledge with a clean microfiber cloth.
- Pay attention to the shelf adjustment tracks on the back wall; spilled broth loves to wick behind those metal or plastic tracks and rot out of sight.
-
Pull and inspect the internal air filter — Look in the top-rear corner or between the crisper bins for a rectangular vented plastic cover. Twist or click it open and slide out the activated-carbon air filter.
- Sniff it close up. If it smells sour or musty, it’s past its adsorption capacity and it’s blowing odor across your vegetables. Toss it.
- Vacuum out the filter housing with a shop vac or dust brush attachment before you slide a fresh filter into place.
-
Disinfect the accordion door gaskets — Pull back the flexible rubber gaskets around the perimeter of both doors. You’ll probably find a black or gray crust of mold, breadcrumbs, and dried condensation stuffed in the folds.
- Spray the folds with a 50/50 mix of distilled white vinegar and warm water.
- Scrub the channels with an old soft-bristled toothbrush, then dry everything off with a rag.
- If the gasket feels brittle or stays smashed flat, it’s letting humid room air into the cabinet, and that feeds mold growth.
-
Remove the lower rear mechanical access panel — Head to the back of the refrigerator and look at the bottom 12 to 18 inches. Pull the 1/4-inch or 5/16-inch hex-head sheet metal screws holding the cardboard or stamped-metal service cover.
- Tools: 1/4-inch nut driver or magnetic drill bit.
- Watch those raw sheet-metal edges; wear cut-resistant gloves.
-
Locate and extract the defrost drain pan — Look next to or directly on top of the black, dome-shaped compressor. You’ll see a white or grey plastic tray. Some pop out with a plastic tab, while others are held by a single 1/4-inch screw.
- Slide the pan out horizontally so you don’t dump rancid, murky liquid onto the floor or electrical wiring.
- If your model has a non-removable drain pan molded to the compressor base, use a wet/dry shop vac to pull out all stagnant water and muck.
-
Scrub and sanitize the drain pan — Take the plastic pan to your laundry sink. Dump any gel-like slime, which is really dust, fungal spores, and fermented milk or juice proteins all mixed together.
- Wash it with warm water, concentrated grease-cutting dish soap, and 1 cup of white vinegar.
- Dry the pan completely with paper towels before snapping it back into the mounting brackets under the cabinet.
-
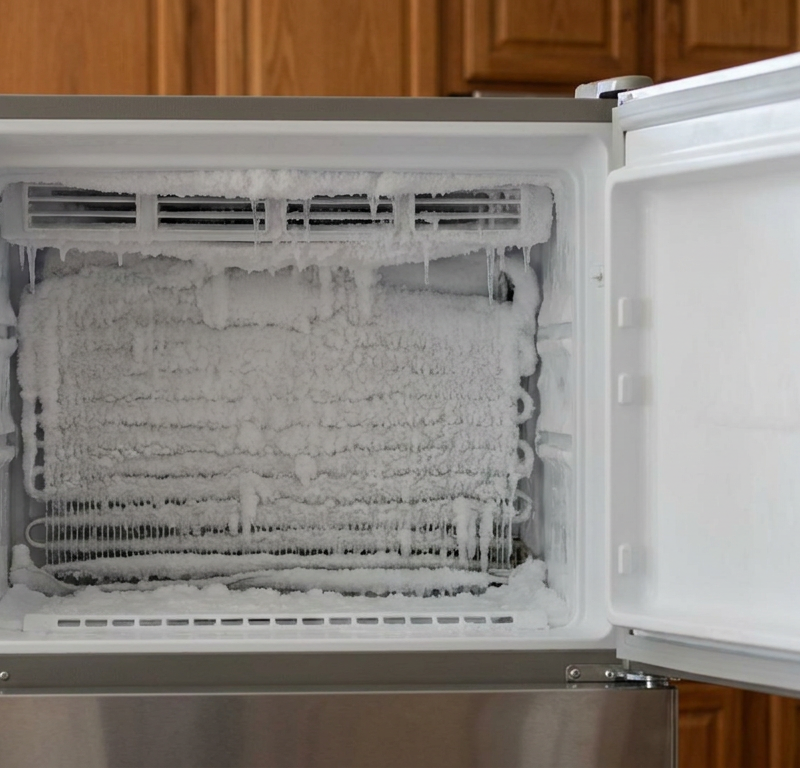
Flush the defrost drain tube from above — Go back to the freezer compartment. If your model’s drain hole is reachable below the rear evaporator panel, clear it now and get the line clean.
- Fill a plastic turkey baster or slip-tip syringe with hot tap water (around 120°F) mixed with a few drops of dish soap.
- Press the baster tip firmly into the drain hole and flush with steady pressure until you hear water draining clean into the bottom pan.
- If the tube backs up, a sludge plug or mold collar is stuck in the rubber duckbill valve at the bottom of the line; pinch that valve from behind the fridge to squeeze out the blockage.
-
Reassemble, power up, and recharge with active carbon — Put the rear mechanical cover back on and screw it tight so condenser air moves across the coils the way it should. Plug the cord back into the wall outlet and level the unit.
- Skip the decorative open box of baking soda — it’s mostly a feel-good move. Put a mesh bag with 8 to 12 ounces of activated charcoal pellets or activated carbon aquarium media on the middle shelf.
- Let the fridge run empty for 4 to 6 hours until the temps settle at 37°F in the fresh compartment and 0°F in the freezer before you restock it.
Common Causes
A refrigerator that won’t stop smelling almost always comes down to one of five root failures:
- Rotting condensate in the drain pan: This is the #1 culprit when the smell sticks around after a surface wipe down. When proteins or sugars slip down the internal evaporator drain, they settle in the warm drain pan. Heated by the compressor motor, that stagnant slurry makes a swampy, sour stink that fills the whole kitchen.
- Clogged or mold-filled "duckbill" drain grommet: A lot of modern refrigerators (especially Whirlpool, KitchenAid, and Samsung) use a rubber valve shaped like a duck’s beak on the end of the drain tube to keep insects and warm air from creeping up into the freezer. That valve gums up fast with organic biofilm, trapping stagnant water inside the tube inside the walls where it just keeps decaying.
- Odor saturation in plastic liners and insulation: Polyurethane foam insulation and ABS plastic liners are a little porous over time. If a package of raw chicken leaked behind the crisper frame or fish juice ran under the liner seams and sat for three weeks, that liquid soaks into the raw foam behind the plastic skin.
- Exhausted carbon air filters: Plenty of French-door and side-by-side units use forced-air filtration systems with a tiny fan. Once that activated carbon is saturated — usually after six months of normal use — it can’t trap volatile organic compounds (VOCs) anymore. When it gets damp from door openings, it throws stale food odors right back into the fresh food airstream.
- Gasket crevice colonization: The magnetic door seals are made from flexible polyvinyl chloride (PVC). Moisture naturally collects in the lower horizontal folds during humid summer months. Dust and crumbs stick to that moisture, and that makes a nice little colony of Cladosporium mold that perfumes every gust of cold air leaving the unit.
Common Mistakes
- Dousing the plastic liner with pure chlorine bleach: Bleach is fine on white porcelain, but strong bleach eats at the thin glossy finish of ABS plastic liners and makes rubber door seals stiff and cracked. Worse, that sharp chemical smell binds with volatile plastics and leaves behind an eye-watering synthetic odor that can ruin butter, ice, and open dairy products for weeks. Stick with distilled white vinegar or a mild baking soda wash.
- Relying on an open box of baking soda: An arm-and-hammer box with the little tear-away window has roughly 4 square inches of exposed surface area. That’s nowhere near enough air exchange to clean an 18-to-25-cubic-foot enclosed space. If you want real results, spread the baking soda out on a rimmed baking sheet so more of the powder touches circulating air, or use granular activated carbon, which has way more internal surface area.
- Forgetting the crisper drawer track seams: When something leaks on a top glass shelf, surface tension pulls the liquid along the plastic frame edges and down to the crisper drawer rails. Homeowners wipe the shelf glass but ignore the friction tracks snapped into the sidewalls. The rotting liquid hides inside the hollow snap-fit channels where you can’t see it, but you can sure smell it.
- Puncturing the freezer liner while clearing ice: If your defrost drain is frozen solid and the water’s backing up, never hack at the ice trough with an ice pick, flathead screwdriver, or kitchen knife. The aluminum suction line and delicate aluminum evaporator tubing sit right behind that thin back panel. One slip punctures the refrigeration loop, dumps the refrigerant charge with a hiss, and turns an easy fix into a $1,200 compressor and coil replacement. Use steaming water or a low-wattage hair dryer held at least 10 inches away.
- Leaving the rear service panel off: After you clean the drain pan, some folks leave the cardboard or metal back cover off because “it’s just a dust shield.” It isn’t. That panel is a critical air shroud. Without it, the condenser fan can’t pull cooling air across the hot compressor and condenser coils properly. Your compressor overheats, trips on thermal overload, and the fresh food section warms up to 55°F, spoiling your groceries all over again.
Cost & Time Breakdown
| Task | DIY Cost | Pro Cost | Time |
|---|---|---|---|
| Defrost drain pan sanitization & vac | $0–$10 (vinegar, rags) | $150–$225 | 30–45 mins |
| Door gasket mold remediation | $5 (baking soda, brush) | $125–$175 | 20–30 mins |
| Defrost drain line hot flush | $8 (turkey baster) | $175–$250 | 30–40 mins |
| Internal air filter replacement | $12–$25 (OEM filter) | $90–$140 | 5 mins |
| Complete cabinet strip & wash | $15 (carbon, cleaners) | $200–$350 | 1–2 hours |
| Replacing saturated duckbill valve | $10–$18 (OEM part) | $160–$230 | 25–35 mins |
Tips & Prevention
- Set your target cabinet temperatures accurately: Keep your fresh food compartment between 36°F and 38°F, and lock your freezer at precisely 0°F. Temperatures above 40°F let psychrotrophic food-spoilage bacteria multiply fast, and they start making volatile organic acids long before milk or leftovers look spoiled.
- Run a preventative drain tube flush every autumn: Once a year, pop off the rear lower cover, remove the drain pan, and flush 8 ounces of hot water mixed with 1 tablespoon of hydrogen peroxide down the defrost tube. That helps kill bacterial biofilm before it turns into thick ropes of slime that clog the drain.
- Vacuum your condenser coils twice a year: Dust-caked coils make your compressor run hotter and longer, which bumps up the temp in the rear machine compartment. That extra heat bakes any organic residue in the drip pan into a stubborn funk that vents straight toward your kitchen island.
- Store open foods in non-porous glass: Plastic containers soak up volatile organic compounds and let them creep back into the refrigerator over the years. High-grade borosilicate glass with silicone-gasket lids keeps pungent odors inside the container and cuts down on moisture transfer.
- Replace the internal air filter every 6 months: Put it on your calendar or tie it to furnace filter changes. When the "Replace Filter" status light pops on your dispenser panel, don’t just clear the indicator by pressing the button for three seconds — actually buy and swap the physical activated-carbon cartridge.
When to Call a Professional
If you’ve cleaned the drain pan, flushed the drain tube, wiped down the liner, and changed the air filter, but a pungent chemical, burning plastic, or dead-rodent odor still fills the cabinet, step back and call a pro.
A sharp, nail-polish-remover or chemical ether smell usually points to a closed-loop refrigerant leak from the evaporator coil inside the wall. Isobutane (R600a) and tetrafluoroethane (R134a) require EPA Section 608 certified technicians with recovery rigs and nitrogen sniffer probes to find and braze. I pulled a fridge in Frisco last month that had exactly this leak, and the owner swore it was “just a dirty pan” — no such luck.
If milk or chicken juice leaked through a physical crack in the bottom plastic liner and soaked into the factory-injected polyurethane insulation, the cabinet itself is contaminated. In bad cases, a technician has to decide whether the inner wall can be opened, sanitized, and resealed, or if the cabinet is a total structural loss because mold has colonized the sealed shell.
Related Articles
Keep troubleshooting with these hand-picked guides from FixlyGuide:
- Water Under Crisper Drawers? 5 Causes and the Step-by-Step Fix — Water pooling under your refrigerator crisper drawers is almost always caused by a frozen or clogged defrost drain line. Here is how to tha…
- The $5 Part That Stops Your Fridge From Leaking (And Why It Fails) — A leaking refrigerator can lead to serious floor damage and appliance issues. Often, the culprit is a clogged defrost drain, a simple fix m…
- Freezer Frost Buildup? 6 Causes and How to Fix the Ice Yourself — Stop thick ice from choking your freezer. Step-by-step diagnosis and repairs for blocked drains, failed defrost heaters, bad bimetal switch…
- Dishwasher Door Won't Latch? 6 Reasons It's Not Closing Securely—and How to Fix It — If your dishwasher door won't latch or close properly, it won't start. Here are the 6 most common causes and how to fix them, from a misali…
- Dishwasher Not Cleaning Dishes Properly? 5 Common Causes and How to Fix It — Is your dishwasher leaving grit, grease, or cloudy film on your dishes? Learn the step-by-step diagnostic sequence to clean filters, unclog…
- The Mystery Smell: Why Your Fridge Stinks (Even After Cleaning It) — That persistent, foul odor in your refrigerator isn't just gross; it's often a sign of hidden issues. Learn the real culprits behind linger…
Should you do this yourself?
Answer five quick questions before you start. Safety outranks savings every time.
Your experience with work like this
How high do you have to work?
Does the job involve any of these?
Will it need a permit?
Specialty tools
Free and instant. Educational guidance only — not a quote, inspection, or professional diagnosis.
What should this project cost?
Enter your project details for a realistic cost range before you call anyone.
Common repairs run $150–$650; repipes and water-heater replacements reach $1,500–$4,500.
- Regional adjustment
- National average
- Labor share (typical)
- ~$754
- Quotes to collect
- 3 written estimates
Educational estimate based on national averages — not a binding quote. Always confirm with written local estimates.
Fixly Project Decision Box
- DIY difficulty
- Moderate
- Estimated time
- 30 minutes – half a day
- Cost level
- Moderate
Main tools / materials
- Adjustable wrench
- Plunger or drain auger
- Bucket and towels
- Thread tape
When to stop and call a pro
- Water you cannot shut off at the fixture or main
- Sewage backing up into more than one fixture
- Water near electrical panels or outlets
- Gas water heater work beyond relighting a pilot
Need professional help?
Get a Licensed PlumberBefore you start
Check the difficulty, permits, and safety risk — then decide whether to call a pro.
- Estimate this projectGet a cost range for your scope and ZIP before you call anyone.Open
- Get local estimatesSend one request and compare written estimates from vetted pros.Open
Free, no signup required. Estimates are educational guidance, not a quote or an inspection.
Get the print-ready PDF of this guide
A clean, ad-free, printable version you can keep on your phone or pin to the workshop wall. Free with a FixlyGuide account.
- Print-optimized layout
- Tools, materials & every step included
- Saved to your account
Frequently asked questions
Why does my fridge still smell bad with an open box of baking soda inside?+
A single small box of baking soda only exposes a few square inches of powder to the air, which cannot keep up with a 20-cubic-foot appliance. Baking soda neutralizes acids, but it works slowly through passive contact. For severe odors, spread the powder across an entire baking sheet to increase surface area, or switch to activated charcoal pellets, which use billions of micro-pores to trap odor molecules much faster.
Where is the refrigerator defrost drain pan located?+
Most modern drain pans are located in the machine compartment at the back of the refrigerator, right behind the lower sheet-metal or cardboard service panel. Some older top-freezer models hide the pan behind the front lower kick-plate grille, accessed by popping off the plastic panel and reaching beneath the cabinet. Look for a shallow, flat plastic tray mounted next to or directly over the black compressor.
Can I use bleach to clean the inside of my smelly refrigerator?+
Avoid using straight bleach on the plastic walls of your fridge. Bleach can cause the polystyrene and ABS plastic liner to turn yellow, brittle, and crack over time. Even worse, the strong chlorine fumes can permeate the porous plastic and taint porous foods like butter and cheese. Use distilled white vinegar or a mixture of baking soda and warm water instead.
What should I do if my fridge drain pan is non-removable?+
If your defrost drain pan is permanently riveted or glued to the top of the compressor, do not attempt to pry it off—you risk snapping the copper refrigerant tubing. Instead, unplug the fridge and use a wet/dry shop vac with a narrow crevice tool to suck out all the standing water and debris. Then, spray the pan down with warm vinegar water and wipe it clean using long bottle brushes and clean rags.
Why does my fridge smell like sweet chemicals or burning plastic?+
A chemical or nail-polish-remover smell usually signals a refrigerant leak from the evaporator coils or tubing. If you smell burning plastic, electrical wiring at the start relay or the defrost heater harness is likely melting. Both situations are fire or health hazards; unplug the refrigerator immediately and call an appliance repair technician.
Can bad odors soak permanently into the refrigerator insulation?+
Yes. When rotting meat juices or old dairy leak into the bottom of the fresh food compartment, capillary action can draw the liquid into the thin seams where the plastic liner meets the cabinet shell. Once organic matter enters the factory-blown polyurethane foam insulation, it cannot dry out and will rot indefinitely, requiring professional remediation or cabinet replacement.
How often should I replace the internal refrigerator air filter?+
Standard refrigerator air filters use activated carbon, which typically saturates after six months of continuous airflow. Once the micro-pores fill up with volatile organic compounds, the filter stops trapping odors and will actually release stale, musty smells whenever the internal circulation fan runs.
Why does my refrigerator smell like rotten eggs when there is no bad food inside?+
A rotten egg smell usually means a small rodent climbed into the warm compressor compartment at the base of the fridge and died near the coils, or food fell behind the unit. Less commonly, sewer gas can enter through a direct-plumbed drain line on commercial models, or a failing electrical component is off-gassing hydrogen sulfide. Pull the fridge forward and inspect the mechanical bay underneath.
Discussion
Loading comments…