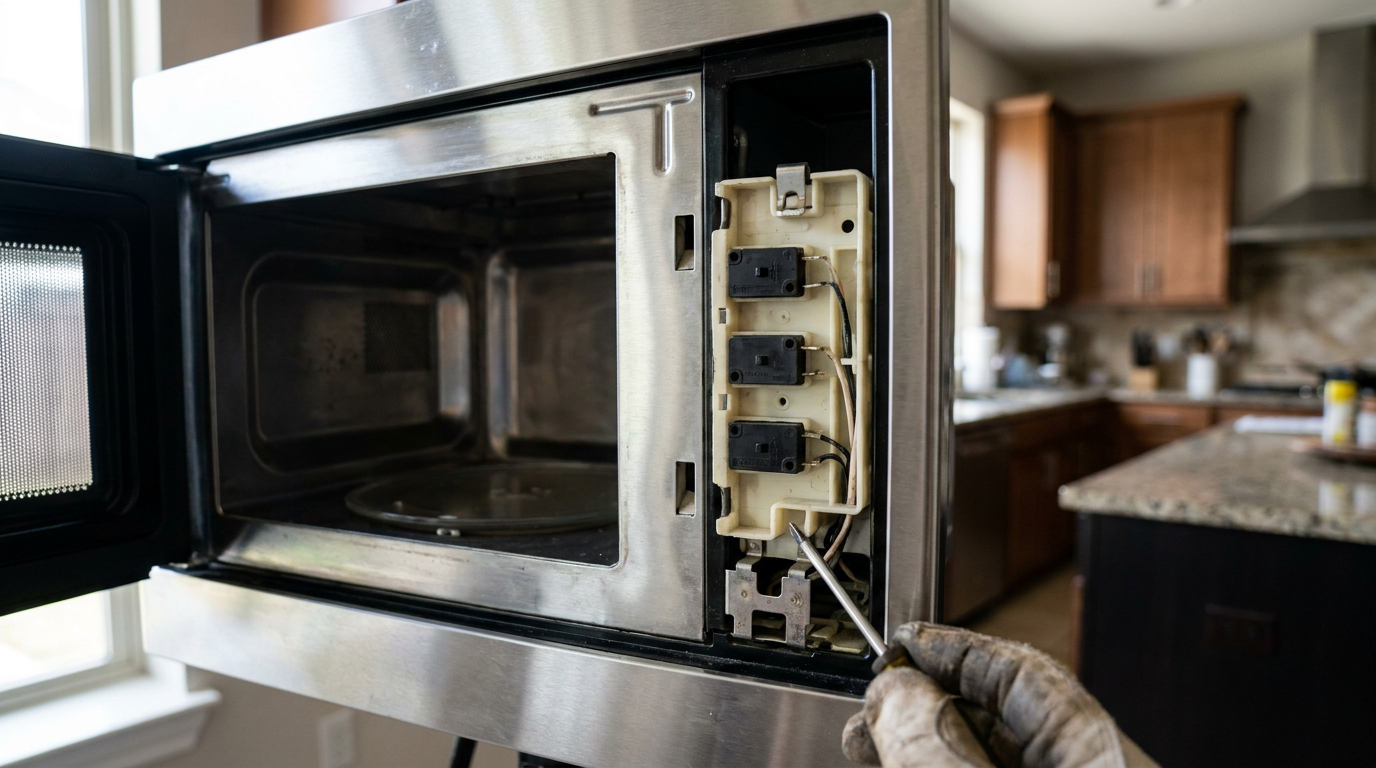
- Faulty Door Interlock Switch: This is hands-down the 1 cause. The switch goes bad and tells the microwave the door’s open, so everything shuts down.
- Overheating: Blocked vents or a dead cooling fan make the internal thermostat trip and cut power.
- Failing Magnetron: As the magnetron wears out, it can pull too much current and trigger a shutdown. Usually you’ll hear that hum, then a few seconds later — nothing.
- Bad Control Board: A bad relay or cracked solder joint on the main board can make the microwave act flaky and stop dead.
- Worn Door Latch: The latch wears down over time and doesn’t press the interlock switches all the way.
HVAC · High energy usage
| Project category | HVAC |
|---|---|
| Problem type | High energy usage |
| Trade required | HVAC |
| Urgency | Planned project |
| Safety risk | Low safety risk |
| DIY suitability | DIY for experienced homeowners |
| Cost category | High cost |
| Typical timeline | Assessment within weeks; replacement planned off-season |
| Contractor type | Licensed HVAC technician |
Repair option
Duct sealing, insulation, and a tune-up before touching the equipment.
Replacement option
High-efficiency replacement sized by a load calculation, not a rule of thumb.
Common causes
- Aging, low-efficiency equipment
- Leaking ducts losing conditioned air
- Insufficient attic insulation
- Oversized system short-cycling
Relevant tools:project cost estimatorrepair or replace
Published October 15, 2026Last updated October 15, 2026
Tools & materials you'll need
Affiliate linksAs an Amazon Associate FixlyGuide earns from qualifying purchases — at no extra cost to you. Prices and availability are accurate as of publication and subject to change.
Quick Answer
Your microwave’s probably tripping a safety feature after a few seconds. Nine times out of ten, I’m looking at a bad door switch fooling the machine into thinking the door’s open, a vent fan that’s quit or is half-choked, or a main control board acting up. Less often, the magnetron’s on its way out, or the high-voltage capacitor’s tired and dropping the unit out under load. The easiest clue? Watch whether it dies every time or only after it’s been running a bit. That tells you a lot.
The Problem
I see this one all the time. You toss in your leftovers, punch in the time, hit start, and for a second everything looks normal. Light on, plate turning, familiar hum — then, boom, dead quiet after 2-5 seconds. Sometimes the clock zeros out. Sometimes the display goes dark. Either way, the thing’s not just failing to heat; it’s shutting itself down mid-run. That’s not a plain old power outage. It usually means an internal part’s gone bad or a safety circuit’s doing its job because something’s not right. The microwave’s protecting itself, basically.
How It Works
A microwave isn’t just a hot box with a timer. It’s a high-voltage appliance with a bunch of safety checks running in the background. You hit start, the control board wakes up, and it does a quick check of the door switches first. There are three little interlock switches in there, and if they don’t all agree the door’s shut, nothing else happens.
If the board gets the green light, it sends power down two paths. One path handles the low-voltage stuff: light, turntable, cooling fan. The other path kicks on the high-voltage side. That’s the transformer boosting your home’s 120-volt power up to nearly 4,000 volts, the capacitor holding that charge, and the diode steering it where it needs to go. All that juice feeds the magnetron, which is the part that actually makes the microwaves.
If the board sees a problem at any point — door switch opens, current spikes because a part’s failing, temperature climbs too fast because the vent’s blocked — it shuts the whole thing down right away. No slow fade. Just off. That’s why you get a hard stop instead of “it just won’t heat.”
Step-by-Step Fix
I’m going to start with the stuff you can check without opening the machine, then move into the internal parts.
SAFETY FIRST: Microwaves store a potentially lethal electrical charge in their high-voltage capacitor, even when unplugged. Never attempt to disassemble your microwave unless you are experienced with high-voltage electronics and know how to safely discharge the capacitor. For most homeowners, the safe troubleshooting steps end after Step 3. Proceed with internal checks at your own risk.
1. Unplug and Wait
- Unplug it from the wall first. Don’t just stare at the blank screen and call it good. That reset can clear a flaky board, and it gives the unit a chance to cool down if heat’s the real issue. Leave it unplugged for at least 10 minutes. Then plug it back in and run it for 30 seconds. If it behaves, you probably just had a temporary electronic hiccup. If it shuts off again, keep moving.
2. Check for Overheating
- Put a hand on the top and sides, especially near the vents. Is it hotter than it ought to be? A microwave’s got to breathe. If it’s jammed into a tight cabinet without the manufacturer-specified clearance (usually 1-3 inches on the sides and top), heat builds up and the thermal protection kicks in.
- Tools: None.
- Action: Clear off the vents. Mail, cookbooks, bread bags — all that junk can block airflow. If it’s a countertop unit, pull it out from the wall a bit so it can breathe. If it’s an over-the-range model, make sure the exhaust fan’s actually running and the grease filter isn’t packed solid. Let it cool all the way down, then try again.
3. Inspect the Door and Latches
- Door problems are the usual suspect. Open and close it a few times. Does it feel sloppy? Does it close with a firm click, or does it feel mushy? Check the plastic hooks on the door. Cracked? Worn down? Broken? Then look at the microwave frame where those latches catch. The switches sit right in there, and if the latches don’t press them just right, the microwave thinks the door’s open and shuts itself off.
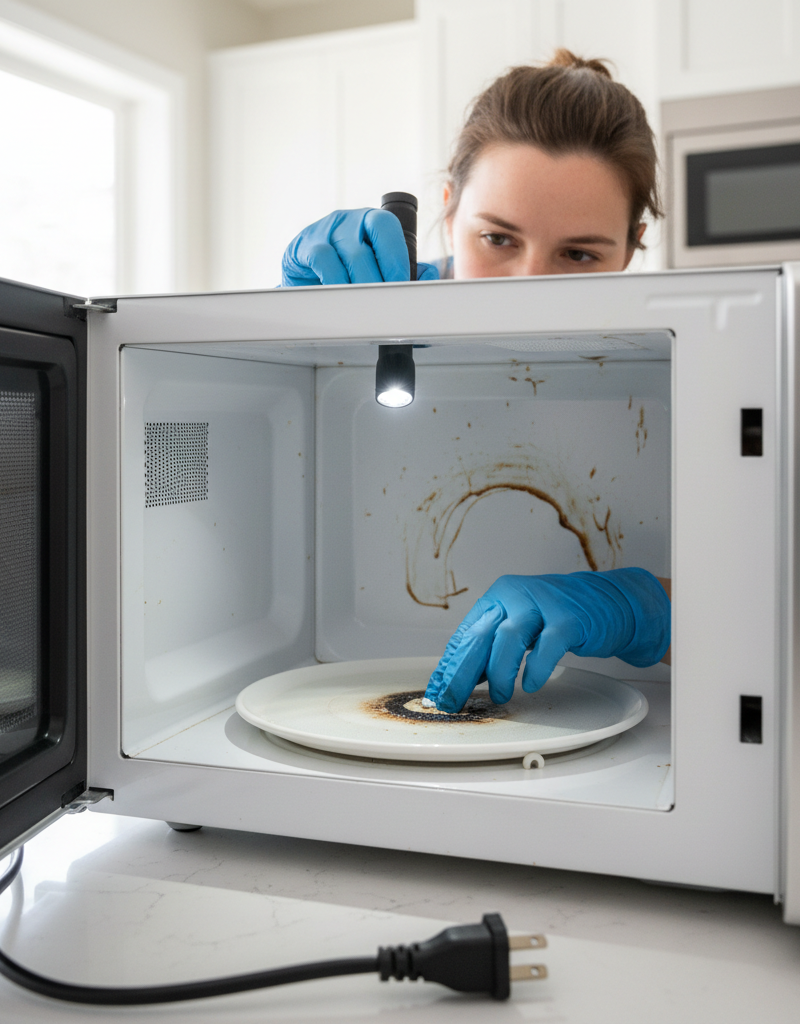
- Action: Grab a flashlight and look for damage or debris in the latch area and the slots it slides into. I’ve pulled out chewed-up bits of plastic wrap and old food more times than I can count. If you find a wad in there, clean it out with a toothpick or a small pick. If a latch is busted, that door’s going to need parts.
4. Test the Door Interlock Switches
- Warning: High-voltage risk beyond this point. This is your first internal check. Unplug the unit, wait 15 minutes, then pull the outer cabinet. The screws are usually on the back and one side. Once the shell’s off, find the 2-3 small switches in a plastic bracket where the door latches hit. You’ll need a multimeter set to continuity — the symbol looks like a sound wave.
- Tools: Phillips screwdriver, multimeter, needle-nose pliers.
- Action: Disconnect the wires from one switch at a time. Press the switch button by hand. A normally open (NO) switch should show continuity only when you press it. A normally closed (NC) switch should show continuity until you press it. Test each one. If one doesn’t change the way it should, it’s toast and needs replacing. Cheap part, too — usually under $15.
5. Check the Cooling Fan Motor
- If it runs for a minute or two before quitting, I’d start eyeballing the fan. Leave the cabinet off and locate the fan assembly. It’s usually a little squirrel-cage or blade-style fan near the magnetron.
- Action: First, make sure the blades aren’t jammed up. Dust, grease, and fuzz can lock that motor down. With the unit unplugged, spin the blades by hand. If they don’t move freely, the motor’s probably done. If they spin okay, check continuity with your multimeter. A healthy motor should read somewhere between 10 and 100 ohms. Infinite reading? That means the windings are broken.
6. Inspect the Magnetron
- A bad magnetron can pull too much current and make the control board shut the whole thing down. Take a look at it — it’s that metal box with fins, usually with a ceramic or metal antenna sticking out. Watch for black tracking marks or cracks around the magnets.
- Action: With your multimeter, do two simple checks. First, test continuity between the two terminals. You want a very low reading, typically less than 1 ohm. Second, check for a short to ground. Put one probe on a terminal and the other on the metal case. You should get an infinite reading, no continuity. Any continuity there means the magnetron’s shorted and it’s done.
7. Look for Damaged Capacitors
- With the unit unplugged and the main capacitor safely discharged, look over the other capacitors on the control board and noise filter board.
- Action: Watch for bulging tops or oily leakage. That’s bad news. The big high-voltage capacitor is the dangerous one, sure, but smaller caps on the control board fail too and can make a microwave quit at random. Replacing those takes soldering skill, so don’t fake your way through it.
8. Assess the Control Board
- If everything else tests out, the main control board — or smart board, if you want to call it that — may be the culprit. Look closely for burn marks, browned spots, or cracked solder joints, especially around the relays. Those are the little plastic boxes that click.
- Action: Usually, all you can do is a visual check. If you spot a scorch mark near one relay, odds are that section failed. At that point, you’re usually replacing the whole board, and that can get pricey — often $100-$250 for the part alone. No magic fix there.
Common Causes
- Faulty Door Interlock Switch: This is hands-down the #1 cause. The switch goes bad and tells the microwave the door’s open, so everything shuts down.
- Overheating: Blocked vents or a dead cooling fan make the internal thermostat trip and cut power.
- Failing Magnetron: As the magnetron wears out, it can pull too much current and trigger a shutdown. Usually you’ll hear that hum, then a few seconds later — nothing.
- Bad Control Board: A bad relay or cracked solder joint on the main board can make the microwave act flaky and stop dead.
- Worn Door Latch: The latch wears down over time and doesn’t press the interlock switches all the way.
- High-Voltage Circuit Fault: A diode or capacitor problem can shut it down too, though I don’t see that as often as the others.
Common Mistakes
- Ignoring the Capacitor: This is the big one. Folks try to swap parts without discharging the high-voltage capacitor first, and that’s a dangerous move — it can hold a charge that’ll ruin your day.
- Slamming the Door: Hammering the door shut over and over beats up the plastic latches and the switch assembly. Doesn’t take long, either.
- Replacing the Wrong Part: Don’t guess. Test the door switches and fan motor with a multimeter before you order anything. Swapping a good switch won’t fix a heat problem.
- Forgetting to Unplug: Sounds stupid, but in the middle of a headache, people forget. Unplugging it is step one. Every time.
- Buying a New Microwave Prematurely: Don’t pitch a $300 microwave because of a $10 part. I pulled a water heater in Frisco last month that had exactly this kind of “must be dead” issue — turned out to be one small failed part. Same story here sometimes.
Cost & Time Breakdown
| Task | DIY Cost | Pro Cost | Time |
|---|---|---|---|
| Clear Vents / Airflow Check | $0 | $85–$120 (trip fee) | 5 minutes |
| Replace Door Interlock Switch | $10–$25 | $120–$200 | 30–45 minutes |
| Replace Cooling Fan Motor | $30–$60 | $150–$250 | 45–60 minutes |
| Replace Magnetron | $50–$120 | $200–$350 | 45–75 minutes |
| Replace Main Control Board | $100–$250 | $300–$500+ | 30–60 minutes |
Tips & Prevention
- Close the Door Gently: Shut it firm, but don’t slam it. That lock assembly wears out faster than most folks think.
- Keep Vents Clear: Don’t stack stuff on top of the microwave. Give it at least 2 inches of clear space around the sides and back so it can move air.
- Clean the Interior Regularly: Spills and splatter can work their way into the latch area and cause trouble. Wipe down the inside of the door and the frame where it seals.
- Don't Run it Empty: Running a microwave with nothing inside can make the magnetron run hot and fail early, since the energy’s got nowhere to go.
- Listen for New Noises: If the hum changes pitch or gets louder, pay attention. That can be the first warning that the magnetron or fan’s going south.
- Check the Filter (Over-the-Range Models): If you’ve got an OTR microwave, clean the charcoal or mesh filter underneath it every 3-6 months. A greasy, clogged filter chokes airflow and helps heat build up.
When to Call a Professional
If you’re not comfortable messing with high-voltage electronics, stop after checking for overheating and inspecting the door. Call an appliance repair pro if clearing the vents doesn’t fix it or you think an internal part’s failed. The shock risk from that capacitor is no joke. A technician’s got the tools and the training to safely test and replace parts like the door switches, magnetron, or control board. If you smell ozone or burning plastic, unplug it right away and call for service.
Related Articles
Keep troubleshooting with these hand-picked guides from FixlyGuide:
- The Fiery Light Show: Why Your Microwave Is Sparking Inside — Microwave sparking is alarming, but often fixable with some DIY know-how, usually pointing to issues with the waveguide cover, metal object…
- The Buzzing Microwave: Is It a Symptom or a Fire Hazard? — A buzzing microwave can be more than just annoying; it might signal a serious issue that needs immediate attention, from a faulty magnetron…
- The 30-Minute Fix: Why Your Gas Burner Lights But Won't Stay Lit — Your gas stove burner lights up for a second then quickly extinguishes? It's a common, frustrating issue often due to a dirty or faulty the…
- Why Your Oven's Set Temperature Is a 50-Degree Lie — Your oven is likely off by 25-50°F, ruining your recipes; learn if it's a simple calibration issue you can fix in minutes or a faulty senso…
- Why Your Dishwasher Leaves Dishes Soaking Wet (And It's Not Your Rinse Aid) — Discover the real reasons your dishwasher isn't drying dishes and how to fix them, from blocked vents to faulty heating elements. Don't let…
- Why Your Lawn's Still Yellow After Fertilizing (And What to Do Tonight) — If you've fed your lawn and it's still looking pale, you're likely dealing with a pH imbalance or compacted soil, preventing nutrient absor…
What should this project cost?
Enter your project details for a realistic cost range before you call anyone.
Cost depends heavily on which system turns out to be the source.
- Regional adjustment
- National average
- Labor share (typical)
- ~$1,620
- Quotes to collect
- 3 written estimates
Educational estimate based on national averages — not a binding quote. Always confirm with written local estimates.
Frequently asked questions
Why does my microwave stop after exactly 2 seconds?+
This is classic behavior for a failed door interlock switch. The control board starts the cycle, but immediately gets a signal from the faulty switch that the door is open, so it shuts down instantly as a safety measure.
Can a bad door latch cause the microwave to stop?+
Absolutely. If the plastic hook on the door is worn or broken, it won't properly engage and depress the interlock switches. The microwave's computer will think the door isn't securely closed and will cut power.
Is it dangerous if my microwave keeps shutting off?+
The shutdown itself is a safety feature working correctly. However, the underlying cause, like a failing high-voltage component or a bad fan causing overheating, can be a potential fire hazard. It's best to unplug it and get it diagnosed.
Why does my microwave clock reset to 00:00 when it stops?+
This often happens when the control board itself reboots due to a power interruption or fault. A sudden power draw from a failing component, like a magnetron, can be enough to trigger a full reset of the main board, clearing the clock.
Could a power surge cause my microwave to shut off?+
Yes, a significant power surge or a brownout (a drop in voltage) could cause the microwave's electronics to shut down. However, if it happens consistently every time you use it, the problem is almost certainly with the appliance itself, not your home's electrical supply.
Is it worth fixing a microwave that stops after a few seconds?+
It depends on the cause. If it's a simple door switch, the part can cost as little as $10, making it a very worthwhile repair. If the magnetron or main control board has failed, the repair could cost $200-$400, which may be more than half the price of a new microwave.
How do I safely discharge a microwave capacitor?+
Using a well-insulated screwdriver, you must carefully touch both terminals of the capacitor simultaneously with the metal shaft of the screwdriver. This will create a loud 'pop' as the charge is shorted out. This procedure is extremely dangerous and should only be performed by someone with experience in handling high-voltage electronics.
What happens if I run a microwave with a bad cooling fan?+
The microwave will continually overheat. The internal thermostat will keep shutting the unit down to prevent damage or fire. Over time, this repeated overheating can cook and destroy other sensitive electronic components like the control board and magnetron.
Discussion
Loading comments…