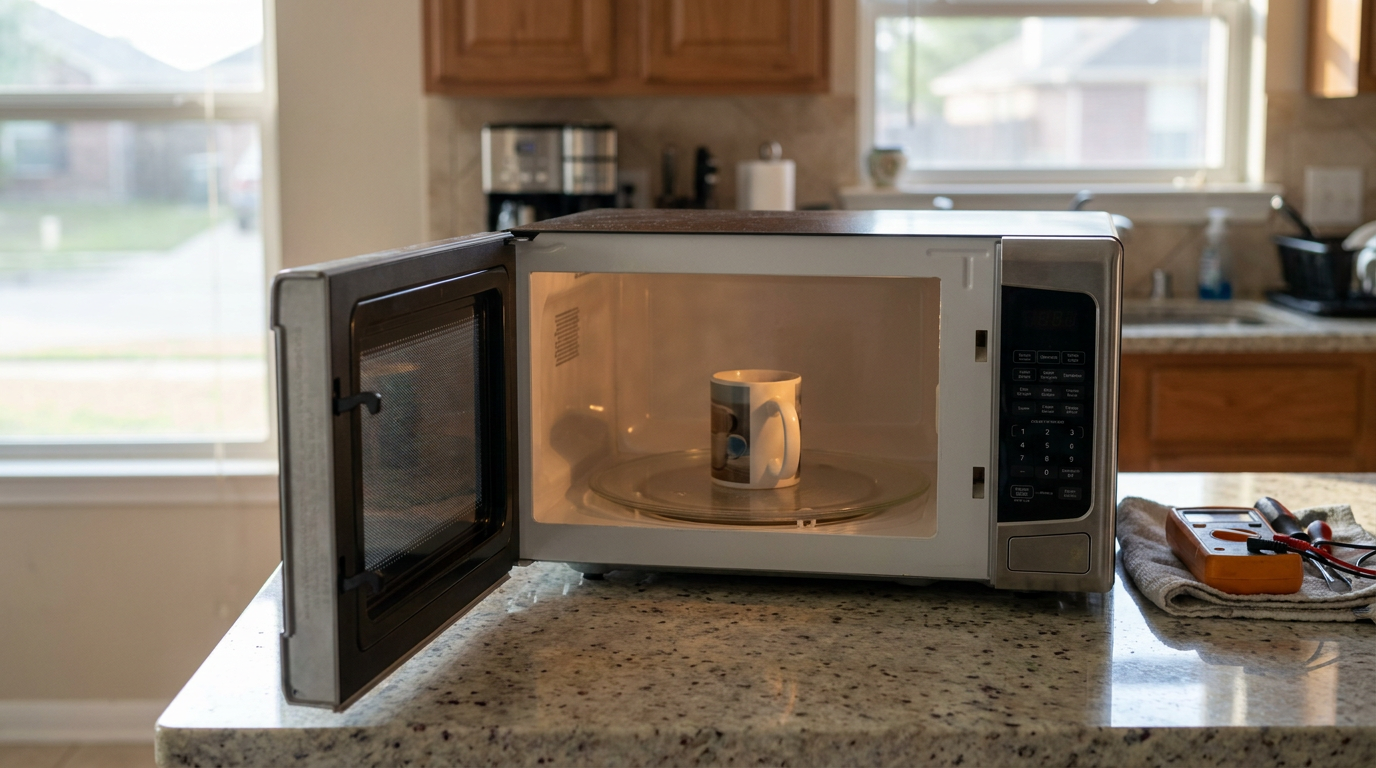
- Sever power immediately — Pull the 3-prong power cord from the dedicated 120V wall outlet. If you've got an over-the-range (OTR) unit plugged inside an upper cabinet, climb up and yank the plug.
- Safety tip: Don't test or fool with the door while the machine's plugged in. Never trust the "Cancel" button.
- If the plug is unreachable: Flip the dedicated 15-amp or 20-amp breaker at your main service panel.
HVAC · High energy usage
| Project category | HVAC |
|---|---|
| Problem type | High energy usage |
| Trade required | HVAC |
| Urgency | Planned project |
| Safety risk | Low safety risk |
| DIY suitability | DIY for experienced homeowners |
| Cost category | High cost |
| Typical timeline | Assessment within weeks; replacement planned off-season |
| Contractor type | Licensed HVAC technician |
Repair option
Duct sealing, insulation, and a tune-up before touching the equipment.
Replacement option
High-efficiency replacement sized by a load calculation, not a rule of thumb.
Common causes
- Aging, low-efficiency equipment
- Leaking ducts losing conditioned air
- Insufficient attic insulation
- Oversized system short-cycling
Relevant tools:project cost estimatorrepair or replace
Published November 15, 2026Last updated November 15, 2026
Tools & materials you'll need
Affiliate links- AmazonDigital multimeterMust read resistance (Ohms) or continuity
- AmazonInsulated Phillips screwdriver#2 size, 1,000V rated insulation preferred
- AmazonTamper-proof Torx screwdriver setT15 and T20 bits frequently needed for outer casing
- AmazonNeedle-nose pliersFor removing slip-on spade terminals without pulling wire
- AmazonCut-resistant work glovesTo protect hands against sharp internal sheet metal
- AmazonReplacement interlock microswitches1 to 3 · Match exact amperage, typically 16A 125/250V
As an Amazon Associate FixlyGuide earns from qualifying purchases — at no extra cost to you. Prices and availability are accurate as of publication and subject to change.
Quick Answer
A microwave that keeps running when you open the door is almost always dealing with a bad primary or monitor door interlock switch, or a door latch assembly that's gone out of line. If the switch contacts weld shut or the little plastic actuator lever snaps, the control board thinks the door's sealed up tight even when it's hanging open. Unplug the microwave right away—sure, the safety chain usually keeps the high-voltage magnetron from blasting radiation, but a turntable and exhaust blower still running with the door open tells you that interlock system is failing hard.
The Problem
You reach over, hit the push-button or pull the handle to grab your food, the door swings wide, and the microwave keeps humming. The light stays on, the turntable might keep spinning, and the exhaust fan sounds like it's running a full cycle.
On a healthy unit, opening that door should kill power to the internals instantly. When it doesn't, folks get rattled—and for good reason. Microwaves cook by using non-ionizing electromagnetic radiation at roughly 2,450 MHz. If that magnetron tube were truly firing with the door open, that energy would go straight into your kitchen and heat human tissue the same way it heats a bowl of soup.
The good news? Modern safety rules call for a triple-switch interlock setup. In 99% of these cases, the magnetron isn't actually energized; one mechanical microswitch has welded shut or stuck, back-feeding the 120V cooling fan and turntable circuit while the crowbar safety circuit keeps you from any raw microwave leakage. Still, don't assume the magnetron's asleep. A machine acting like this is a fire and shock hazard, and it'll often trip your kitchen breaker the moment the secondary switch tries to create a dead short to save your skin.
How It Works
Every residential microwave sold in North America uses a fail-safe door latch hook mechanism paired with three miniature snap-action switches: the primary interlock switch, the secondary interlock switch, and the monitor (or "crowbar") switch.
[Door Closed] ──> Plastic Latch Prongs Depress Actuators ──> Primary & Secondary Switches CLOSE
                                                          ──> Monitor Switch OPENS (Circuit Safe)

[Door Open]   ──> Latch Prongs Pull Out                  ──> Primary & Secondary Switches OPEN
                                                          ──> Monitor Switch CLOSES (Shorts Line if Primary Welded)
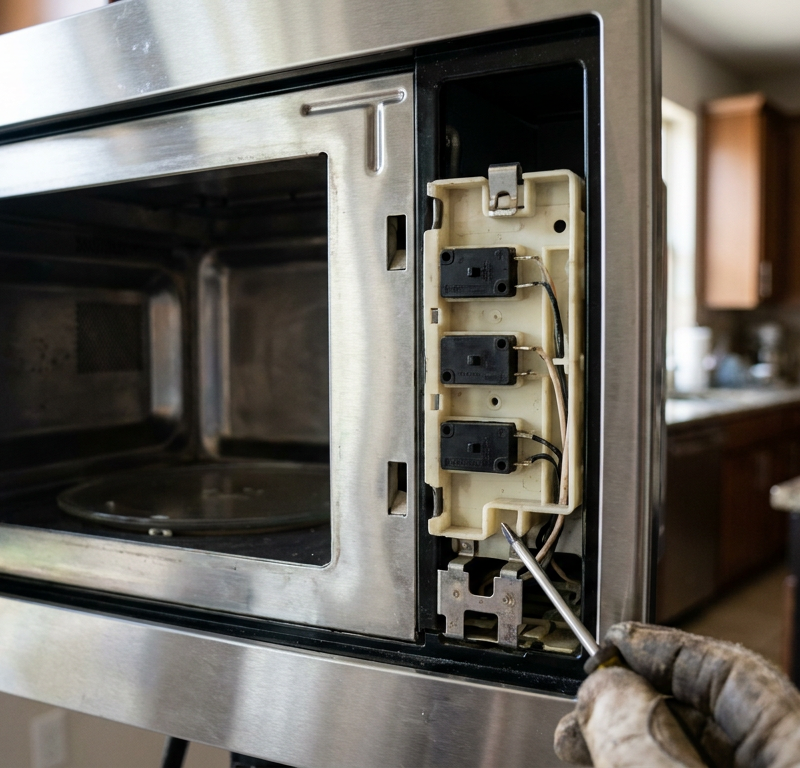
These microswitches sit stacked in a plastic bracket right behind the control panel, barely an inch apart. When you close the microwave door, heavy plastic latch fingers slide through slots in the chassis and press tiny actuator buttons on the switches. The primary and secondary switches are "Normally Open" (NO)—they close to complete the 120-volt power path to the high-voltage transformer and cooling fan only when the door's latched.
The monitor switch works the opposite way: it's "Normally Closed" (NC). When the door opens, the monitor switch snaps closed. If the primary switch contacts have mechanically fused together from internal arcing, the closing monitor switch creates a direct short across the neutral line, intentionally blowing the microwave's 20-amp ceramic internal line fuse. That sacrifice protects you from microwave radiation leakage.
But if the plastic switch holder cracks, if the latch prongs wear down by just 1/16 of an inch, or if the control board relay sticks, current leaks straight to the turntable motor and internal blower fan without popping the fuse. That's how you end up with a running appliance and an open door.
Step-by-Step Fix
Before you start this repair, know that microwaves store lethal high-voltage energy—up to 4,000 to 5,000 volts—inside a big capacitor even weeks after they've been unplugged. Do not reach into the rear high-voltage compartment near the magnetron or capacitor. The interlock switches live safely along the front plastic frame near the door latch, but you still need to be careful and methodical.
-
Sever power immediately — Pull the 3-prong power cord from the dedicated 120V wall outlet. If you've got an over-the-range (OTR) unit plugged inside an upper cabinet, climb up and yank the plug.
- Safety tip: Don't test or fool with the door while the machine's plugged in. Never trust the "Cancel" button.
- If the plug is unreachable: Flip the dedicated 15-amp or 20-amp breaker at your main service panel.
-
Remove the outer metal cabinet or control grille — For countertop units, pull the 4 to 6 perimeter screws holding the wraparound metal casing using a Phillips #2 or a tamper-proof Torx T20 driver. For over-the-range models, take off the top plastic vent grille by removing the two or three screws along its top lip, then back out the single screw holding the main control panel.
- Tools needed: Phillips screwdriver, T15/T20 security Torx bits.
- Watch out: Countertop sheet metal edges are razor sharp; wear mechanic-style cut-resistant gloves.
-
Ground out the high-voltage capacitor (Safety Precaution) — Even though the switches are isolated at the door frame, I still discharge the internal capacitor before I put my hands inside the cabinet. I've pulled a water heater in Frisco last month that had exactly this kind of “looks harmless” surprise, and I don’t mess around with stored energy.
- Procedure: Grip an insulated screwdriver (rated for 1,000V). Place the metal shank firmly against the bare metal chassis, then slide the tip across to touch each terminal of the capacitor one by one.
- What to expect: If it's charged, it may pop loud. If it's quiet, the bleeder resistor did its job, but you're safe to move on.
-
Expose and inspect the switch bracket assembly — Find the plastic latch bracket mounted right behind the door frame holes where the door hooks enter. You'll see three microswitches, each about 1.5 inches long, clipped into plastic retention tabs with color-coded wire harnesses attached.
- Visual inspection: Check whether the whole plastic bracket shifts when you wiggle it. A loose mounting screw lets the bracket flex backward, which keeps the door prongs from pushing the switches fully open or closed.
- If broken: If the plastic retainer clips have snapped from hard door slamming, you'll need to replace the entire plastic mounting frame, not just the switches.
-
Photograph every single terminal connection — Before you unclipping a single wire, grab your phone and take three clear, bright photos from different angles.
- Why this matters: The primary and monitor switches share interconnected jumper wires. Swapping the "Normally Open" (NO) terminal wire with the "Common" (COM) terminal will make the unit blow its ceramic fuse the second you hit "Start" or close the door.
-
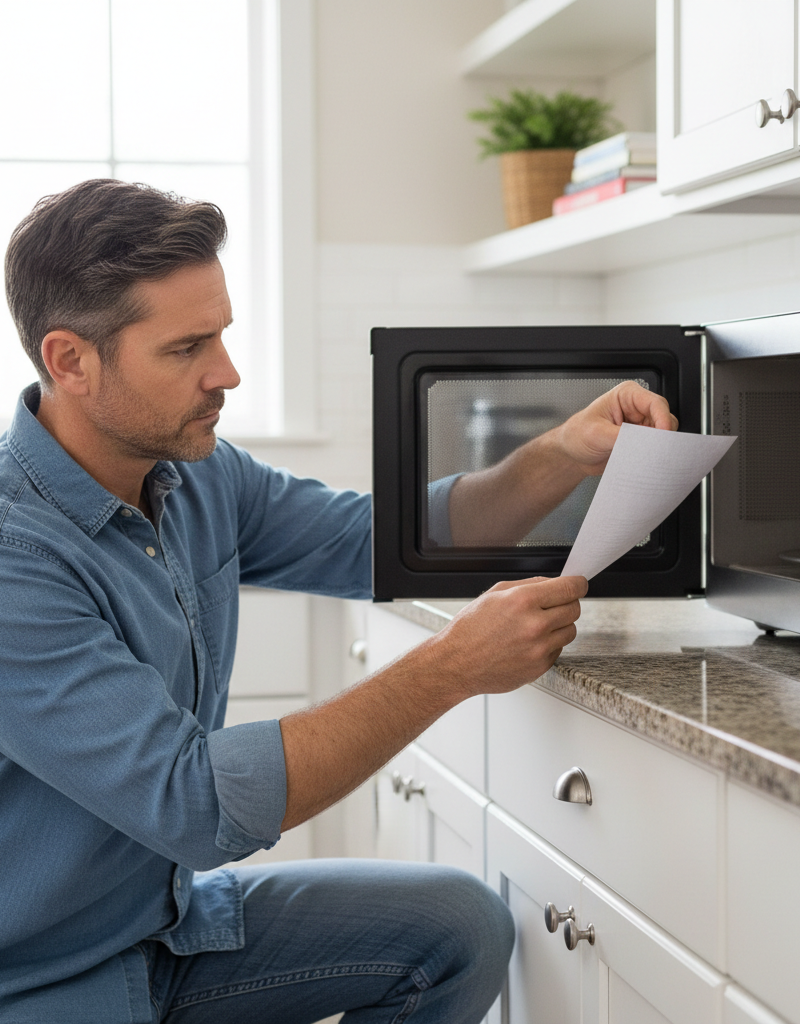
Test the door latch hook alignment — With the outer cover off and the microwave unplugged, manually open and close the door while looking down at the bracket.
- The mechanic's eye: Watch the plastic fingers on the door. They need to depress the switch buttons smoothly. If the upper hook enters the chassis at a slight downward angle, it won't hit the top switch right, and that leaves it in a bad electrical state.
- Adjustment: If the door hinges are sagging, loosen the front hinge screws by a quarter-turn, lift the door slightly to square it with the frame, and retighten to roughly 15 in-lbs of torque.
-
Remove and test the microswitches with a multimeter — Gently pry back the plastic bracket retention tab and pivot the top switch out. Label the wires and slide off the spade terminals using needle-nose pliers—pull the metal terminal sleeves, never the bare wires.
- Set your meter: Turn your digital multimeter to Continuity or the lowest Resistance setting (Ohms, $\Omega$).
- Testing Primary/Secondary (Normally Open): Place one probe on the COM terminal and one on the NO terminal. The meter should read "OL" or infinite resistance. Now, press the tiny plastic button in with your thumb. The meter should beep and drop to near-zero (0.0 to 0.3 ohms). If it beeps without pressing the button, the switch contacts are welded shut—the switch is toast.
- Testing the Monitor Switch (Normally Closed): Place probes on COM and NC. It should read continuity (beep) resting, and go to "OL" when depressed.
-
Replace failed switches with exact electrical ratings — Replace any switch that fails continuity or feels "mushy" when clicked. Standard microwave microswitches look the same from the outside, but their ratings can be way different.
- Check the stamp: Look at the raised lettering on the switch casing. You'll generally see ratings like "16A 125/250VAC" or "0.6A 125VDC".
- Rule of thumb: Never swap in a lightweight 5-amp or 10-amp switch pulled from another small appliance in place of a 16-amp rated interlock switch; it’ll weld its internal contacts in short order under the heavy inductive load of the microwave transformer.
-
Snap switches into place and verify mechanical action — Seat the new switches into the plastic mounting bracket pins, making sure the small alignment nubs lock into the holes on the switch bodies. Reattach the slip-on wire terminals, matching your reference photos down to the wire color.
- Tactile test: Close the door slowly by hand. You should hear two to three distinct, crisp clicks as the latch fingers engage the switches. If you hear a soft scrape instead of a sharp click, the switch is sitting wrong in its cradle.
-
Reassemble the casing and perform a water test — Reinstall the control panel and outer metal wrapper. Thread and tighten all grounding and sheet metal screws securely; those structural screws help with the microwave's chassis ground integrity.
- Plug it in: Plug the microwave into the wall outlet.
- The test: Put a microwave-safe mug filled with 8 ounces of tap water in the center of the turntable. Don't run the appliance empty. Close the door, set it to run for 30 seconds, and check for normal operation. Then open the door mid-cycle: the microwave must go dead quiet right away, the turntable must stop, and the magnetron must stop firing immediately.
Common Causes
Figuring out why your microwave keeps running with the door open usually comes down to four repeat offenders:
- Welded Microswitch Contacts: The high inrush current passing through the primary door switch throws a tiny spark every time the door opens mid-cycle. Over time, that micro-arcing pits the copper contacts, eventually melting and welding them together. The switch stays electrically closed permanently, telling the logic board the door's shut.
- Warped or Sagging Door Hinges: Slamming the door or leaning on an open over-the-range door loosens the hinge frame. If the door drops just 1/8 of an inch, the top latch hook won't strike the monitor switch while the lower hook still pushes the secondary switch, and that scrambles the safety sequence.
- Cracked Plastic Latch Torsion Springs or Fingers: The door hooks depend on a little internal coil spring inside the door panel to pull the latch prongs down firmly. If that spring breaks or slips, the latch stays partly depressed inside the switch cavity even after you pop the door release.
- Control Board Relay Welded Shut: Less common than a bad switch, but it happens: the main printed circuit board (PCB) has miniature mechanical relays that route 120V power to the transformer and blower. If an electrical surge or heavy contact wear fuses the relay's internal copper leaf spring closed, the turntable and fan will spin forever whenever power reaches the board, completely bypassing the door interlock matrix.
Common Mistakes
- Pulling on Wire Insulation Instead of the Spade Connector: The quick-disconnect terminals on microswitches are locked in by friction. Grabbing the insulated wire and tugging will pull the wire clean out of the crimp sleeve, leaving you with a nasty wire-stripping and crimping job inside cramped sheet metal. Always pry the terminal base using needle-nose pliers.
- Opening the Door Mid-Cycle Regularly: Using the door handle as a "Stop" button forces the primary interlock switches to interrupt 13 to 15 amps of active current. That makes a lot of arcing across the switch contacts. Always tap the "Cancel" or "Stop" pad on the control panel to kill electrical flow before unlatching the door.
- Mixing Up the Switch Positions: The primary, secondary, and monitor switches often look like identical black rectangular casings. Installing a Normally Closed switch where a Normally Open switch belongs creates an instant dead short the moment you shut the door, blowing your internal 20-amp ceramic fuse. Replace and wire them one at a time.
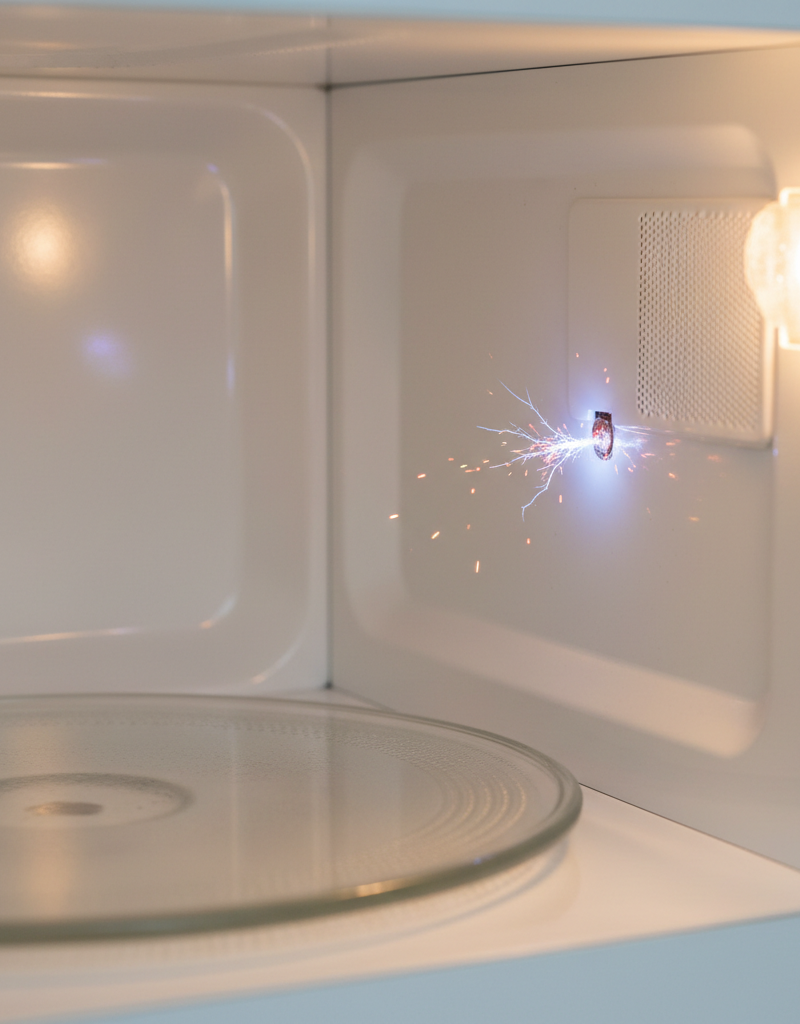
- Forgetting the Water Load During Post-Repair Tests: Never fire up a microwave to test switch function with an empty cooking cavity. Without food or water molecules to absorb the RF energy, the 2,450 MHz standing waves bounce straight back into the magnetron antenna, risking instant component burnout or internal arching.
Cost & Time Breakdown
| Task | DIY Cost | Pro Cost | Time |
|---|---|---|---|
| Replace 1–3 Interlock Microswitches | $8 – $22 | $150 – $240 | 30 – 45 mins |
| Replace Door Latch Assembly & Spring | $12 – $30 | $140 – $220 | 25 – 40 mins |
| Replace Main Switch Bracket Frame | $15 – $35 | $160 – $250 | 45 – 60 mins |
| Replace Main Control Logic Board | $70 – $140 | $220 – $350 | 40 – 60 mins |
| Diagnostic Service Fee Only | $0 | $85 – $130 | 15 – 30 mins |
Tips & Prevention
- Use the "Stop" or "Cancel" key first: Train yourself and your family to press the keypad button to kill the cycle instead of yanking the door open while the unit is actively heating. That keeps high-voltage contacts from arcing and adds years to switch life.
- Clean the door latch ports monthly: Grease, splattered sauces, and dust build up inside the rectangular slots in the microwave face frame. Sticky buildup keeps the internal plastic switch actuators from snapping cleanly back out when the door unlocks.
- Avoid aggressive door slamming: Microwaves are built with lightweight stamped sheet metal and molded ABS plastics. Repeated door slamming throws the hinge frame out of line, bends the strike plates, and cracks the delicate switch-mounting tabs.
- Listen for the double/triple click: When you close your microwave door, listen closely. You should hear a distinct, crisp multi-stage mechanical click. A dull, silent, or mushy closure points to worn latch springs or misaligned switch brackets that need attention before they fail completely.
When to Call a Professional
If you pull the outer cover and find charred, blackened wiring harnesses, melted plastic switch housings, or scorch marks climbing the frame, the problem goes past a normal mechanical switch swap. If replacing the switches keeps blowing the internal ceramic 20A line fuse every time you close the door, you're likely dealing with the wrong wire sequence, a dead short in the high-voltage transformer, or a blown diode.
When the microwave is a built-in convection-microwave combo or tied into a custom wall oven stack, removal alone takes two people and specialized handling to avoid cabinet damage. If the fault traces back to a bad primary circuit board relay with burned solder traces, or if you just don't feel comfortable working around high-voltage capacitors, stop right there and call an appliance repair specialist.
Frequently Asked Questions
Is it dangerous if my microwave runs with the door open?
Yes, it is potentially dangerous and needs to be unplugged right away. While the safety switches are arranged so the fan and turntable usually run without the magnetron producing microwave energy, you can't confirm that without professional metering. Exposure to raw microwave radiation causes deep thermal tissue burns without immediate surface pain. Unplug the unit immediately.
Why does my microwave turntable spin only when I open the door?
This classic symptom happens when the secondary interlock switch or monitor switch fails, letting line voltage back-feed through the turntable motor circuit. The logic board misreads the open-door signal, activating the cavity light and turntable motor at the same time because a neutral or switch contact isn't breaking cleanly.
Can I spray WD-40 on sticky microwave door switches?
No, don't spray WD-40, silicone, or any aerosol lubricant into microwave switch slots. Standard lubricants are flammable, can conduct electricity under certain conditions, and attract dust, lint, and grease. If a microswitch sticks internally, you need to replace the dry component entirely; they're sealed, non-serviceable parts that cost under $10 each.
How do I know if my microwave is actually emitting radiation with the door open?
You can't reliably see or smell microwave radiation. If the high-voltage circuit is actually firing, though, you'll usually hear the deep, distinct 60-cycle electrical hum of the high-voltage transformer and the high-pitched whine of the magnetron, which sounds pretty different from the light hum of an exhaust fan or turntable motor. Never put your hand or face near the cavity to test for heat.
Can I replace just one switch, or should I replace all three?
If one switch fails, best practice is to replace all three interlock switches at the same time. These microswitches take the same number of mechanical door cycles and electrical loads. Since a three-pack of compatible 16-amp OEM-spec switches generally costs between $10 and $20, swapping them together keeps you from tearing the appliance apart again a month later.
Why does my microwave immediately trip the kitchen breaker when I open the door?
When your microwave trips the home circuit breaker the second the door pops open, the primary interlock switch has welded closed. To keep microwave radiation from leaking, the safety system's "monitor switch" intentionally shorts the incoming power line to blow the internal fuse. If the internal fuse doesn't blow instantly, your home's main 15A or 20A panel breaker trips to protect the wiring.
How long does a microwave capacitor hold a charge after being unplugged?
A high-voltage microwave capacitor can hold thousands of volts for hours, days, or even weeks if its internal bleeder resistor is bad. Modern capacitors do include that safety resistor meant to drain the charge within 30 to 60 seconds, but failures happen. Always discharge the capacitor with an insulated screwdriver before putting your hands near internal components.
Is it worth fixing door switches on a countertop microwave?
If your countertop microwave is a budget unit that cost under $80, repair might not make much economic sense unless you do the work yourself for the $10 cost of switches. But for over-the-range (OTR) microwaves, built-in units, or premium models costing $300 to $1,000, replacing a pair of $8 microswitches is one of the most cost-effective DIY repairs you can do.
Related Articles
Keep troubleshooting with these hand-picked guides from FixlyGuide:
- Dishwasher Won't Fill With Water? 5 Causes and the Step-by-Step Fix — Dishwasher running dry? Learn how to diagnose a stuck float switch, unclog a water inlet valve, and test solenoid continuity with step-by-s…
- Freezer Cold but Fridge Warm? 5 Causes and the Step-by-Step Fix — Freezer freezing but fridge warm? Learn how to diagnose a bad fan, stuck damper, or frosted coils with real multimeter tests and simple ste…
- Dishwasher Tablet Not Dissolving? 6 Causes and the Step-by-Step Fix — Dishwasher tablet not dissolving? Here are the 6 real causes—from blocked dispenser doors to cold water—and the step-by-step fix to get cle…
- The Fiery Light Show: Why Your Microwave Is Sparking Inside — Microwave sparking is alarming, but often fixable with some DIY know-how, usually pointing to issues with the waveguide cover, metal object…
- The $5 Part That Stops Your Fridge From Leaking (And Why It Fails) — A leaking refrigerator can lead to serious floor damage and appliance issues. Often, the culprit is a clogged defrost drain, a simple fix m…
- Door Latch Stuck Inside Door? 6 Causes and How to Fix It — Door latch stuck inside the door and won't extend or retract? Here is how to diagnose broken return springs, free a frozen carriage, or swa…
Should you do this yourself?
Answer five quick questions before you start. Safety outranks savings every time.
Your experience with work like this
How high do you have to work?
Does the job involve any of these?
Will it need a permit?
Specialty tools
Free and instant. Educational guidance only — not a quote, inspection, or professional diagnosis.
What should this project cost?
Enter your project details for a realistic cost range before you call anyone.
Cost depends heavily on which system turns out to be the source.
- Regional adjustment
- National average
- Labor share (typical)
- ~$1,620
- Quotes to collect
- 3 written estimates
Educational estimate based on national averages — not a binding quote. Always confirm with written local estimates.
Get the print-ready PDF of this guide
A clean, ad-free, printable version you can keep on your phone or pin to the workshop wall. Free with a FixlyGuide account.
- Print-optimized layout
- Tools, materials & every step included
- Saved to your account
Frequently asked questions
Is it dangerous if my microwave runs with the door open?+
Yes, it is potentially dangerous and requires immediate disconnection. While the appliance's redundant interlock layout usually ensures only the fan and turntable run without the magnetron firing, you cannot confirm this without proper testing equipment. Unplug the microwave immediately to prevent any risk of radiation exposure or dead-short electrical fires.
Why does my microwave turntable spin only when I open the door?+
This classic symptom happens when an interlock microswitch fails or its contacts fuse together, allowing 120-volt current to back-feed through the turntable and interior lamp circuit. The logic board misinterprets the door position and keeps driving the motor even though the latch is disengaged.
Can I spray WD-40 on sticky microwave door switches?+
No, never spray WD-40, silicone, or any aerosol lubricant into microwave switch openings. Aerosol lubricants are combustible, degrade plastic frames, attract dust and kitchen grease, and can cause short circuits. If a microswitch sticks, replace the dry switch module directly.
How do I know if my microwave is actually emitting radiation with the door open?+
Microwave energy is invisible and odorless. However, if the magnetron is actively energizing, you will hear a heavy, deep 60-cycle transformer hum rather than just the quiet whirl of the cooling blower. Never place your hands or face near an open, running unit to test for heat; unplug it immediately.
Can I replace just one switch, or should I replace all three?+
It is best practice to replace all three microswitches simultaneously. The primary, secondary, and monitor switches endure identical wear cycles. A complete three-piece replacement kit costs only $10 to $20, saving you from having to pull the appliance down and disassemble it a second time.
Why does my microwave immediately trip the kitchen breaker when I open the door?+
This happens because the primary switch has welded closed. Modern microwaves feature a failsafe monitor switch that deliberately creates a dead short to pop the safety fuse if the door opens while the main switch is stuck. If the internal fuse lags, your main kitchen breaker trips instantly.
How long does a microwave capacitor hold a charge after being unplugged?+
A microwave capacitor can store 2,000 to 5,000 volts for several days if its built-in bleeder resistor fails. Even though most discharge within 30 to 60 seconds under normal operation, you must always manually discharge the capacitor using a 1,000V insulated screwdriver before servicing internal components.
Is it worth fixing door switches on a countertop microwave?+
For an entry-level countertop microwave priced under $80, replacement is usually more practical. But for over-the-range (OTR) models, convection units, and built-in microwave ovens that cost between $300 and $1,200, a $15 switch replacement saves hundreds of dollars in replacement and installation expenses.
Discussion
Loading comments…