- A lot of ranges (Whirlpool, GE, Frigidaire) will kick off an internal homing cycle on boot-up, spinning the latch motor until it finds the “home” (open) switch position.
- If you hear the motor whirring for 5 to 10 seconds and the latch clicks back, open the door right away.
- If this doesn’t work: You’ll hear silence or a clicking gear, and the display will throw the lock error code again. Move on to manual release.
HVAC · High energy usage
| Project category | HVAC |
|---|---|
| Problem type | High energy usage |
| Trade required | HVAC |
| Urgency | Planned project |
| Safety risk | Low safety risk |
| DIY suitability | DIY for experienced homeowners |
| Cost category | High cost |
| Typical timeline | Assessment within weeks; replacement planned off-season |
| Contractor type | Licensed HVAC technician |
Repair option
Duct sealing, insulation, and a tune-up before touching the equipment.
Replacement option
High-efficiency replacement sized by a load calculation, not a rule of thumb.
Common causes
- Aging, low-efficiency equipment
- Leaking ducts losing conditioned air
- Insufficient attic insulation
- Oversized system short-cycling
Relevant tools:project cost estimatorrepair or replace
Published November 19, 2026Last updated November 19, 2026
Tools & materials you'll need
Affiliate links- AmazonDigital Multimeter1 · For testing ohms and continuity on switches and motor
- Amazon1/4-inch Nut Driver1 · For removing rear access panel sheet metal screws
- Amazon5/16-inch Nut Driver1 · For console or internal mounting screws
- Amazon1-inch Stiff Metal Putty Knife1 · For manually tripping and releasing a jammed latch
- AmazonNeedle-Nose Pliers1 · For disconnecting wiring spade terminals without damaging wires
- AmazonLeather Work Gloves1 pair · To protect hands against sharp stamped sheet metal edges
- AmazonReplacement OEM Door Lock Assembly1 · Matched exactly to your range model number
As an Amazon Associate FixlyGuide earns from qualifying purchases — at no extra cost to you. Prices and availability are accurate as of publication and subject to change.
Quick Answer
If your oven door won’t latch or unlock, the motorized door lock assembly is usually stuck, jammed up with baked-on crud, or dealing with a failed microswitch. I’d start by resetting the control: unplug the range or flip its dedicated double-pole breaker for 10 minutes. If that latch still sits there frozen, you can manually trip or release the hook with a thin putty knife, check the motor and microswitches for continuity with a digital multimeter, and swap the whole lock assembly if the motor gear’s stripped. I pulled a wall oven in Frisco last month that had exactly this problem—door locked solid, turkey still inside, and the cam gear looked like somebody chewed it up.
The Problem
Few appliance failures are more aggravating than an oven door that won’t stay shut or traps your Sunday roast behind locked glass.
In modern electric and gas ranges, the door latch isn’t just a simple hook. It’s an electromechanical interlock tied straight into the main electronic control board (ERC). When that system goes sideways, the oven’s brain gets confused. If the switch senses the latch is open, the control board will flat-out refuse to run a bake or broil cycle, flashing error codes like F9, F90, or door. If the motorized cam jams halfway through a cycle, the mechanical pawl traps the door tight, locking you out of the cavity even after the unit cools all the way down to room temperature.
Whether you’re looking at an oven that won’t lock for a high-temperature self-clean cycle or one that’s welded itself shut with dinner inside, the fix comes down to how the motor, the position switches, and the mechanical linkage work together. Miss one piece, and you’ll be chasing your tail.
How It Works
Modern ovens use a motorized door lock mechanism located behind the control console or directly above the front oven cavity opening. The assembly includes a small shaded-pole or synchronous gear motor running on 120 volts AC, an eccentric cam, a heavy-gauge steel latch arm, and two small snap-action microswitches.
[Main Control Board (ERC)]
         |
      (120V AC)
         v
  [Synchronous Motor] ---> [Rotating Cam] ---> [Spring Latch Arm] ---> [Door Strike Hole]
                                  |
                                  +----------> [Microswitch 1 (Open / Closed State)]
                                  +----------> [Microswitch 2 (Lock Sense Confirmation)]
When you start a cycle that needs a secure closure—or when the oven enters a pyrolytic self-clean phase reaching 800°F to 900°F—the control board sends 120V to the lock motor. The motor turns the cam 180 degrees, pushing the latch arm forward through a slot in the chassis and down into the matching strike hole on the oven door.
As the cam rotates, its lobes physically press the actuators on the microswitches. One switch tells the computer the latch has engaged; the second confirms the door frame is sitting flush against the perimeter gasket. Once those contacts close, the computer cuts power to the motor.
When you cancel the cycle and the cavity temperature drops below approximately 500°F, an internal thermal bimetal disc closes and tells the board it’s safe to run the motor another 180 degrees to retract the arm. If the motor binds, a gear tooth snaps, or grease gums up the microswitch contacts, the cam stalls halfway. The computer sees the missing switch signal, stops feeding current, and leaves your door stuck in no man’s land.
Step-by-Step Fix
Follow these steps to diagnose, bypass an emergency lockout, test the parts, and replace a bad lock assembly.
1. Kill the Power at the Panel
Start by cutting electricity completely. Slide the range out a bit to unplug it, or go right to your home’s breaker panel and shut off the dedicated 40-amp or 50-amp double-pole breaker for an electric range (or the 15-amp single-pole breaker for a gas model).
- Safety: Don’t stick metal tools into an oven’s interior latch slot while the appliance is live; 120V lines run straight to the motorized latch assembly switches.
- Leave the power off for at least 10 minutes. That lets the microcontroller capacitors on the main control board drain all the way down, which can clear temporary microswitch logic loops.
2. Attempt a Logic Reset
Flip the breaker back on. Listen close to the top console the second power returns.
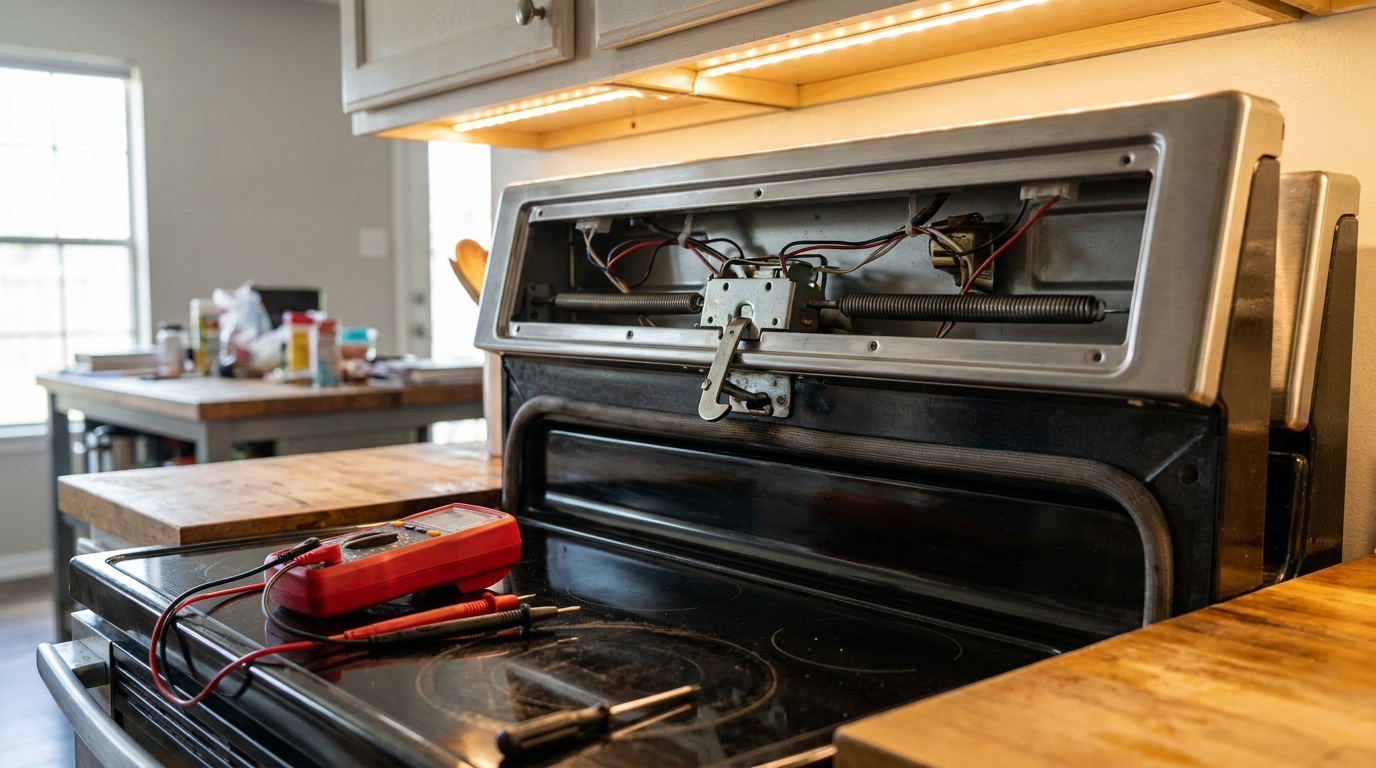
- A lot of ranges (Whirlpool, GE, Frigidaire) will kick off an internal homing cycle on boot-up, spinning the latch motor until it finds the “home” (open) switch position.
- If you hear the motor whirring for 5 to 10 seconds and the latch clicks back, open the door right away.
- If this doesn’t work: You’ll hear silence or a clicking gear, and the display will throw the lock error code again. Move on to manual release.
3. Manually Release a Trapped Door
If the door is locked shut and dinner’s inside, you’ve got to free the pawl mechanically without cracking the door glass. Grab a stiff 1-inch metal putty knife or a piece of coat hanger wire bent into a tight 1/4-inch hook at the tip.
- Slide the blade into the gap between the top edge of the oven door and the bottom of the control panel, lined up with the center latch slot.
- Feel for the metal hook holding the door pin. Push or hook the latch slide firmly to the left (on most GE/Kenmore units) or to the right (on Whirlpool/Maytag units) while pulling gently outward on the door handle.
- The latch should pivot on its internal spring with decent hand pressure, freeing the door.
4. Remove the Upper Rear Access Panel
Pull the range away from the wall so you can get at the mechanical side of the latch. Using a 1/4-inch or 5/16-inch nut driver, back out the perimeter sheet metal screws holding the upper back panel.
- Toss the screws in a magnetic tray so they don’t disappear under nearby base cabinets.
- Lift the sheet metal panel up and away, wearing leather work gloves—factory edges can be razor-sharp.
- Find the motorized latch assembly mounted in the top center of the chassis, right behind the oven cavity insulation blanket.
5. Inspect the Mechanical Linkage for Physical Binds
Look over the long metal rod that runs from the motor cam to the front door frame.
- Watch for baked-on grease drips, burnt wiring insulation, or a return tension spring that’s popped loose.
- Wiggle the pivot arm by hand. If the linkage feels frozen solid or the plastic cam wheel on the motor shaft is split clean in half, the mechanical drive has failed.
- Check the front door strike hole on the door itself. A bent strike plate will pinch the latch arm and keep the return spring from pulling it back even when the motor’s fine.
6. Label and Disconnect the Wiring Harness
Before you pull the assembly, use your phone to snap a clear photo of the electrical connections.
- You’ll see two larger terminals feeding the motor coil (usually 120V line and neutral) and two to four smaller push-on spade connectors going to the microswitches.
- Pull the spade terminals off by their brass sleeves using needle-nose pliers—don’t yank the wires themselves, or you’ll rip the conductor out of the crimp terminal.
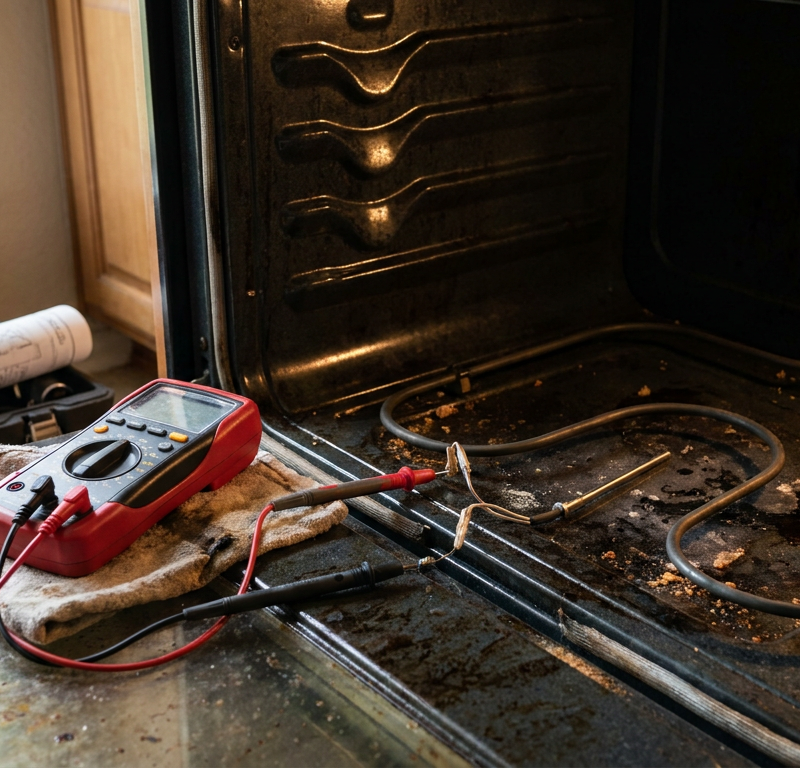
7. Test the Motor Coil Resistance with a Multimeter
Set your digital multimeter to the low Ohms ($\Omega$) setting (usually the $200\Omega$ or $2k\Omega$ range). Touch one probe to each of the two primary motor terminals.
- A healthy small drive motor will usually read between 1,000 and 3,000 ohms ($1.0\text{k}\Omega\text{ to }3.0\text{k}\Omega$) across the coil.
- If the meter shows
O.L.(open loop / infinite resistance), the copper winding inside the motor has burned open or broken; the motor’s done and needs replacement. - If it reads zero ohms or below $100\Omega$, the winding has shorted internally.
8. Test the Microswitches for Continuity
Switch your multimeter to continuity mode (the audible beep setting). Press the probe tips against the common (COM) and normally open (NO) terminals on the first microswitch.
- With the switch actuator sitting untouched, the meter should stay quiet (
O.L.). - Press the small actuator button with your finger or by turning the cam. You should hear a sharp mechanical click, and the meter should beep right away, showing a reading below 0.5 ohms.
- Test the second switch the same way. If either switch won’t beep when clicked, or shows resistance above $1.0\Omega$ when closed, the internal contacts are pitted with carbon or burned out.
9. Remove and Replace the Lock Assembly
Take out the two 1/4-inch mounting screws holding the assembly bracket to the oven frame.
- Tilt the bracket back and slide the long front latch rod clear out of the chassis receiver slot.
- Bring the new OEM replacement assembly into place. Feed the front latch hook carefully through the chassis opening until it seats into the cavity face.
- Drive the mounting screws in snug. Don’t crank them down; strip those chassis threads and you’ll be drilling new holes or hunting for oversized sheet-metal screws.
10. Reconnect Wiring and Reseat Panels
Use that reference photo. Push every spade terminal firmly onto its matching spade terminal on the new motor and switches until you feel them snap home.
- Lift the rear metal shield back into place, line up the screw holes, and run all the sheet metal screws back in with your nut driver.
- Push the range back into the counter opening, making sure you don’t crush the flexible gas line or pinch the heavy 240V power cord behind the drawer.
- Restore power at the circuit breaker.
11. Run a Verification Cycle
With power back on, test both the locking and unlocking functions without heating the oven to full cleaning temps.
- Press the Self Clean button on your control console and press Start.
- Step up front: within 15 to 30 seconds, you should hear the motor run and watch the latch slide smoothly into the door strike, locking the door tight.
- Right away, press Clear/Off or Cancel.
- The motor should kick on again within 10 to 45 seconds, swinging the latch back out of the strike and releasing the door cleanly. Open and shut the door three times to make sure the alignment’s good.
Common Causes
When an oven door won’t latch or unlock, the trouble almost always comes from one of four parts in the electromechanical chain:
- Stripped Motor Gearbox: Most latch assemblies use small plastic nylon planetary gears driven by a tiny electric motor. After years of heat, those teeth snap under the load of pulling the heavy door tight against a stiff fiberglass gasket. The motor hums, but the latch won’t budge.
- Burnt Microswitch Contacts: The microswitches handle the low-voltage logic signal telling the main board where the latch sits. Heat from the oven vent can cause oxidation or carbon buildup on those tiny internal contacts, breaking the circuit and freezing the control sequence.
- Thermal Limit Lockout: If an oven gets too hot during normal baking—maybe the cooling fan’s weak or the bake element’s running wild—the high-limit safety thermostat will trip. On many brands, that safety disconnect locks the latch closed until the thermal switch manually resets or cools below $150^\circ\text{F}$.
- Physical Hinge and Strike Misalignment: Folks put heavy cast iron pots on an open oven door, and the hinges sag. If the door drops by even $1/8\text{ inch}$, the latch hook will smack the solid edge of the door face instead of sliding into the strike opening, binding the motor.
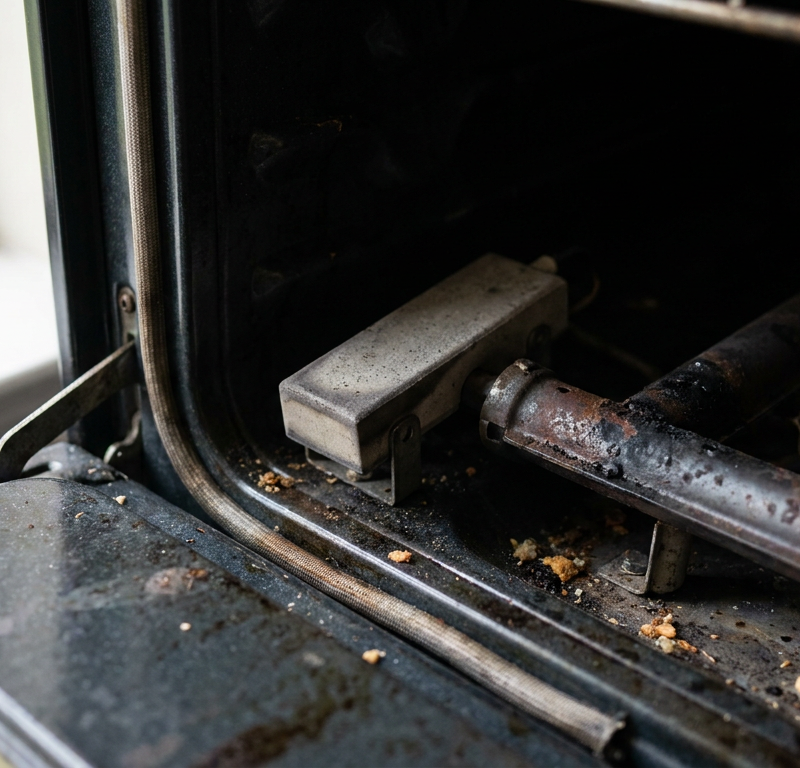
- Spilled Grease and Food Residue: The latch slot sits right under the stovetop or just above the door opening. Boilovers from soups, sugar syrups, or hot cooking fats drip straight into the mechanism, congealing into a glue-like paste that overloads the return spring.
Common Mistakes
- Yanking the Door with Brute Force: When the lock stays engaged, homeowners often grab the oven handle with both hands and pull with their whole body weight. That shatters the outer tempered glass panel or snaps the door hinges, turning a $40 microswitch issue into a $350 cosmetic mess. Use a putty knife to release the hook from inside the gap instead.
- Lubricating the Latch with Flammable Spray (WD-40): Hosing standard penetrating oil or WD-40 into an oven latch mechanism is a serious fire hazard. Oven frames get hot enough that standard oils burn off, stink up the kitchen with toxic smoke, and leave behind gummy petroleum residue that speeds up switch failure. If lubrication’s needed, use only high-temperature food-grade dry graphite or high-temp silicone grease rated past $500^\circ\text{F}$.
- Replacing the Control Board First: Appliance control boards run anywhere from $180 to $400. Homeowners see an “F9” code, assume the main computer’s toast, and order a new board—only to find the exact same error sticks around because a simple $8 microswitch on the latch arm was open. Always test continuity at the latch before blaming the board.
- Testing Components While the Range Is Plugged In: An electric range gets 240 volts between legs and 120 volts to neutral. Poking around behind the rear access panel with a multimeter while the unit’s plugged in risks a nasty shock or shorting the control board traces against the metal chassis with your probe tips.
- Overlooking Door Hinge Sag: Swapping a latch assembly won’t fix the problem if the door hinges are worn out. If the top edge of your oven door doesn’t sit perfectly parallel with the control console, the new latch will bind against the door strike plate within a month.
Cost & Time Breakdown
| Task | DIY Cost | Pro Cost | Time |
|---|---|---|---|
| Circuit Breaker Logic Reset | $0 | $100–$150 (Service call fee) | 10–15 min |
| Manual Door Latch Bypass | $0 (Putty knife/wire) | $120–$180 | 5–10 min |
| Individual Microswitch Replacement | $8–$25 | $150–$225 | 30–45 min |
| Complete Motorized Latch Assembly | $45–$140 | $220–$350 | 45–60 min |
| Door Hinge Replacement (if sagging) | $35–$80 | $180–$260 | 40–60 min |
Tips & Prevention
- Skip the Pyrolytic Self-Clean Cycle: The extreme heat from self-cleaning ($850^\circ\text{F}$ to $950^\circ\text{F}$) is the biggest killer of latch assemblies, control boards, and thermal fuses. Clean your oven by hand with baking soda and water or use a steam cycle instead of cooking the electronics to death.
- Keep the Latch Slot Clear: Every few months, take an old toothbrush dampened with warm water and mild dish soap and clean out the latch opening on the front frame. Wipe away crumbs and greasy film before they run down into the mechanical slide.
- Inspect the Strike Opening for Burr Marks: Look inside the rectangular hole on the top of the door where the latch enters. If you see gouged paint or shiny scratched metal on one side, your door’s out of alignment; adjust the hinges before the latch arm snaps.
- Never Hang Heavy Wet Towels on the Handle: Hanging cast-iron pans or multiple heavy, soaked bath-sized towels over the oven handle puts steady downward leverage on the door frame, stretching the hinge springs and knocking the latch strike out of line.
- Listen for Gear Grinding: If you start your oven and hear a chattering or rapid clicking sound from the upper console, the nylon gears inside your latch motor are stripping their teeth. Replace the assembly before it locks up completely with your food trapped inside.
When to Call a Professional
While replacing a motorized latch assembly is well within the wheelhouse of a confident DIYer with a multimeter and nut driver, some situations call for a licensed appliance repair technician:
Call a professional right away if you smell scorched electrical wiring or see black carbon soot trailing up the back of your control panel. That points to a melted wiring harness or an arced trace on the main control board that needs specialized pin-out testing and harness re-pinning.
You should also put the tools down if you’ve got a high-end dual-fuel or built-in wall oven where access means pulling a 250-pound appliance out of custom cabinetry—dropping an unanchored wall unit can tear out cabinet stiles, snap high-voltage hardwiring, or break gas supply tubing.
Finally, if you replace both the latch motor assembly and the switches, but the control board still won’t clear the lock error and still won’t send 120V down the line, the relay drivers on the board itself are fried. Have a pro verify the circuit before you drop cash on an expensive, non-returnable electronic board.
Related Articles
Keep troubleshooting with these hand-picked guides from FixlyGuide:
- Dryer Squeaking? 5 Causes of Loud Screeching and the Fix — Stop that ear-piercing squeak or screeching noise coming from your dryer drum. Learn the 5 common causes and follow our step-by-step DIY re…
- The 30-Minute Trick When Your Dishwasher Won't Drain (Plumbers Keep Secret) — Discover the real reasons your dishwasher isn't draining and how to fix it in under an hour, without calling a plumber.
- Freezer Cold but Fridge Warm? 5 Causes and the Step-by-Step Fix — Freezer freezing but fridge warm? Learn how to diagnose a bad fan, stuck damper, or frosted coils with real multimeter tests and simple ste…
- Microwave Runs With Door Open? 4 Causes and the Step-by-Step Fix — Does your microwave keep running when you open the door? Learn how to safely test and fix the faulty interlock switches and latch mechanism…
- The #1 Mistake Homeowners Make When Their Dryer Stops Drying (And How to Fix It Free) — If your dryer is taking too long to dry clothes, the most common culprit is a clogged vent, which can be easily fixed with simple tools.
- The #1 Reason Your AC Blows Warm Air (And It's Not What You Think) — A dirty air filter is often the overlooked culprit behind an air conditioner blowing warm air, hindering its ability to cool your home effi…
Should you do this yourself?
Answer five quick questions before you start. Safety outranks savings every time.
Your experience with work like this
How high do you have to work?
Does the job involve any of these?
Will it need a permit?
Specialty tools
Free and instant. Educational guidance only — not a quote, inspection, or professional diagnosis.
What should this project cost?
Enter your project details for a realistic cost range before you call anyone.
Cost depends heavily on which system turns out to be the source.
- Regional adjustment
- National average
- Labor share (typical)
- ~$1,620
- Quotes to collect
- 3 written estimates
Educational estimate based on national averages — not a binding quote. Always confirm with written local estimates.
Before you start
Check the difficulty, permits, and safety risk — then decide whether to call a pro.
- Estimate this projectGet a cost range for your scope and ZIP before you call anyone.Open
- Get local estimatesSend one request and compare written estimates from vetted pros.Open
Free, no signup required. Estimates are educational guidance, not a quote or an inspection.
Frequently asked questions
How do I get my oven door open if it's locked shut right now?+
Cut power at your home's breaker panel for 10 full minutes to let the control board completely drain its residual charge, then restore power. Many modern ranges run an automated homing cycle upon reboot that spins the latch motor back to the open position. If that fails, gently slide a thin metal putty knife into the top door gap to manually nudge the latch pawl sideways off the strike pin.
Can I still use the oven if the latch won't close all the way?+
No. If the lock microswitch does not send a closed-circuit signal back to the main electronic control board, the board will block the bake and broil relays from engaging as a built-in fire and burn safety feature. The display will usually flash an error code like F9, F90, or 'door' until the lock issue is resolved.
Can I spray WD-40 or lubricant on a sticking oven latch?+
Yes, but with extreme caution. Disconnect power to the range first. Never spray aerosol lubricants like standard WD-40, which are flammable and will burn off into toxic smoke when the oven reaches normal operating temperatures. If the mechanical pivot is sticking, use a few drops of high-temperature dry graphite or food-grade silicone lubricant rated to at least 500°F.
Why does my oven always lock up and break after a self-clean cycle?+
Self-clean cycles push oven temperatures up between 800°F and 900°F for several hours. This extreme thermal load frequently cooks the motorized latch assembly mounted directly above the cavity, melting the plastic gears inside the motor housing or burning out the miniature contacts inside the microswitches.
How do I test my oven door lock motor with a multimeter?+
Check the motor coil with a multimeter set to Ohms. A functioning motor coil typically reads between 1,000 and 3,000 ohms across its two terminals; if the meter reads 'O.L.' (open loop), the winding has burned out. Next, test the microswitches for continuity: when the actuator button is manually depressed, you should hear a mechanical click and read less than 0.5 ohms across the terminals.
Why is my oven latch motor constantly running and clicking?+
If the latch assembly motor runs continuously without stopping, the cam lobe has likely broken off or the internal position-sensing microswitch has failed. When the switch fails to close, the control board never receives the confirmation signal that the door has successfully locked, so it keeps supplying 120V to the motor indefinitely in a loop.
What does an F9 error code mean on an oven display?+
An F9 or F90 error code on brands like GE, Whirlpool, and Frigidaire indicates a door lock status failure. It means the control board commanded the lock motor to turn, but the position microswitches did not change state within the allotted time (typically 30 to 45 seconds), pointing directly to a jammed latch, bad switch, or failed motor.
Should I replace just the microswitch or the entire latch assembly?+
While you can sometimes replace individual microswitches for $10 to $20, it is usually far better to replace the complete assembly. The high-temperature plastic housing, internal motor gears, and mechanical springs all experience the same thermal wear, and replacing the entire unit ensures you won't have to tear the oven apart again when the motor fails two months later.
Discussion
Loading comments…