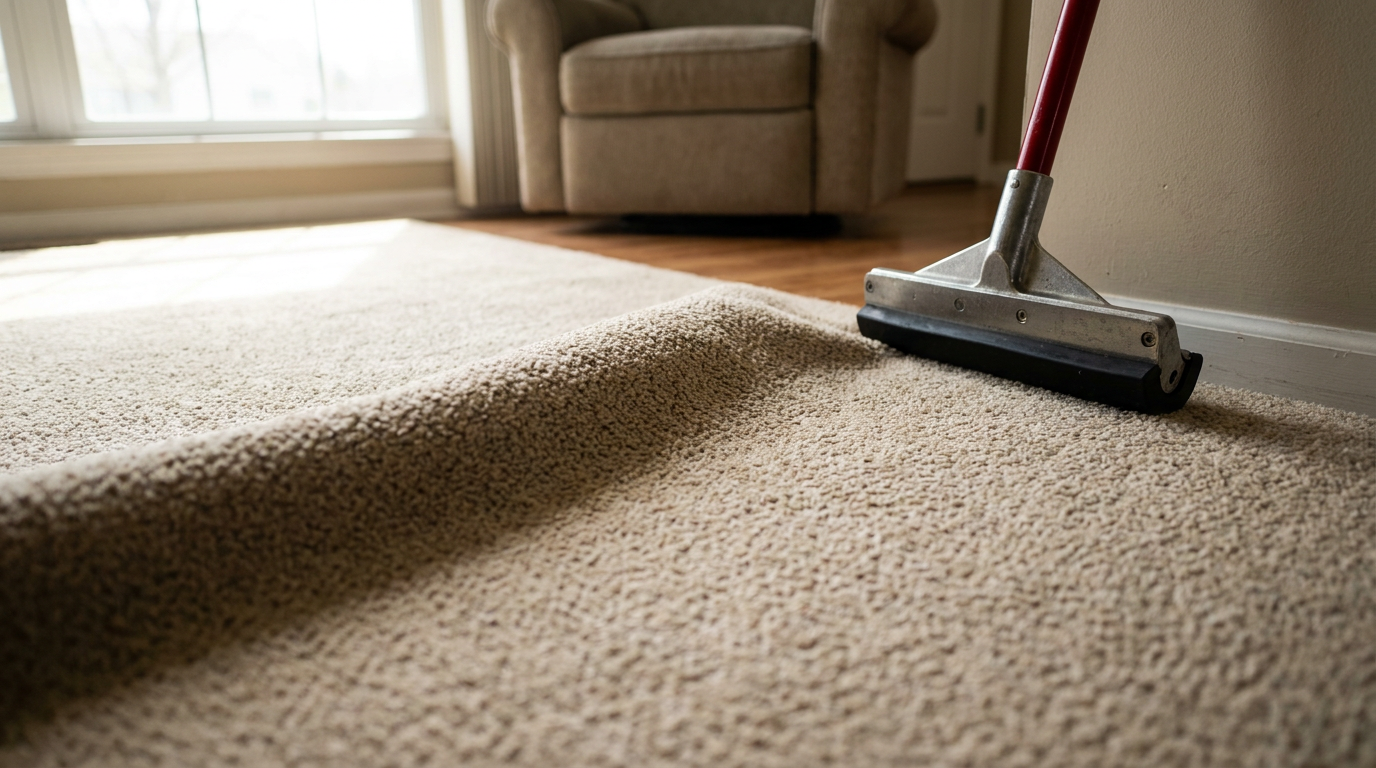
- Set Up the Power Stretcher.
- Safety First: A power stretcher stores a lot of energy. Keep your hands and feet clear of the head and pole sections. Wear gloves so you’re not kissing those tacks.
- Put a piece of 2x4 or a thick padded board against the baseboard of the wall you’re starting from. That keeps the drywall from getting beat up. The stretcher base will brace against it.
- Set the head of the stretcher about 6 inches from the wall you’re stretching toward. Adjust the pole extensions so the tool reaches across the room.
- Set the dial on the power stretcher head to match your carpet’s thickness. Lower numbers are for thinner carpet, higher for thick plush.
Published October 19, 2026Last updated October 19, 2026
Tools & materials you'll need
Affiliate links- AmazonPower stretcherCan be rented from most tool rental centers
- AmazonKnee kickerOften rented along with the power stretcher
- AmazonUtility knifeWith a fresh, sharp blade
- AmazonCarpet knife or trimmer
- AmazonStair tool or stiff putty knifeFor tucking the carpet edge
- AmazonPliersTo pull the carpet up from the tack strip initially
- AmazonGloves
As an Amazon Associate FixlyGuide earns from qualifying purchases — at no extra cost to you. Prices and availability are accurate as of publication and subject to change.
Quick Answer
Carpet ripples or buckles for four main reasons: high humidity, improper installation, dragging heavy furniture, or delamination of the backing. Nine times out of ten, humidity is the main offender. It makes the latex in the carpet backing expand, and then the whole floor covering starts to loosen up. The fix usually means re-stretching the carpet with a power stretcher and trimming the excess back clean. For small spots, you might get by with a knee kicker, but if you want it tight for the long haul, a proper stretch is the way to go. I’ve seen plenty of rooms where that thing looked fine one week and had a wrinkle running through it the next—no mystery once you know what’s happening.
The Problem
You walk into the living room and there it is—a long, ugly ripple snaking across your once-flat carpet. Maybe it’s a little buckle in a doorway. Maybe it’s a full wave right in the middle of the room. Either way, it’s an eyesore and a trip hazard. Step on it and it just springs back. That’s your carpet telling you it’s lost tension and isn’t locked to the floor the way it should be.
Those waves don’t show up overnight. They creep in as the carpet loosens from its moorings. Leave them alone long enough and you can end up with permanent creases, broken-down backing, and a carpet that wears out way too soon. The tops of the ripples grab dirt first too, so they get nasty fast. That’s why the problem seems to shout at you every time you look down.
How It Works
To get why carpet buckles, you’ve got to know how it’s put in. Most residential carpet goes over pad and gets held by tack strips. Those are thin wooden strips, about an inch wide, nailed or glued around the perimeter of the room. They’ve got hundreds of sharp angled tacks sticking up and toward the wall. The carpet gets stretched over them, and the tacks bite into the backing to hold everything under tension.
Think of it like a drum skin. If you want it flat, it’s got to be pulled tight in every direction. That tension gets set during installation with a power stretcher—a long adjustable pole with a head that grabs the carpet and a base that pushes off the opposite wall. The installer puts a stretch into the carpet (typically 1 to 1.5 percent of its length) and then locks it onto the tack strips. If that first stretch wasn’t strong enough, or if something made the carpet expand later, you get ripples. Most of the time, the latex layer in the backing is the culprit. It swells with changes in temperature and humidity, and then the whole setup loses its taughtness. I pulled a carpet back in Frisco last month that had exactly this issue after a damp spell—looked like somebody ran a washboard through the hallway.
Step-by-Step Fix
Fixing a buckled carpet means re-stretching it. You can rent the tools, sure, but this job takes some muscle and a little feel. Mess it up and you can damage the carpet. This is for a confident DIYer taking on a single room.
-
Clear the Room. First, empty the room completely. Furniture has to go. No dice around that one. You can’t stretch carpet properly with a couch or bed in the way.
-
Pull Up the Carpet. Start in a corner and, with pliers, carefully pull the carpet up and away from the tack strip. Work your way down one wall. It should peel off the tacks with that ripping sound you’ll never forget. You only need to detach the two adjacent walls you’re stretching toward.
-
Inspect the Tack Strips & Pad. With the edge lifted, check the tack strips. Are they rusted, broken, or pulled away from the subfloor? If they are, replace them now. Pry up the old strips and nail new ones down, making sure the tacks angle toward the wall. The gap between the tack strip and the wall should be about two-thirds the thickness of your carpet, roughly 1/4 to 3/8 inch. While you’re there, make sure the carpet pad is smooth and secure.
-
Set Up the Power Stretcher.
- Safety First: A power stretcher stores a lot of energy. Keep your hands and feet clear of the head and pole sections. Wear gloves so you’re not kissing those tacks.
- Put a piece of 2x4 or a thick padded board against the baseboard of the wall you’re starting from. That keeps the drywall from getting beat up. The stretcher base will brace against it.
- Set the head of the stretcher about 6 inches from the wall you’re stretching toward. Adjust the pole extensions so the tool reaches across the room.
- Set the dial on the power stretcher head to match your carpet’s thickness. Lower numbers are for thinner carpet, higher for thick plush.
-
Engage and Stretch. Press the teeth of the stretcher head firmly into the carpet. Lean down on the activation lever. You’ll feel the carpet tighten as the tool does its work. It’s a firm, steady push—don’t slam it. You’re aiming for a smooth, taut surface and the ripple gone.
-
Set the Carpet. While holding tension with the stretcher, use a knee kicker or a stair tool to force the carpet down onto the tack strip. You should hear it “sing” when it catches. Start in the middle of the wall and work toward the corners.
-
Repeat Across the Room. Release the stretcher and move it over about 18 inches. Do it again: engage, stretch, and set. Keep that rhythm going across the width of the room until all the slack is pushed to one side.
-
Stretch the Second Wall. Now repeat the whole process on the adjacent wall, stretching the remaining slack that direction.
-
Trim the Excess. At this point you’ll have a flap of extra carpet bunched up against the wall. Use a sharp carpet knife or a carpet trimmer and cut off the excess. Be careful here. You want a neat cut, leaving just enough (about 1/4 inch) to tuck down into the gully between the tack strip and the wall.
-
Tuck the Edges. Use a stair tool or a stiff putty knife to tuck the cut edge firmly into the gap between the tack strip and the baseboard. That’s what gives you the clean, finished look.
-
Final Vacuum. Put the furniture back in place, but lift it—don’t drag it. Then vacuum the room well to groom the fibers and check your work.
Common Causes
- High Humidity: This is the #1 cause, especially in places like North Texas. The latex backing of your carpet sucks up moisture from the air, expands, and loosens up. You’ll often see ripples show up in humid summer months and sometimes ease back in the dry winter.
- Improper Installation: The installer may have skipped the power stretcher and relied only on a knee kicker. A knee kicker is for positioning, not for the main stretch. Or maybe they just didn’t hit the industry standard of 1-1.5% tension.
- Dragging Heavy Furniture: Scraping a heavy sofa, bookshelf, or piano across the carpet can catch the fibers and literally pull the carpet off the tack strips, which creates slack.
- Wrong Padding: An overly thick or too-soft carpet pad can let the carpet flex more than it should underfoot, and that can eventually lead to stretching and buckling.
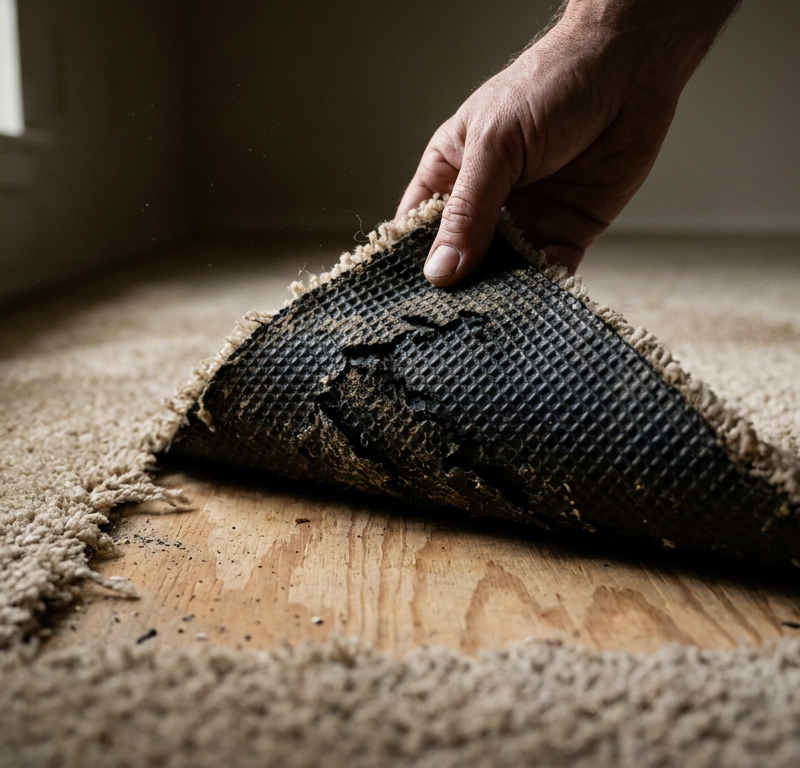
- Delamination: This is where the primary and secondary backings separate. Once that happens, the carpet loses its structure and can’t hold tension. It usually shows up as bubbles or ripples and is generally a manufacturing problem.
Common Mistakes
- Using Only a Knee Kicker: A knee kicker (the tool you “kick” with your knee) just doesn’t have the muscle to tension a whole room properly. It’s for small areas and positioning. Using it as the only tool is a shortcut that usually means the ripples come back.
- Not Replacing Bad Tack Strips: If the tack strips are old, rusted from pet stains or previous water damage, or packed with drywall dust, the tacks won’t grip the backing like they should.
- Over-Stretching: Yep, you can stretch it too much. That can tear the backing or make the face yarns pull apart, leaving visible lines in the carpet. Older carpets and Berber-style carpets are especially touchy.
- Cutting Too Much Off: Get too aggressive trimming the excess and you can wind up with a gap between the carpet and the baseboard. That’s not something you fix with a quick tweak—it usually means patching in a new piece, and that’s pro territory.
- Not Acclimatizing New Carpet: New carpet should sit in the home for at least 24-48 hours before installation so it can adjust to the home’s usual temperature and humidity. Put it in cold and you can end up with buckling later.
Cost & Time Breakdown
| Task | DIY Cost | Pro Cost | Time |
|---|---|---|---|
| Rent Carpet Stretcher & Kicker | $40–$60 per day | N/A | 1 day |
| Replace Tack Strips (if needed) | $15–$25 per room | Included in labor | 30 mins |
| Professional Carpet Stretching | N/A | $100–$250 per room | 1–2 hours |
| DIY Re-stretch (1 room) | $40–$85 | N/A | 3–5 hours |
Tips & Prevention
- Control Your Humidity: Run your air conditioning in the summer and think about a dehumidifier if indoor humidity keeps sitting above 55%. That’s the best prevention, hands down.
- Lift, Don't Drag: Always pick furniture up off the floor when moving it. For heavy stuff, use furniture sliders. Your carpet will thank you.
- Choose a Quality Installer: When you’re buying new carpet, ask the retailer if their installers use a power stretcher. Good installers always do. Don’t chase the cheapest bid and expect a better result.
- Get a Post-Installation Stretch: A lot of carpet warranties want a re-stretch within the first year or two. Sometimes it’s included, sometimes it’s discounted by the original installer.
- Clean Spills Quickly: Letting water or cleaning solutions soak into the carpet can weaken the latex backing over time, which makes it more prone to humidity-related expansion.
When to Call a Professional
If you’ve got ripples in multiple rooms, on stairs, or if the carpet’s old and maybe brittle, I’d call a pro. A good carpet repair tech can figure out the cause and stretch it without wrecking the material. If the ripples are from delamination of the backing, the carpet itself is bad and needs replacement, not stretching—a pro can tell you that fast. And if you’ve got seams or patterns to line up, don’t wing it. That’s where a seasoned installer earns their money.
Related Articles
Keep troubleshooting with these hand-picked guides from FixlyGuide:
- Why Does My Carpet Smell Like Corn Chips? The 4 Main Causes—and What to Do — If your carpet has a persistent corn chip or Fritos-like smell, it's usually caused by the chemical breakdown of the latex backing, not dir…
- The Mystery Smell: Why Your Fridge Stinks (Even After Cleaning It) — That persistent, foul odor in your refrigerator isn't just gross; it's often a sign of hidden issues. Learn the real culprits behind linger…
- The 3 Lies Your Carpet Cleaner Tells You (And Why Your Carpet Stinks) — Ever notice those 'cleaned' carpet stains pop right back up, or a lingering funk that just won't quit? It's not bad luck; it's bad science.
- The Mystery of the Sprouting Carpet Tuft (And How to Stop It) — Ever noticed little loops or long strands sticking up from your carpet after cleaning or heavy use? That's called sprouting, and it's not j…
- Dishwasher Not Draining? 6 Reasons for Standing Water (and How to Fix It) — Seeing a puddle of dirty water in your dishwasher after a cycle is a common, fixable problem—here's how to diagnose and clear the clog, fro…
- The Secret Reason Your Oven Fails to Heat (It's NOT Always the Element) — Discover why your oven isn't reaching its set temperature, from common part failures to overlooked calibration issues, and how to fix it.
Should you do this yourself?
Answer five quick questions before you start. Safety outranks savings every time.
Your experience with work like this
How high do you have to work?
Does the job involve any of these?
Will it need a permit?
Specialty tools
Free and instant. Educational guidance only — not a quote, inspection, or professional diagnosis.
Estimate your own project cost
National averages are a starting point. Enter your details for a range that fits your house.
Flooring cost estimator
- Material$498 – $1,095
- Installation labor$360 – $720
Tile installs and stairs increase labor cost. Get 2–3 quotes for jobs over 200 sq ft.
Educational estimate only — always confirm with written local bids.
What should this project cost?
Enter your project details for a realistic cost range before you call anyone.
Cost depends heavily on which system turns out to be the source.
- Regional adjustment
- National average
- Labor share (typical)
- ~$1,620
- Quotes to collect
- 3 written estimates
Educational estimate based on national averages — not a binding quote. Always confirm with written local estimates.
Before you start
Check the difficulty, permits, and safety risk — then decide whether to call a pro.
Free, no signup required. Estimates are educational guidance, not a quote or an inspection.
Get the print-ready PDF of this guide
A clean, ad-free, printable version you can keep on your phone or pin to the workshop wall. Free with a FixlyGuide account.
- Print-optimized layout
- Tools, materials & every step included
- Saved to your account
Frequently asked questions
Can I fix a carpet ripple without tools?+
Unfortunately, no. A temporary fix like placing a heavy object on the ripple won't work because the carpet has excess length that needs to be stretched out and trimmed. You need specialized tools like a power stretcher or at least a knee kicker to apply enough tension.
Why did my carpet get ripples after cleaning it?+
This is very common. The moisture from the carpet cleaning—especially hot water extraction—can cause the latex backing to expand. If the carpet wasn't perfectly tight to begin with, this temporary expansion is enough to create ripples once it dries.
How much does it cost to have a carpet stretched professionally?+
The cost varies, but for a standard-sized room, you can expect to pay between $100 and $250. The price depends on the size of the room, how much furniture needs to be moved, and your location. Most companies have a minimum service charge.
Is a knee kicker good enough to fix my bumpy carpet?+
For a very small area, like a tiny buckle in a doorway, you might get away with using a knee kicker. However, for larger ripples or whole-room issues, a knee kicker doesn't provide enough force for a lasting repair. A power stretcher is the correct tool for the job.
How long does a carpet stretch last?+
A professional carpet stretch done with a power stretcher should be a permanent fix, provided the underlying cause is addressed. If your home has high humidity, the problem could return over several years unless you manage the indoor climate.
Can Berber carpet be stretched?+
Yes, Berber carpet can be stretched, but it requires more care. The looped construction is more prone to damage or running if it's over-stretched or snagged with a tool. It's often a job best left to a professional.
Will my carpet ripples go away on their own?+
No, they will not. In fact, they will likely get worse over time. The ripples create high spots that receive more foot traffic, causing them to wear and soil faster, and the creases can eventually become permanent.
What's the difference between a buckle and a ripple?+
The terms are often used interchangeably. Generally, a 'buckle' might refer to a smaller, more localized bump, often near a wall or in a doorway. A 'ripple' or 'wave' usually describes a longer, more pronounced undulation that can run across a larger section of the room.
Discussion
Loading comments…