- Heavy Cooking: Lots of frying, sautéing, or high-heat cooking throws off more airborne grease and smoke. If your kitchen stays busy, those filters are working overtime and need more attention.
- Lack of Degreaser: Water alone won't do it. Grease is hydrophobic, so it pushes water away. You need a strong degreasing agent to break down the fat and lift it off the filter.
- Skipping the Soak: Tried scrubbing a cold, dry filter? No dice. Hot, soapy water is non-negotiable. It softens the hardened grease so you can actually remove it instead of just smearing it around.
Kitchen · Kitchen remodel
| Project category | Kitchen |
|---|---|
| Problem type | Kitchen remodel |
| Trade required | General contracting |
| Urgency | Planned project |
| Safety risk | Low safety risk |
| DIY suitability | Pro recommended |
| Cost category | Major investment |
| Typical timeline | Design and cabinet lead time 8–16 weeks; build 4–8 weeks |
| Contractor type | Kitchen remodeler or general contractor |
Repair option
Refacing, new counters, or hardware for a fraction of a gut remodel.
Replacement option
Full remodel when layout, plumbing, or electrical needs to change.
Common causes
- Dated layout
- Failing cabinets or counters
- Adding function or resale value
Relevant tools:project cost estimatorcompare quoteshome improvement material prices
Published September 27, 2026Last updated September 27, 2026
Tools & materials you'll need
Affiliate linksAs an Amazon Associate FixlyGuide earns from qualifying purchases — at no extra cost to you. Prices and availability are accurate as of publication and subject to change.
Quick Answer
Your range hood filter isn't just catching smoke; it's a greasy magnet for cooking byproducts, and if you don't clean it on the regular, you're breathing in more than you think. I've seen filters so packed up they looked felted. You need to soak these things in a real degreaser — I like hot water, dish soap, and baking soda mixed together — for at least 30 minutes, and sometimes an hour or more if it's really crusted on. Then you go after it with a stiff brush and a little elbow grease to get that gunk out. It makes a big difference in your kitchen air and how hard your hood has to work.
The Problem
Alright, let's talk about that box over your stove. Your range hood. Most folks figure it's just there to keep the smoke alarm from screaming when dinner gets away from them. But its real job is pulling grease, smoke, and cooking odors out of the kitchen. The filter's the workhorse doing the dirty part.
I've been in kitchens where the air still felt heavy, even after the homeowner swore they had just cleaned up. Nine times out of ten, I'd look up at the hood and see a filter so loaded with greasy muck you could've scraped it off with a putty knife. I've pulled a water heater in Frisco last month that had exactly this kind of buildup on the vent hood over the stove next to it — same story, same smell. A clogged filter chokes the fan, makes the hood work harder, and cuts way down on efficiency. That means more smoke hanging around, more grease on the cabinets, and a kitchen that just doesn't smell right. Simple fix. Gets ignored all the time. And yeah, it's pretty nasty when you see what comes out.
How It Works
So how does the whole range hood filter thing actually work? Most home hoods use baffle filters or mesh filters, though some recirculating models use charcoal filters because they don't vent outside. I'm mainly talking about the metal mesh or baffle types here, since those are the ones you clean.
When you flip the hood on, the fan pulls air up from the cooktop. That air is carrying steam, smoke, grease particles, and odors. The filter catches it. With mesh filters, you've got a layered screen of aluminum or stainless steel with tiny openings. As greasy air moves through, the heavier grease droplets smack into the mesh and stick. Cleaner air keeps moving, either out through ductwork or, on recirculating hoods, through a charcoal filter and back into the room.
Baffle filters work a little differently. They use angled metal plates that force the air through a zig-zag path. Grease-laden air hits those plates, and centrifugal force and gravity do the rest — the grease condenses and drips into collection troughs in the filter or hood. You see these a lot in commercial kitchens because they're tough and good at grease removal and fire suppression, but they show up in nicer residential setups too. Either way, the idea's the same: separate grease from air through physical impingement and condensation. Once the filter gums up, air can't move the way it should, and the hood stops doing its job right.
Step-by-Step Fix
Here’s how I tackle a genuinely greasy range hood filter. Don't be shy; it's a dirty little job, but it's pretty satisfying when that grime starts coming loose.
-
Prep Your Workspace — Grab gloves and throw down old towels or newspaper. You're gonna have greasy water splashing around, and you don't want it tracked all over the kitchen. This ain't a delicate operation.
- Safety: Unplug the range hood or flip off the breaker for the hood at your electrical panel before you start fooling with anything up there. You don't want that fan kicking on while your hands are near it.
-
Remove the Filters — Most filters have little clips or latches you push or pull to free them. They'll usually slide out or pivot down. Take a second to note how they go back in. If they're stuck, a gentle wiggle usually does the trick. Don't muscle it.
- If stuck: If they're packed with grease, a quick spray of degreaser cleaner (like a heavy-duty kitchen degreaser) can help break the seal before you pull them out.
-
Find a Soaking Tub — You need something big enough to fully submerge the filters. A laundry tub, a large utility sink, or even your bathtub works fine — just clean it well afterwards. I've used a big plastic storage bin on oversized filters plenty of times.
-
Create the Degreasing Brew — Fill your tub with the hottest water you can safely pull from the tap. Then use my go-to mix: about a cup of liquid dish soap (Dawn is my usual pick; cuts grease like crazy) and half a cup of baking soda for every gallon or so of water. Stir it up until the soap dissolves. Hot water does the heavy lifting here.
- Alternative: For really stubborn grime, a few squirts of oven cleaner (the fume-free kind) can work wonders, but don't get sloppy. Test on an inconspicuous spot first, and wear heavy-duty gloves and eye protection. I hardly ever have to go that route, though.
-
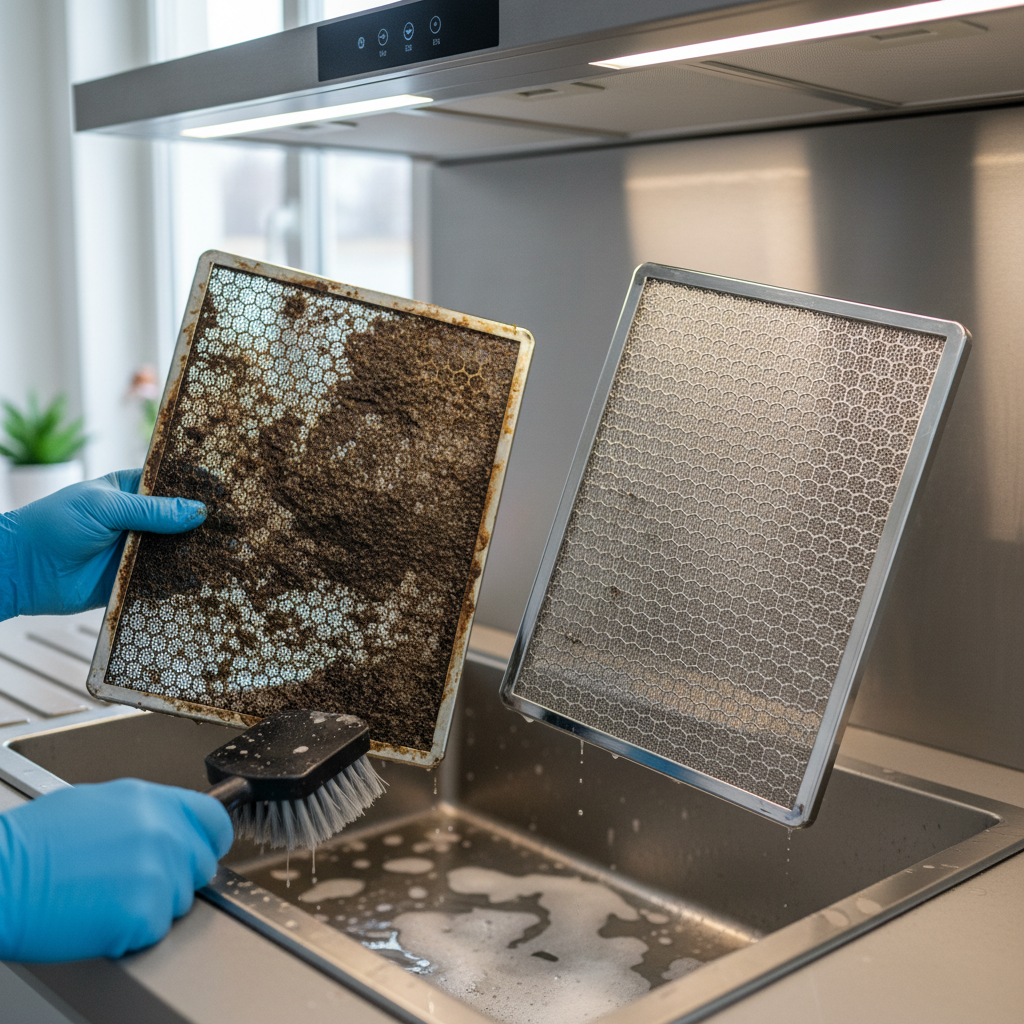
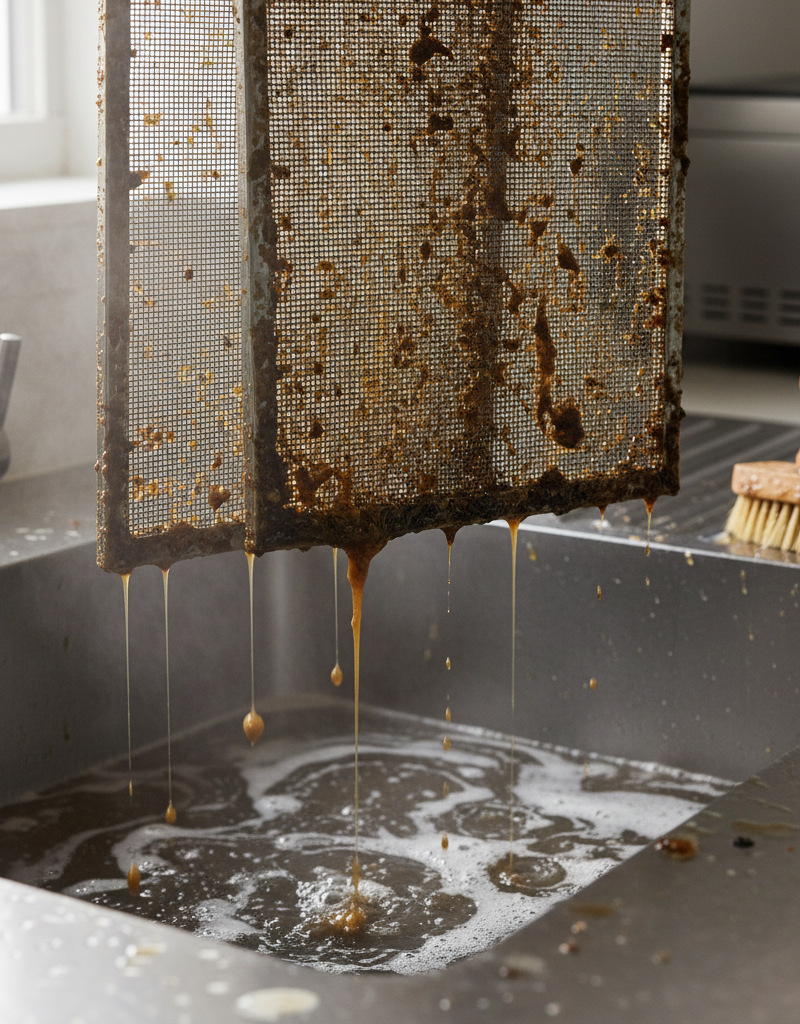
Soak 'Em Good — Drop the filters completely into the hot degreasing solution. If they float, set something heavy on top to hold them down. Then leave 'em alone. Light buildup might loosen in 30 minutes. Filters that look like they've been through a grease fire can take 1-2 hours, maybe even overnight. I had a customer in Westford whose filter soaked for nearly four hours, and the water came out black as coffee grounds. Give it time.
-
Scrub the Gunk Away — Once they've soaked, pull the filters out. The grease should be softened and a lot easier to remove. Use a stiff-bristled brush — an old toothbrush or bottle brush works great for mesh filters; a scrub brush for baffle filters — and work off whatever's still hanging on. Hit the edges and corners. Rinse with hot water as you go so you can see what you've missed. Sometimes you'll need to dunk them back in and give 'em another pass.
- Check for clogs: Hold the filter up to the light. Can you see through all the mesh or baffles clearly? If not, keep at it. Dark spots mean there's still grease left.
-
Rinse Thoroughly — Don't skip this. Rinse the filters under hot running water until all the soap and loose grease are gone. You want them squeaky clean. I usually finish with a cold-water rinse to help tighten up the metal a bit.
-
Dry Completely — Don't put wet filters back into the hood. Let them air dry on a clean towel or paper towels, or wipe them down with a microfiber cloth. Make sure they're bone dry before you reinstall them.
-
Reinstall the Filters — Slide them back into place and lock those clips or latches. Make sure they're seated right. Turn the breaker back on or plug the hood in. Then step back and see what you did. You'll notice the airflow pick up right away.
Common Causes
- Infrequent Cleaning: This is the big one. Grease builds up over time, period. If you're only cleaning it once a year, you're asking for a clog. I tell folks to shoot for every 1-3 months, depending on how much they cook. Fry bacon every morning? You'll need to clean it more often.
- Heavy Cooking: Lots of frying, sautéing, or high-heat cooking throws off more airborne grease and smoke. If your kitchen stays busy, those filters are working overtime and need more attention.
- Lack of Degreaser: Water alone won't do it. Grease is hydrophobic, so it pushes water away. You need a strong degreasing agent to break down the fat and lift it off the filter.
- Skipping the Soak: Tried scrubbing a cold, dry filter? No dice. Hot, soapy water is non-negotiable. It softens the hardened grease so you can actually remove it instead of just smearing it around.
- Wrong Cleaning Agents: Harsh abrasives or strong acidic cleaners can chew up the filter material, especially aluminum mesh, and leave you with pitting or discoloration. Stick with alkaline degreasers like dish soap and baking soda, or a dedicated kitchen degreaser.
Common Mistakes
- Using a Dishwasher: Some manufacturers say filters are dishwasher safe, and sometimes they are, but I've had mixed results. The heat can discolor or warp aluminum filters, and dishwashers usually don't have enough scrubbing power to get caked-on grease out of every corner. You'll still end up hand-cleaning it anyway.
- Ignoring the Fan Blades: You've got the filters out, so take a quick look at the fan blades inside the hood. If they're greasy, that's hurting performance too. A quick wipe with a degreaser-soaked cloth can help a lot. Just don't bend the blades.
- Not Drying Properly: If you reinstall wet filters, you're asking for drips and maybe rust, especially on older units or if the hood housing isn't perfectly dry. Let 'em air out or wipe 'em down well.
- Using Steel Wool: Never use steel wool or harsh abrasive pads on your filters. Especially not aluminum. You'll scratch the surface, make it harder to clean next time, and possibly create weak spots that corrode later.
- Forgetting Safety: I said it before, but I'll say it again. Unplug the hood or flip the breaker. Those fan blades can do some damage if they kick on unexpectedly. Better safe than sorry.
- Thinking It's a Permanent Solution: Filters get dirty again. That's just the deal. This isn't a one-and-done job; it's part of normal kitchen maintenance. Same as changing your oil — you've gotta stay on top of it.
Cost & Time Breakdown
Here’s a quick look at what you’re putting into this job.
| Task | DIY cost | Pro cost | Time |
|---|---|---|---|
| Materials (soap, baking soda) | $5–$15 | $0 | N/A |
| Remove & Soak Filters | $0 | $0 | 30–120 min |
| Scrub & Rinse Filters | $0 | $0 | 15–30 min |
| Reinstall Filters | $0 | $0 | 5 min |
| Total | $5–$15 | $0 | 50–155 min |
Tips & Prevention
- Regularity is Key: Make it a habit. Set a reminder on your phone for every 2-3 months. If you do a lot of heavy cooking, shorten that to once a month. It's way easier to clean a filter that's a little greasy than one that's been building up crud for a year.
- Run the Fan: Always run your range hood fan while cooking, even if you figure you don't need it. That airflow helps pull grease and moisture away before it settles somewhere else.
- Use the Right Cookware: Frying pans with higher sides help contain splatter, which cuts down on the amount that makes it into the air and onto the filter.
- Consider Filter Type: If you're shopping for a new range hood, look at models with baffle filters. They're usually easier to clean and better at catching grease than mesh filters. They also hold up better to repeated cleanings.
- Immediate Wipe-Downs: If you get a heavy grease splatter on the underside of the hood or on the filters, wipe it down right away with a degreasing cleaner. Don't let it harden up.
- Replace When Damaged: If your filters are bent, torn, or corroded, it's time for new ones. A damaged filter won't work right. You can usually find replacements online or at appliance parts stores — just make sure you've got the make and model number of your hood.
When to Call a Professional
Look, cleaning a range hood filter is a DIY job for most folks, but there are times when you should bring in a pro. If you've got an industrial-strength hood with complicated baffle systems or a commercial-style setup that's past your comfort zone, call a specialized kitchen ventilation cleaner. And if your range hood fan starts making weird noises, shakes like crazy, or still doesn't move air well after you've cleaned the filters, you've probably got a motor or duct issue. A qualified appliance tech or HVAC pro can track down problems with the fan motor, electrical connections, or a blockage in the venting ductwork itself. Don't go poking at electrical components or tearing into ductwork unless you really know what you're doing; that's how a simple cleaning turns into a pricey headache.
Related Articles
Keep troubleshooting with these hand-picked guides from FixlyGuide:
- The Grimy Cloud: Why Your Range Hood Filter Stays Greasy — Is your range hood filter constantly caked with grease, even after a wash? I'll show you why it happens and the pro-level trick to get it t…
- The Grimy Secret Under Your Oven: Why Your Kitchen Never Feels Truly Clean — Your oven and range hood are silent culprits in your kitchen's battle against persistent grease and grime. This guide tackles how to deep c…
- The Grimy Gunk Under Your Washer: Why Your Laundry Still Smells — If your laundry comes out smelling less than fresh, the culprit might be hidden gunk and mildew in your washing machine. I'll show you how…
- The Grimy Secret Under Your Stove — And How to Scrape It Clean — Discover the hidden culprit behind kitchen odors and pests: the neglected grease and food debris under your stove. Learn my proven method t…
- The Secret to Cleaning Your Greasy Oven Door (No Harsh Chemicals Needed) — Don't spend hours scrubbing a grimy oven door with harsh chemicals; I'll show you a contractor's trick to get that glass sparkling clean in…
- The #1 HVAC Mistake Costing You Money (And 3 Ways to Fix It) — Discover the crucial reasons why your HVAC filter needs regular changing and how this simple task can save you money and improve your home'…
Should you do this yourself?
Answer five quick questions before you start. Safety outranks savings every time.
Your experience with work like this
How high do you have to work?
Does the job involve any of these?
Will it need a permit?
Specialty tools
Free and instant. Educational guidance only — not a quote, inspection, or professional diagnosis.
What should this project cost?
Enter your project details for a realistic cost range before you call anyone.
Cosmetic refreshes start near $5,000; full remodels commonly $25,000–$45,000.
- Regional adjustment
- National average
- Labor share (typical)
- ~$8,550
- Quotes to collect
- 3 written estimates
Educational estimate based on national averages — not a binding quote. Always confirm with written local estimates.
Before you start
Check the difficulty, permits, and safety risk — then decide whether to call a pro.
- Estimate this projectGet a cost range for your scope and ZIP before you call anyone.Open
- Get local estimatesSend one request and compare written estimates from vetted pros.Open
Free, no signup required. Estimates are educational guidance, not a quote or an inspection.
Get the print-ready PDF of this guide
A clean, ad-free, printable version you can keep on your phone or pin to the workshop wall. Free with a FixlyGuide account.
- Print-optimized layout
- Tools, materials & every step included
- Saved to your account
Frequently asked questions
How often should I clean my range hood filter?+
Most contractors recommend cleaning your range hood filter every 1 to 3 months. If you cook frequently, especially frying or sautéing, you should aim for monthly cleaning. Less frequent cooking might allow you to stretch it to every quarter.
Can I put my range hood filter in the dishwasher?+
While some manufacturers say it's okay, I generally advise against it, especially for aluminum filters. Dishwashers can cause discoloration or warping, and they often don't effectively remove deeply caked-on grease from all the nooks and crannies. Hand-soaking and scrubbing are usually more effective.
What's the best cleaner for a greasy range hood filter?+
For most filters, a strong degreasing solution of hot water, liquid dish soap (like Dawn), and baking soda works wonders. For really stubborn grime, a dedicated kitchen degreaser spray might be needed, but always test it first and wear protective gear.
My range hood filter is aluminum. Will cleaning damage it?+
Aluminum filters can be safely cleaned with hot, soapy water and a soft brush. Avoid harsh abrasives like steel wool or overly acidic cleaners, as these can scratch, pit, or discolor the aluminum. Always ensure it's completely dry before reinstalling to prevent oxidation.
Why does my range hood still smell after cleaning the filter?+
If the filter is clean but you still smell odors, check the fan blades and the interior of the hood for grease buildup. Also, ensure your ductwork isn't obstructed or dirty, as accumulated grease there can also cause persistent smells. Sometimes, the problem could even be the fan motor itself.
How do I know if my range hood filter needs cleaning?+
Besides visible grease, a good sign is reduced airflow or a loud, struggling fan. If you hold a piece of paper or a napkin near the running hood and it doesn't get sucked up readily, your filter is likely clogged and needs attention.
Can I replace my range hood filter instead of cleaning it?+
Yes, you can. If your filter is heavily damaged, torn, or corroded, replacement is the best option. You'll need your range hood's make and model number to find compatible replacement filters, usually available online or at appliance parts stores. It's often cheaper to clean rather than replace, however, unless it's beyond saving.
What if my range hood has a charcoal filter?+
Charcoal filters are typically found in 'ductless' or recirculating range hoods and are designed to absorb odors. These filters cannot be cleaned; they must be replaced periodically, usually every 3-6 months depending on usage, as their odor-absorbing capacity eventually gets used up. Always check your hood's manual for specific replacement intervals and instructions.
Discussion
Loading comments…