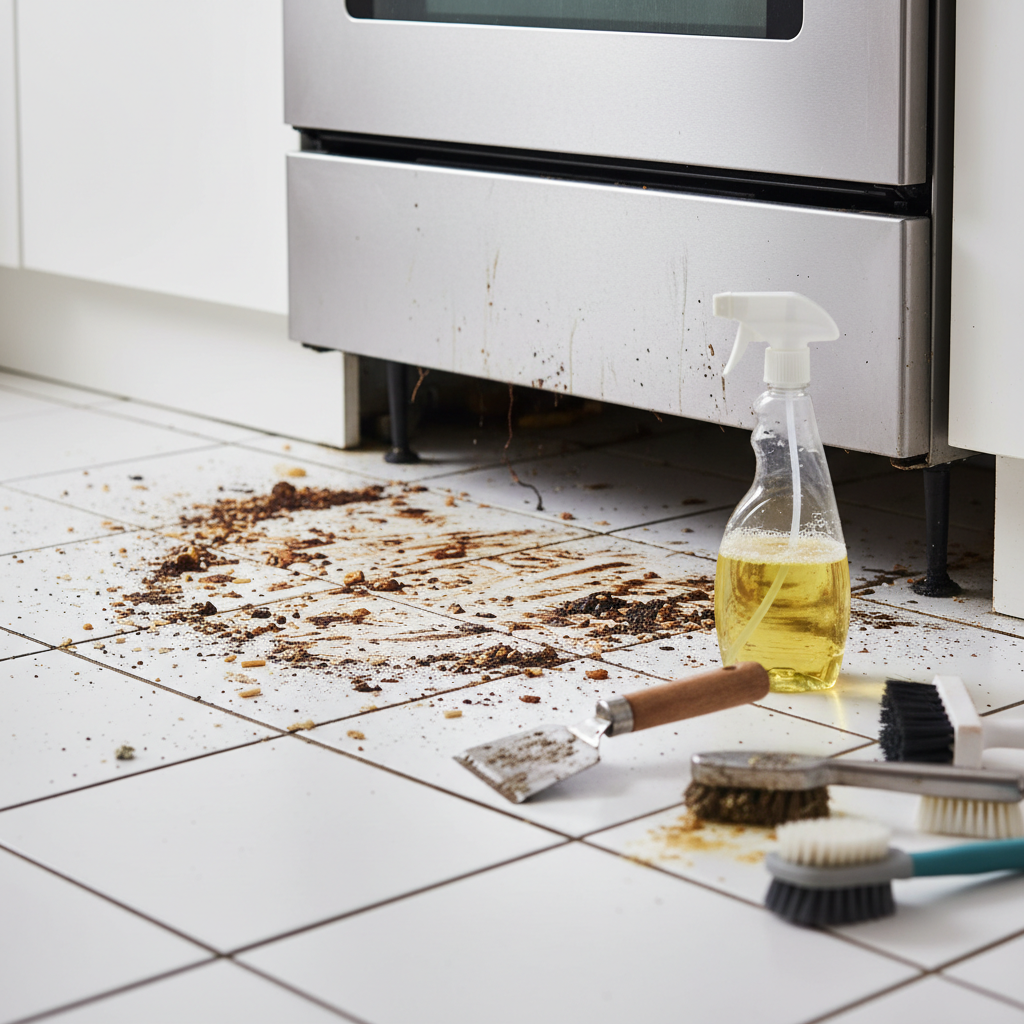
- Splashes and Spills: The obvious culprit. Boiling pots overflow, bacon grease splatters, and sauce drips down the sides. It's just part of cooking.
- Gravity: Plain and simple, gravity pulls airborne grease particles and small crumbs down into any available crevice, and the gap under your stove is a big one.
- Infrequent Cleaning: Let's be honest, who's regularly pulling out their stove to clean under it? Most homeowners only think about it when a problem arises, so years of buildup pile up fast.
- Ventilation Issues: A poor range hood or lack of ventilation means more grease vapor settles on all surfaces, including those hard-to-reach spots.
Kitchen · Kitchen remodel
| Project category | Kitchen |
|---|---|
| Problem type | Kitchen remodel |
| Trade required | General contracting |
| Urgency | Planned project |
| Safety risk | Low safety risk |
| DIY suitability | Pro recommended |
| Cost category | Major investment |
| Typical timeline | Design and cabinet lead time 8–16 weeks; build 4–8 weeks |
| Contractor type | Kitchen remodeler or general contractor |
Repair option
Refacing, new counters, or hardware for a fraction of a gut remodel.
Replacement option
Full remodel when layout, plumbing, or electrical needs to change.
Common causes
- Dated layout
- Failing cabinets or counters
- Adding function or resale value
Relevant tools:project cost estimatorcompare quoteshome improvement material prices
Published September 21, 2026Last updated September 21, 2026
Tools & materials you'll need
Affiliate linksAs an Amazon Associate FixlyGuide earns from qualifying purchases — at no extra cost to you. Prices and availability are accurate as of publication and subject to change.
Quick Answer
Alright, let's get straight to it. That funky smell in your kitchen, or maybe some unexpected critters? Don't look past your stove. The space underneath and around your oven is a magnet for spilled food, grease, and dust. Most folks forget about it entirely, but it's a prime spot for grime to bake on and fester. You've gotta pull that beast out, get down and dirty with some serious degreasing, and give it a good scrub. It's not a fun job, but it'll make a world of difference for your kitchen's hygiene and smell.
The Problem
I've seen it a hundred times. Homeowners call me out for a "mystery smell" in their kitchen or complain about ants and roaches that just won't quit, no matter how much they clean. And nine times out of ten, the first thing I ask is, "When's the last time you moved your stove?" You see, that gap between your stove and the floor, and the wall behind it, isn't just a cozy little nook; it's a culinary graveyard. Gravy splatters, crumbs from that midnight snack, boil-overs from pasta night—it all drips down there. Then, with the oven blasting away, that stuff bakes on, turning into a rock-hard, greasy mess that's tough to budge.
Over time, this buildup doesn't just look bad; it's a health hazard. It pulls in all sorts of pests—mice, roaches, ants—who are happy as can be to find a buffet under your range. That baked-on gunk can start to smell pretty ripe, especially on hot days or when your oven's running. It's not just surface-level dirt; it's deep-seated junk that needs a real contractor's approach to get rid of.
How It Works
When we talk about cleaning under the stove, we're dealing with a couple of different surfaces and types of grime. First, you've got the kitchen floor itself, typically tile, linoleum, or hardwood. Those surfaces are usually tough enough for the job, but they can get etched or discolored by acidic food spills if they sit too long. Then there's the back and sides of the stove unit, which are usually painted metal or stainless steel. Grease loves to cling to metal, and once it's heated over and over, it polymerizes, turning into a sticky, stubborn film that's water-resistant.
The real trick is heat. Your oven and stovetop throw off a ton of it, often reaching 350-450°F during normal cooking. That heat bakes spilled food and grease onto the floor and the stove's exterior surfaces. This process is called thermal degradation or pyrolysis, where organic materials get broken down by heat into carbonized residues. Think of it like charring food in a pan—it gets a whole lot harder to remove than a fresh spill. What started as a liquid splatter turns into a solid, adhesive, odor-releasing crust. Regular cleaning products often just smear that baked-on goo around because they aren't built to break down these heat-modified bonds. You need something stronger, and yeah, some old-fashioned elbow grease with a scraper.
Step-by-Step Fix
1. Safety First — Unplug that stove, partner. Before you do anything else, make darn sure that stove is completely disconnected from power. Pull the plug if it's electric; if it's gas, you'll still need to unplug it for the ignition and clock, but the gas line is a different beast. For gas stoves, do NOT disconnect the gas line yourself unless you're a licensed professional. Just unplug the electrical and proceed carefully. You don't want to be messing with live electricity or a leaking gas line.
2. Clear the Decks — Get everything out of the way. Empty out anything you've got stored in the broiler drawer or storage drawer underneath the oven. You don't want crumbs or cleaning chemicals getting on your pots and pans. Give the surrounding floor a quick sweep or vacuum to pick up any loose debris before you start shifting the appliance.
3. Move the Beast — Slow and steady wins the race. This is usually a two-person job, especially for a heavy range. Most stoves have leveling feet that can scratch floors, so you might want to lay down some old towels or a cardboard path. Carefully grip the front of the stove and slowly pull it straight out, away from the wall. Don't yank it—you could damage the floor or the wall. Pull it out about 2 to 3 feet, enough so you can easily access the floor behind and under it. For gas stoves, be extra cautious not to kink or stress the flexible gas line. If the line feels tight or looks old, stop and call a pro. I pulled a water heater in Frisco last month that had a gas connector about this tired, and it was hanging on by a prayer—same kind of situation here.
4. Initial Scrape — Tackle the big stuff first. Grab your plastic scraper or an old putty knife. Start gently scraping up the biggest chunks of baked-on food and solidified grease. You'll be amazed at what you find—petrified pasta, fossilized french fries, you name it. Go easy on delicate flooring like linoleum; you don't want to gouge it. A razor blade scraper can be used on hard surfaces like tile or concrete, but use it at a shallow angle to avoid scratching.
5. Degrease and Dwell — Let chemistry do some work. Spray a generous amount of your heavy-duty kitchen degreaser directly onto the greasy spots on the floor and the lower back of the stove. Don't be shy. Let it sit for at least 10-15 minutes—this "dwell time" is critical. It gives the chemicals a chance to penetrate and break down that stubborn, baked-on grease. For really tough spots, you might even put down a hot, damp rag on top of the degreaser to help it penetrate.
6. Scrub It Down — Elbow grease is your friend. After the degreaser has had time to work, grab your stiff-bristled brush or an abrasive sponge (like a Scotch-Brite pad). Scrub the affected areas vigorously. You'll start to see that dark, sticky mess turn into a more manageable, brownish liquid. Rinse your sponge or brush frequently in a bucket of hot, soapy water. For corners and tight spots, a detail brush or even an old toothbrush can work wonders.
7. Wipe Away the Filth — Clean rags are key. Once you've scrubbed, use a stack of clean, hot, damp rags to wipe up all the dissolved grease and grime. You'll probably go through several rags, turning them or swapping them out as they get saturated with gunk. Rinse the area thoroughly with clean water to remove any degreaser residue, then dry completely with fresh, clean towels. Leaving moisture can encourage mold or attract more dirt.
8. Clean the Stove's Underside — Don't forget the appliance itself. While the stove is still pulled out, take a moment to wipe down the lower back and sides of the appliance. Grease often drips down the back and accumulates there. Use the same degreaser and scrub technique as you did for the floor. Don't spray directly into any vents or electrical components; spray onto your rag first. Pay attention to the leveling feet, too—they can get pretty nasty.
9. Reconnect and Replace — Carefully put it back. Once everything is sparkling clean and completely dry, carefully push the stove back into its original position. Take care not to pinch any cords or gas lines. Reconnect the power. If your stove has a broiler or storage drawer, slide it back in. Now, stand back and enjoy the fresh smell and clean look of your kitchen! You'll notice a difference, I promise.
Common Causes
- Splashes and Spills: The obvious culprit. Boiling pots overflow, bacon grease splatters, and sauce drips down the sides. It's just part of cooking.
- Gravity: Plain and simple, gravity pulls airborne grease particles and small crumbs down into any available crevice, and the gap under your stove is a big one.
- Infrequent Cleaning: Let's be honest, who's regularly pulling out their stove to clean under it? Most homeowners only think about it when a problem arises, so years of buildup pile up fast.
- Ventilation Issues: A poor range hood or lack of ventilation means more grease vapor settles on all surfaces, including those hard-to-reach spots.
Common Mistakes
- Forgetting to Unplug: Rookie mistake, and a dangerous one. Always, always cut the power to an electric stove before moving it or cleaning around electrical components.
- Ignoring Gas Lines: Pulling a gas stove out too far or too fast can kink or damage the flexible gas line, creating a dangerous leak. When in doubt, call a pro.
- Using Abrasives on Wrong Surfaces: A metal scraper on a linoleum floor is asking for trouble. Know your surfaces and use appropriate tools to avoid permanent damage.
- Not Letting Degreaser Dwell: Spraying and immediately wiping won't do much for baked-on grease. Give that degreaser time to work its magic.
- Leaving Residue: Not rinsing thoroughly can leave a sticky film that attracts new dirt and dust, or, worse, can be corrosive over time.
- Only Cleaning the Front: The real nastiness is usually behind and under the unit, not just the easily visible areas.
Cost & Time Breakdown
| Task | DIY Cost | Pro Cost | Time |
|---|---|---|---|
| Degreaser/Cleaners | $10–$25 | Included | N/A |
| Scrapers/Brushes | $5–$15 | Included | N/A |
| Moving/Cleaning Stove | $0 (your labor) | $150–$300 (cleaning) | 1–2 hours |
| Gas Line Inspection/Repair | N/A | $100–$250 (service) | 30–60 minutes |
| Floor Damage Repair (if any) | $20–$100+ DIY | $200–$500+ | Varies |
Tips & Prevention
- Regular Wipes: Wipe down the sides and back of your stove with a damp cloth after each cooking session to catch fresh splatters before they bake on.
- Drip Pans: For electric coil stoves, make sure drip pans are clean and doing their job. Replace them when they get too grimy.
- Annual Pull-Out: Aim to pull your stove out and clean underneath it at least once a year. Mark it on your calendar or tie it to a spring-cleaning day.
- Use a Mat: Consider placing a thin, heat-resistant, easy-to-clean mat under your stove to catch spills and make cleanup easier. Just make sure it doesn't interfere with airflow or the stove's feet.
- Inspect Gas Line: If you have a gas stove, visually inspect the flexible gas line for kinks, cracks, or signs of wear whenever you move the stove. If anything looks off, call a pro immediately.
- Ventilation: Use your range hood or exhaust fan every time you cook to pull grease and steam out of the air, reducing overall buildup.
When to Call a Professional
Look, cleaning under a stove isn't rocket science, but there are definitely times when you should just pick up the phone and call in a pro. If you've got a gas range and the flexible gas line looks old, cracked, or if you smell gas when you're trying to move it—stop immediately, open windows, and call your gas company or a licensed plumber. Don't try to move it further or reconnect anything. Similarly, if your stove is hardwired into your electrical system (rare for modern ranges, but I've seen it), or if you encounter any electrical issues like sparks or tripped breakers, you need an electrician. If the stove is just too heavy or awkward for you to move safely, or if you're worried about damaging your floors or the appliance, a handyman service can often handle the physical labor. And if you've got a persistent pest problem under there that the cleaning doesn't solve, it’s time for an exterminator. Your safety and home's integrity are always worth the cost of a professional call.
Related Articles
Keep troubleshooting with these hand-picked guides from FixlyGuide:
- The Grimy Secret Under Your Microwave — And How to Scrape It Clean — I've seen it a hundred times: homeowners totally overlook the disgusting, grease-caked filters hiding under their microwave. Cleaning 'em i…
- The Grimy Secret Under Your Oven: Why Your Kitchen Never Feels Truly Clean — Your oven and range hood are silent culprits in your kitchen's battle against persistent grease and grime. This guide tackles how to deep c…
- The Grimy Secret Behind Your Dull Bathroom Faucet — And How to Make It Shine — Discover the real culprit behind your bathroom faucet's dull, grimy appearance and how to quickly restore its shine with a few common house…
- The Grimy Gunk Under Your Washer: Why Your Laundry Still Smells — If your laundry comes out smelling less than fresh, the culprit might be hidden gunk and mildew in your washing machine. I'll show you how…
- The Secret to Cleaning Your Greasy Oven Door (No Harsh Chemicals Needed) — Don't spend hours scrubbing a grimy oven door with harsh chemicals; I'll show you a contractor's trick to get that glass sparkling clean in…
- The Hidden Culprit Behind Your Fuzzy Table Saw Cuts (It's Not Just the Blade!) — Fuzzy table saw cuts and tearout are frustrating, but often the problem isn't just your blade; hidden factors like feed rate, blade height,…
Should you do this yourself?
Answer five quick questions before you start. Safety outranks savings every time.
Your experience with work like this
How high do you have to work?
Does the job involve any of these?
Will it need a permit?
Specialty tools
Free and instant. Educational guidance only — not a quote, inspection, or professional diagnosis.
What should this project cost?
Enter your project details for a realistic cost range before you call anyone.
Cosmetic refreshes start near $5,000; full remodels commonly $25,000–$45,000.
- Regional adjustment
- National average
- Labor share (typical)
- ~$8,550
- Quotes to collect
- 3 written estimates
Educational estimate based on national averages — not a binding quote. Always confirm with written local estimates.
Before you start
Check the difficulty, permits, and safety risk — then decide whether to call a pro.
- Estimate this projectGet a cost range for your scope and ZIP before you call anyone.Open
- Get local estimatesSend one request and compare written estimates from vetted pros.Open
Free, no signup required. Estimates are educational guidance, not a quote or an inspection.
Frequently asked questions
How often should I clean under my stove?+
I tell my clients to aim for at least once a year. If you cook a lot, especially greasy foods, or if you have a busy household with kids and pets, you might want to do it every six months. It prevents that baked-on mess from getting out of control.
What's the best degreaser for baked-on stove grease?+
For truly baked-on stuff, you need a heavy-duty alkaline degreaser. Look for products designed for ovens or tough kitchen grease. My go-to is often a commercial-grade cleaner from the hardware store, but even a strong dish soap and hot water can work with enough dwell time and elbow grease.
Can I use a razor blade scraper on my kitchen floor?+
You can, but be super careful! I only recommend it for very hard surfaces like ceramic tile or concrete, and always use it at a very shallow angle. Never on linoleum, vinyl, or wood, as you'll scratch them badly.
My stove is really heavy; can I still move it myself?+
It's tough, and I usually recommend two people. If you're on your own, try sliding a piece of cardboard or an old blanket under the front leveling feet after you tilt it slightly. This helps it slide more easily and protects your floor. But honestly, if it feels too heavy, call a friend or a handyman.
What if I smell gas when I move my stove?+
STOP immediately. Do not try to move it further. Open windows and doors to ventilate the area, then call your gas company or a licensed plumber right away. Gas leaks are serious business, and it's not a DIY fix.
How do I prevent future buildup under the stove?+
Good question! Wiping down the sides of your stove regularly after cooking is key. Also, using your range hood consistently helps reduce airborne grease. And for the really proactive, an annual full pull-out and clean will keep it in check.
Can oven cleaner be used on the floor under the stove?+
You can, but I'd advise against it on most flooring types. Oven cleaners are incredibly harsh and can damage or discolor linoleum, vinyl, or finished wood. Stick to kitchen degreasers for the floor, and use oven cleaner only inside the oven or on specific, designated oven parts.
What tools do I need for this job?+
You'll want a plastic or metal scraper, a stiff-bristled brush, a good heavy-duty degreaser, a stack of clean rags or old towels, and maybe some old cardboard to protect your floor. Safety gloves are a must, too.
What should I do if pests are nesting under there?+
After you've cleaned everything thoroughly, if you still see signs of pests, it's time to call a professional exterminator. Cleaning helps remove their food source and habitat, but sometimes you need that extra kick to get rid of an established colony.

Discussion
Loading comments…